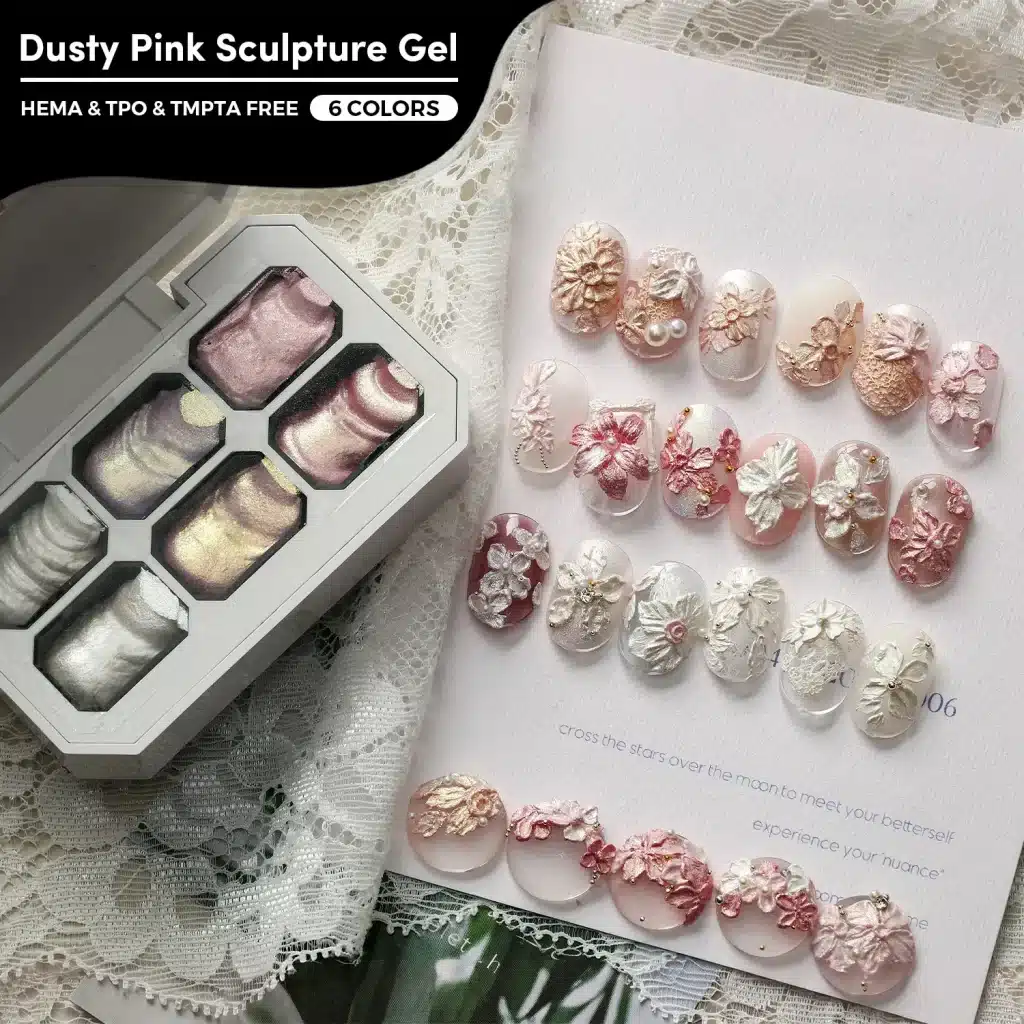
For nail brands and salon suppliers, clear sculpting gel adds a new way to use an existing color range: transparent petals and raised patterns keep the color underneath visible. A small floral accent can sit over a familiar nude shade, while a layered rose can become the focal point of a more elaborate set.
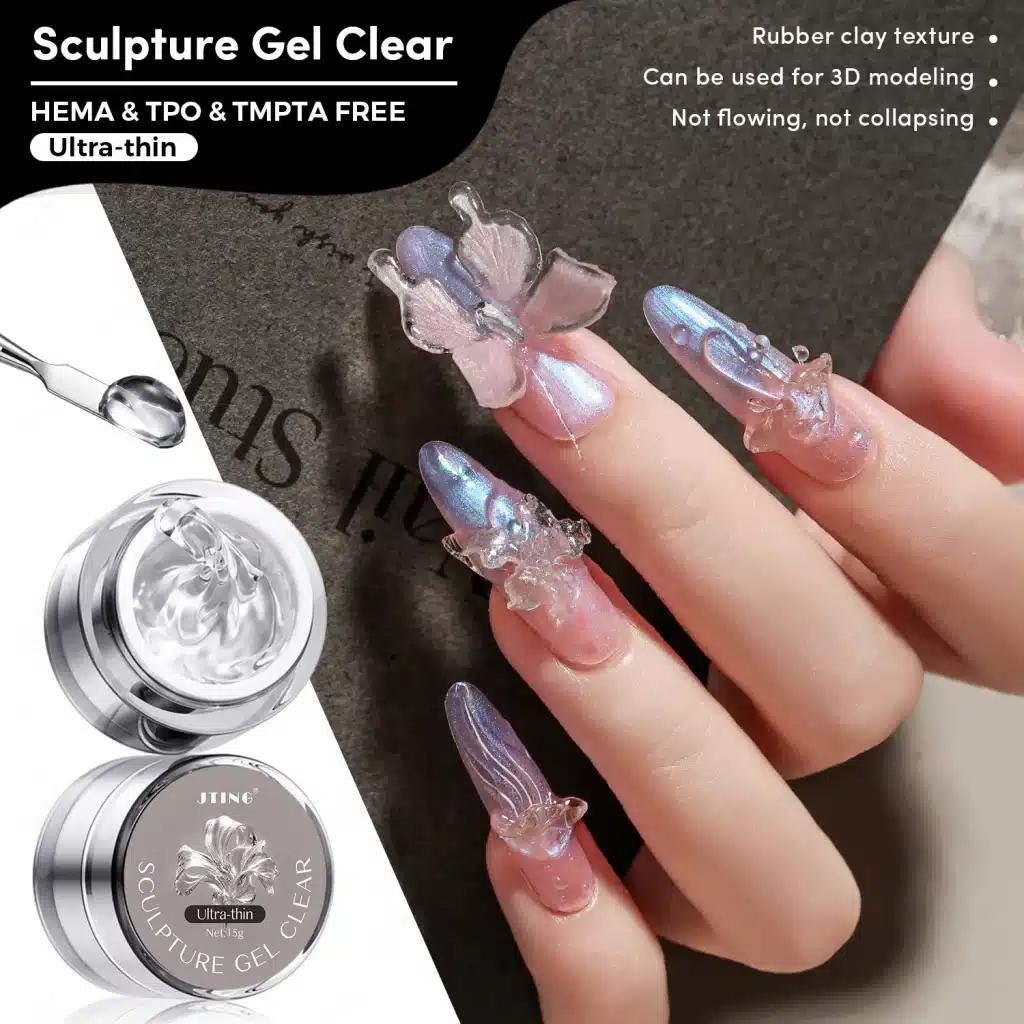
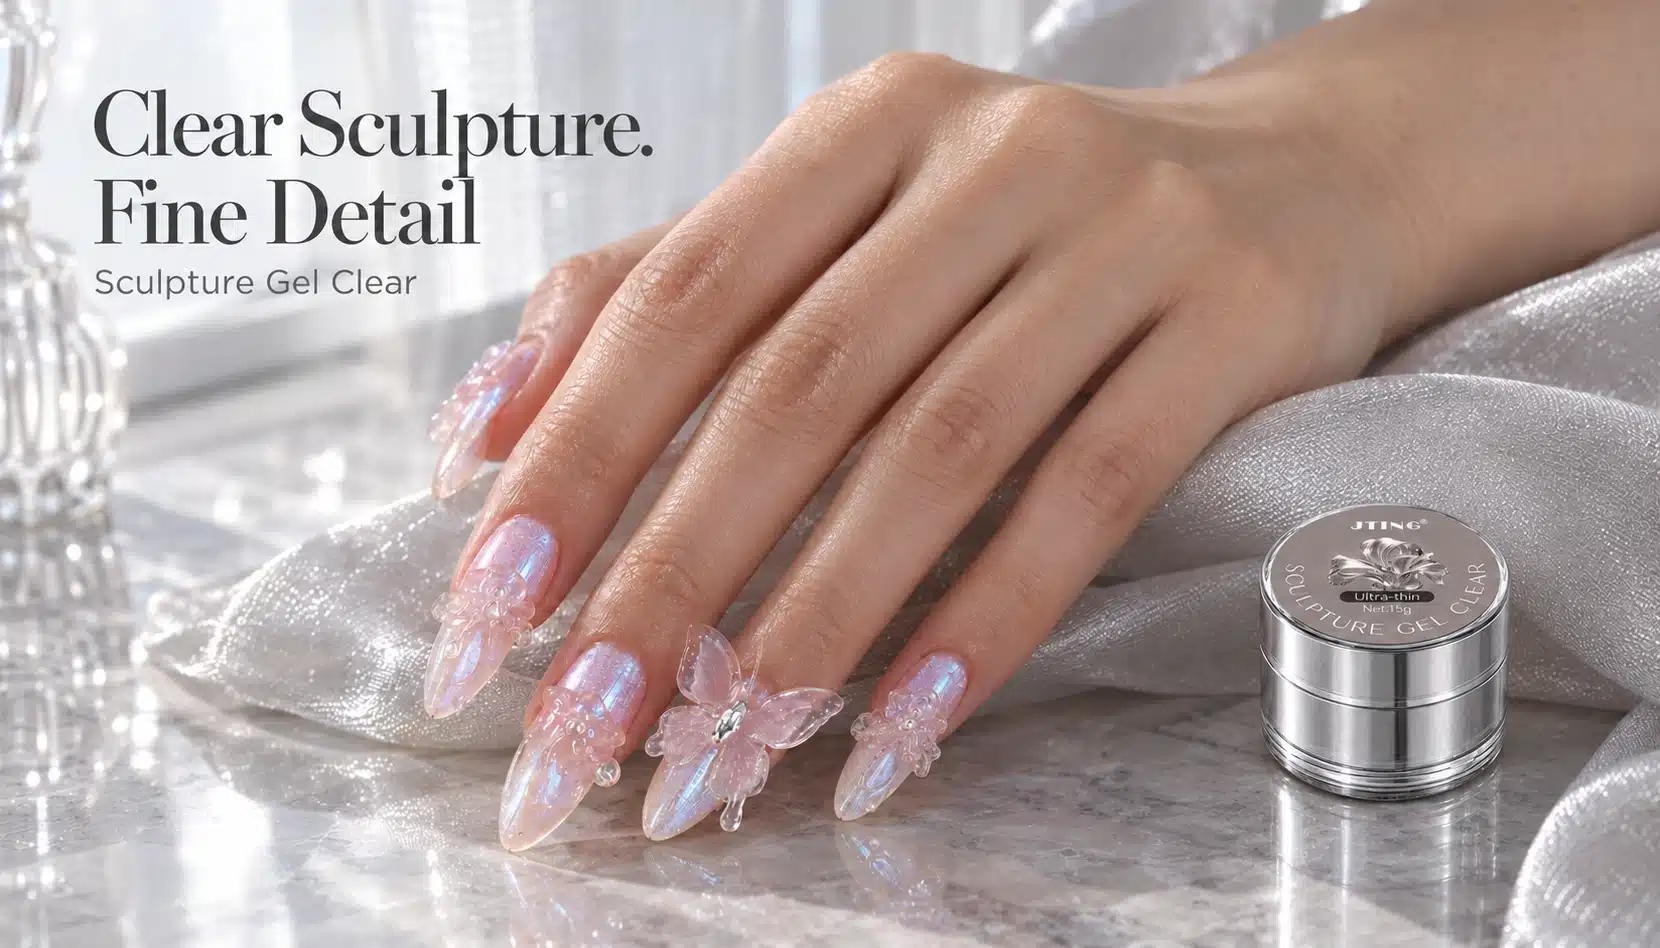
JTING Sculpture Gel Clear is a transparent 3D nail art gel with a clay-like, non-flowing texture. Supplied in 15 g jars, it can be shaped into thin petals, flowers, bows and other raised details before curing. Its Clear color allows the base and the sculpted layers to contribute to the finished design.
For a wholesale or private label launch, choose designs that fit your customers' techniques, appointment times and product range. This guide covers material selection, shaping and finishing, then explains how to evaluate samples, estimate material use and prepare the packaging and order details.
1. What Is Clear Sculpture Gel Used For?
Clear sculpture gel forms decorative relief on a prepared nail. The technician shapes each petal, fold or ripple with a tool, adjusting its outline before curing. This makes it useful for designs where the shape of the decoration and the color beneath it both need to remain visible.
Sculpture Gel Clear has a moldable, non-flowing consistency that holds details in place before curing. Thin edges and deeper folds can be shaped within the same motif, giving a petal or bow a defined contour. A small amount can be worked into one element before the next layer is added.
Position clear sculpture gel as a decorative addition to a professional nail art range. The base and color products provide the prepared surface and background; the sculpting gel adds the relief. Structural building and extensions require a product intended for those applications.
At a glance: Clear color · 15 g net weight per jar · Moldable, non-flowing texture · Transparent, no-wipe finish after curing
For an existing color collection, start with combinations your customers already understand: clear flowers over soft shades, transparent folds over a pearlescent base, or a small raised accent on a deeper color. The buying decision then rests on the designs and application support your channel needs.
2. Choose the Material for the 3D Result You Want
When comparing sculpture gel for nails with other decoration options, consider how much control the technician needs over the shape, whether the base should remain visible and how the design will be applied. These differences help you choose between hand-shaped transparent relief, opaque detail and ready-made ornaments.
Swipe to view the full table.
| Desired Result | Material Direction | What to Confirm |
|---|---|---|
| Transparent, Hand-Shaped Detail | Clear sculpting gel for petals, folds and relief that reveal the base color. | Tool control, edge definition, layer arrangement and the curing conditions for the chosen shape. |
| Opaque Colored Relief | A suitable colored nail art material, selected for the required coverage and shape. | Its intended application, shaping method, coverage and product-specific curing instructions. |
| A Repeated Ready-Made Shape | A finished nail ornament with a predetermined outline. | Size, placement, attachment method and how the ornament fits the intended nail design. |
Hand shaping lets a technician adjust the size, fold and placement of a motif to suit the nail. When selecting 3D sculpting gel for nails, include the shaping technique in the evaluation: the result depends on both the material and the user's ability to repeat the design.
A fixed ornament gives you a predetermined shape to select and attach. Sculpting gel gives the technician more control over the proportions during application. Choose the approach that suits the intended service and the level of technique your customers use.
3. Plan the Base Color and Transparent Effect Together
Treat the base color as part of the transparent design. A soft background can keep the composition tonal; a deeper shade or an existing shimmer effect provides another direction. Build a small group of combinations using colors from the range you already supply.
Nude and Milky Bases
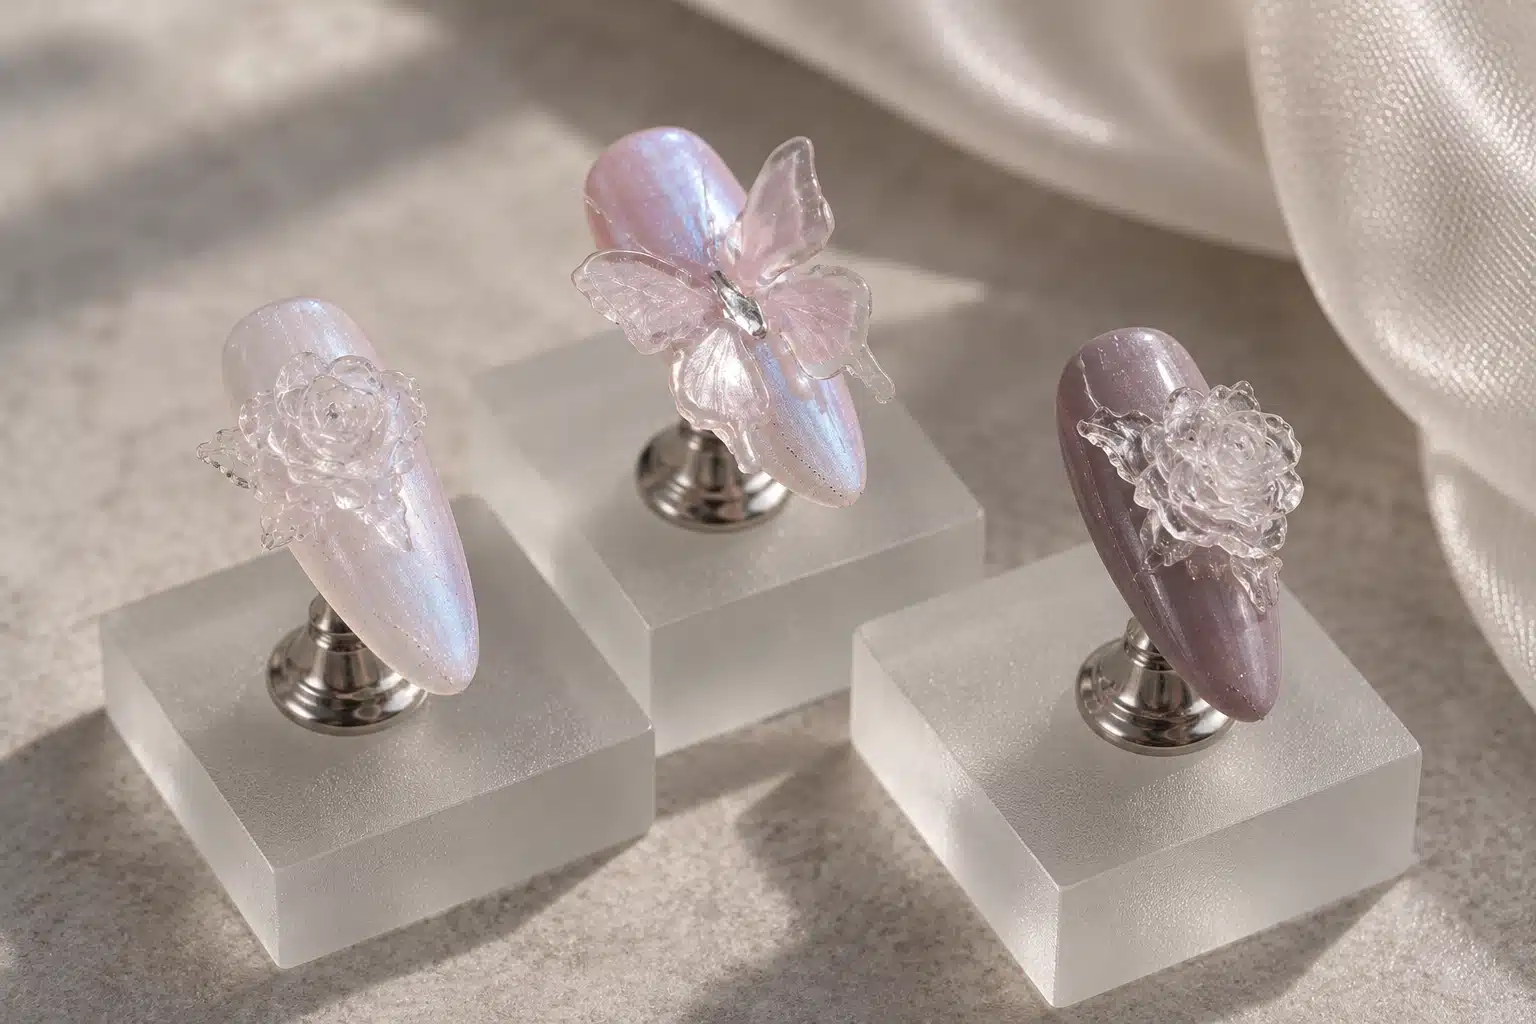
Use nude and milky shades for a soft floral composition. Leave room around the flower so its outline can be seen, and use folds and overlapping petals to give the clear shape definition. This is a useful design direction for customers seeking delicate detail over a familiar base color.
Deeper Base Colors
Try a deeper background for a different relationship between the base and the clear relief. A small petal or folded accent leaves more of the background exposed than a full flower. View the sample from the front and side to judge the balance between color, outline and height.
Cat Eye and Pearlescent Bases
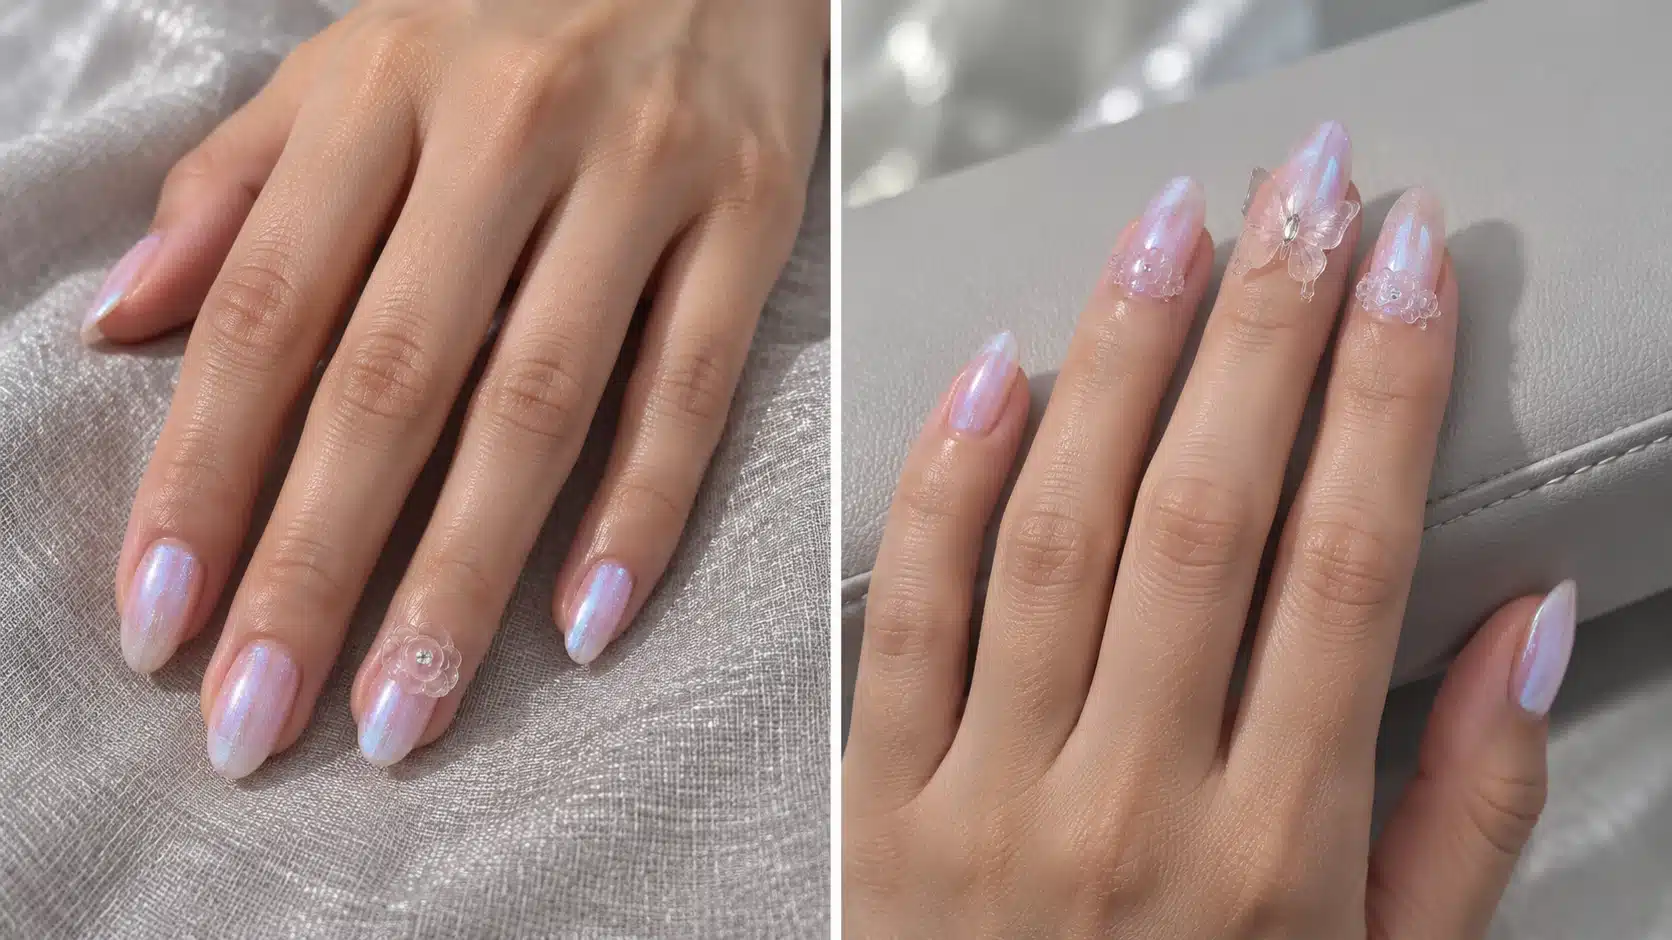
Place transparent details where the background effect can still be seen. For example, a smaller flower can leave part of a pearlescent nail visible, while a few raised curves can frame an effect rather than covering the whole nail. Assess the finished combination under consistent lighting.
Keep approved combinations with the names of their base colors. This gives sales teams and salon customers a practical starting point when choosing companion products for the Clear gel.
4. Shape Thin Petals and Build Layered Flowers
Begin with a single petal when learning how to use sculpture gel. This isolates the handling decisions that become harder to see in a complete rose: how much gel to take, where to press, how to refine the edge and how to create a fold without losing the outline.
-
Start with a Small Portion
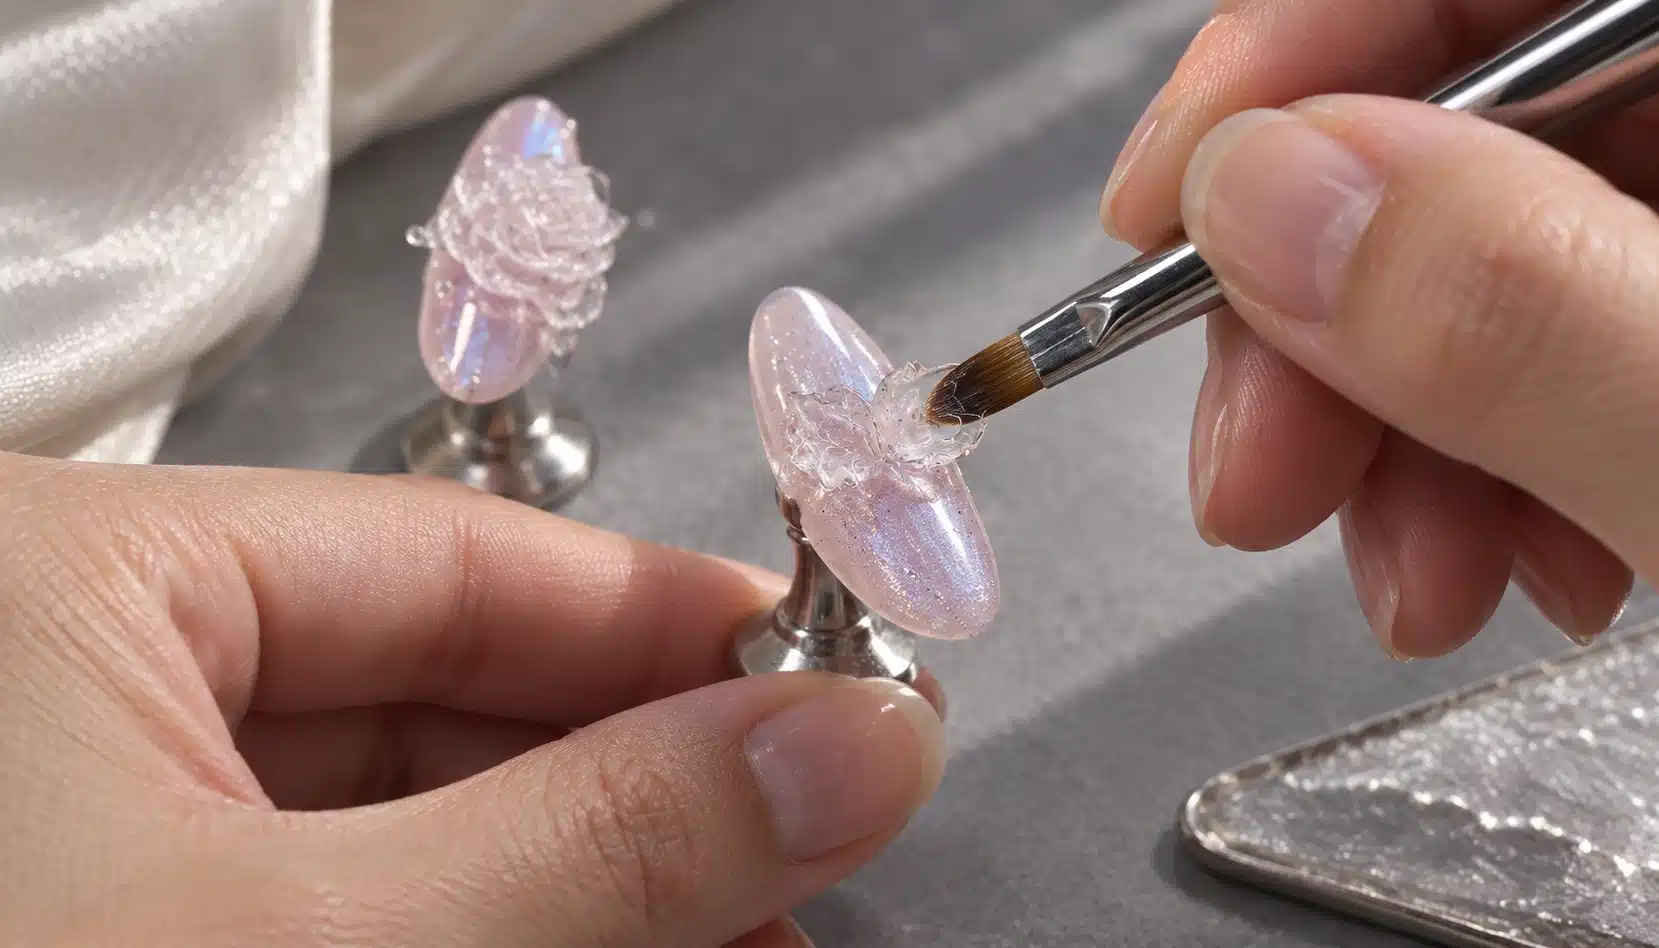
Place a small amount on the prepared, cured base using a suitable sculpting tool. Keep the initial practice shape simple enough to observe from both the front and the side.
-
Press the Main Shape
Use controlled presses to spread the portion into the intended petal outline. Work around the shape in stages so the edge can be adjusted without repeatedly flattening the whole piece.
-
Refine the Edge
Press outward where a thinner edge is wanted, then review the transition toward the center. The aim is a distinct petal contour, with the thickness distributed according to the chosen design.
-
Introduce the Fold
Use the tool to shape a shallow curve or crease. Look at the resulting silhouette before adding another detail; several closely packed folds can make a small petal difficult to read.
-
Review before Curing
Check the outline, placement and surrounding space while the gel remains adjustable. Use the setting and full-curing guidance in Section 7 for the selected layer and design.
Once the single petal is repeatable, progress to a partial overlap and then a small layered flower. Arrange each new petal so that some of its edge remains visible. For a rose, plan the central shape and surrounding petals as separate thin elements, building the larger design in layers.
For demonstrations of 3D gel flowers, show a single petal, a partial overlap and the finished flower. Technicians can then follow how each layer is formed and how much space remains between petals. Pair the demonstration with the tools and curing sequence used for that example.
5. Extend the Technique to Bows, Lace and Ripple Textures
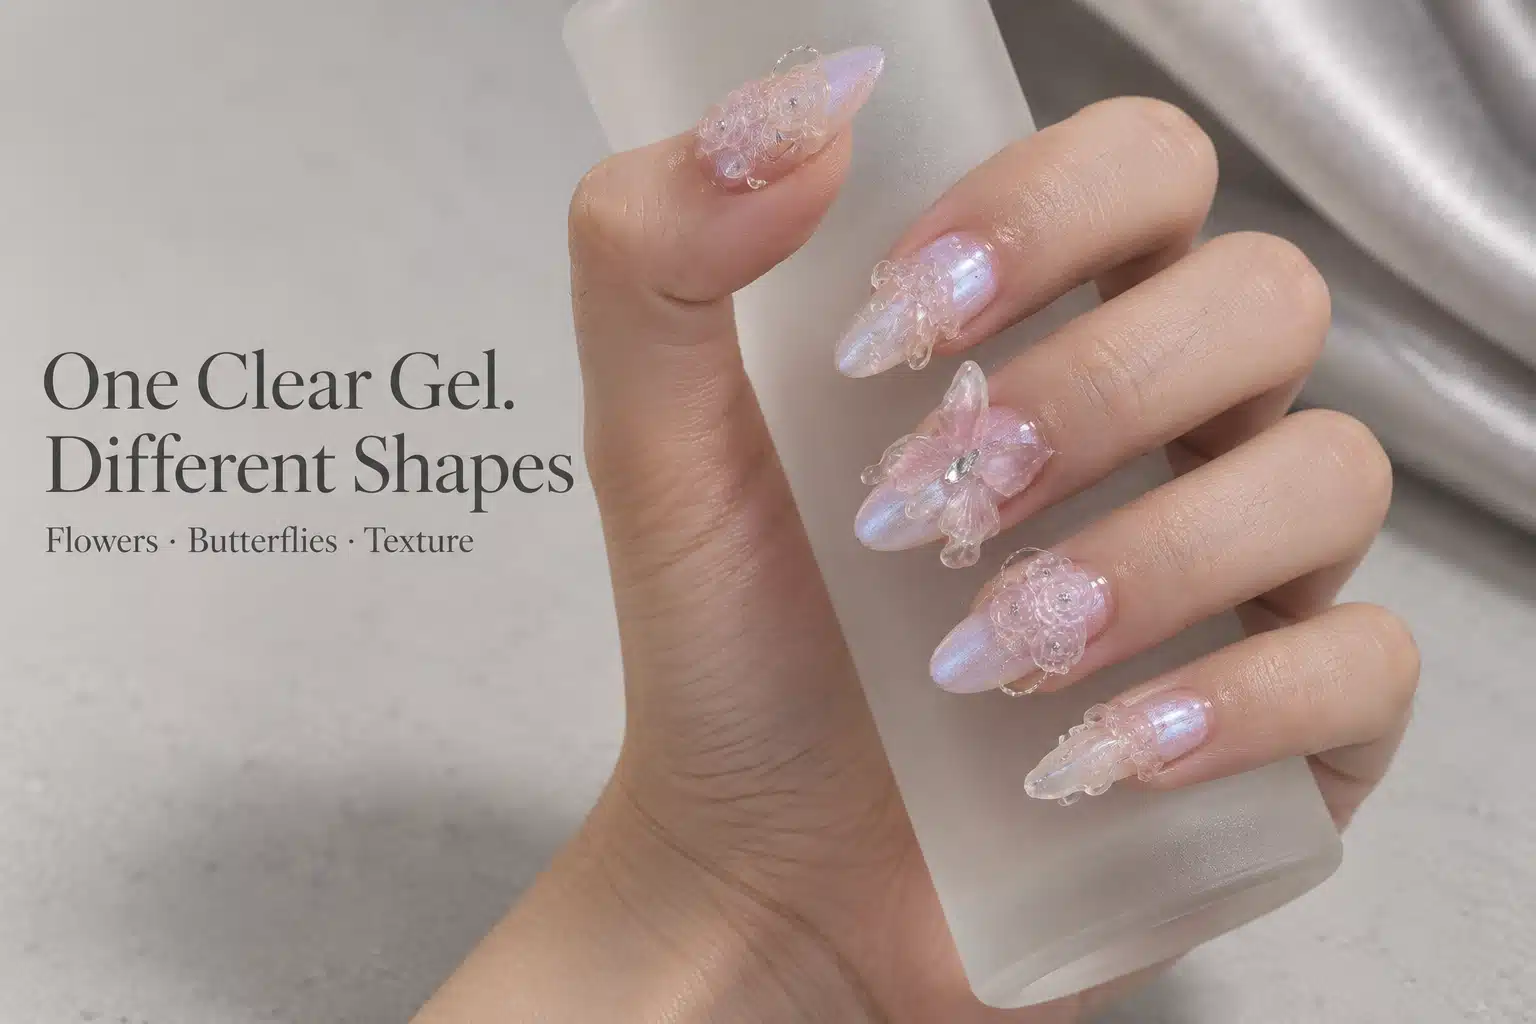
Flowers, bows, lace-inspired accents and ripples use the same clear material in different ways. Offer a small selection that shows these differences: a recognizable silhouette, an open pattern and a continuous raised texture.
Bows: Define the Fold and Center
Plan the two sides and the central detail before shaping. Keep the fold on each side readable, and check that the center does not obscure the surrounding contours. A small bow is a useful trial for controlled folding; a larger version needs a separate assessment of its layered construction.
Lace: Preserve Open Space
Approach a lace-inspired motif as a series of fine shapes with visible gaps. Start with a short section rather than covering the nail immediately. Review whether neighboring elements remain separate after shaping and finishing, since the spaces are part of the pattern.
Butterflies: Organize the Silhouette
Establish the wing outline and central arrangement first. Compare the balance of the two sides before adding folds or small details. For a transparent butterfly, clear boundaries between the wings and center help the intended shape remain recognizable.
Ripples: Follow a Clear Direction
Plan a few curves across a selected area of the nail. Keep the ridges and the spaces between them distinct, allowing the base color to show through the pattern. A short ripple can serve as a small accent; a more extensive arrangement needs additional shaping and layered construction.
For a first collection, select designs at different levels of complexity. A small accent gives technicians a starting point; a fuller composition shows where they can take the technique with practice.
6. Add Tints and Painted Accents to Clear Designs
Color can come from the base beneath the clear sculpture, from painted surface details or from a compatible material mixed into the gel. Choose the route according to the effect your customer wants and the supporting products available.
Keep the Sculpture Clear over a Colored Base
Use the underlying gel nail polish to supply the color while leaving the sculpted material clear. This lets customers explore different backgrounds with the same jar, with the thin edges and overlapping layers remaining part of the transparent design.
Paint Selected Details
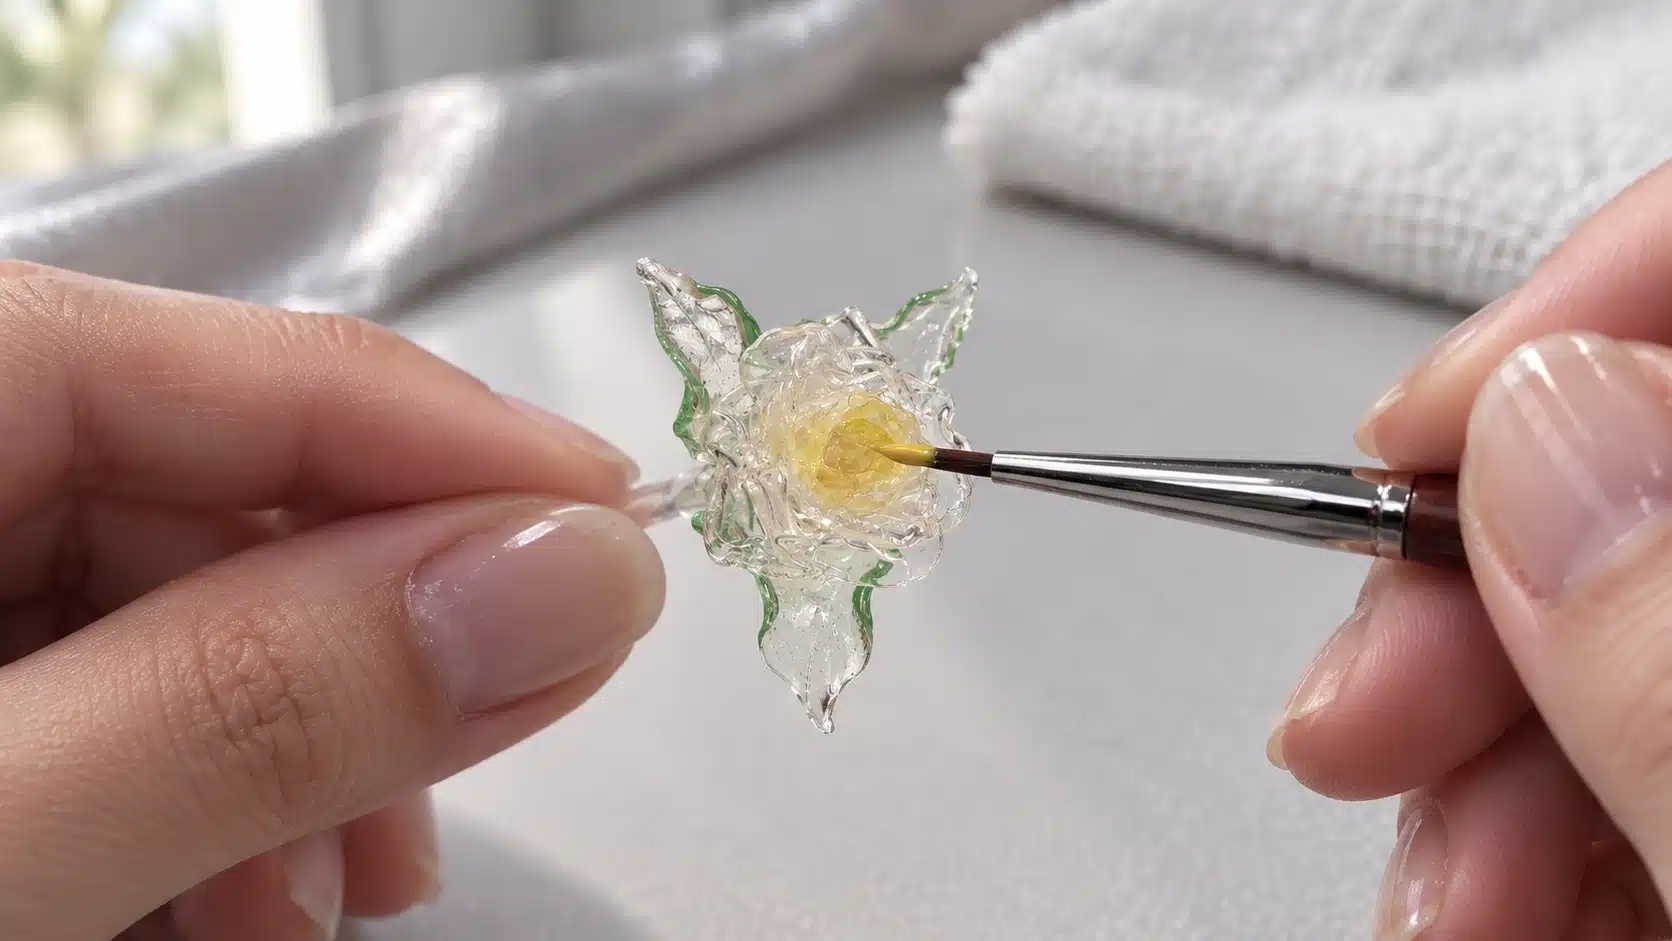
Add color to chosen parts of a formed design, such as flower details or leaves, while leaving other areas clear. The painted material has its own application, curing and finishing requirements; include those steps in the method supplied to the salon.
Develop a Tinted Combination
For color mixed into the gel, discuss the intended coloring material and amount with JTING. Compare the proposed mixture with an uncolored sample for transparency, shaping and curing, then retain the agreed combination in the instructions. Use a material and method evaluated for this purpose rather than assuming that any pigment or color gel is suitable.
7. Set Thin Layers and Complete the LED Cure
Set thin layers as you build the design, then complete the LED cure. Show these as separate steps when teaching the technique or preparing instructions for your customers.
-
Prepare the Base
Apply and cure the base coat and base color according to their own instructions before placing the sculpted decoration.
-
Shape a Thin Element
Refine its outline before curing. Larger flowers and other substantial designs should be built in thin layers rather than as one thick mass.
-
Set Each Thin Layer
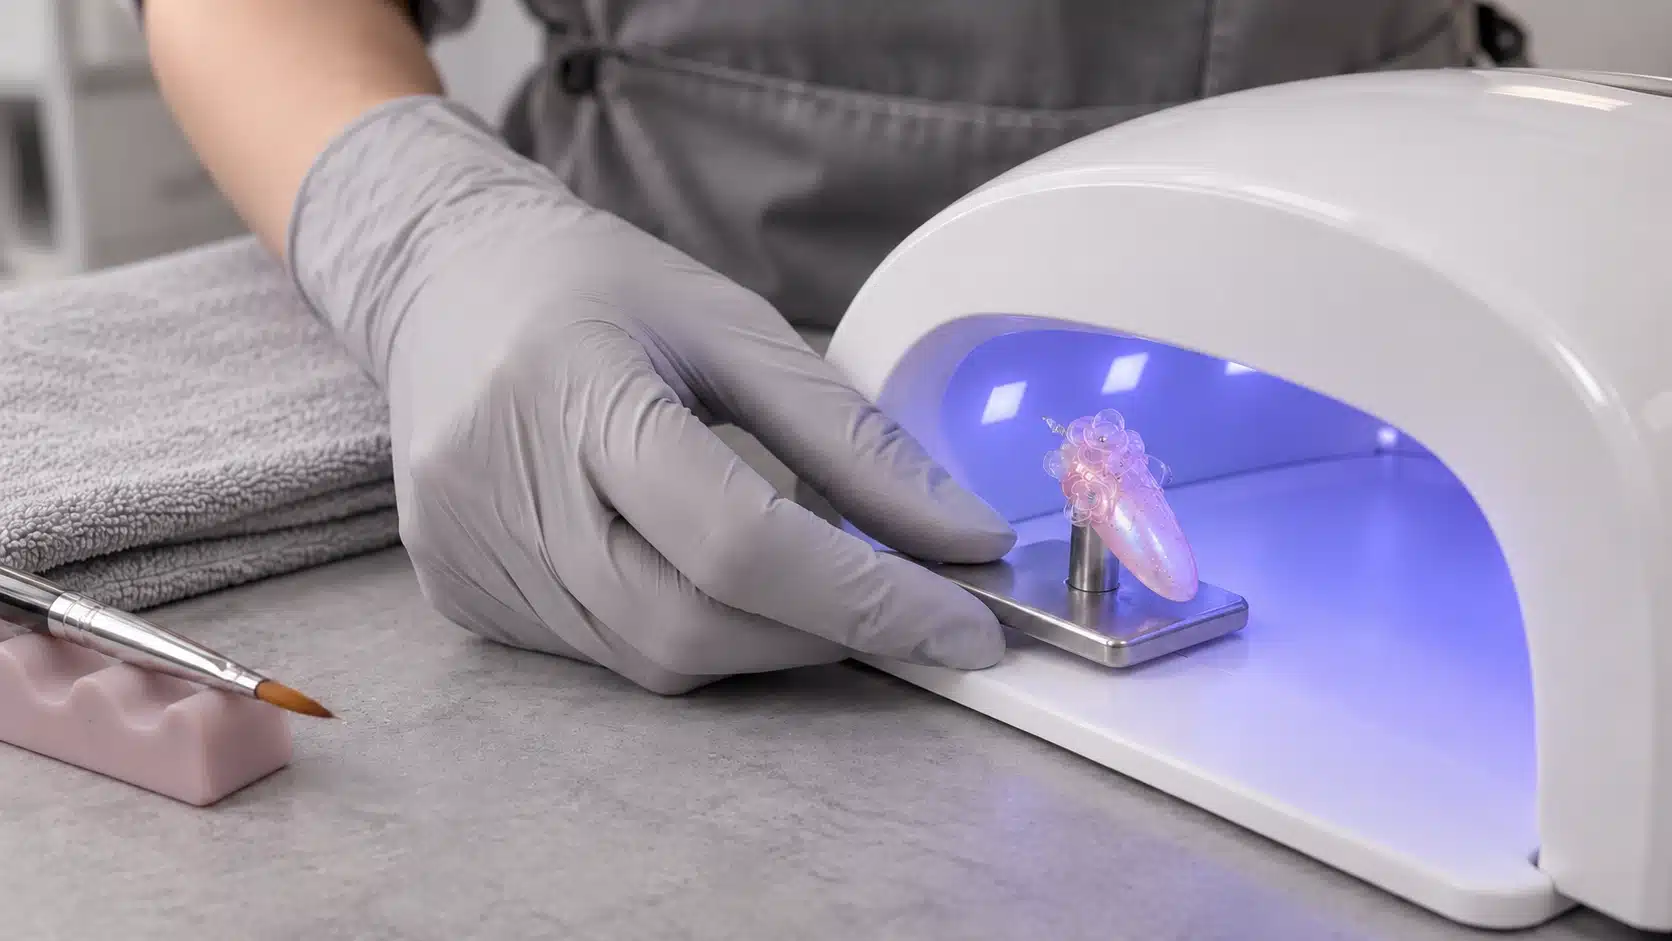
Use the 20–30-second setting step for thin layers during construction. This short exposure does not replace the full cure.
-
Complete the Required Cure
The LED full-curing guidance is 60 seconds. Confirm the layer sequence, actual design and lamp combination when evaluating the sample.
-
Finish the Complete Design
Any additional coloring product or optional top coat must also follow its applicable application and curing instructions.
During sampling, agree on the method for the lamp, layer thickness and any coloring material that your customers will use. Keep these details with the application instructions, particularly for larger flowers with several overlapping layers.
A non-tacky surface is not proof that the inside of a sculpted design has cured adequately. Visual appearance and surface feel cannot replace confirmation of suitable curing conditions.
8. Finish Clear Relief without Hiding the Detail
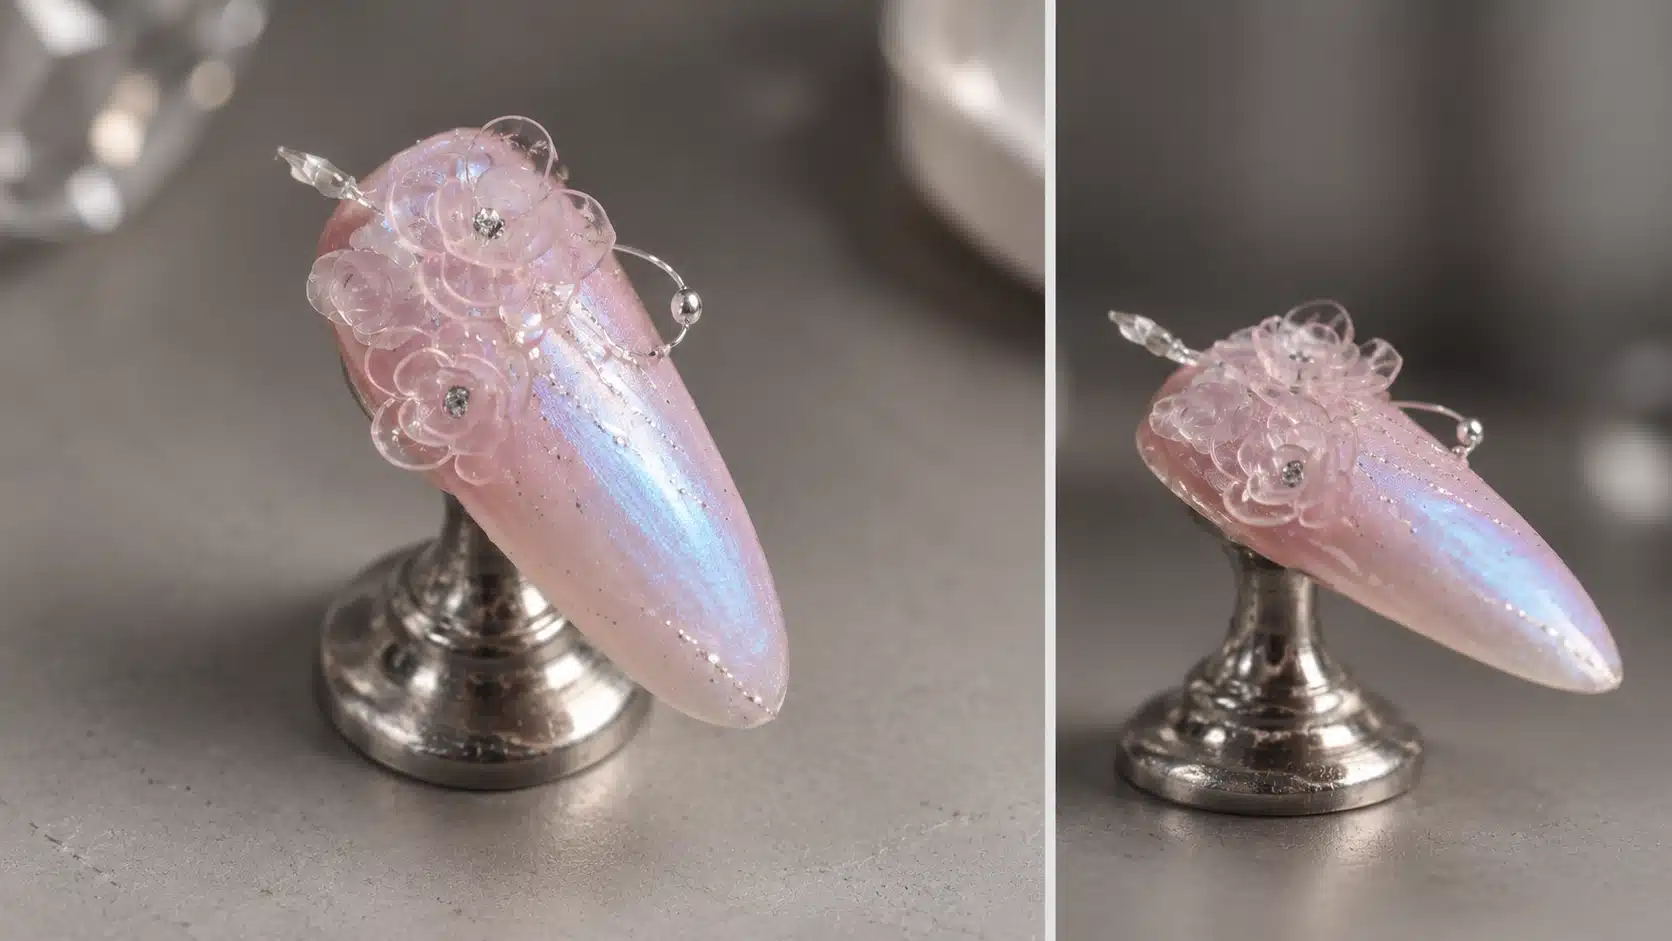
Sculpture Gel Clear cures to a no-wipe finish. A thin top coat is optional when extra gloss is wanted. Choose the finish according to the design: the shine should complement the clear relief while leaving the petal edges and folds visible.
When applying a top coat, watch for material collecting in narrow gaps or around the edges. Compare the outline from the front and the side before adopting the finish for your customer instructions. A defined silhouette matters as much as surface shine in transparent nail art.
Base colors, painted accents and other decorations may need their own finishing steps. Specify those alongside the optional finish for the sculpture, so technicians can follow one complete method for the chosen design.
9. Troubleshoot Clear 3D Nail Art
Record the visible issue and the products and steps used. Change one condition at a time and retain the original sample, so you can see whether the adjustment improves the result.
Swipe to view the full table.
| Observed Issue | First Conditions to Check | Next Sample |
|---|---|---|
| Petal Edges Look Indistinct | Starting portion, edge refinement and the contrast with the base. | Repeat one petal, adjusting either the portion or edge shaping while keeping the background unchanged. |
| Neighboring Petals Merge Visually | Spacing, overlap and whether later shaping covered an earlier outline. | Make a partial flower with more visible separation before progressing to the full design. |
| Fine Texture Becomes Less Visible | The relief before finishing, top-coat application and material in narrow gaps. | Compare the same simple texture with the intended optional finish and without it. |
| The Transparent Effect Is Hard to Read | Base color, shape thickness, lighting and any added color. | Repeat an uncolored shape on a second base, keeping the viewing conditions consistent. |
| Behavior Changes after Adding Color | The coloring material, amount, application sequence and confirmed compatibility. | Return to an uncolored reference and ask JTING to review the proposed combination before repeating it. |
If a curing question remains, send JTING the lamp details, layer construction and products used. Resolve the application method before introducing that combination to your customers.
10. Select Designs for Everyday and Statement Nail Services
Choose 3D gel nail art designs that your salon customers can fit into their services. A small accent, one feature nail and a layered composition can be offered as different design options, with shaping time and technique assessed for each.
- Small, Thin Accents: Trial a petal, short ripple or small fold over an existing gel nail polish color. Assess the edge finish, overall height and placement on the nail.
- One Statement Nail: Use a flower or bow as the focal point of a set. Check its proportions against the other nails and record the time needed to repeat the design.
- Layered Compositions: Test a more detailed arrangement for services that allow additional shaping and curing stages. Review the spaces between petals and the profile from the side.
Select examples on the nail lengths and shapes your customers work with. Alongside the appearance, ask technicians to assess the placement and height in relation to everyday use, including comfort and possible snagging. These observations help decide which designs to introduce first and which need more practice or a longer appointment.
11. Evaluate Samples beyond the Finished Photograph
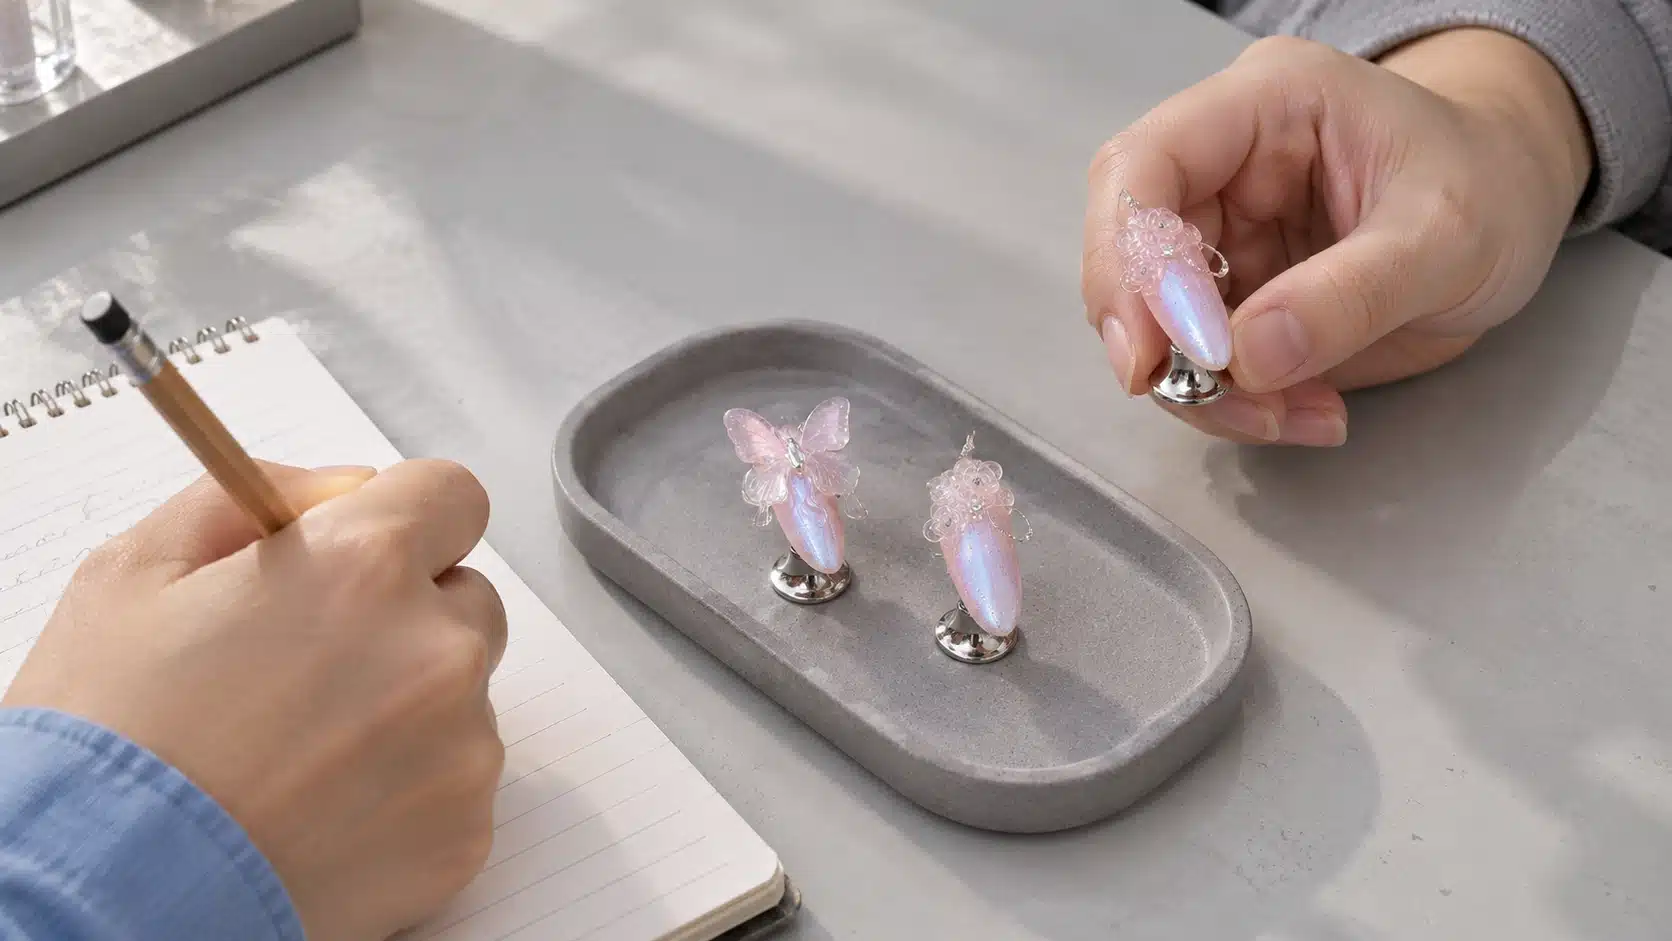
Evaluate the samples against the designs you intend to sell or teach. A single thin petal, a small layered flower and a short ripple give you three different shaping tasks. Use selected base colors from your customers' usual range and assess the points below.
Swipe to view the full table.
| Evaluation Area | What to Observe | What to Record |
|---|---|---|
| Shaping | Pickup, pressing, edge refinement and adjustments before curing | Tool, portion size, design and operator |
| Shape retention | Whether the intended folds and spacing remain before the setting step | Waiting interval and any reshaping needed |
| Clear appearance | Visibility of the base color, petal boundaries and overlapping layers | Base products, lighting and front and side photographs |
| Finish | Surface appearance and detail with the selected finishing method | No additional top coat or the specific thin top coat used |
| Curing and combinations | Suitability of the intended lamp, layer construction and added coloring materials | Product names, lamp details, curing sequence and questions for technical review |
Have the technicians who will use the product repeat the designs with the same instructions. Note where their results differ: pickup, edge shaping, petal spacing or finishing. This helps distinguish a design that is ready for your customers from one that needs clearer guidance or more practice.
Keep the approved samples together with the products and method used to make them. Purchasing staff can refer to the agreed appearance, while the salon team can reproduce the application. Include unresolved curing or material-combination questions in the discussion with JTING before approval.
12. Assess Material Use, Working Time and Training Needs
For wholesale 3D nail art gel, compare the jar price alongside consumption and service time. A small transparent accent and a layered flower use different amounts of gel and require different shaping work. Estimate each design separately before deciding how it fits your offer.
Gel cost per completed design = purchase cost per 15 g jar ÷ 15 × grams consumed per completed design.
Use a scale suitable for small quantities to weigh the closed jar before and after several repeated designs. Divide the gel consumed by the number of completed designs. Include discarded material and gel used in unsuccessful attempts in the total consumption, so the estimate reflects actual working use.
Track active shaping and finishing time separately from time spent under the lamp. Add the costs of the base, color, optional top coat and other consumables using a consistent purchasing basis. If the technician performs another task while a design cures, avoid counting that interval twice in the labor estimate.
Repeat the exercise after practice to identify the steps that need training. For a distributor, these observations help answer salon questions about application effort. For a salon group, they help assess appointment length and service pricing. Use measured consumption for yield estimates; the 15 g jar size alone does not determine how many sets can be completed.
13. Choose the Gel and Supporting Materials for Your Customers
Start with the materials your customers already use. A salon with suitable sculpting tools and base products may need the gel and its application instructions. A customer introducing the technique may also need help selecting companion products. List any additional items separately when requesting a quotation.
Swipe to view the full table.
| Item | Order Scope to Confirm |
|---|---|
| Sculpture Gel Clear | 15 g Clear gel in a screw-lid jar, with the selected branding and packaging |
| Sculpting tools | Identify tools already used by the salon; confirm any additional supply separately |
| Base and color products | Choose from the customer's existing system or discuss additional products for sampling |
| Coloring materials and top coat | Specify any intended tint, painted accent or optional thin top coat; evaluate the combination |
For brands and distributors, useful launch materials include a close-up of the transparent detail, a short shaping demonstration and clear application instructions. JTING can support product photography and videos; discuss the designs, products and instructions you want covered. Match these materials to the combination your customers will actually receive or use.
14. Prepare Private Label Packaging and Product Instructions
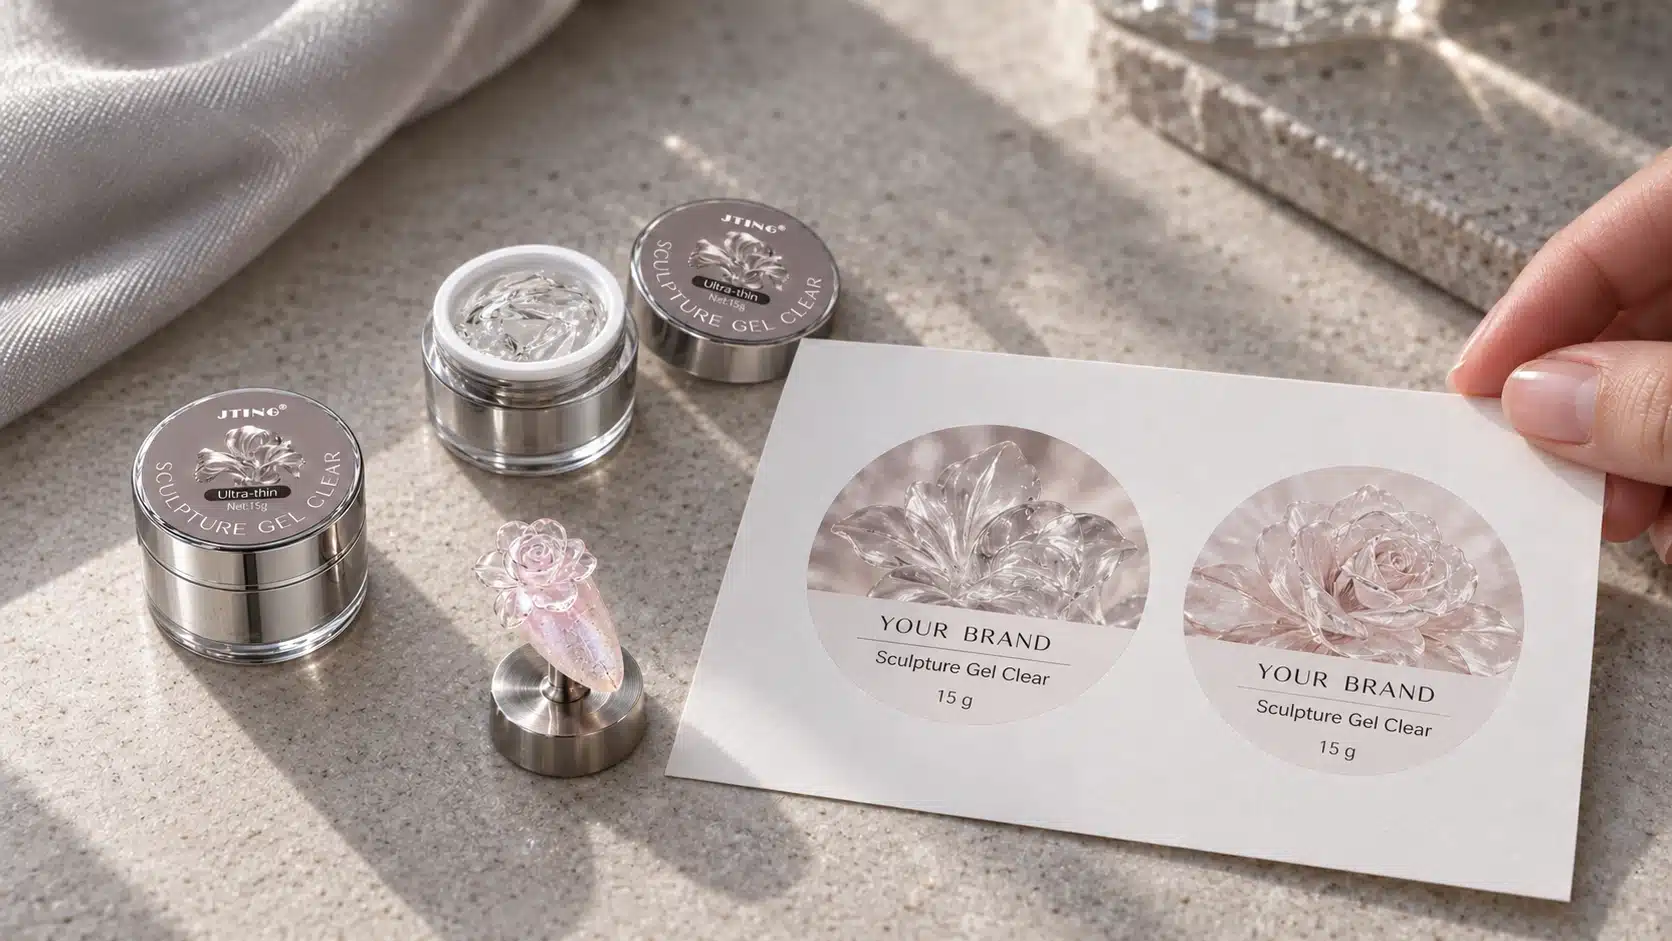
A private label clear sculpting gel launch needs a branded jar, clear application information and the packaging agreed for the order. Begin with the 15 g product and define these requirements together.
Branding on the Jar
JTING can adapt an existing label design with your logo and product details, then adjust it to your requirements. Review the product name, Clear identification, net weight and other necessary information on the lid and jar labels. Check the artwork at its actual printed size before approving it.
Outer Packaging and Supplied Items
If you need an outer box, include its design and the intended contents in the quotation. Allocate the product information across the selected packaging so it remains readable. Alternative jar styles or capacities can be discussed separately.
Application Instructions
Keep shaping, thin-layer setting and full curing as distinct steps. Explain the no-wipe finish and optional thin top coat, and name any coloring material used in the approved method. The instructions supplied with the product and those used in demonstrations should describe the same application.
Product Information and Documents
Sculpture Gel Clear is HEMA-free, TPO-free and TMPTA-free. Share your destination market and documentation requirements before packaging approval. JTING can support product information and documents, including SDS/MSDS and INCI information, depending on the product and market requirements.
15. Compare Quotes and Plan First and Repeat Orders
Request a quotation for JTING Sculpture Gel Clear, model FG167, in 15 g jars. Specify the quantity, branding and packaging, then compare offers on the same basis. A jar-only price and a price that includes labels or outer boxes cover different supplied items.
Swipe to view the full table.
| Quote Factor | First Order | Repeat Order |
|---|---|---|
| Product and quantity | Clear color, 15 g net weight and jar count | Confirm the same specification and revised quantity |
| Branding and packaging | JTING brand or private label; labels and any outer boxes | Reference approved artwork and list requested changes |
| Additional items | List additional products, photographs, videos and required documents | Confirm what must be supplied again |
| Delivery scope | Destination, production schedule and shipping arrangement | Reconfirm timing against the replenishment requirement |
For private label projects, JTING's general starting point is 10 pieces per shade. Confirm the applicable minimum for this 15 g Clear jar and the requested labeling or outer packaging before planning launch quantities. Product specifications, packaging and customization can affect the final MOQ.
Standard samples typically take 7–10 business days. Bulk production typically takes 15–20 days after sample and packaging approval. Work back from your required arrival date, allowing time for sample review, artwork changes and shipping as well as production.
For repeat orders, provide the previous order reference, jar quantity and approved packaging details, with any changes listed separately. Plan replenishment around actual sales or usage, the agreed production schedule and shipping time. If salon feedback leads to a revised design or method, update the application materials alongside the next order.
16. Questions Buyers Ask about Sculpture Gel Clear
What Is the Difference between Clear Sculpture Gel and Builder Gel?
Sculpture Gel Clear is for decorative relief such as thin petals, bows and raised textures. Building nail structure or adding length requires a gel intended for that purpose. Choose the decorative and structural products according to the application you plan to offer.
Is Sculpture Gel Clear Supplied in Other Colors?
This product is supplied in Clear, in 15 g jars. Color in the finished design can come from the underlying gel nail polish, surface painting or a compatible coloring material added to the clear gel.
Can I Add Color to the Clear Gel?
Yes, with a suitable coloring material and method. Discuss the intended material and amount with JTING, then evaluate the combination for transparency, shaping and curing. A colored base or painted surface accents can also introduce color while leaving parts of the sculpture clear.
Does the Gel Need Wiping or a Top Coat?
The gel has a no-wipe finish after curing. A thin top coat is optional for extra gloss. Check whether it fills delicate folds or spaces between petals. Follow the relevant finishing instructions for the base, painted details and other materials in the design.
Is a Short Setting Cure the Same as a Full Cure?
No. The 20–30-second step sets thin layers during construction; the LED full-curing guidance is 60 seconds. Build larger designs in thin layers and confirm the method for the lamp, thickness and coloring combination used.
How Should I Evaluate a Sample for My Salon Customers?
Use a thin petal, layered flower and textured accent on selected base colors. Ask the intended technicians to repeat them, comparing shaping, edge definition, transparency and working time. Keep the approved examples with the products, lamp and application method used.
Are Sculpting Tools and Coloring Products Included?
Tools and coloring products are separate items to confirm in your quotation. List the materials your customers already use and those you want supplied, then agree on availability, quantities and the application combination to evaluate.
What Can Be Customized for a Private Label Order?
JTING can adapt labels with your logo and product details and discuss outer packaging for the 15 g jar. Review the artwork, supplied items, documents and MOQ together. Alternative jars or capacities require separate assessment.
What Are the MOQ and Typical Lead Times?
JTING's general private label starting point is 10 pieces per shade; confirm the applicable minimum for the 15 g Clear jar and its packaging. Standard samples typically take 7–10 business days. Bulk production typically takes 15–20 days after sample and packaging approval, with shipping time planned separately.
17. Discuss Your Clear 3D Nail Art Range with JTING
For samples or a quotation for JTING Sculpture Gel Clear, tell us which designs your customers want to create, your estimated quantity of 15 g jars, your destination market and your label or packaging requirements. Include any base products or coloring materials you want to evaluate with the gel.
Choose JTING-brand supply or private label and share your intended launch timing. We can then discuss the sample selection, packaging, product photographs or videos and quotation for your order.