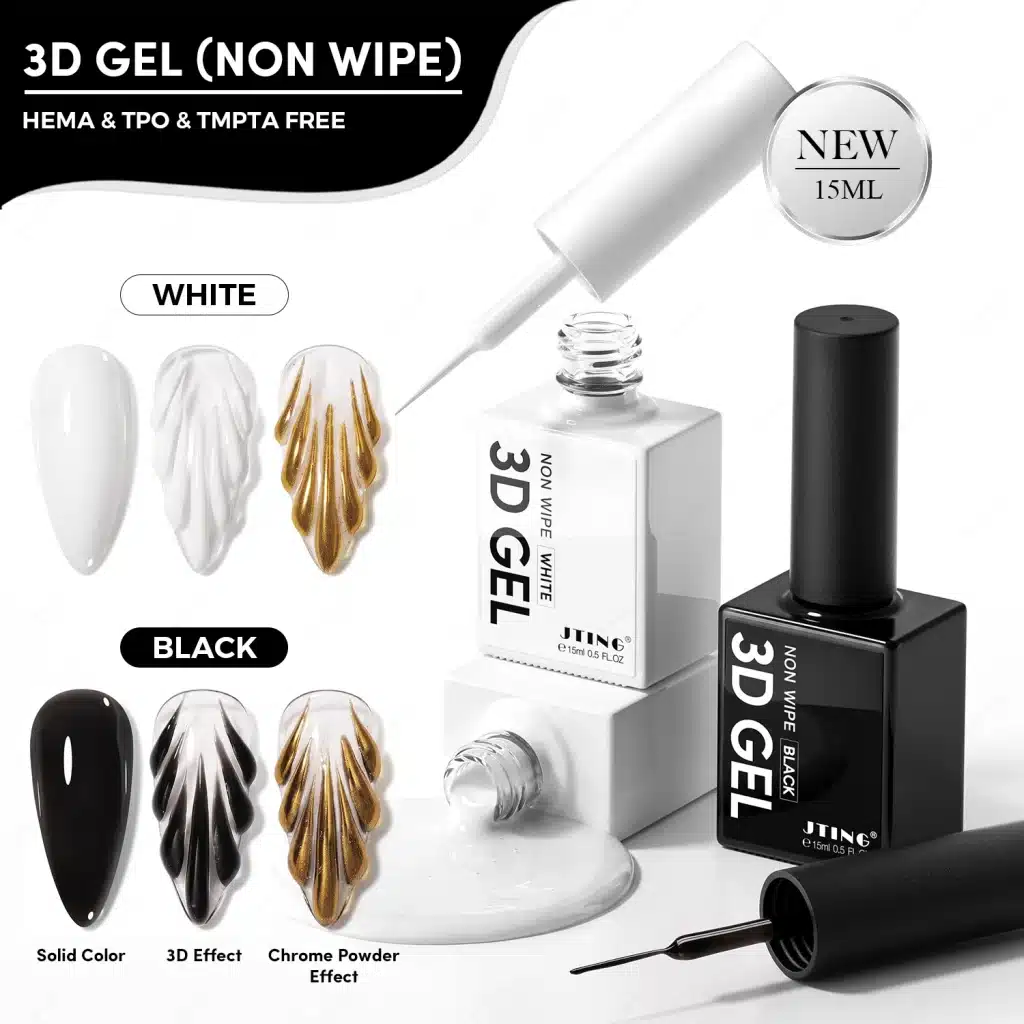
JTING Black & White No-Wipe 3D Gel brings fine lines and raised nail art into a 15 ml bottle with a built-in fine-tip brush. The thick, shape-holding gel can be used for outlines and small accents directly from the bottle, while a separate sculpting brush is used for larger petals, bows and textured motifs.
Black gives graphic designs a defined edge; white supports floral, lace and ornamental detail. The two colors can work over light, dark or colored bases and can be combined in the same design. Metallic finishes are created with additional chrome powder, providing another application to evaluate alongside the original black and white relief.
For nail brands, wholesalers and salon suppliers, product selection involves both the finished look and the working method. This guide covers brush control, layered shaping, LED curing and no-wipe finishing, followed by a sample-review checklist and the details needed for branded packaging, a wholesale quotation and replenishment by color. Compare the complete application with your intended base products before confirming the bottle quantities and materials for your order.
1. Meet JTING Black & White No-Wipe 3D Gel
JTING Black & White No-Wipe 3D Gel is a bottled 3D nail art gel for professional ranges that need both precise line work and sculpted detail. Each 15 ml bottle has a built-in fine-tip brush, making it possible to draw outlines and small accents directly from the bottle. For more substantial raised shapes, a separate sculpting brush gives the technician a broader tool for placing and shaping the gel.
The two colors have individual model references. FG169 Black No-Wipe 3D Gel is the black option for graphic lines, defined French edges and dark relief. FG170 White No-Wipe 3D Gel is the white option for petals, lace, bows, clouds and knitted textures. The colors can be used separately or combined in one design, depending on the look a salon or brand wants to offer.
The thick gel holds placed lines and sculpted shapes while they are refined before curing. This gives a brand or salon supplier two application directions in the same bottle format: fine painted detail and raised texture. The finished gel detail is glossy and no-wipe; larger motifs are built and cured in stages.
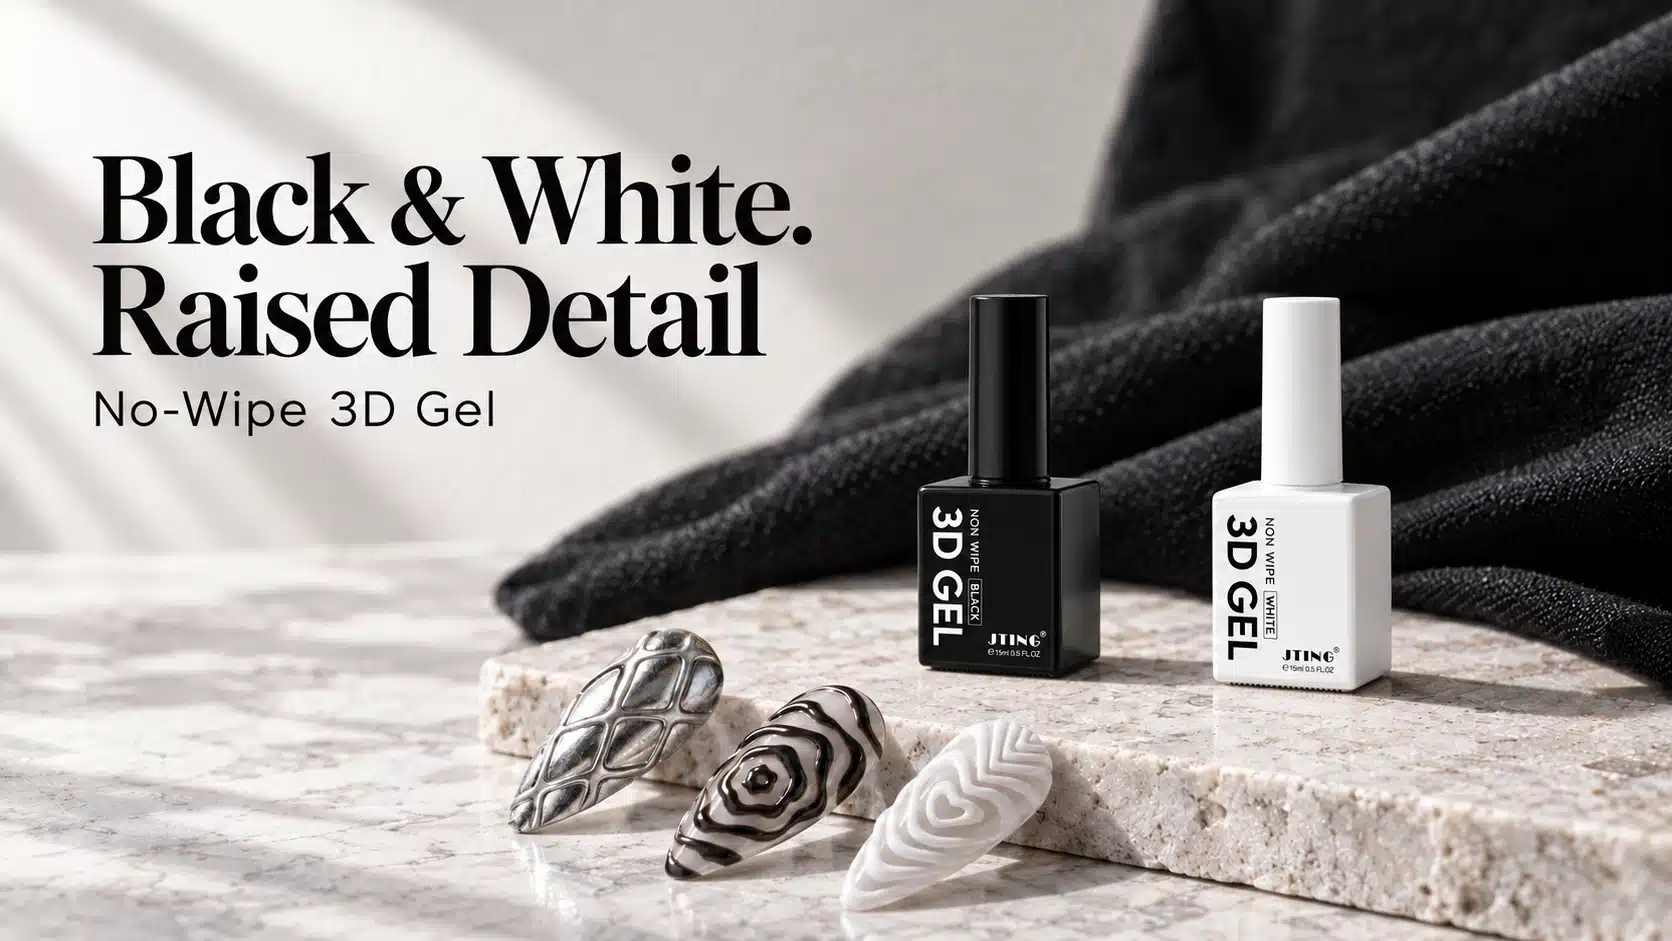
Black and white bottled 3D gel for fine lines and raised nail detail.
2. Choose Black and White for Different Nail Art Styles
Black and white serve different design needs. Black defines a motif with a clear outline or dark raised detail. White adds light-colored flowers and ornamental texture. Together they cover graphic, bridal and textured applications, with the base shade and pattern determining the finished style.
Use Black for Definition and Contrast
FG169 Black No-Wipe 3D Gel suits outlines, fine graphic strokes, French-edge accents and dark sculpted patterns. Over a pale or neutral base, a black line gives strong contrast. Over a darker base, black can create a subtler raised pattern whose shape is seen through light and shadow. A narrow contour can frame another detail, while a thicker placed shape creates a more pronounced relief effect.
For a French-inspired design, the black gel can define an edge or add a decorative line beside the smile area. Assess the intended line width and placement on the actual base shade: a detail that stands out on a light base may be less visible on a deep one. The base color provides the background, while Black No-Wipe 3D Gel supplies the line or raised detail.
Use White for Floral and Textured Detail
FG170 White No-Wipe 3D Gel is suited to raised petals, lace-like lines, bows, cloud shapes and knitted patterns. Its pale color can support bridal or soft floral designs, while the raised edge helps a motif remain distinct from the base. On a dark or saturated base, white can create stronger contrast; on a pale base, it can give a quieter, dimensional effect.
Black and white can also be used together: a black contour can define a white motif, while white raised details can sit beside graphic black accents. A bridal or floral selection can focus on the white applications; a graphic selection can focus on the black ones. Compare the designs relevant to your customers when deciding which color to introduce or whether to offer both.
Swipe to view all columns.
| Product | Model | Design Direction |
|---|---|---|
| Black No-Wipe 3D Gel | FG169 | Outlines, French-edge accents, graphic lines and dark relief |
| White No-Wipe 3D Gel | FG170 | Petals, lace, bows, clouds, knitted textures and white French details |
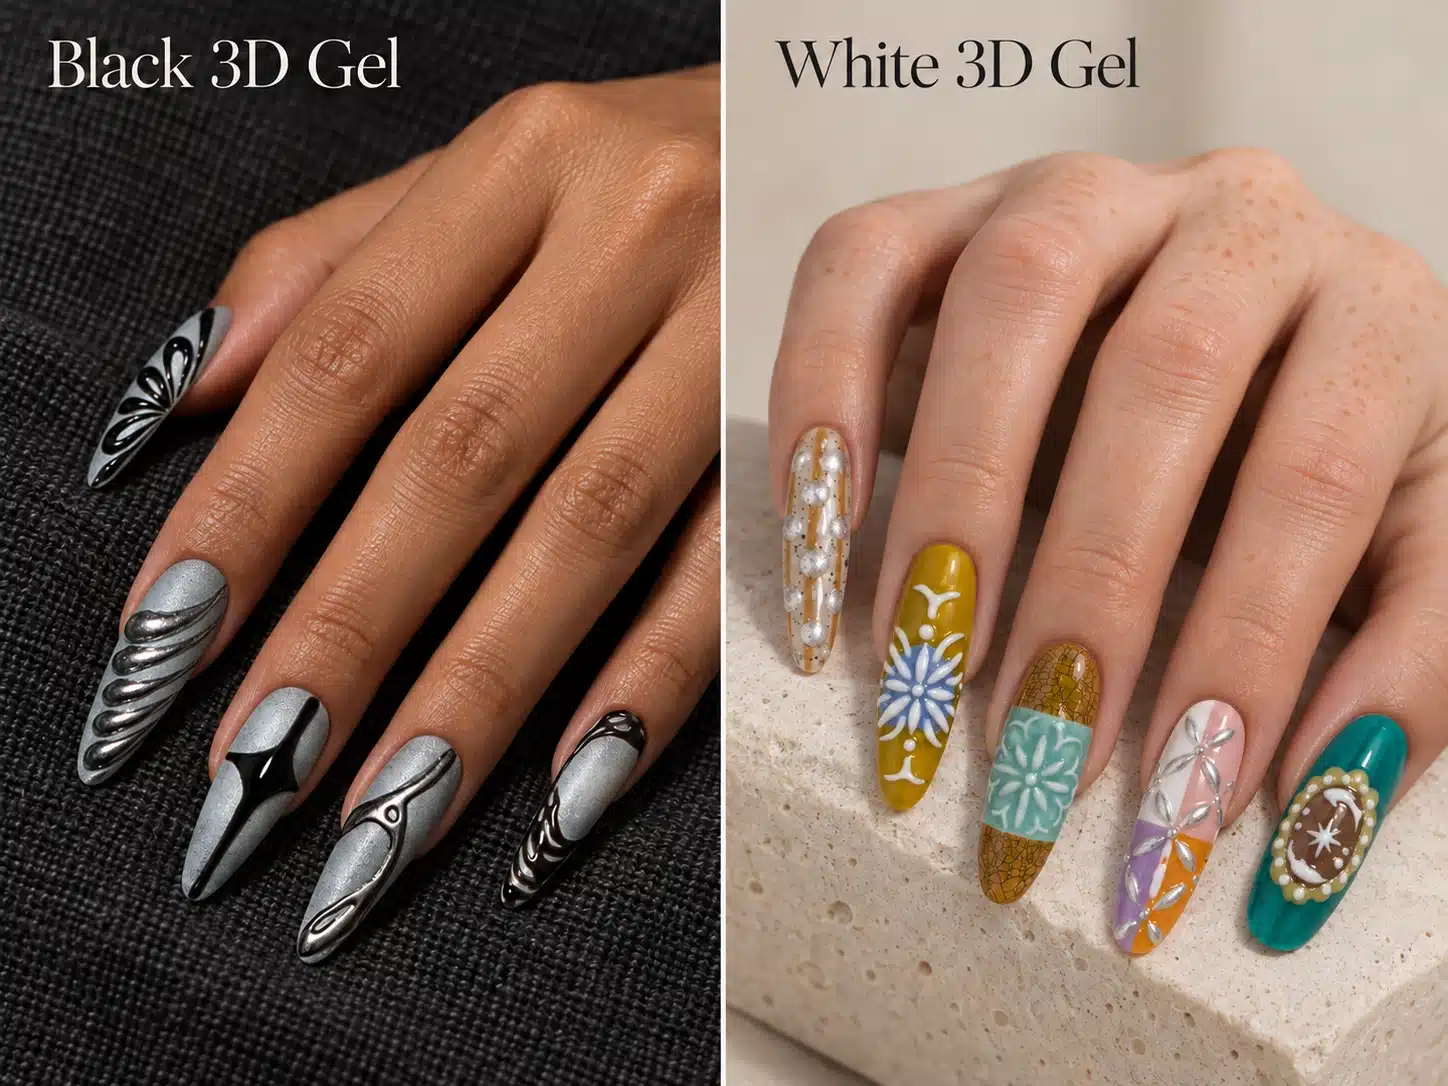
Black graphic lines and white relief details create different styles over the selected base colors.
3. Use the Built-In Fine-Tip Brush for Lines and Small Details
The built-in fine-tip brush is intended for controlled strokes and small accents. It lets a technician pick up gel from the bottle and work on fine outlines, French-edge details or patterned lines without changing to a separate brush for every small mark. A light pickup helps keep the stroke narrow; a heavier pickup deposits more material and can make a line broader or more dimensional.
For controlled work, use a small amount and watch how the gel moves as the line is drawn. The thick consistency is useful when a detail needs to hold its position, but taking too much product at once can make fine work harder to manage. A design can be adjusted before curing, so small corrections to a contour or the placement of an accent can be made while the gel is uncured.
Match the Tool to the Shape
Use the bottle’s fine-tip brush for lines and compact details. A separate sculpting brush is more suitable for larger petals, bows or other raised shapes that need broader shaping. Selecting the brush for the size and structure of the design gives the technician the appropriate contact area for each detail.
Care for the Brush and Bottle
Remove gel residue from the brush before returning it to the bottle. Close the cap securely after use and store the bottle away from light.
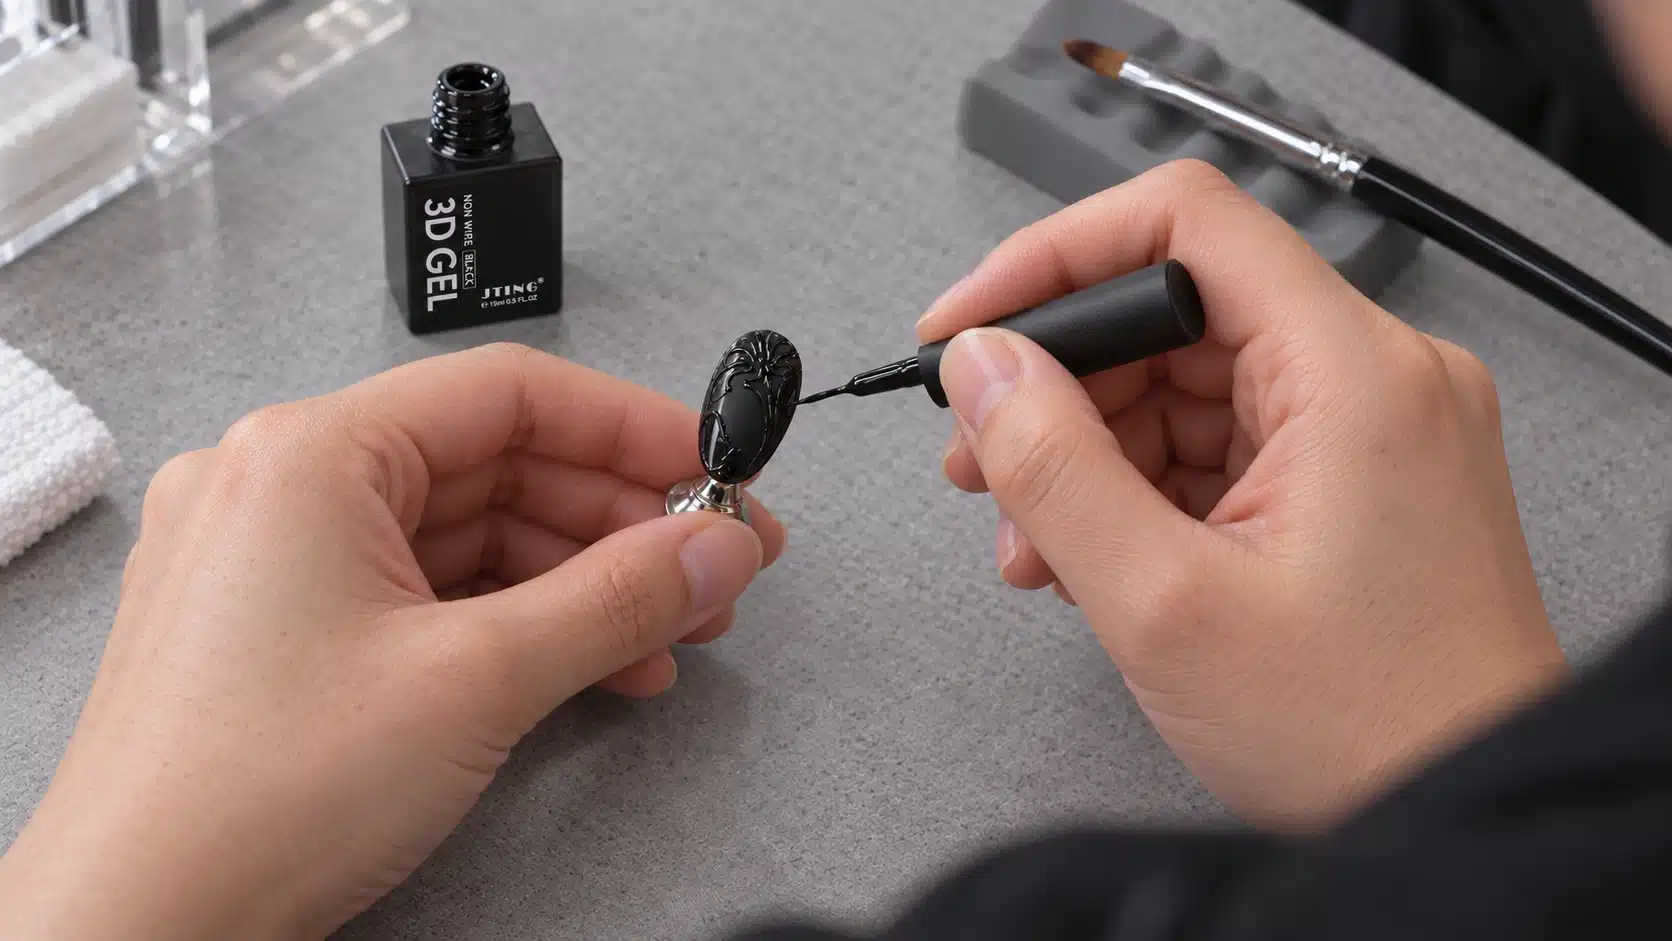
The built-in fine-tip brush handles small lines; a separate sculpting brush can be selected for larger shapes.
4. Shape Raised Petals, Bows and Textured Patterns
Use a sculpting brush to place small amounts of gel and press gently to form a raised motif. Shape individual petals, bow sections or textured marks while keeping their edges distinct. The gel remains adjustable before curing, allowing the technician to refine the detail before setting that stage.
The gel’s thick body helps it retain a placed shape, while the uncured design can still be adjusted. That combination supports deliberate relief work: the technician can refine the curve of a petal, tidy a border or reposition a small element before curing. Use only as much product as the shape requires, because the goal is a defined raised profile rather than excess material around the motif.
Build Definition with Small, Deliberate Shapes
On a flower, several shaped petals can create a dimensional motif while leaving space between their edges. A lace effect can use fine lines and small raised points; a cloud can be formed from connected rounded shapes. A bow benefits from clearly defined loops and a compact center. The same white gel can create soft motifs over pale colors or crisp raised contrast over deeper colors. Black can be used for outlined shapes or a more graphic raised pattern.
View the motif from the side as well as from above. The side view shows the height of the relief; the top view shows the spacing and outline of its individual parts. Refine a line or petal while uncured, keeping the profile and edges of the intended design clear.
If a design includes small pearls or chains, evaluate their attachment in the completed sample. Confirm the attachment method for the chosen accessory, including any dedicated adhesive needed for that application.
5. Prepare the Base and Cure Raised Designs in Layers
Prepare the nail, then apply and cure the base coat and chosen base color according to their own instructions. Complete these layers before drawing or shaping with the 3D gel.
The product’s LED application guidance is 60 seconds per curing stage. For larger relief, form and cure one layer before adding the next. Use the actual lamp and design thickness in the sample process to confirm complete curing.
Use a Staged Process for Larger Relief
Small details can be shaped and cured as individual designs. For a larger flower or other built-up motif, use two or three stages. Cure each layer before placing the next one so the underlying shape is set before more material is added. This approach gives the technician opportunities to check the silhouette and build height in manageable steps.
Prepare the Base
Complete nail preparation, base coat and base color according to the relevant product instructions, and cure those layers as directed.
Place the Detail
Use the built-in fine-tip brush for line work or a separate sculpting brush for a larger raised shape. Take a controlled amount and refine the uncured outline.
Cure the First Stage
Cure under LED for 60 seconds and confirm complete curing with the selected lamp and design thickness.
Add the Next Layer When Needed
For a larger shape, add the next portion only after the previous stage has cured. Repeat the check for each layer; build in two or three stages as appropriate.
Review the Finished Sample
Check the raised edges and cured surface under the same lamp and thickness planned for the application. Follow separate finishing directions for the base color or any additional powder.
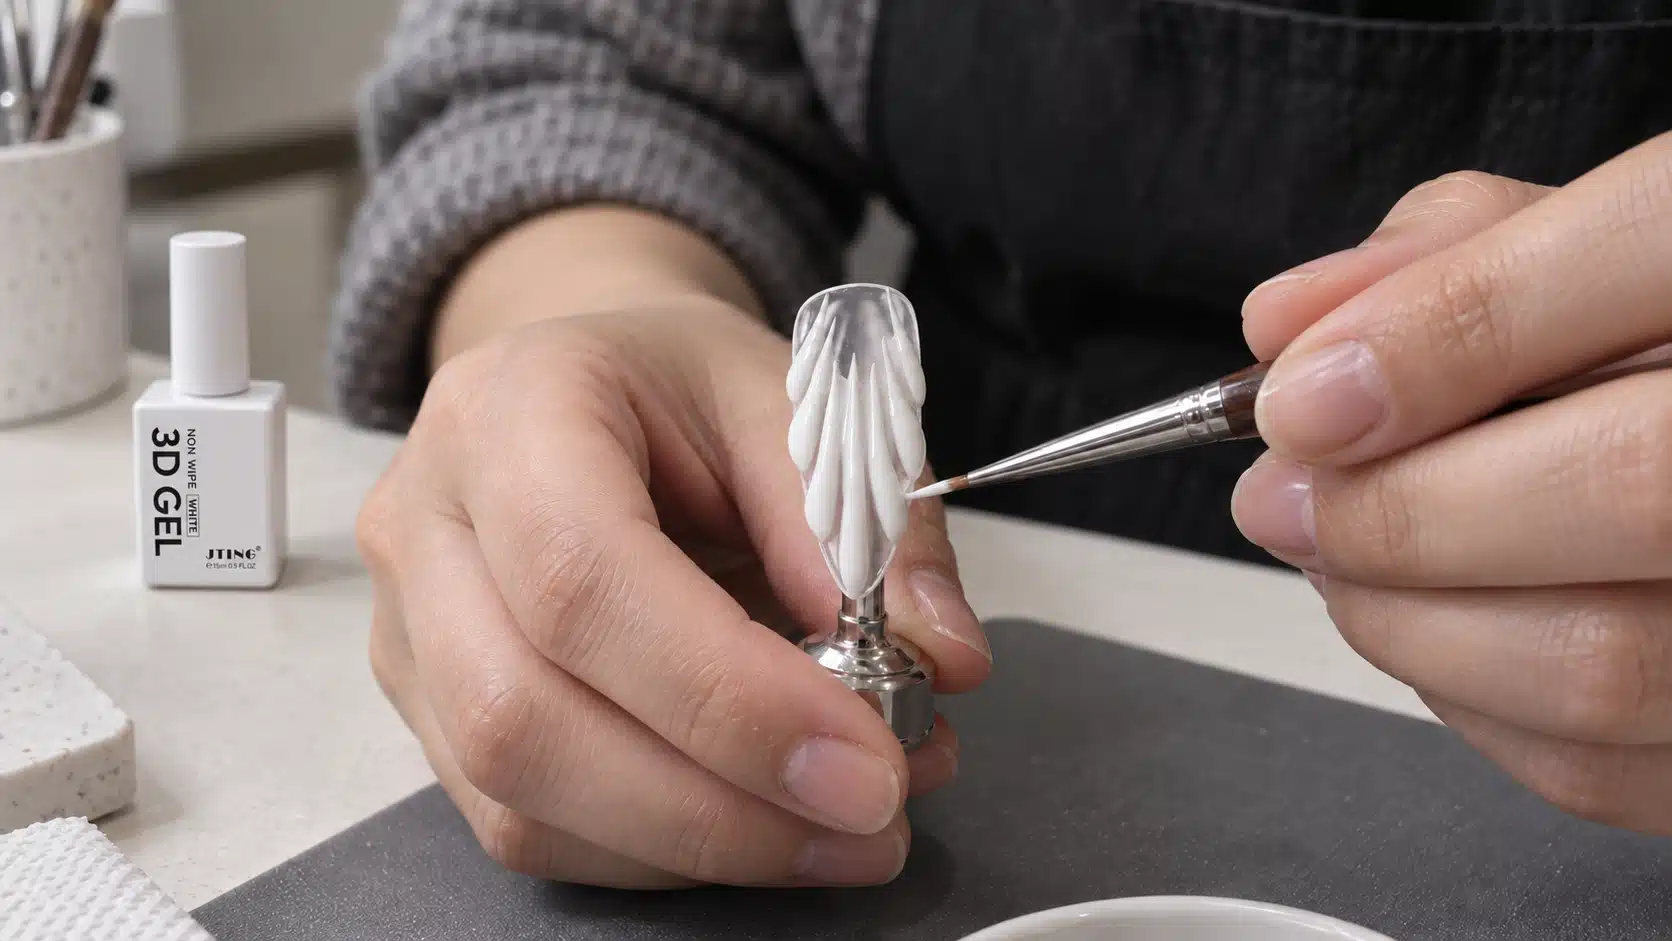
Refine individual raised shapes before curing the next stage of a larger design.
6. Understand the No-Wipe Finish and Optional Top Coat
Standard cured 3D gel details need no wiping or additional top coat. Leaving the detail as cured preserves its glossy raised outline. The surrounding base color retains the finishing requirements of its own product system.
A thin top coat is optional. Some designs may call for a different overall finish, but applying a coating can change how the raised edges appear. Check the result on a sample before selecting that finish for a product presentation or salon procedure. Consider whether the coating follows the relief or softens the visual separation between the raised shape and the base.
Swipe to view all columns.
| Area | Product Guidance | Sample Check |
|---|---|---|
| 3D gel detail | Standard cured details need no wiping or additional top coat | Review the cured surface and raised outline |
| Optional top coat | A thin layer may be used when desired | Check how it affects the relief and overall appearance |
| Surrounding base color | Follow the base product’s own finishing directions | Assess it with the selected base and gel combination |
| Chrome powder or other added material | Use the requirements of the selected product system | Evaluate the complete combination during sampling |
For chrome-powder designs, use the application and finishing products specified for the selected powder. Assess the powder-coated relief and surrounding base together when choosing the final finish for salon supply.
7. Create Metallic Relief with Additional Chrome Powder
Black No-Wipe 3D Gel and White No-Wipe 3D Gel supply the original black or white detail. Gold and silver finishes shown with the range use additional chrome powder. When you request a metallic sample, identify the powder effect as well as the underlying gel color.
A raised line or motif can be evaluated with a separately selected powder to see how a metallic accent works with the black or white detail. The chosen powder, base shade, raised shape and finishing products all contribute to the final appearance. A gold effect over one base may read differently from a silver effect over another, so compare the specific combinations intended for the range.
Evaluate the Complete Combination
Review the visibility of the raised edges, the appearance of the metallic surface and its contrast with the base shade. Compare the intended powder finish with the original black or white relief if both looks will be part of your product offer. Keep the base and motif consistent so the examples show the finishing choices clearly.
Include the selected powder and its finishing products in the application information for that design. Their instructions determine the powder method and finish; JTING can review the requested sample combination and confirm which additional materials are available for your project.
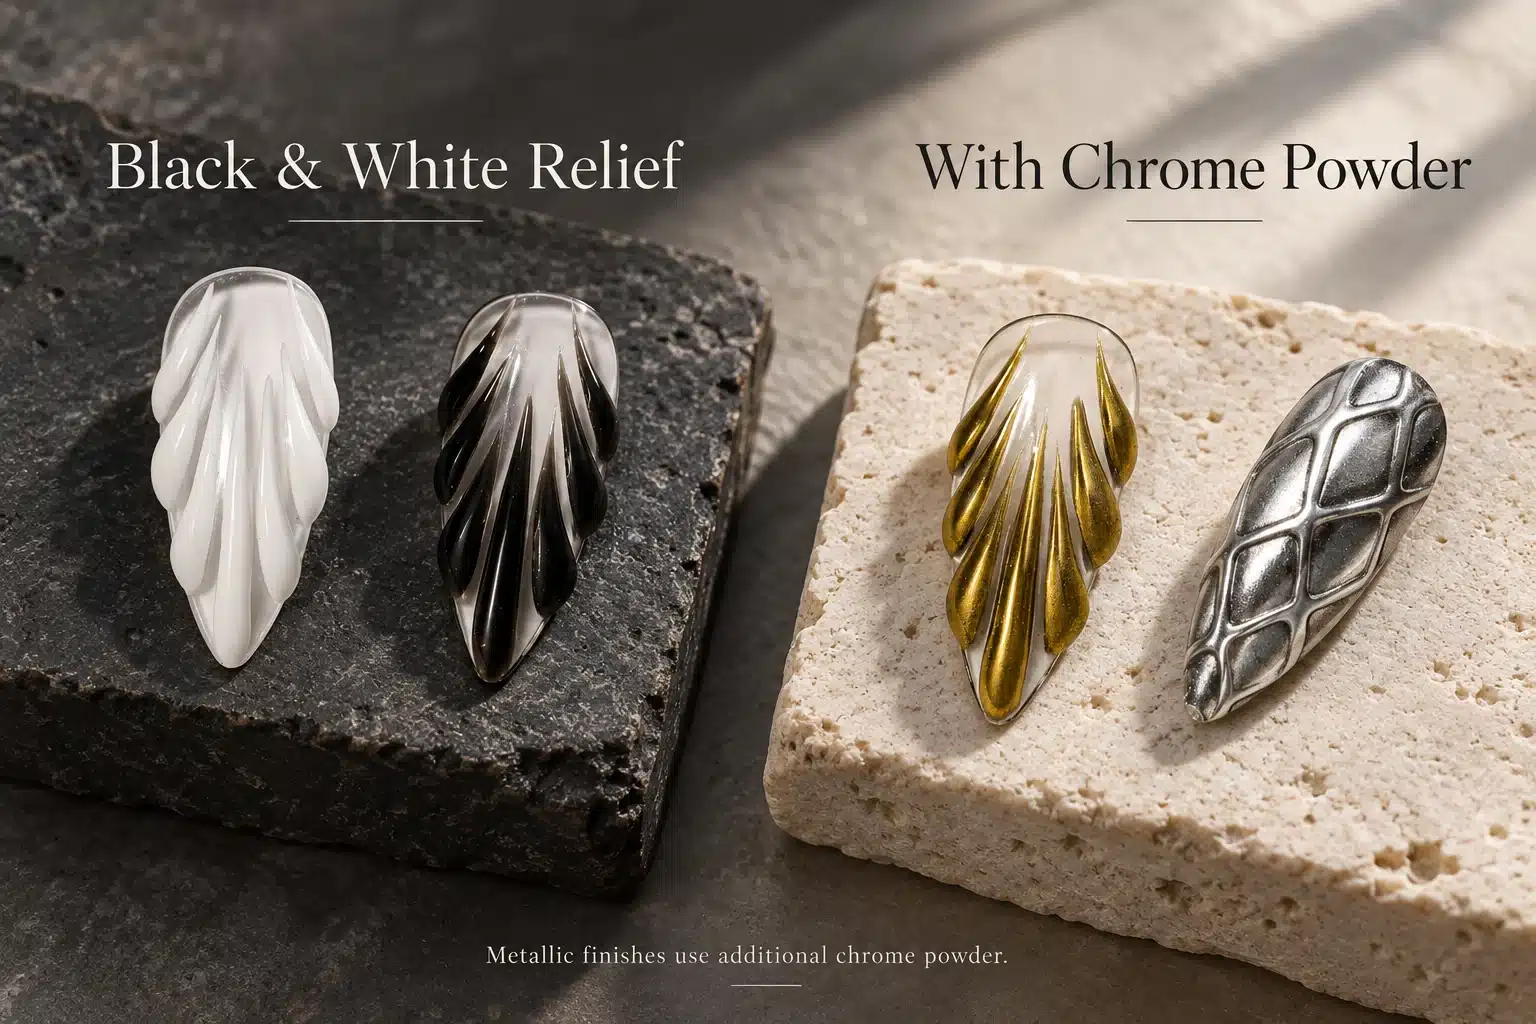
The gold and silver finishes use additional chrome powder.
8. Evaluate Both Colors before Approving Your Samples
Request Black No-Wipe 3D Gel and White No-Wipe 3D Gel samples for the applications you intend to offer. Tell JTING whether the review is focused on fine lines, floral relief, textured patterns or a powder-coated finish, and identify the base shades and tools your technical team plans to use.
Use a consistent set of sample designs so the two colors can be compared fairly. Include a fine outline made with the bottle brush, a raised detail shaped with a separate sculpting brush, and at least one light and one dark or colored base. If metallic relief is part of the planned assortment, evaluate it as a separate design with the additional chrome powder and its finishing products. The powder effect is an added application; it is not a metallic color contained in either gel.
Swipe to view all columns.
| Review Area | What to Examine | Record for Approval |
|---|---|---|
| Brush and line work | Pickup, stroke width and control with the built-in fine-tip brush in both colors. | Whether the brush suits the fine details in your planned designs. |
| Color and base pairing | How black and white appear over your selected light, dark and colored bases. | The base shades and design examples used for review. |
| Raised details | Edge definition and visible layers in petals, bows or textured patterns. | The sculpting brush and shaping approach used for larger details. |
| Curing and finish | The cured surface under your LED lamp and the thickness used in the sample. | Observed results for the exact lamp, design and finishing products evaluated. |
| Optional effects | Chrome powder or accessory placement in the complete design, if required. | Additional materials and finishing steps to specify for the order. |
Keep the sample design and application conditions with the approval record, together with photographs of the finished detail. Share any requested changes to the brush, appearance or packaging with JTING before approving the order. This gives your purchasing and technical teams a common reference for the selected products and their presentation.
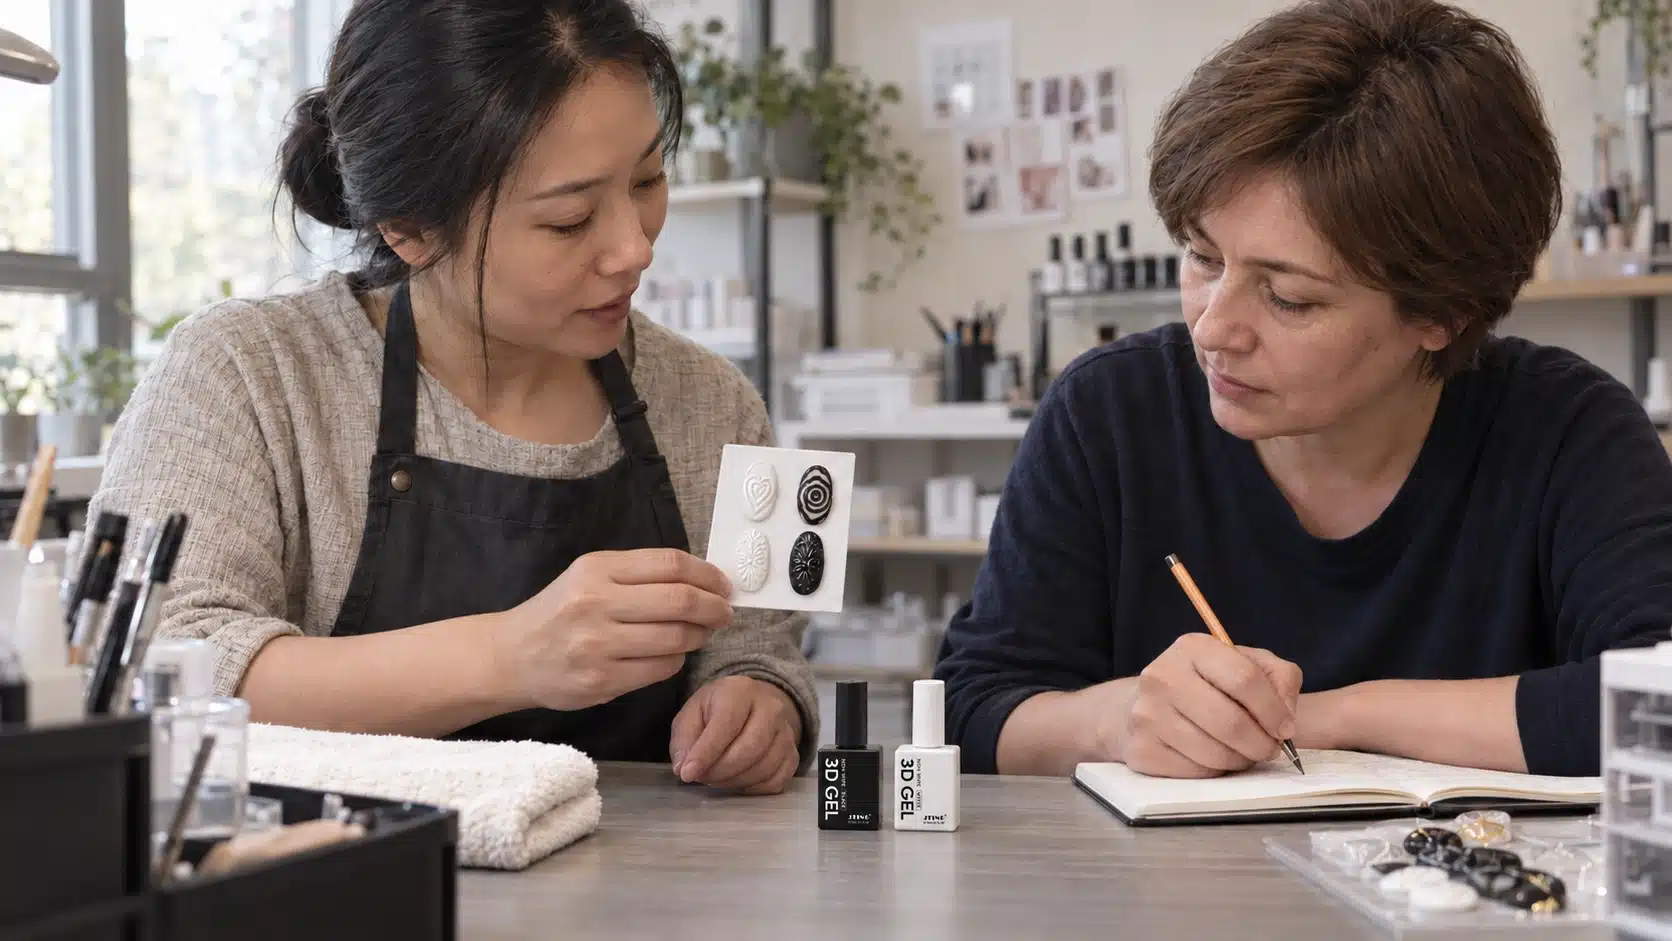
Review the selected line work and raised designs alongside the bottle and application details.
9. Confirm Black and White Quantities and Supplied Items
A wholesale 3D nail art gel order can specify different quantities of black and white. State the bottle count for FG169 Black No-Wipe 3D Gel and FG170 White No-Wipe 3D Gel separately, based on the designs and customer requirements you plan to serve. The quotation can then reflect the selected color quantities and packaging.
Confirm the supply unit, 15 ml bottle with built-in fine-tip brush, label and outer packaging when comparing quotations. If you require chrome powder, tools or decorative materials for the project, list them separately. JTING will confirm the available supply scope and any materials your team needs to arrange separately.
Swipe to view all columns.
| Order Detail | Black Option | White Option |
|---|---|---|
| Product identity | FG169 Black No-Wipe 3D Gel | FG170 White No-Wipe 3D Gel |
| Quantity | Enter the requested bottle count. | Enter the requested bottle count. |
| Standard bottle format | 15 ml with built-in fine-tip brush | 15 ml with built-in fine-tip brush |
| Bottle dimensions | 87 mm total height × 32 mm width | 87 mm total height × 32 mm width |
| Brand presentation | Specify logo, label information, outer packaging and any requested design changes. | |
| Additional materials | List chrome powder, tools, accessories or other items separately for confirmation. | |
JTING’s general starting point for private label gel nail polish is 10 pieces per shade. The minimum for this 3D gel order is confirmed with the chosen packaging and customization. Share your per-color quantities and presentation requirements to receive a product-specific quotation.
10. Develop Your Branded Black & White 3D Gel Collection
JTING supports a private label 3D gel collection through logo and label adaptation, packaging customization and sample approval. Existing label designs can be adapted with your logo, color identification and product information, or adjusted to your brand’s design requirements. Outer packaging can be developed around the bottle configuration and number of products you want it to hold.
The current 15 ml bottle has a total height of 87 mm and a width of 32 mm. Use the physical bottle sample to review label placement, visibility of the color identification and fit within the proposed outer packaging. If you need a different brush, bottle or cap arrangement, assess those components with the gel and intended application before approval.
Keep the black and white color identification clear on the branded labels. Agree the final artwork and packaging sample together, including the language and product information needed for your destination market. The approved bottle, brush and packaging provide the reference for bulk production and later repeat orders.
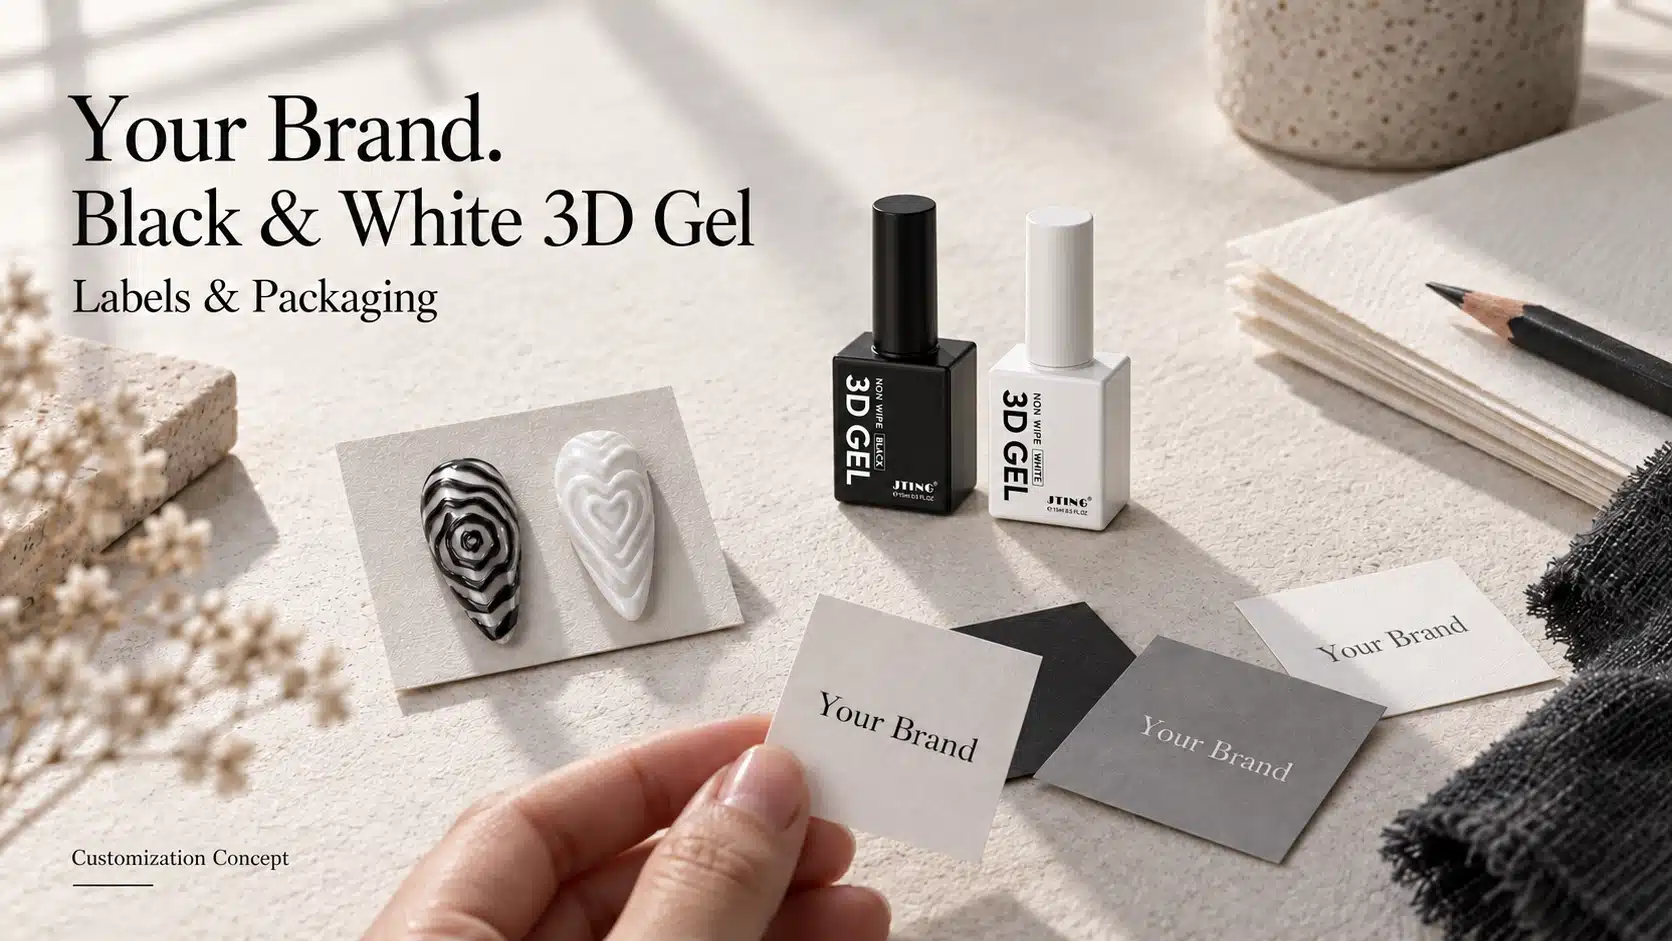
Label concepts are shown for discussion; final artwork and packaging are developed for the confirmed project.
11. Product Images and Application Support for Your Sales Channel
JTING can support product photography, product videos and sample presentation for this black-and-white 3D nail art gel range. Requested materials can cover the bottles and brush details, black line work, white floral relief and the chrome-powder finishes selected for your product offer.
Application videos can show the bottle brush drawing fine details or a sculpting brush forming a raised motif in layers. Product images can show the original black and white relief alongside the additional powder effect. The content can be based on the applications and samples agreed for your project, with the added materials clearly identified.
For brands, wholesalers and salon suppliers, these materials can support product pages, catalogues and technical conversations with professional customers. Share the images, video sequences or sample displays you need and the format in which you will use them. JTING can discuss the content and supplied materials alongside the branded product requirements.
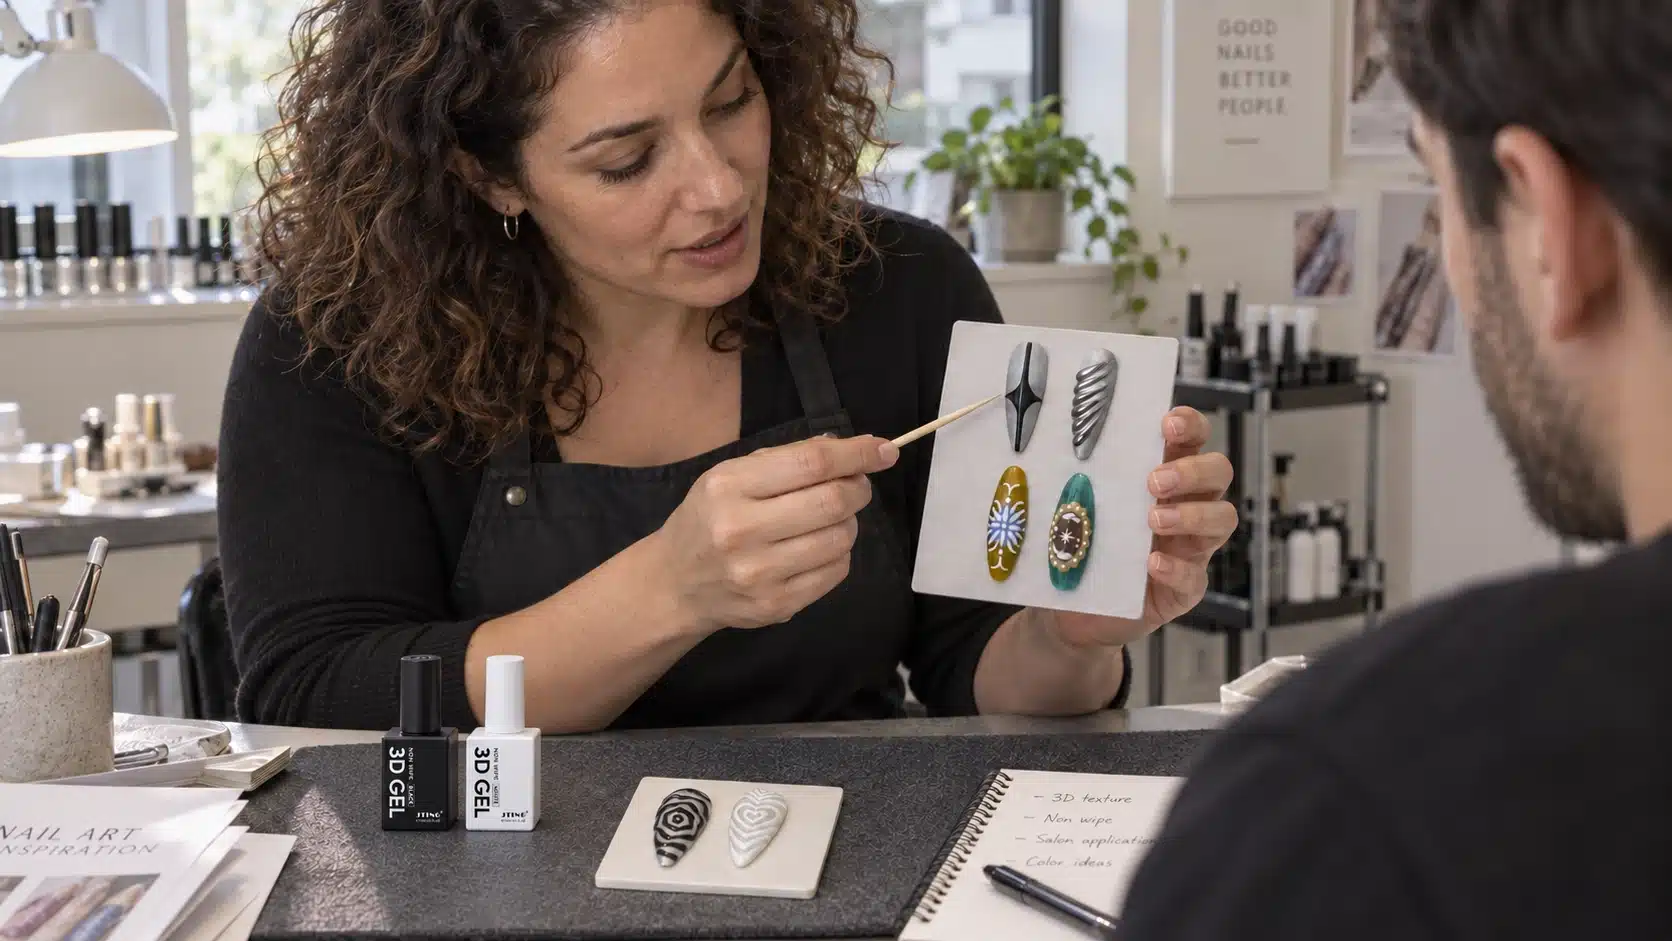
Mounted nail samples help explain line work, raised detail and selected finishing options.
12. Confirm Packaging, Product Documents and the First Order
Before the first order, approve the black and white samples, bottle and brush, label artwork, outer packaging and per-color quantities together. Add the confirmed supply list for any extra materials. This makes the quotation, product samples and packaging approval refer to the same order configuration.
Both gels are HEMA / TPO / TMPTA-free. If your destination market requires ingredient information or product documents such as SDS/MSDS, tell JTING the market and intended product use. JTING can support documents depending on the product and destination market; confirm the required files alongside the final label information and order configuration.
Standard samples typically take 7–10 business days. Bulk production typically takes 15–20 days after sample and packaging approval, with timing confirmed for the selected quantities, customization and any revisions. Discuss the production schedule and shipping arrangements together when planning your required arrival date.
| Approval Point | Confirm before Production |
|---|---|
| Products and quantities | Full product name, model and bottle count for each color. |
| Sample and components | Approved color and application sample, standard or reviewed brush, and any additional materials. |
| Brand presentation | Final label information and artwork, bottle presentation and outer packaging. |
| Market documents | Destination market and the product-specific documents to be discussed. |
| Schedule | Applicable MOQ, production timing and separate shipping or delivery arrangements. |
13. Plan Repeat Orders by Color
Repeat orders can replenish either color or both, with separate bottle quantities for FG169 Black No-Wipe 3D Gel and FG170 White No-Wipe 3D Gel. Reference the previously approved sample, label and packaging when requesting the next quotation.
Use the approved product sample, bottle brush, label and packaging as the reference for the next production order. If you want to change the brush, formula, artwork or outer packaging, raise the change before confirming the repeat order so the revised configuration can be reviewed. A component or presentation change may affect the applicable MOQ and schedule.
For application feedback, send the product color, a photograph of the design and the base, lamp and finishing products used. Include the raised-layer thickness or shaping method when relevant. This information gives JTING a clearer starting point for discussing the result and any sample adjustments your team requests.
14. Questions Buyers Ask about Black & White No-Wipe 3D Gel
How Do the Black and White 3D Gels Differ?
FG169 Black No-Wipe 3D Gel is used for defined outlines and dark raised details. FG170 White No-Wipe 3D Gel is used for petals, lace, bows and other light relief. Each is a separate 15 ml product with a built-in fine-tip brush.
What Can the Built-In Fine-Tip Brush Do?
It supports fine lines, outlines and small accents. A separate sculpting brush is used to shape larger petals and raised forms.
What Should I Include in a Sample Request?
Specify the black or white gel, the fine-line or raised designs you want to review, your intended base products and any chrome-powder effect. Include the destination market and branding or packaging requirements so JTING can discuss the appropriate sample contents.
How Should I Cure a Larger Raised Design?
The product’s LED guidance is 60 seconds per curing stage. Build larger designs in two or three stages, curing each layer before adding the next. Confirm complete curing with the lamp and thickness used in your samples.
Does No-Wipe Mean a Top Coat Is Never Needed?
Standard cured 3D gel details need no wiping or additional top coat. A thin top coat is optional. The surrounding base color and any chrome powder follow their own product-system finishing requirements.
Are Metallic Effects Included in the Black or White Gel?
No. Metallic relief uses additional chrome powder. Identify the powder finish you want to evaluate and confirm the additional materials required for the sample or quoted order.
Can I Order Different Quantities of Black and White?
Yes. Specify separate bottle counts for Black No-Wipe 3D Gel and White No-Wipe 3D Gel. They are two color options, not a fixed two-bottle set.
Can I Customize the Label, Bottle or Packaging?
JTING supports logo and label adaptation, label design adjustments and customized outer packaging. Requests for a different bottle or brush are reviewed with the gel and packaging sample.
What Is the MOQ for This 3D Gel?
JTING’s general private label gel nail polish reference starts from 10 pieces per shade. The MOQ for this product and packaging configuration is confirmed for the specific order.
What Sample and Production Timing Should I Expect?
Standard samples typically take 7–10 business days. Bulk production typically takes 15–20 days after sample and packaging approval; shipping time is separate. Confirm the schedule for your selected configuration.
15. Discuss Your Black & White No-Wipe 3D Gel Order with JTING
To discuss samples or a quotation for JTING Black & White No-Wipe 3D Gel, send the bottle quantity you need in each color, your destination market and your label or packaging requirements. Include the fine-line, raised or chrome-powder designs you want to evaluate, together with any additional materials requested for the order.
JTING can review the sample requirements, branded presentation and supplied items with your team, then confirm the applicable minimum quantities and schedule. Contact JTING with your project brief and target delivery window to begin the discussion.