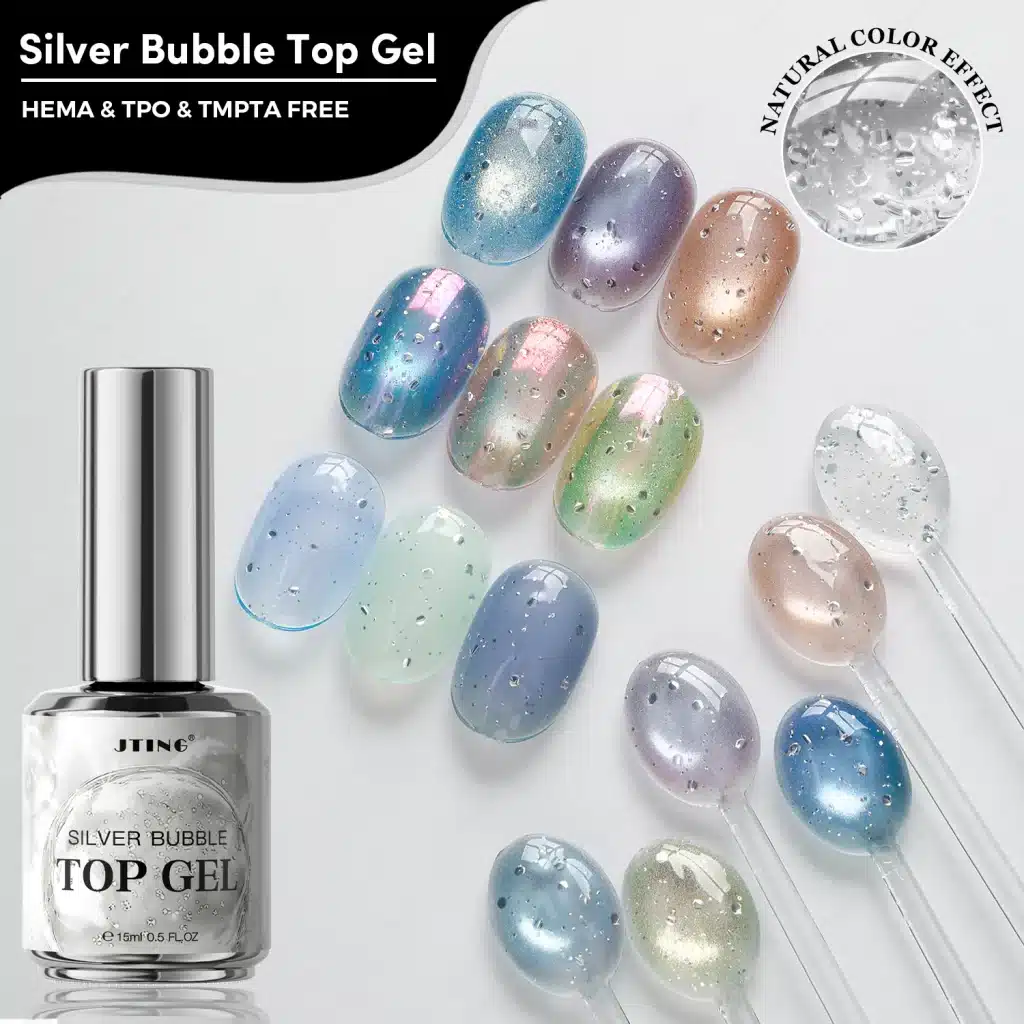
JTING Silver Bubble Top Gel gives cured color a glossy, translucent finish with raised silver points. The base shade remains visible, while the silver detail catches light as the nail turns. Compare the finish with plain gloss and fine shimmer, then use the application sequence and three design cards below to build samples for salon services or a wholesale launch. The designs and order scenarios are planning examples.
01. Find the Gap in Your Finish Range
Start with the colors that already earn space on your display. JTING Silver Bubble Top Gel gives those shades a glossy, translucent finish with raised silver points. A brand can add a distinct finish to its color story, a distributor can demonstrate it alongside existing lines, and a salon can offer it as a defined service upgrade.
- Existing Assortment
A useful assortment review begins with the finish customers can already get. Lay out a plain glossy manicure, the closest shimmer shade and a magnetic look from your own catalogue. If customers can already get a similar result by choosing another color, an extra effect bottle needs a clearer role. The case for a silver bubble finish is strongest when the buyer wants to preserve a recognizable base and offer visible surface detail that the existing top coat does not provide.
- Channel Fit
For a brand, that role could be an effect extension to a collection that already has a strong color identity. For a distributor, it could be a way to demonstrate a new finish with products the sales team already knows. A salon supplier has a different test: can the finish be described in one sentence, shown on a client-length tip and reproduced by a technician who did not make the original sample? Ask each channel to name the specific gap it would fill before deciding which swatches to commission.
- Lead Use
Give the launch one primary use. For example, a neutral-focused brand can lead with a soft silver treatment on milky nude, while a magnetic specialist can use a turning sample to show the relationship between the light band and the silver detail. Keep the other looks available as supporting examples. This gives the same bottle a clear place in each channel without making every sales presentation explain the whole assortment.
02. Compare Clear Gloss, Fine Shimmer and Raised Silver Detail
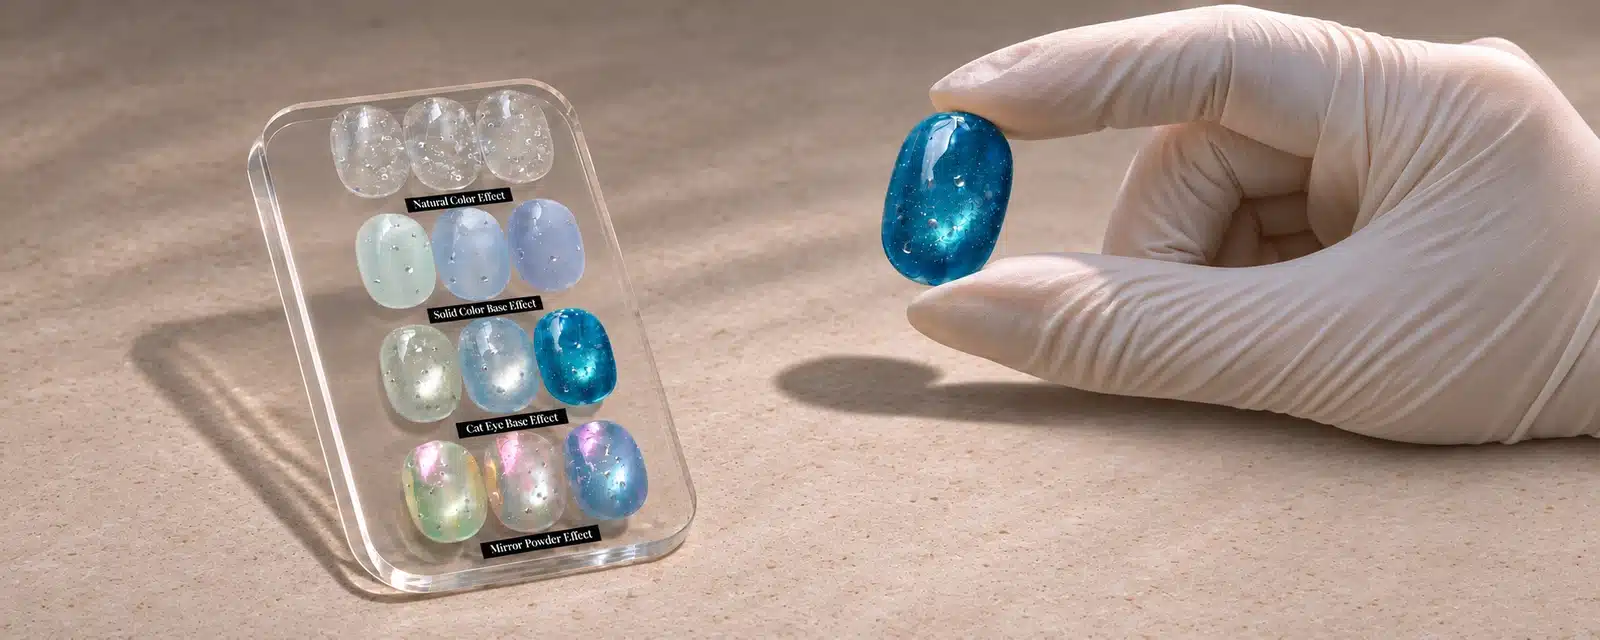
Make three tips from one color. A clear glossy gel top coat emphasizes the color and surface shine. A fine silver glitter top coat gives a more distributed sparkle. Silver Bubble Top Gel creates individual raised points of light. Compare all three straight on and at an angle before choosing the finish for the collection.
| Finish | Visible Result | Best Use in a Sample Set |
|---|---|---|
| Clear gloss | Base shade and broad shine | Plain control for judging the color |
| Fine silver shimmer | Distributed sparkle | An even shimmer option |
| Silver bubble finish | Individual raised silver highlights | An effect accent with the original base still visible |
Judge the three finishes at the distance customers actually use. At the counter, a clear glossy top coat may do the best job of showing a shade accurately. In a close product photo, fine shimmer may read as an even veil of sparkle. On a turning sample, individual silver points can draw attention to particular areas. Use the same nail shape and base color for the comparison so that a larger tip or deeper shade does not make one finish look more dramatic by itself.
Build the comparison around three questions. Can the buyer still recognize the base? Does the sparkle read as a field of fine shimmer or as separate points? Does the desired detail show up under the lighting the channel can provide? A catalogue that relies on one small thumbnail needs a finish that reads straight away. A distributor with physical swatches can demonstrate details that are hard to capture in a static image. These are different selling conditions even when the gel and the sample are identical.
Keep the names distinct on the sample card. Label the plain tip with its base shade and finish, and give the two effect tips descriptive names. A customer asking for a silver glitter top coat may want even shimmer across the nail. The side-by-side tips help a representative explain the difference in appearance before the customer orders or books a service.
03. Apply Silver Bubble Top Gel
- Complete and cure the base and color according to their own instructions.
- Brush Silver Bubble Top Gel on as the final layer. Keep uncured gel off the skin.
- Cure this top gel under LED for 60 seconds. No wiping is needed after curing.
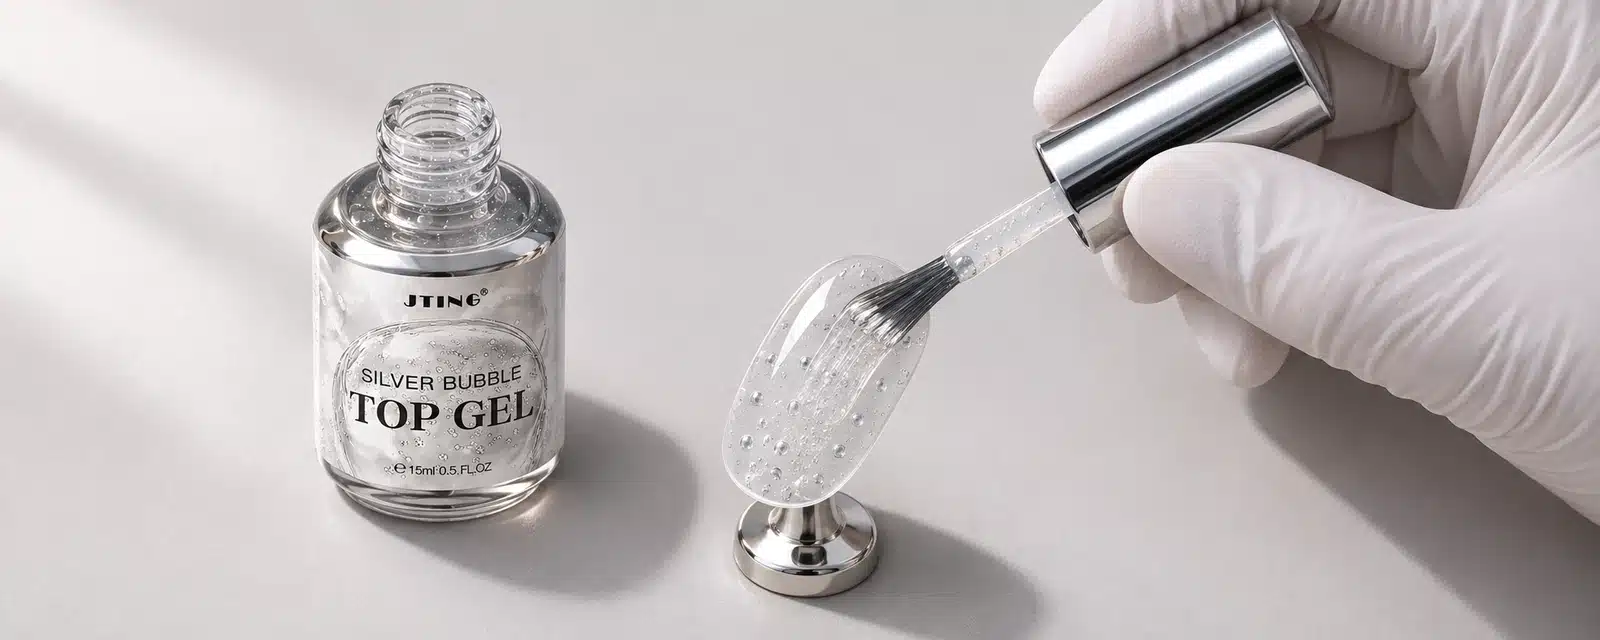
Keep a finished reference beside the practice tip so the team can check the balance of visible base color, gloss and silver detail.
Put the products in sequence at the workstation. Keep the base and color instructions available next to the finishing step, particularly when the salon is testing a shade from its existing range. Use the approved sample to show the intended result before application. For a cat-eye look, complete the magnetic effect and cure the color according to its own system before applying the final effect layer.
A short application card should identify the base shade, any magnetic step, the final top gel and the lamp used for the trial. Show one uninterrupted application on a sample tip, followed by the finished result under the same light. This gives a second technician a visual reference and gives the trainer a way to distinguish a missing preparation detail from a difference in the appearance of the finished nail.
Keep the curing instruction next to the actual step in the card and the demonstration video. The 60-second LED instruction belongs to Silver Bubble Top Gel. The separate products underneath retain their own preparation and curing directions. Once the effect top gel has cured, show the finished surface without adding a wipe step. The same sequence should appear in the sample instructions and any branded sales material that teaches the technique.
04. Build a Three-Look Launch from Existing Colors
Organize the display around three distinct uses. A milky nude shows a quiet everyday finish. A deep teal or navy makes silver points easier to pick out. A cat eye gel polish gives the demonstrator a moving highlight to show as the tip turns. Start with one shade for each job and name the actual base beside every finished tip.
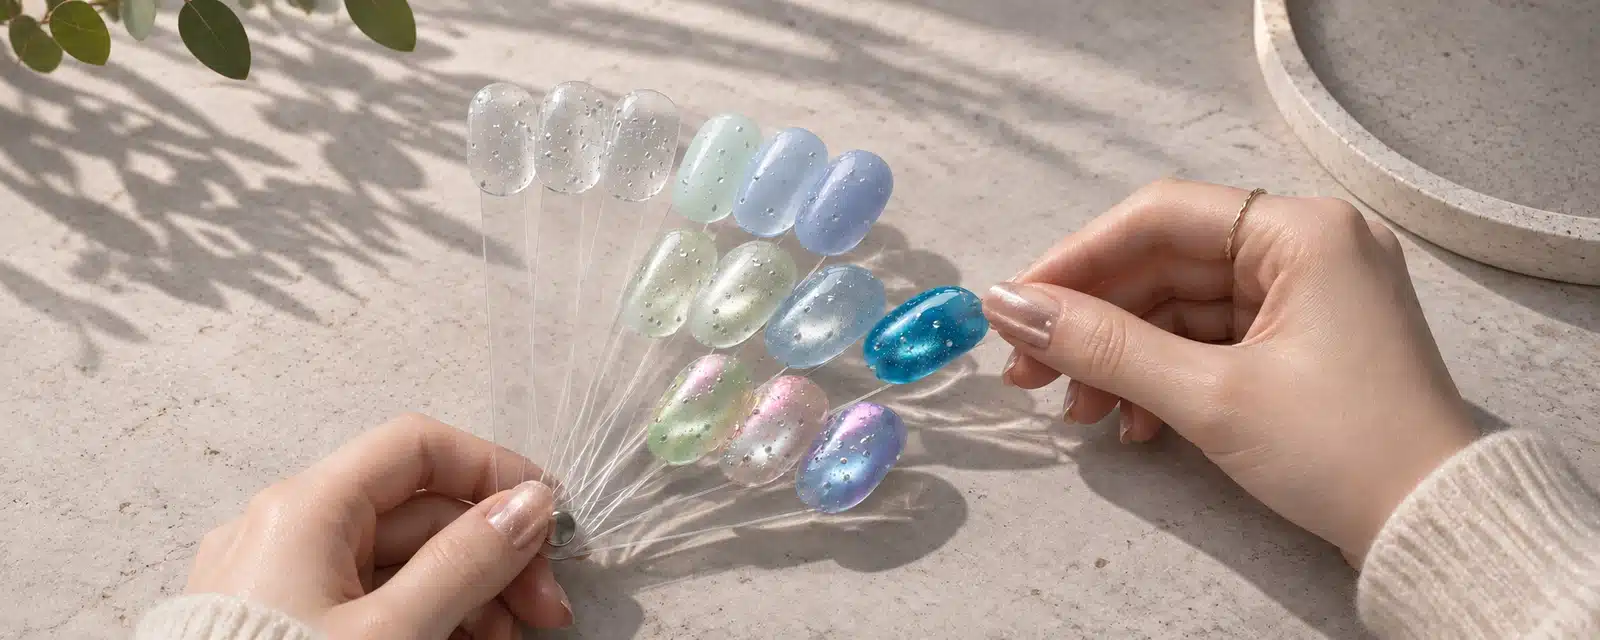
| Look | Suggested Base | What the Buyer Can Judge |
|---|---|---|
| Everyday Silver | Milky nude | How much of the original tone shows through |
| High Contrast | Deep teal or navy | How distinct the silver points look at display distance |
| Moving Light | Cat eye gel polish | Whether the magnetic highlight and silver points remain distinct |
For the everyday look, choose a pale shade that is already recognizable in your line. Pair the treated tip with the plain version and use a photo showing enough surrounding nails to establish scale. A salon supplier can place this look in a neutral menu where the silver detail is a small finishing choice. A brand can use the same image in the listing for the base shade so customers can see an additional way to wear it.
For the high-contrast look, choose an established deep shade rather than introducing another launch color at the same time. Keep the shape and finish coverage similar to the everyday sample. The job of this swatch is to show the outlines and highlights of the silver points clearly at a glance. Use it for a display card or image thumbnail when the subtle version is difficult to distinguish at small sizes.
For the moving-light look, start with a magnetic shade whose highlight can already be seen clearly on the plain control. The video has a specific job: show the band moving while the silver points catch the light in smaller areas. Give each finished look its own reference, tied to the actual base shade. If only one look is ready on launch day, prioritize the one that fits the first sales channel and retain the other two as options for later demonstrations.
Three Design Cards for a First Sample Round
| Design | Build | Show | Lead Channel |
|---|---|---|---|
| Everyday Silver | Milky nude with one silver accent per hand | Whole hand first, then a close view of the accent beside a plain nail | Salon menu and neutral shade catalogue |
| Deep Teal Contrast | Deep teal with the effect across the display set | Normal viewing distance followed by one side-lit close-up | Counter display and wholesale catalogue |
| Moving Silver | A cured magnetic base with a distinct band beneath the silver finish | One slow turn under a fixed light | Representative demo and online listing video |
05. Create Two Design Directions from One Base Shade
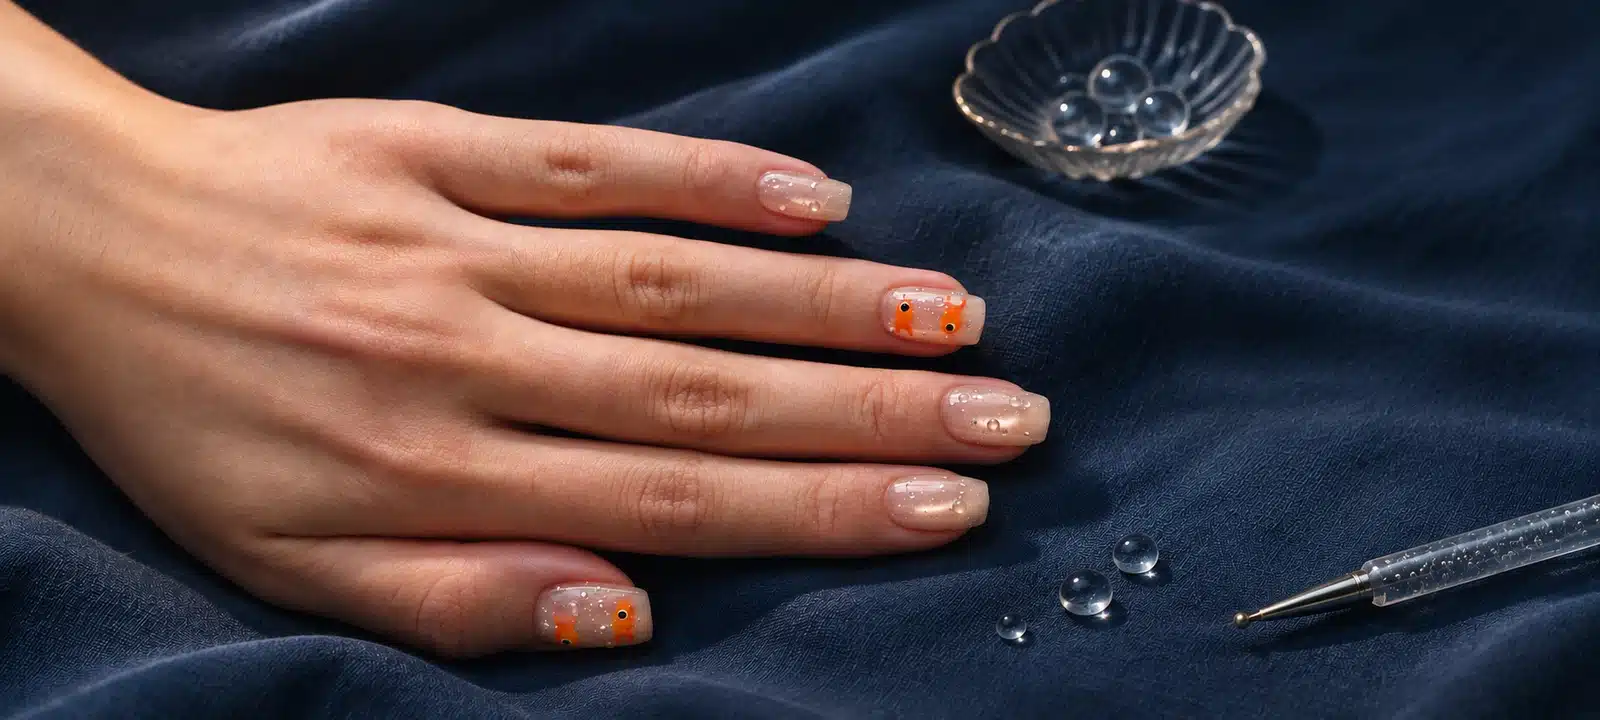
Use one solid shade for a single finished accent and a full silver set. Place the examples beside the plain shade. The first keeps the manicure predominantly about color, while the second makes the finish a defining part of the look. The comparison gives a buyer two display options without adding another base shade.
- Single Accent
For a hypothetical launch, consider a distributor that already sells a deep teal with a plain glossy finish. For a restrained design, show a five-tip set with the effect on one accent and the familiar finish on the surrounding nails. For an effect-led design, show the same shade with Silver Bubble Top Gel across the set. The first image can sit in the shade catalogue as a service idea. The second can lead an effect top coat listing because the customer can see what the finish contributes across several nails.
- Full Set
Compare the two sets from the same distance. The small accent should be distinguishable without a macro image. The full set should still read as deep teal and show enough variation as the hand turns. If a photograph makes both versions look almost identical, start by adjusting the framing and lighting. A macro can explain the texture, but the full-set image should communicate how the design looks in normal use.
- Selling Format
Record the selling choice as well as the design. If the buyer wants a low commitment add-on, keep the shade and finish available separately and show them together on a swatch card. If a buyer wants a specific promotional pairing, give that combination a clearly named reference. When the promotion ends, customers should still be able to identify and reorder each product by its own name.
06. Keep the Cat-Eye Highlight Visible
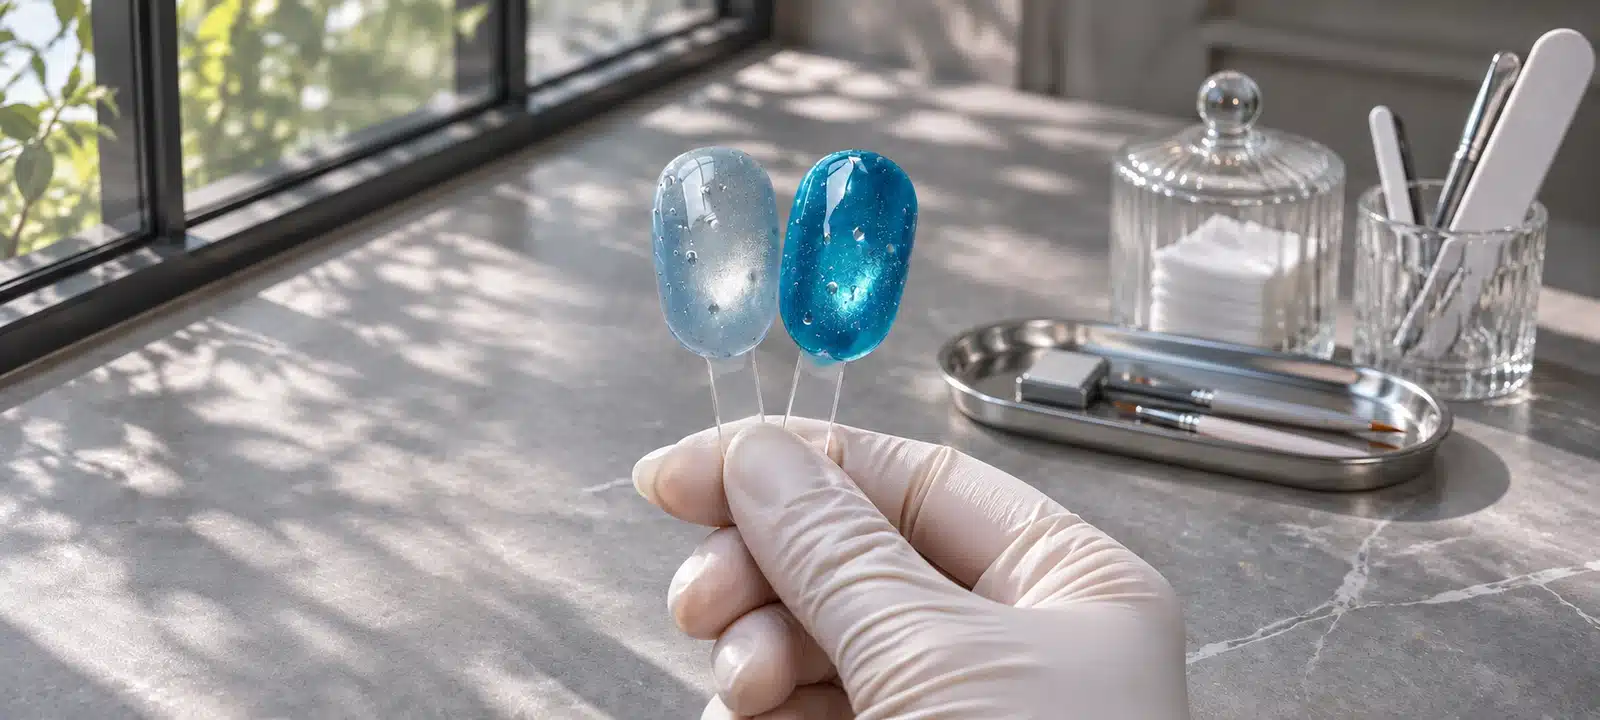
When choosing a top coat for cat eye gel polish, make an uncoated control with the same magnetic pattern. Compare a strong highlight on deep blue with a softer one on pale silver-blue. Tilt each pair under one fixed light and check whether the highlight still travels visibly beneath the smaller silver reflections.
- Contrast Choice
Choose the magnetic base according to which part of the look should lead. A deep blue or teal can make the silver points easier to distinguish in a still image. A softer silver-blue can make the finish look more integrated when viewed in person. Try both approaches if the product will be demonstrated across different channels. A look intended for a sales reel can rely on visible movement, whereas a small printed swatch needs enough contrast in a single view.
- Magnetic Reference
Choose a clear magnetic band for a moving-light demo and a softer glow for a subtle salon option. Use the sample matrix later in this guide to compare the finished look against its plain reference.
- Channel Recommendation
Make a clear recommendation for the account. For instance, use a bolder blue as the demonstration shade if a representative has only a few seconds to show the contrast. Keep the softer shade as an option for salons that can show clients a physical sample. Use the shade name in the demonstration script so a customer can reproduce the pairing instead of trying to match a video from memory.
07. Decide When Chrome Powder Adds to the Look
A mirror-powder surface creates broad reflection. Silver points add smaller highlights. Compare a mirror tip with and without the silver finish before choosing the image for your launch. Follow the instructions for the powder system you use, including its designated application surface.
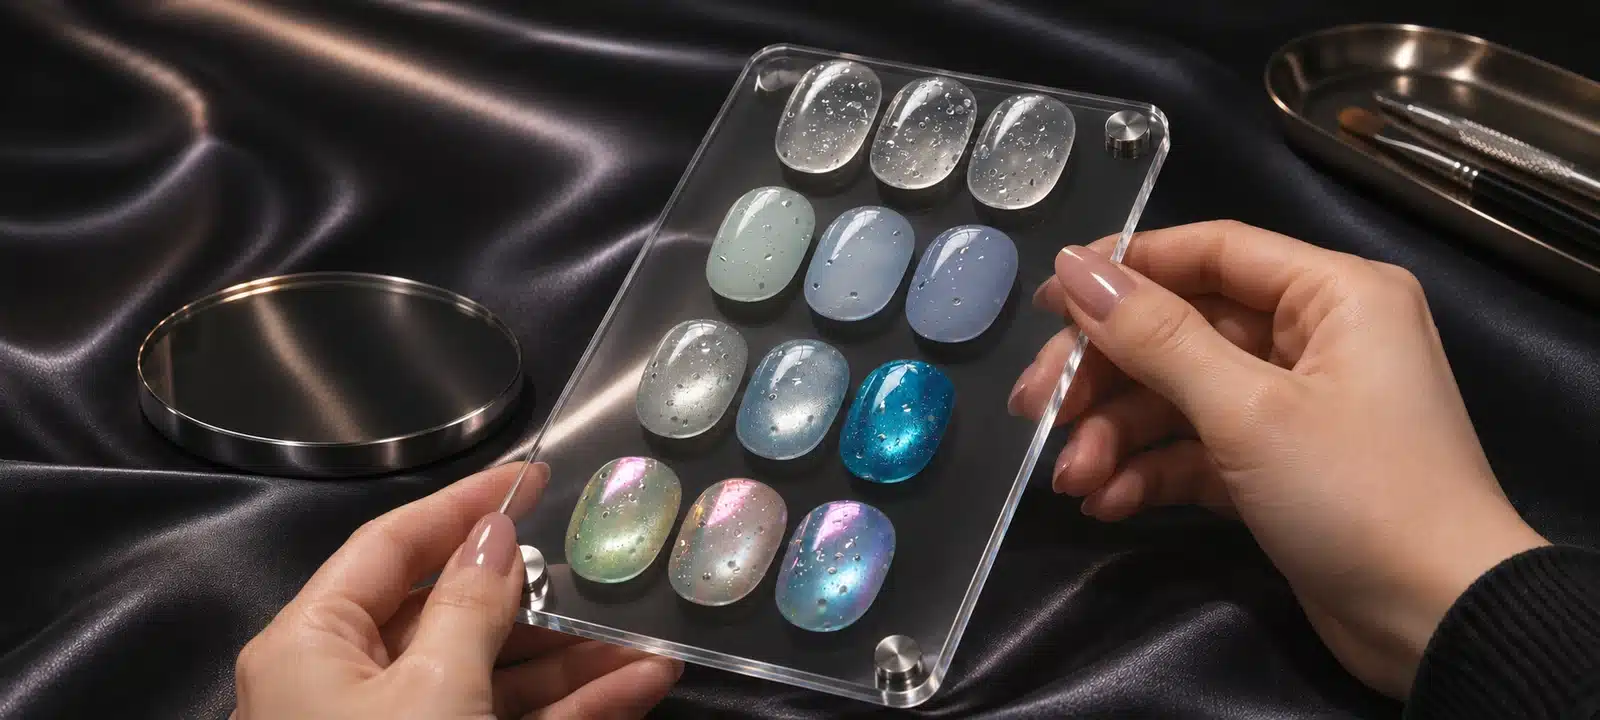
Decide whether the mirror effect is a primary design feature or a supporting detail. A uniform mirror base can produce a broad highlight that competes with the silver points. A darker or more subdued mirror look may leave the smaller reflections easier to read. Use the chosen powder system to make a complete reference, then evaluate a corresponding version that uses the silver finish as the final effect layer according to the applicable system instructions.
Keep the comparison practical. If the ordinary mirror sample already answers the brief, the added layer needs a visual purpose, such as a distinct silver detail on one accent. If the combined effect looks convincing only under a narrow beam of light, keep it for in-person demonstrations or show that lighting setup explicitly in the content. Lead with a simpler solid or magnetic pairing if the mirror result is difficult to explain in the channel's normal images.
For a product listing, identify the mirror powder and silver effect gel separately. A finished image alone can lead buyers to assume one bottle creates both the continuous mirror reflection and the raised silver details. An annotated comparison can show what the powder contributes and what changes after the final layer. Give the technician the actual powder system instructions and the approved finish reference together so the sample can be reproduced without relying on a generic chrome tutorial.
For the designs in this guide, Silver Bubble Top Gel is the final effect layer. Use the designated surface and application sequence from the selected chrome powder system for powder adhesion. A no-wipe finish describes the surface after curing and does not by itself establish suitability as a powder adhesion layer.
08. Adapt Display Designs for Short Nails
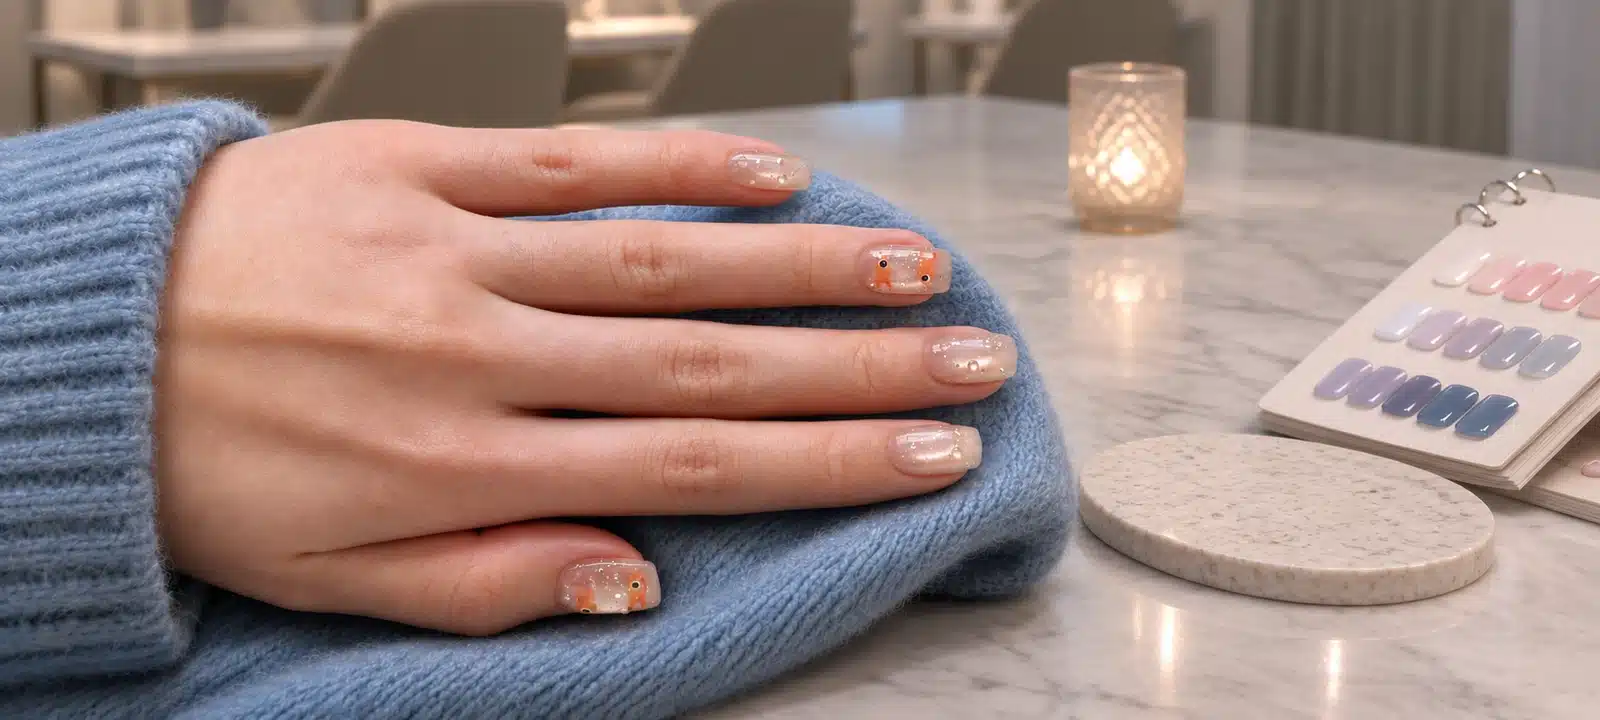
Show the effect on a short oval as well as a long display tip. On a short set, one finished accent can make the design easier to read at normal viewing distance. Use the long example to show texture in detail and the short example to show how the look translates to a salon appointment.
- Display Scale
A display tip and a real short nail serve different purposes. A long tip gives the photographer space to show the reflective detail. A short oval or square shows whether a client can still recognize the base color and distinguish the finished accent from its neighbors. Put one short and one long sample into the teaching pack if the audience includes salons with different client preferences.
- Accent Placement
When adapting a full display set, decide which part of the look is essential. A short manicure can carry one effect nail next to four plain nails and still present the contrast clearly. On a short oval, use the surrounding plain nails to frame the accent. On a short square, judge the look from a full-hand view as well as the straight-on swatch so the reference shows the shape the client will wear. Show the whole hand before using a crop to explain the details.
- Service Reference
Translate the display into a service reference with the shade name, nail length and number of nails that receive the finish. A technician then has a specific result to offer when a client points to a long catalogue tip. A distributor can include the short design in a sales pack to demonstrate how the same product can be introduced in everyday appointments, alongside the larger image used to show texture.
09. Turn the Three Looks into Salon Services
Use three bookable menu names: Everyday Silver, one accent per hand; Contrast Pair, two accents per hand; and Full Silver Finish, all ten nails. Show clients the finished set before they choose. Specify how many nails receive the effect so the sample, service name and booked appointment refer to the same work.
- Booking Scope
Name the service by what the customer will see and what the technician will do. An everyday silver accent might be one finished nail per hand over the selected milky shade, with the remaining nails finished as usual. A contrast pairing might use two effect accents and a deep solid base. A full silver finish can specify the effect across the entire manicure. These are example service scopes, and each salon can set the number of decorated nails it can deliver consistently.
- Sample Board
Use a sample board that makes the differences obvious. Put the plain manicure first, followed by the accent options and the full treatment. Include the magnetic example as a design choice with its own preparation step if it requires a different base application. If the booking team treats every photograph as the same add-on, time estimates can be misleading when a client selects the magnetic full set after booking a simple accent.
- Menu Template
A supplier can give salons a small menu template with the finished image, recommended base and the service scope. The template can also identify which options need a magnetic demonstration or extra photography. Let each salon add its own time and price after a practical trial. The aim is a named service customers can request again and staff can deliver from the same reference.
10. Measure the Cost of an Effect Add-On
Time the additional work against a comparable plain manicure. Include switching bottles, applying the finish and any rework. Measure material consumption across multiple comparable trials. Calculate incremental cost from additional labor, gel and consumables, then use the salon’s own rates to set a service price.
- Baseline Service
Begin with a plain service using the same base shade and nail length. Compare it with a service that adds the effect on a defined number of nails. Record the actual difference in hands-on time and total appointment time. If the effect replaces the normal final coat on those nails, compare the two finishing workflows directly. If another technique was added for the magnetic look, record that work separately.
- Trial Fields
Use a trial sheet with columns for base shade, decorated nail count, hands-on minutes, elapsed minutes, gel used and rework. A scale may be more informative across several comparable applications than for one accent. Use the same measurement procedure across the trials. Include gel used during practice or correction in the trial where it occurred so the estimate reflects the service as delivered.
- Direct Cost
Calculate incremental direct cost using the salon's own labor rate and material cost. Compare that figure with the planned add-on price and the appointment time it occupies. One service may use little gel but require a more involved setup or explanation. Another may be quick to present but use the finish on all ten nails. Keep both dimensions visible when deciding which tier to offer widely, which to reserve for a longer appointment and which to revise after the first few bookings.
11. Diagnose a Finish That Differs from the Swatch
When the color looks muted, place the finished tip next to its base-only counterpart under the same light. When the magnetic band is weak, look at the control before changing the top gel. When the silver points disappear in a photograph, change the angle of the light before changing the application. Change one variable per trial so the next test answers a clear question.
| What You See | Check First | Next Comparison |
|---|---|---|
| Base looks muted | Plain and finished tips under neutral light | Change only the base shade if the difference also appears in person |
| Cat-eye band looks weak | Magnetic definition on the plain control | Try a higher-contrast base if the control is already clear |
| Silver detail is hard to photograph | Viewing angle and light direction | Compare a full view and a side-lit close-up |
Work through the observation that actually caused concern. If a nude looks cloudier in a photo, compare the plain and finished samples under neutral light before deciding that the product pairing needs a change. Check whether exposure and reflections make one sample appear lighter. If the same difference appears in person, try another existing shade and keep the lighting and finish procedure consistent for the new comparison.
If a magnetic highlight seems faint, check the original magnetic tip first. A poorly defined band before finishing is a base design issue. If the band is clear on the plain reference and harder to read on the effect sample, test a stronger contrast shade or change the placement of the design in the set. Preserve the failed example alongside the next trial so the team can identify which change improved the presentation.
If buyers see gloss but miss the silver points, observe the sample at normal distance, then tilt it under side light. A detail visible only in the macro image may be appropriate for a subtle service, but weak for the lead image of an effect range. Decide whether to change the lighting, select a deeper base or use a more detailed photo. When the concern is about curing or the surface condition, refer back to the applicable product and lamp instructions before approving the sample for use.
12. Build a Sample Matrix before Buying in Bulk
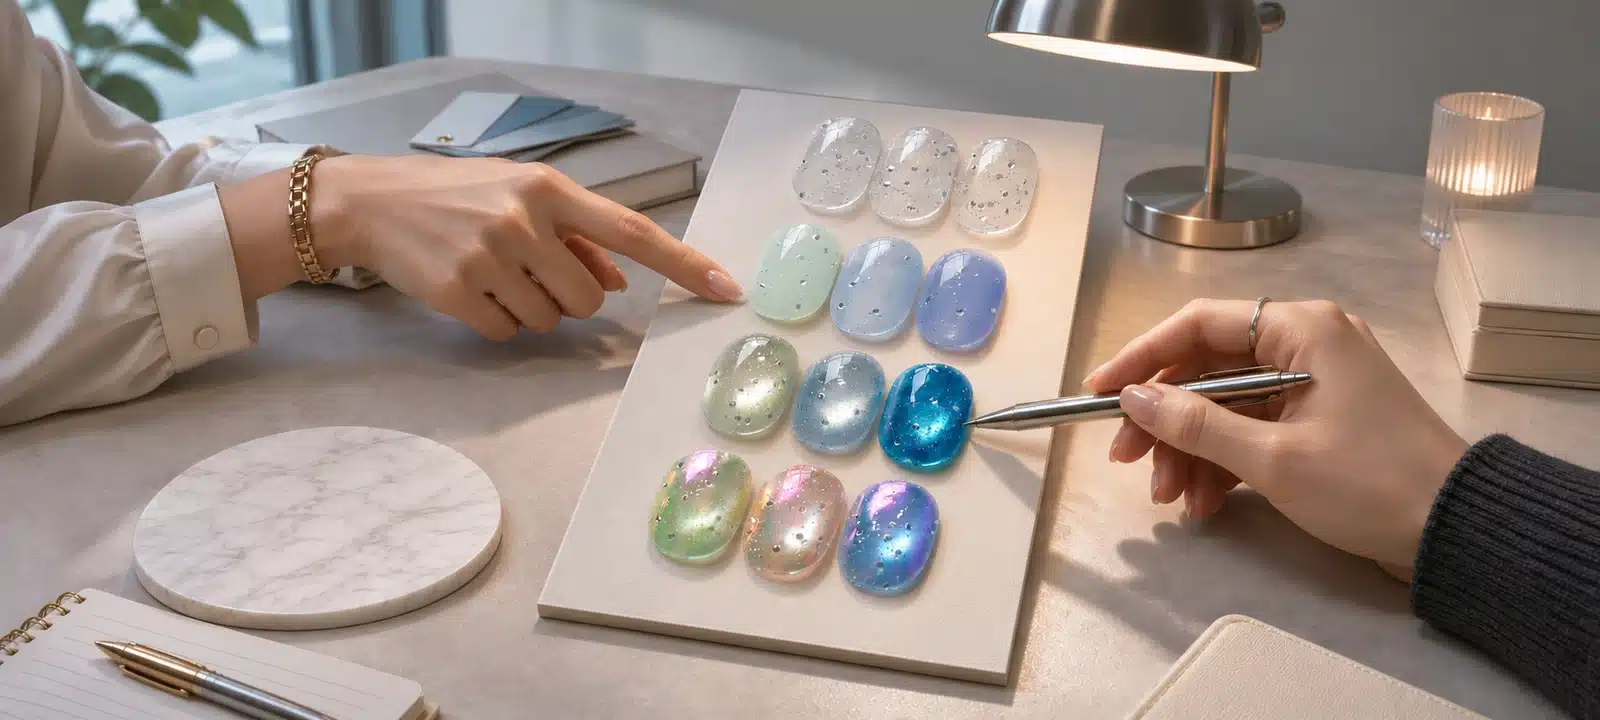
Make paired tips for the three launch looks and have a second operator repeat the lead design. Approve the design when it reads clearly in the intended display and the team can reproduce it. Adjust the shade if the visual balance is wrong. Repeat the trial if the application or lighting varied.
| Check | Record |
|---|---|
| Base clarity | Shade name and comparison with the uncoated tip |
| Silver detail | Visibility straight on and under side light |
| Cat-eye movement | Highlight visibility as the tip turns |
| Reproduction | Second operator’s result and approval decision |
Start with the three commercial looks and one plain control for each. Label each pair with the exact shade and the finish. For a brand or distributor, the approval set should answer three separate questions: does the finished look fit the range, can a second operator reproduce it, and can a buyer understand it from the materials they will receive? A swatch can pass the visual review and still need a better demonstration before it is ready for launch.
Use simple decisions. Approve a look if the underlying shade remains recognizable, the intended silver detail is visible under the planned viewing conditions and the second operator can reproduce the design. Adjust a look if the technique is repeatable but the color contrast or coverage does not fit the intended service. Repeat the trial if the comparison changed lighting, shade or other conditions in a way that obscures what caused the result.
Keep a duplicate of the final reference with the technique card. If the launch uses a different base shade from the one originally shown, update the photo, sample name and instructions together. This makes the physical sample useful later, when training another account or comparing a reorder. Keep visual preferences distinct from product observations so buyers can see when a result is technically usable but a different pairing would work better for their channel.
| Decision | Trigger | Next Action |
|---|---|---|
| Approve | Base recognizable, silver points visible in the intended display and a second operator reproduces the design | Keep the approved tip and use its exact shade reference in training and photography |
| Adjust | Result is repeatable but the contrast or coverage misses the brief | Change one design variable, such as the base shade or number of accent nails |
| Repeat | The comparison used inconsistent lighting, shade or application | Restore matched conditions and rerun the sample before making a buying decision |
13. Show Base Color, Silver Detail and Cat-Eye Movement
Use a straight-on photo for color, side light for the raised silver points and a short turning clip for magnetic movement. Keep exposure and framing consistent across each comparison. A catalogue can use a paired still, while an online listing can put the short clip next to a clear image of the actual selling unit.
- Shot List
Use the cat-eye comparison in Section 6 as the visual reference for this shot list.
- Straight-on photo — show the base shade beside the plain control.
- Side-lit close-up — show the raised silver points and surface detail.
- Slow turning clip — show the magnetic band and silver reflections under fixed light.
Keep the base shade and the photographed nail reference in the shot notes.
- Channel Use
Use the files differently by channel. The catalogue may need a simple two-image layout with a shade caption. A product listing can lead with the finished look, then show the actual bottle and a close comparison. A representative can use the turning clip after showing the physical samples. Give each image a job so the listing avoids several near-identical photos that leave the same buyer question unanswered.
- Consistent Lighting
Avoid relying on exposure changes to create the before-and-after effect. Keep the framing, light and exposure stable when the images are intended as a comparison. If the macro and the full hand use different lighting for their separate purposes, label the views accordingly. A buyer should be able to tell what the product looks like at service distance and which details become visible only when the nail turns or moves closer to the light.
14. Give Sales Reps a Short Demonstration
Show the plain base first. Add the finished tip beside it, then turn both in the light. Explain which product supplies the shade and which adds the silver points. Close by pointing to the actual products the buyer needs to order. Give the technician the matching shade reference and application card for the same design.
- Counter Script
A representative can open with a plain deep teal tip and its finished counterpart. Identify the exact base, show the two tips face on and turn them together. A short script could say that both tips use the same shade, while the finished version adds the raised silver points. Move next to the bottle so the customer can identify the product that creates the finish. The demonstration can end with a choice between seeing another base pairing or requesting a sample.
- Sales Materials
For a salon supplier, add a short wearable design to the same presentation. Show how the display look translates to an accent and give the technician the associated service card. For a distributor introducing the effect remotely, send the matching still, turning clip and contents image in that order. The buyer can see the effect, understand its movement and identify what can actually be purchased.
- Buyer Questions
Collect questions that interrupt the demonstration. If several accounts ask whether the blue is in the bottle, improve the labels on the paired sample card. If the most frequent question is whether the effect can sit over the customer's own colors, send a simple swatch trial brief. Feedback from these conversations can improve sales material before the first bulk order and give the training team specific examples to address.
For a counter demonstration, use this wording: “This is the same teal on both tips. The second tip has Silver Bubble Top Gel as the final layer. Turn it with me and look for the small points of silver light. The display pairs the gel with teal, and the contents image shows the bottle you are ordering.” Adapt the last sentence when the quotation includes a set, so the demonstration explains the offer customers can actually buy.
15. Choose a Single Bottle, Pairing or Curated Set
A standalone bottle suits accounts that already carry compatible color systems. A pairing display can show a recommended color next to the finish while selling both separately. For a curated set, identify every included item on the order and listing. Keep a standalone reorder option for accounts that use the top gel faster than the paired colors.
- Account Fit
Choose the offer according to what the account already stocks. An account with a complete gel color range can buy the standalone effect bottle and use an approved pairing card to train customers. An account looking to feature a particular shade can display the finish alongside one base, with each item separately identified and priced. A buyer developing a curated set can define its exact contents around an approved look.
- Offer Contents
Use separate images for inspiration and contents. A photograph showing a bottle, several nail tips and other products can explain the design. A contents image should show the items included in that selling unit. Give a bundle a distinct listing or a clearly labeled option so a buyer can see the difference between a recommended pairing and a packaged set. Use the same naming on the carton, order confirmation and account materials.
- Selling Unit
On the sales sheet, label a standalone offer as one 15 ml bottle. For a suggested pairing, list the color as a separate item. For a boxed set, list the exact quantities of each product included.
16. Build a Private Label Listing around the Finish
Use the label to identify the 15 ml silver effect top gel. Use the swatch caption to identify the underlying shade. Use the contents image to show the bottle or actual set. A useful listing names the finish prominently and places a plain-versus-finished comparison close enough to explain why the displayed tips have different colors.
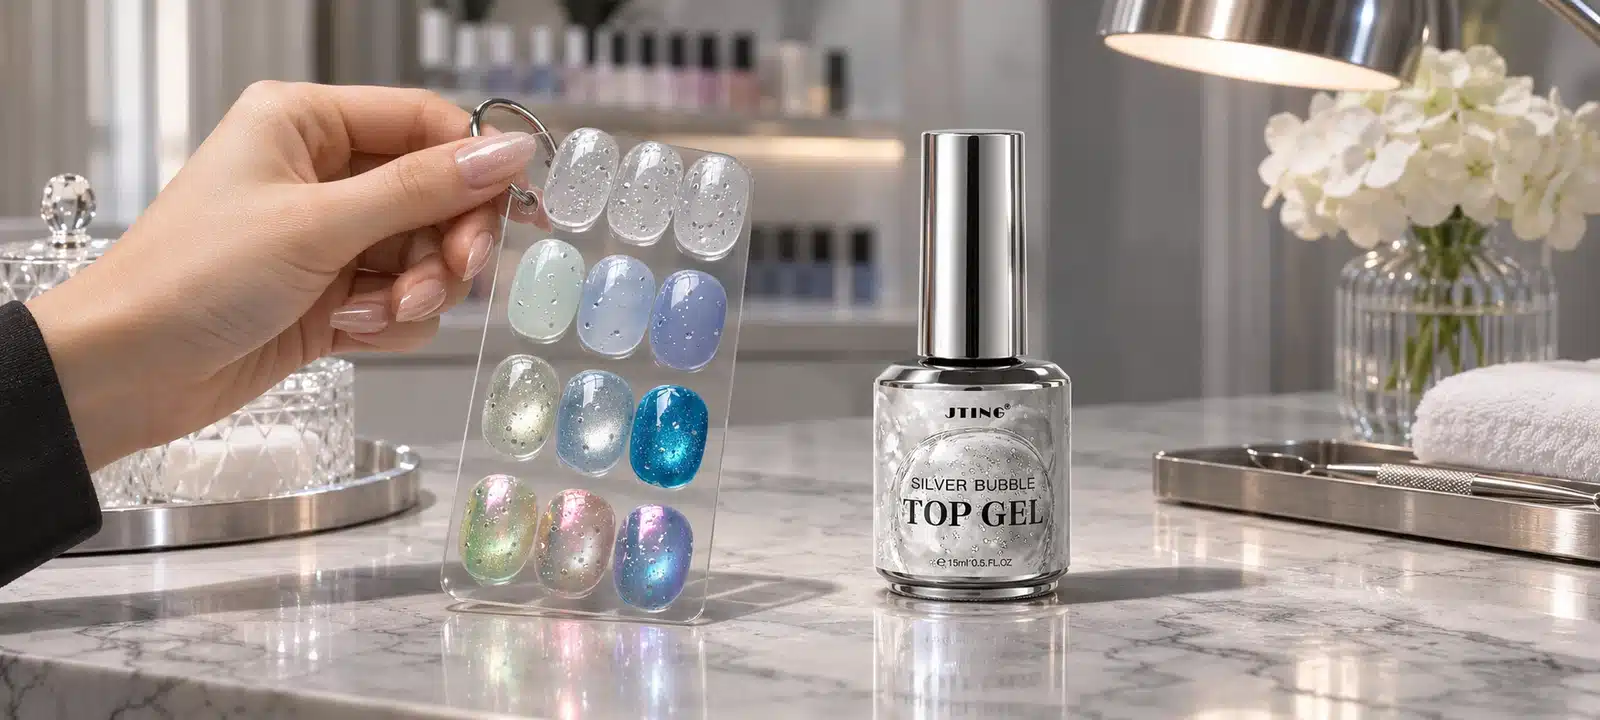
- Bottle Label
The 15 ml bottle label has a simple role: identify the product and make the finish easy to recognize on the shelf. A clear product name and a legible size statement help the buyer find the same bottle after seeing it in a demonstration. Use the swatch caption to identify the underlying color and the product listing to explain how the finish looks over different bases. Those details have more room on a product page than on a small label.
- Listing Sequence
A branded launch can use a sequence of four assets. Show the approved finished look, then the plain and finished comparison. Follow with the contents image and the application information. Place the exact shade name near the comparison rather than building it into the name of the silver finish. If the listing is for the single bottle, use a dedicated bottle image that separates the product from the illustrative base shades.
- Artwork Review
JTING can adapt the bottle label to the buyer's brand and coordinate packaging for the planned selling format. Review the proof at actual size next to the approved sample and the listing title. Check that the terminology matches across each surface. A distributor or private label brand can reuse the same set of approved product names and captions in a catalogue, training card and reorder form.
17. Run a Pilot and Separate Interest from Orders
Give each account one sample reference and record four stages separately: viewed the design, requested a sample, expressed purchase intent and confirmed an order. A sample request helps prioritize follow-up. Only confirmed quantities feed the committed portion of the first order.
- Pilot Objective
Give the pilot a clear purpose before allocating stock. A brand can test which look customers understand quickly. A distributor can test whether representatives can explain the pairing and whether accounts already have the relevant base products. A salon supplier can test whether technicians can reproduce the look and sell it as a named service. Select a small set of accounts that can answer the question the pilot is intended to resolve.
- Demand Signals
Track interest, sample requests and orders as separate events. A turning magnetic clip may get attention while the deep solid pairing generates more practical enquiries. If accounts ask for the solid look because they can make it with their existing shades, prepare materials around that use. Keep the magnetic clip for demonstrations where movement helps explain the product. Each asset can have a distinct role without determining the entire order.
- Account Feedback
Ask pilot accounts what they made from the sample and which parts of the sales or application material they used. Record whether they intend to buy the finish on its own or with a base shade, and distinguish that intent from a confirmed order. Use the first conversations to improve the display card and clarify the contents of the offer. When the first bulk order is planned, the strongest signal is an account's intended use and confirmed requirement, supported by what it could actually reproduce.
18. Use Pilot Results to Plan the First Bulk Order
Separate demonstration stock from confirmed orders and stock intended for open demand. Track wholesale gel top coat sales separately from paired shade sales. For private label quotes, compare the same bottle count, label and packaging scope, and account for artwork approval before the launch date.
| Allocation | Example Quantity | Planning Basis |
|---|---|---|
| Account requests | 16 bottles | 8 accounts × 2 bottles |
| Training and demonstrations | 4 bottles | Separate from sellable stock |
| Open stock | 6 bottles | Reserve for new demand |
| Example total | 26 bottles | Replace all quantities with actual account needs |
- Stock Allocation
Build the first order from three quantities: units already requested by accounts, units needed for sales and training samples, and units available for new orders. Keep sample stock separate from saleable stock in the plan. A distributor with confirmed demand for standalone bottles can allocate most of the order to that format, even when a styled pairing attracts the most attention in demonstrations.
- Quote Comparison
When comparing quotations, ask for the same selling format, label scope and quantity. Compare the cost per saleable bottle after the relevant packaging and delivery costs. If planning a set, include the actual cost and availability of each included base shade or accessory. Keep a standalone quote as a reference so the effect bottle can be replenished without forcing customers to buy the full pairing again.
- Reorder Planning
Schedule artwork review and sample approval alongside the order rather than leaving them to the end. Use the approved design as the reference for the listing and the reorder. After launch, track sales and stock separately for the effect gel and each associated shade. If accounts use the finish across several colors, reorder the bottle according to its own usage and confirmed demand. Replenish the base shades according to their actual sales, including sales unrelated to the launch.
On the first reorder, compare demand from three groups: salons that bought the finish by itself, customers who purchased a named pairing, and accounts that received samples but have not yet ordered. The first group can indicate how widely the product fits existing color ranges. The second can show whether one base shade deserves a permanent place beside it. The third is a follow-up list for the sales team. Treat requests from that group as pipeline until the accounts confirm their requirements.
For the reorder conversation, bring the previous order reference and the approved packaging version. If the selling format has changed, state which items changed and which sample the new listing uses. Purchasing and sales can then work from the same offer, even if the hero design in the catalogue has moved from a magnetic shade to a solid.
If the navy pairing is still awaiting sample approval, list it separately as a potential offer. Allocate sellable pairing stock after the accounts choose that configuration.
19. Questions Buyers Ask about Silver Bubble Top Gel
Can You Apply a No-Wipe Top Coat over Cat Eye Gel Polish?
Apply Silver Bubble Top Gel over the completed, cured cat-eye base. Check the moving highlight on an approved sample before using the pairing as your lead design.
How Long Do You Cure Silver Bubble Top Gel?
Cure this final layer under LED for 60 seconds. Follow separate instructions for the products underneath.
Does the Silver Finish Change the Base Color?
The translucent gel leaves the base visible. The underlying shade and lighting change how the silver detail reads.
Do You Wipe the Finish after Curing?
No. Silver Bubble Top Gel is a no-wipe finish.
Which Base Shades Should I Use for a First Sample?
Start with a pale solid for an everyday look and a magnetic shade for a moving-light demonstration. Add a dark solid when your channel relies on catalogue thumbnails or a high-contrast counter display. Keep the exact shade reference beside each finished tip so an account can reproduce the pairing after sampling.
Are the Base Colors Included with the Silver Top Gel?
The shades in a demonstration show what can be achieved over different bases. Use the quotation or listing to identify the actual selling unit. If you plan to offer a paired set, identify both products by name and make the contents clear in the listing and order.
How Should I Reorder the Finish Separately from Its Base Colors?
Track sales and usage of the finish by bottle. Keep the associated shade references on the display card, then replenish each base shade against its own demand. Include the previous order and approved packaging reference when requesting the next batch.
20. Build a Sample Brief from the Shades You Already Sell
Start with one everyday solid and one cat-eye shade from your range. Share the channel, the finish you want to demonstrate and whether you plan to sell a standalone bottle or a pairing. That gives JTING a concrete starting point for sample selection and wholesale or private label planning.
- Channel and Use
A useful brief starts with the account's planned use. For example, a distributor could bring an existing navy shade and a silver-blue cat eye, explain that representatives will demonstrate both in person and request a standalone bottle format. A salon supplier could bring a milky nude and describe an accent service it wants to teach. A private label brand could identify the intended shelf position and provide a label reference after selecting the lead look.
- Sample Brief
Include the shade names or physical references, where customers will see the finished design and which product format the buyer intends to sell. Share the most important success criterion, such as a visible magnetic band on video or a subtle result that still reads on a short nail. This helps the sampling conversation start with a visible outcome and gives the buyer a clear basis for approving or revising the look.
- Approved Reference
After the sample is approved, use the same reference for photos, training and the first order. If the buyer wants a second design, add it as another named option with its own base shade rather than replacing the original reference. A clear link from sample to selling unit makes it easier for a representative to explain the product and for a salon or distributor to order the finish again.