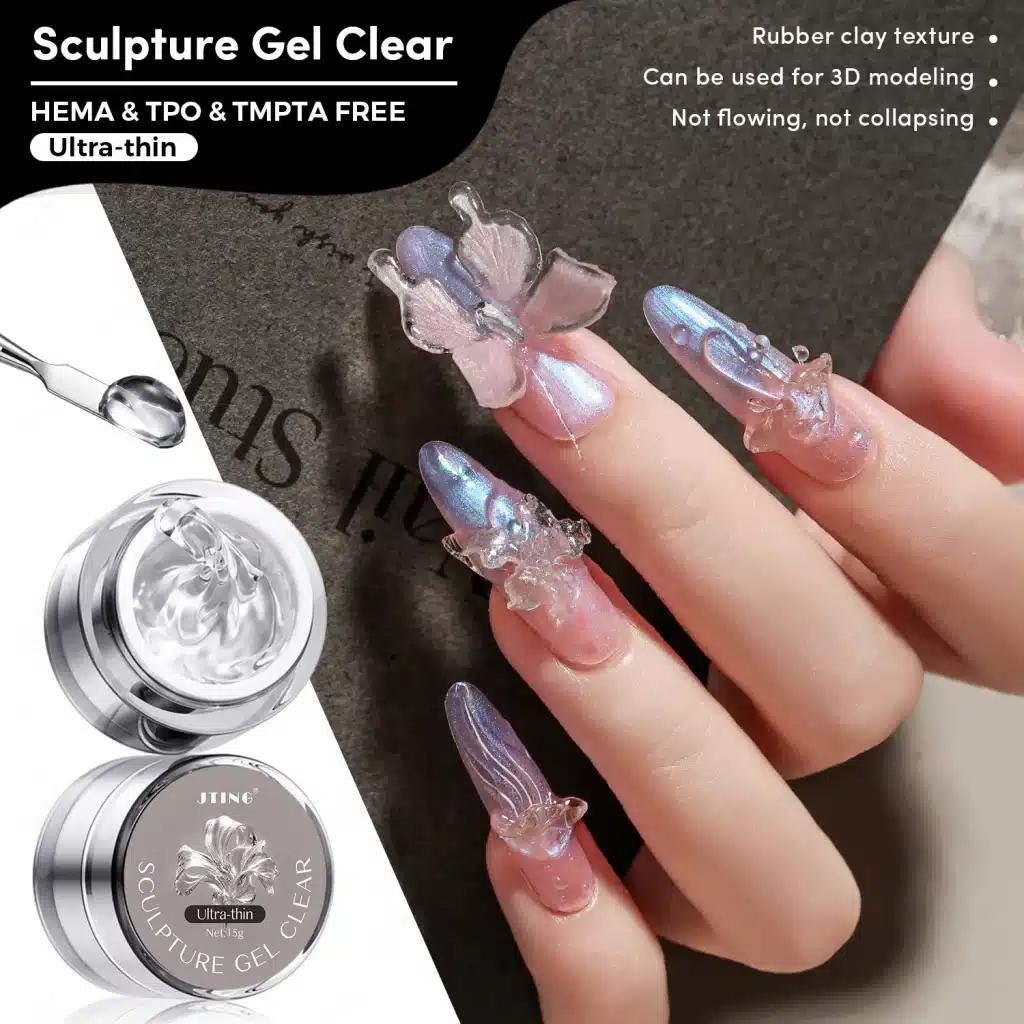
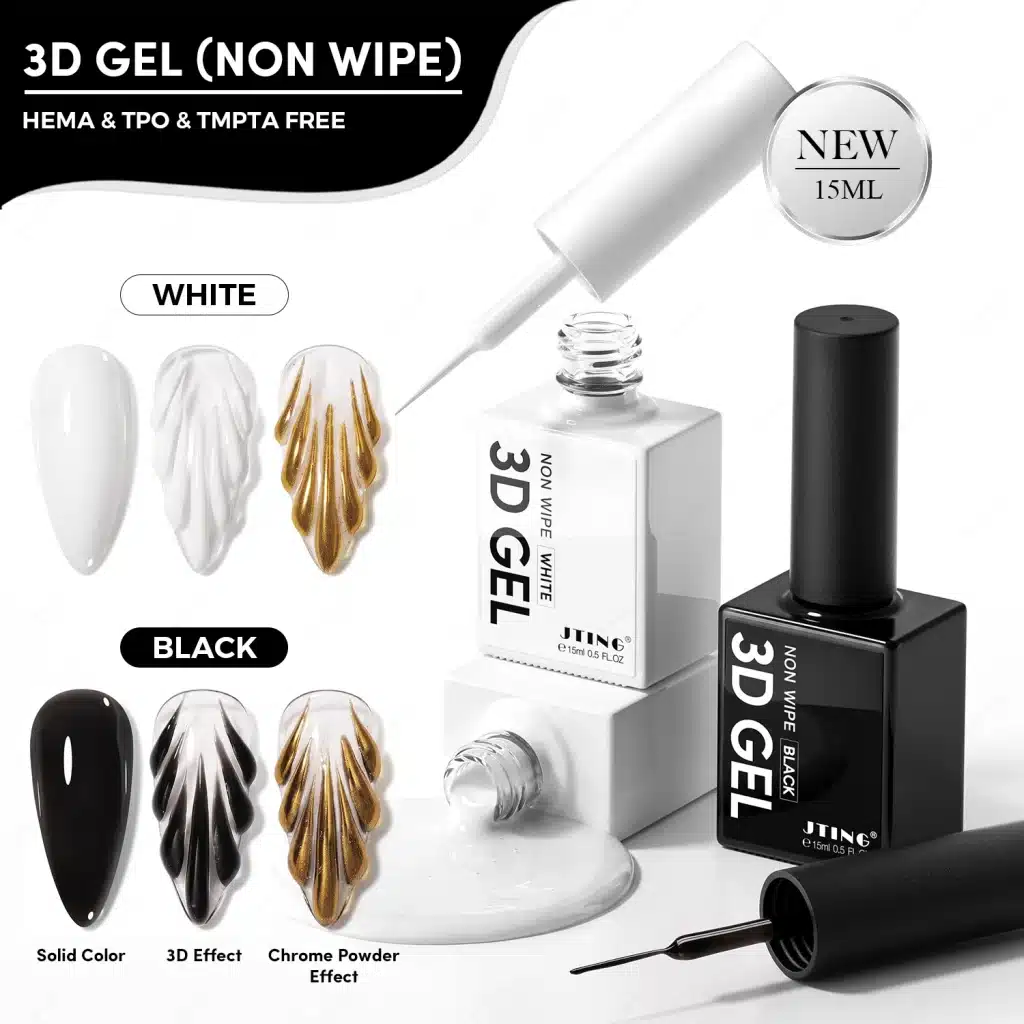
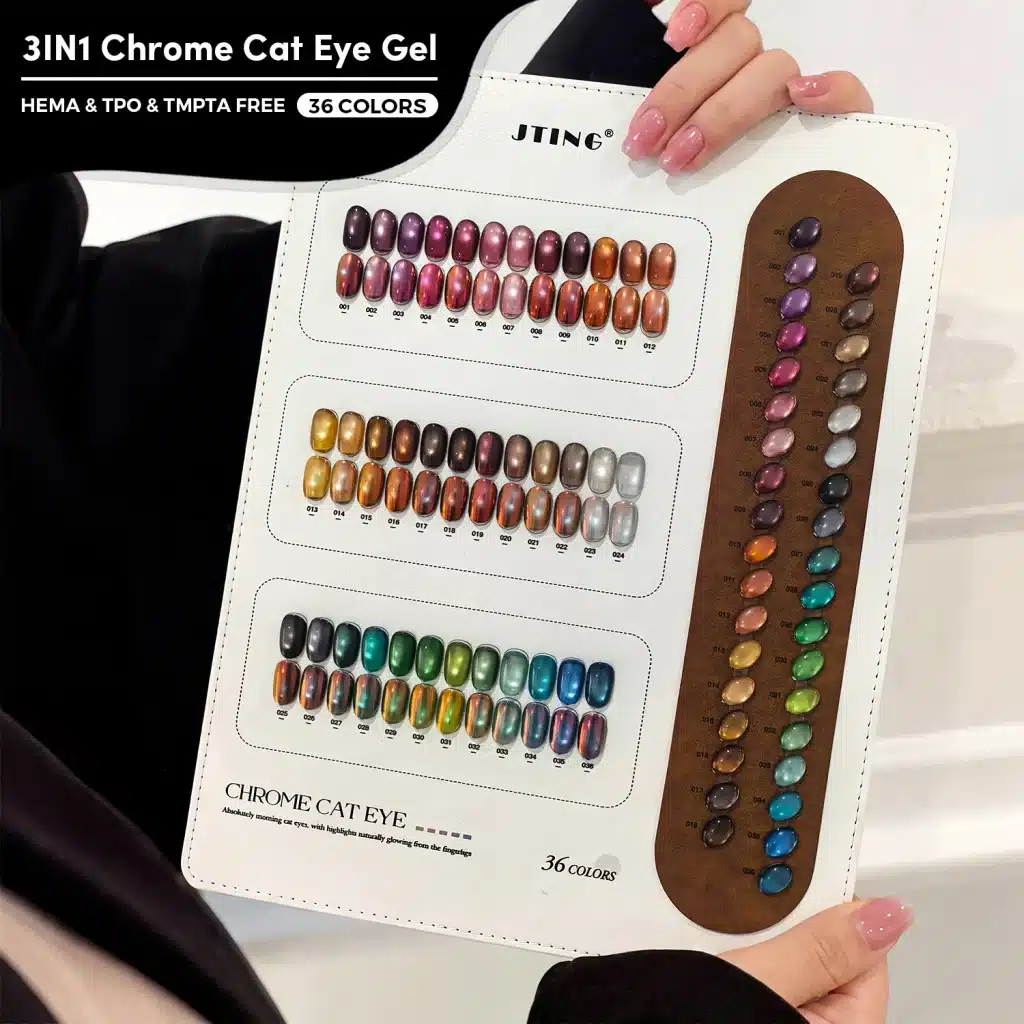
A soft flower, an amber tortoiseshell accent or a flowing marble detail can give a simple manicure a distinctive finish. Blooming gel helps create those diffused edges, opening up a wide range of nail art with a small selection of colors.
The challenge is getting the spread you want. A pattern can stay too compact, expand beyond its intended shape or lose definition before it reaches the lamp. Understanding the product, the color pairing and the working sequence makes it easier to turn an attractive inspiration image into a repeatable salon design.
This guide explains how to use blooming gel, choose designs, approach common problems and build a practical product selection for a salon or private label nail brand.
1. Quick Answer: How Do You Use Blooming Gel?
For a wet-layer blooming gel, apply the blooming medium over your prepared, cured background, place compatible gel color into the uncured layer, allow the design to develop, then cure and finish with the specified top coat. The most useful first exercise is one color on one practice tip, using the application sequence supplied with your product.
Choose the route through this guide that matches your goal. Start with the application section if you already have the materials. Go to the design chapters if you need a service idea. If you are buying for a brand or salon, use the sample-comparison section to turn an attractive supplier demonstration into a selection you can confidently order.
- Learning the technique: focus on product identity, background preparation and a simple repeatable pattern.
- Improving an existing result: compare color compatibility, mark size and the stage at which you complete the design.
- Planning a collection: select a few finished looks first, then choose the materials and presentation that support them.
2. What Is Blooming Gel, and What Does It Do?
Blooming gel is a nail art medium that encourages a compatible gel color to disperse, creating softened outlines and fluid patterns. In the common wet-layer method, a colored dot or brush mark spreads within an uncured blooming layer before the design is cured.
Think of the blooming layer as the surface that enables movement and the colored gel as the material that draws the pattern. The background color is a separate design choice. A pale background makes small details easy to see; a richer background can become part of the finished composition.
For a salon, the appeal is variety: the same core materials can support several service looks. For a brand, the opportunity is to sell a coordinated nail art system with recognizable results and clear application guidance. A compact assortment can be compelling when customers understand exactly what they can create with it.
3. How Does the Blooming Effect Develop?
In a wet-layer blooming gel system, the colored mark continues changing after you place it. Its edge can soften and its footprint can expand within the uncured medium. Once the design reaches the appearance you want, follow the curing procedure for that gel system. Planning for this movement helps you leave the right amount of space between the initial marks.
For practical design work, separate three things: the mark you place, the appearance it develops into and the final cured result. A tiny initial dot is only a starting shape. Plan the layout around the finished shapes you want to see, including the empty spaces between them.
Softness and Definition Are Separate Design Choices
A pattern can have soft edges while remaining easy to recognize. Decide which feature needs to stay clear: the center of a flower, the spaces in a patterned tip or the main direction of a marble composition. Give that feature enough room instead of making every part of the nail equally detailed.
A useful comparison is two tips with the same colors. Give one a spacious layout and the other a denser layout. Review them at normal viewing distance, not only through a phone close-up. The one that looks more elaborate in a macro photograph may not be the one a client prefers on a hand.
Design Timing Is Different from Curing
Choosing when a pattern looks ready is an artistic decision. Providing the cure required by the selected material is a product instruction. Keep those decisions separate when writing a step card or explaining the technique to a colleague. Use the same distinction in a demonstration video: show the visual target, then identify the correct curing step for the actual system.
4. Blooming Gel vs Other Nail Art Products
Similar-looking marble or watercolor nails can be made with different products. Before choosing a tutorial, identify whether the material is a UV/LED-curable blooming gel or a decorative ink. The names on a collection page alone do not establish the application sequence.
| Product | Main role | What to check |
|---|---|---|
| Blooming gel | Creates a surface on which compatible gel colors can diffuse. | Layer order, suitable color gels, required lamp and curing instructions. |
| Blooming or marble ink | Adds decorative color for ink-style patterns. Some systems air-dry and use their own blending method. | Recommended surface, drying procedure, blending liquid and sealing method. |
| Regular gel nail polish | Provides the background or the colored marks used in a compatible blooming system. | Whether the selected shade spreads as intended in that particular combination. |
| Base coat | Forms part of the manicure's foundation. | Its specified use; a base coat is not automatically a substitute for a blooming medium. |
| Painting or liner gel | Used for drawn details in its intended application. | Whether it is suitable for diffusion, separate detail work or both in the selected system. |
JTING Marble Inks offer a naturally drying route to watercolor, marble and fluid nail art. The ink step dries in air; any gel background and top coat follow their own curing instructions. A wet-layer Blooming Gel design uses a different method, with color dispersing in an uncured gel layer before lamp curing.
Choose by the finish you want. Explore JTING's classic, metallic and pearlescent Marble Ink options for fluid color and stone-inspired texture. Use the wet-layer gel tutorial below when working with a product specifically designed for that method.
When buying, ask for an application demonstration of the exact product. Watching the sequence from prepared background to finished top coat is more useful than judging compatibility from a single finished photograph.
5. Blooming Gel Nail Designs: Choose Your Direction
Build a design menu around different visual results rather than collecting many versions of the same pattern. The following are creative directions to explore on sample tips; choose the ones your selected product combination reproduces most successfully.
Soft Floral Accents
Use a flower detail as the focal point of a set, with simpler companion nails that repeat one of its colors. A restrained palette makes the shape easier to appreciate. For collection photography, show both a close-up of the accent and the full manicure so customers can understand how it fits into a wearable service.
Amber and Tortoiseshell Patterns
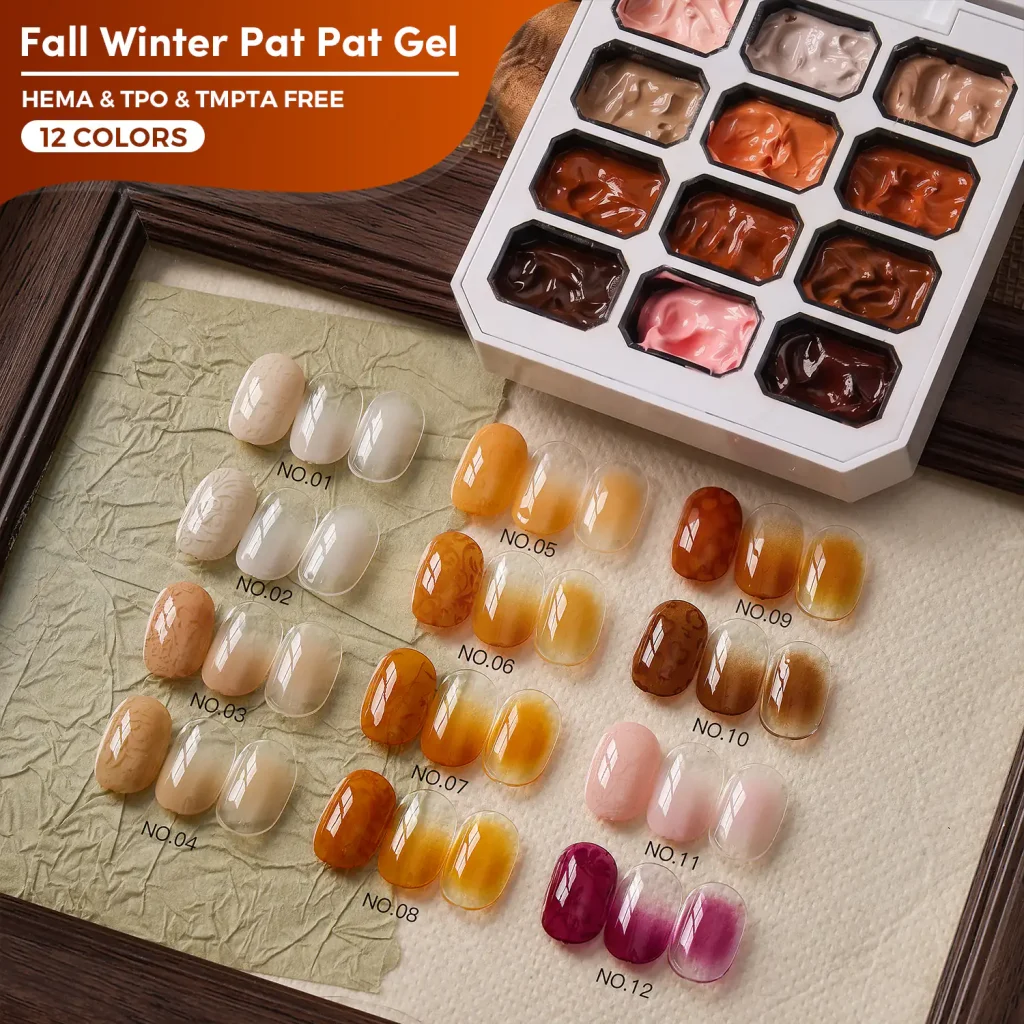
Amber, caramel and dark brown form a useful design palette for tortoiseshell-inspired nails. Vary the placement and scale of the patches rather than making every nail identical. Leave lighter areas visible between darker marks, and select the layering method for your chosen materials. For a coordinated set, repeat one warm shade on the plain companion nails.
Reptile-Inspired Patterns
Organized spacing gives this direction its character. A neutral full set with one patterned accent offers a different commercial look from a vivid patterned French tip. Develop the simpler version first, then explore stronger contrast once the shapes stay distinct in your chosen system.
Marble and Natural-Stone Effects
Plan where the main movement should sit before adding fine detail. A pale stone concept, a smoky gray design and a warmer earth-tone version can belong to the same small collection. Keep enough quiet background visible to avoid turning every part of the nail into an equally busy focal point.
Abstract Watercolor-Look Designs
These designs suit asymmetry and open space. As a styling direction, try a limited palette and let one color lead. Photograph sample tips together to check whether the designs feel related enough for a collection while still giving a salon several distinct options.
Soft Halo-Inspired Accents
A diffused central accent is another direction to test. Establish the target on a sample tip before promising an exact match to an inspiration image: a softly blooming mark and a highly controlled airbrushed gradient are different visual results. Choose reference images that reflect the technique you actually intend to offer.
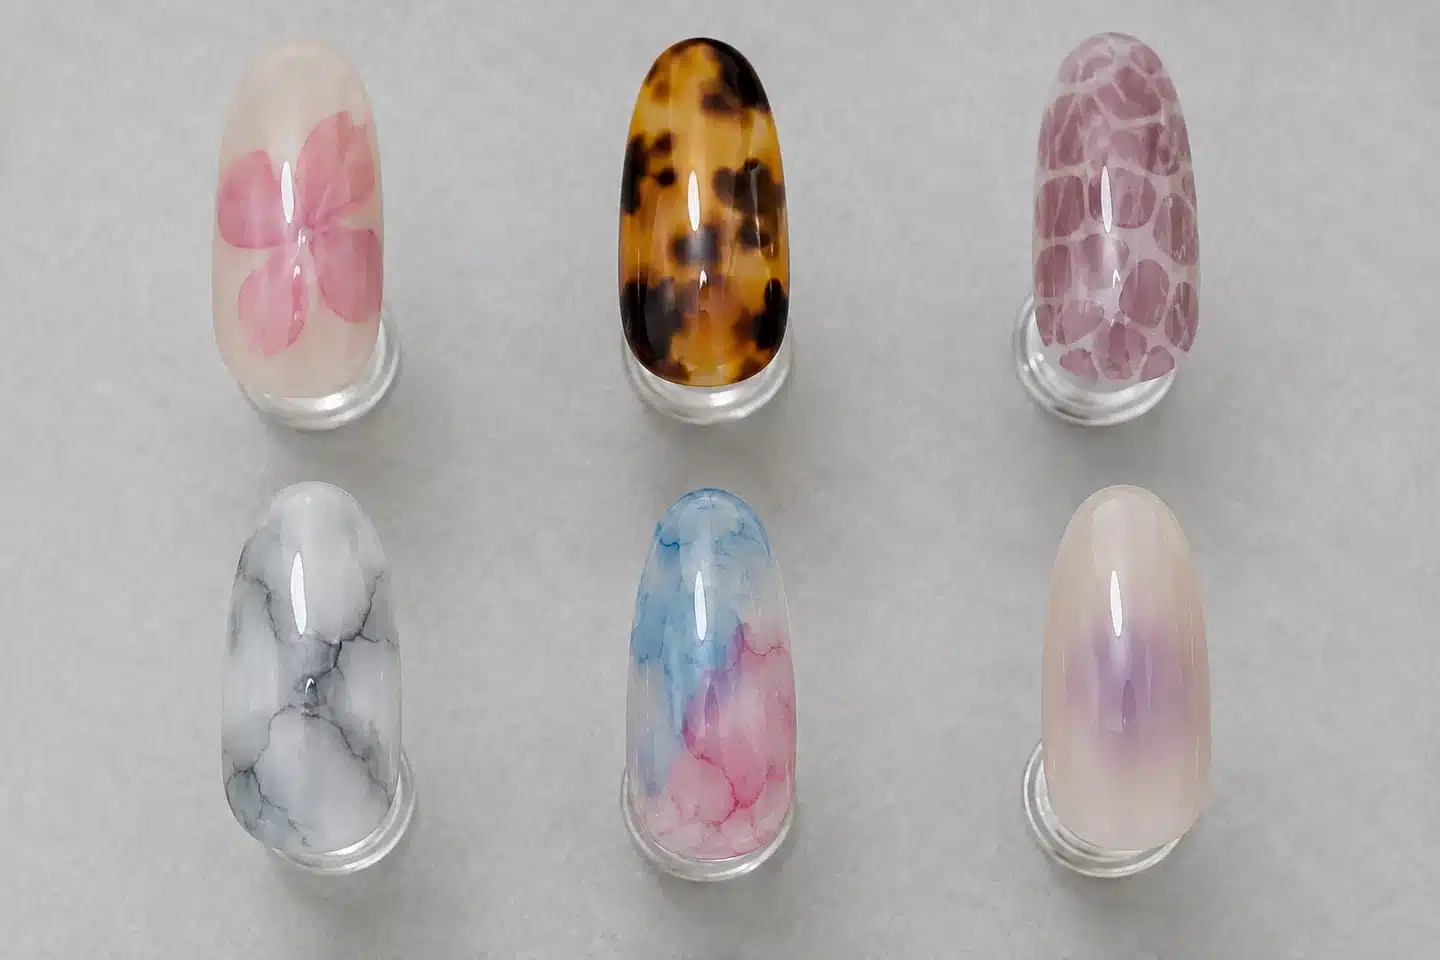
- 1. Soft floral
- 2. Tortoiseshell
- 3. Reptile-inspired pattern
- 4. Gray marble
- 5. Watercolor
- 6. Soft halo
Choose the complexity for the person who will use the collection. A new user benefits from a clear two-color exercise. A salon can develop several service levels around the same palette. A distributor can help retailers by showing which products belong to each look. The most useful collection is one whose finished effects and application path are immediately understandable.
6. Tools and Product Setup: What You Need Before You Start
A short, organized setup makes a first trial easier to evaluate. Begin with one background shade and one contrasting design color. Extra shades can wait until you understand how that pair behaves.
- A prepared nail or practice tip, with the base system required for that application.
- A background gel color and a suitable colored gel for the pattern.
- The blooming gel you intend to use.
- A clean dotting tool or detail brush suited to the design.
- The specified gel top coat and compatible curing lamp.
- A reference image and a few spare tips for comparing trials.
Practice tips are especially helpful for separating a design experiment from a full client service. Compare the same pattern over two backgrounds, then choose the clearer result. Keep the other variables steady so you can see what the background actually changes.
Arrange the tools before opening the design stage. Once a wet blooming layer is in use, searching for another brush or choosing a new shade interrupts the working sequence. Keep uncured gel off the surrounding skin and follow the product's application instructions.
7. How to Choose Background Colors and Design Colors
Build a palette in roles: one background, one main pattern color and an optional accent. This approach gives every bottle a job and makes a small assortment easier to explain. Begin with a single clear combination before developing related variations.
Choose Contrast Before Adding More Shades
For a readable floral sample, try a light neutral background with a distinct petal color. For a quieter look, explore neighboring tones such as a warm nude and a deeper rose. These are palette ideas to sample, rather than promises that every pigment combination will behave identically.
Photograph both versions under the same lighting. Ask whether the pattern remains visible in a full-hand photograph, where clients will judge it alongside nail shape and skin tone. If it disappears, reconsider the contrast or layout before adding more detail.
Give Sheer and Opaque Colors Different Jobs
A translucent background can be part of a glass-like design direction, while an opaque background can provide a more uniform visual field. Compare the actual samples rather than judging transparency from bottle color. A swatch showing the background on its own alongside the completed pattern makes the difference easier to understand.
| Design brief | Palette to explore | What to evaluate |
|---|---|---|
| Soft floral | Milky neutral, rose, optional deeper center accent | Whether petals remain readable at salon nail length. |
| Warm tortoiseshell | Amber, caramel, dark brown | Balance between open amber areas and dark patches. |
| Cool stone | Soft white, gray, charcoal | A clear direction through the composition. |
| Colorful abstract | Neutral background with two chosen accent colors | Whether the overlap supports the intended palette. |
Before expanding the range, make sure each additional shade creates a meaningfully different look. A coordinated pale and dark option may offer more choice than several almost identical mid-tones. Use the finished design board to decide what belongs in the collection.
8. How to Use Blooming Gel Step by Step
The sequence below describes the common uncured blooming-layer method. Check that your selected product uses this method before starting. Exact curing settings belong to the product and lamp combination.
- Prepare the foundation. Complete the nail preparation and base stages required by your chosen gel system.
- Create the background. Apply the selected background color and cure each required layer as directed.
- Add the blooming layer. Apply a thin, even layer. For this wet-layer method, leave it uncured.
- Place the color. Use a detail brush or dotting tool to add the intended marks into the wet layer.
- Watch the pattern develop. Let the color disperse to the desired appearance, then complete the prescribed cure.
- Finish the design. Apply the recommended top coat and cure according to its instructions.
Keep the design sequence and the curing instructions together when you practice. Work on one tip at a time until the placement and final appearance feel repeatable. The required cure comes from the product and lamp combination, rather than from how quickly the pattern appears to spread.
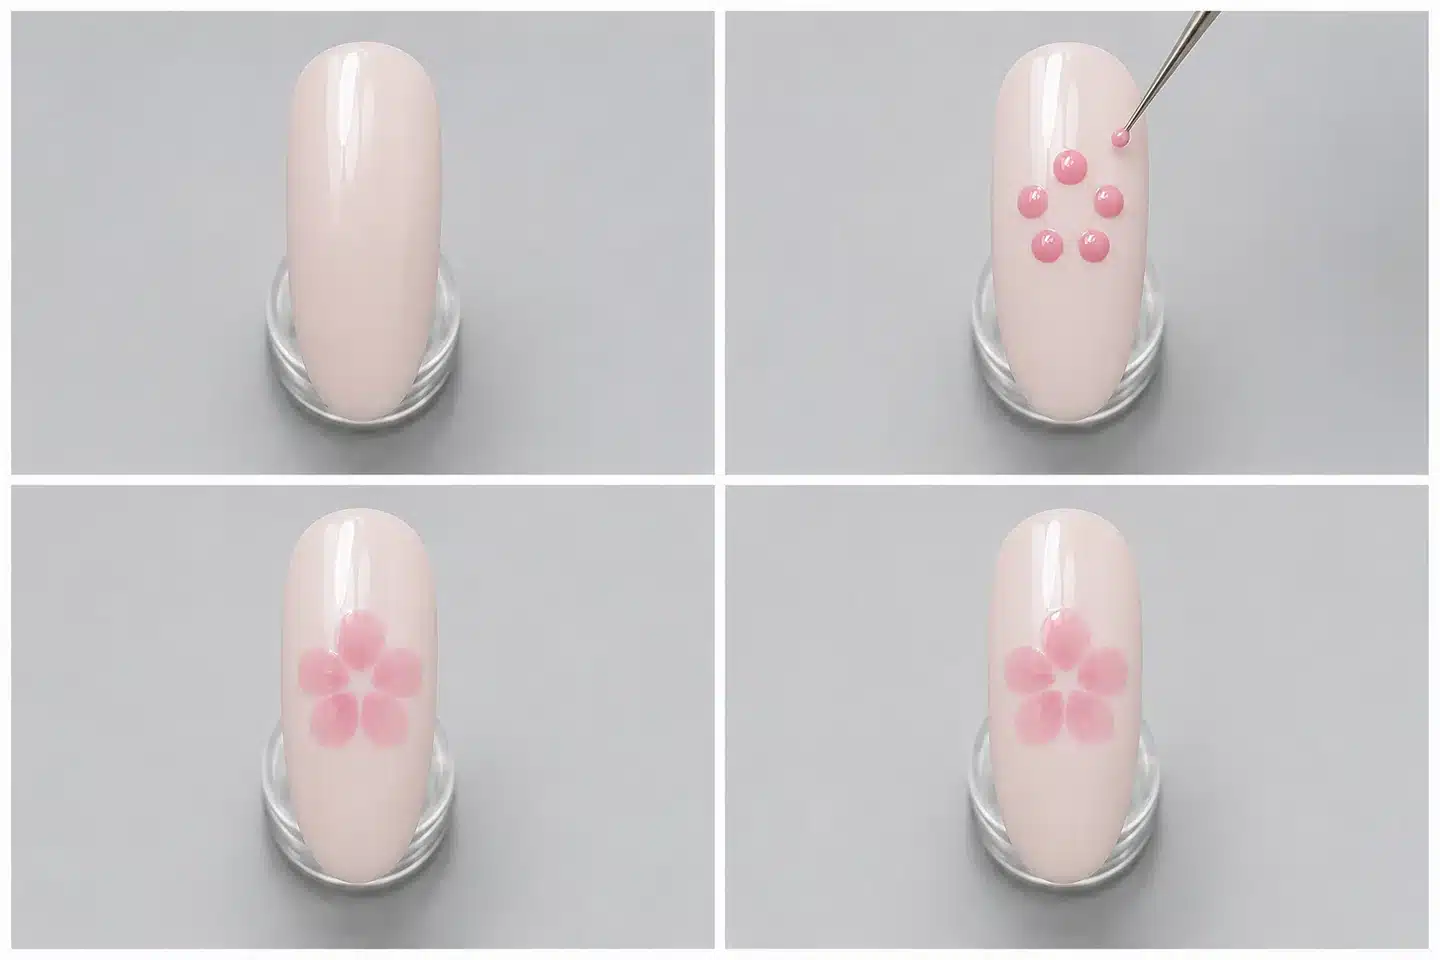
- 1. Prepare the surfaceApply the wet blooming layer over the cured background.
- 2. Place the colorSpace five small dots around an open center.
- 3. Watch the petals developAllow the edges to soften without losing the flower shape.
- 4. Cure and finishCure at the desired spread and complete the compatible finishing system.
Make the First Trial Easy to Read
Use a simple placement plan on a practice tip: a small cluster of marks with visible space around it. Judge the completed sample against that plan. If the first attempt feels too crowded, repeat the same design with fewer marks before trying a more elaborate motif.
Keep your approved reference nearby when making the next tip. Compare the size of the finished pattern, the remaining background and the overall balance. This turns practice into a repeatable design exercise instead of a series of unrelated experiments.
9. How to Control the Spread for Cleaner Designs
A useful practice session answers one question at a time. Instead of changing the blooming product, brush, colors and design together, repeat a simple dot pattern and adjust one variable. The goal is to find an effect you can recognize and reproduce.
Check the Color Pairing First
Color gels do not all behave identically in a blooming layer. Compare the shades you intend to use with that specific medium, starting with a combination demonstrated for the selected system. Choose colors that give both a clear pattern and the desired diffusion. A successful sample with one shade is the starting point for building your palette, not a reason to skip the remaining shade checks.
Compare Placement and Color Amount
For your trial, place small and larger marks on separate sample tips. Compare their finished footprints and the space left between them. Choose the version that preserves the intended design, then repeat that amount with the same tool. This gives a more useful working reference than an instruction such as "use a little color."
Find Your Working Window
Observe how the pattern looks immediately after placement and as it develops. A short practice video can help a team recognize the desired stage. Treat this as design timing, separate from curing time: reaching the right visual shape does not establish that the gel has received its required cure.
Scale the Design to the Nail
A long display tip gives a pattern more room than a short salon nail. Before adding a design to a service menu, trial it on a comparable length and shape. Fewer details may communicate the idea more clearly on a small surface. A strong accent should still be recognizable when viewed as part of the whole hand.
10. Planning Blooming Flower Nails
A floral design works best when the viewer can identify a main flower without having to inspect every mark. Start by choosing the composition: one generous flower, a partial flower entering from an edge or several smaller blossoms. These layouts ask different things of the same nail surface.
Design Around the Center
On a paper sketch or a blank display tip, decide where the center belongs and how much space the petals should occupy. For a cropped flower, let part of the imagined flower sit beyond the visible edge of the composition. For a full flower, leave enough background to distinguish it from surrounding accents.
Use the wet-layer technique from the application chapter to test your chosen arrangement with a compatible color. Concentrate on the final spacing between the petal shapes. Once you find a layout that reads well, repeat it before introducing another petal color or a second flower.
Create a Simple Version and a Detailed Version
For a salon menu, develop a simple flower accent and a more detailed floral set as separate choices. Keep the color family related so clients can understand the difference in design work. The detailed version might use more accent nails, contrasting centers or additional drawn elements, completed with the appropriate products and application sequence.
A brand can present these as two tutorials using overlapping materials. Show exactly which items are needed for each version. Customers should be able to choose the simpler look without purchasing extras that only appear in the advanced design.
Evaluate Flowers at the Size Clients Wear
Review the design on a short sample and a longer sample. An oversized display flower may need fewer petals or a different placement on a short nail. Keep a full-hand view in the finished imagery; it helps a customer imagine wearing the design and stops the product presentation from relying entirely on close-up details.
11. Tortoiseshell, Crocodile and Snake-Print Design Planning
Patterned designs need a clear rhythm. Tortoiseshell suggests irregular patches; crocodile- and snake-inspired designs suggest more organized shapes and spacing. Decide which visual language you want before choosing the marks you will place.
Build a Tortoiseshell Composition
Sketch a few larger dark areas surrounded by visible amber or caramel. Avoid filling every gap just because there is room for another mark. As a design exercise, make three samples with different proportions of dark and light, then choose the one that feels most balanced on a hand.
Use a demonstrated tortoiseshell method for the selected products when deciding the layering order. Some finished references combine translucent color, diffused areas and sharper details. Identify those layers before attempting the look so that the tutorial and materials match the reference.
Plan Repeating Shapes with Breathing Room
For a reptile-inspired concept, sketch the rows or grouping first. Try one layout with evenly sized shapes and another with a change in scale from the center toward the sides. Compare the finished pattern after completing your chosen product method; the spaces between shapes should remain part of the design.
A patterned French tip offers a compact way to introduce this look. Because the available area is narrow, begin with fewer repeated shapes. A broader accent nail gives you more space to explore detail without forcing a miniature version of a large reference into the tip.
Build a Wearable Companion Set
Repeat one color from the pattern on the plain nails. For a warm patterned accent, caramel or a deep brown makes a coherent companion option. For a brighter print, choose whether the other nails should carry the background shade or the accent shade. Photograph both options if you want to show how the same product selection can support different client preferences.
12. Marble, Smoke and Abstract Blooming Designs
Abstract nail art still benefits from a plan. Decide whether the design should suggest a vein through stone, a cloud-like area or a collection of floating patches. That decision tells you where the visual weight should sit and what can remain simple.
Marble: Give the Eye a Direction
Draw an imaginary path through the nail before choosing your pattern placement. A diagonal or slightly curved composition is one option to sample. Leave some areas calmer than others so the stone effect has variation. For a commercial palette, show a light stone version and a darker interpretation using the same compositional idea.
Separate the diffused area from any crisp detail you want to add. A fine drawn vein is a different task from a soft blooming patch. Select the tools and layer order for each task rather than asking one movement of the brush to create every effect at once.
Smoke: Choose the Method Behind the Reference
Smoke-like imagery may be produced with decorative inks, gels or a combination of techniques. Establish which method you are using before selecting the materials. For an ink route, follow its surface preparation, blending and drying instructions; for a blooming gel route, work from the gel's own demonstrated method.
As a palette brief, compare a pale background with charcoal accents against a deeper background with a lighter contrasting accent. Keep the final sample as the reference for your product photography. A reference made with another technique can inspire the mood without becoming an exact outcome promised by your product.
Abstract: Edit the Design Before Adding More Color
Make one sample with two focal areas and another with several smaller areas. View them alongside the companion plain colors you intend to sell. The stronger option is the one that helps the whole set feel intentional. This approach also gives an educator a useful discussion exercise: students can compare composition before adding technical complexity.
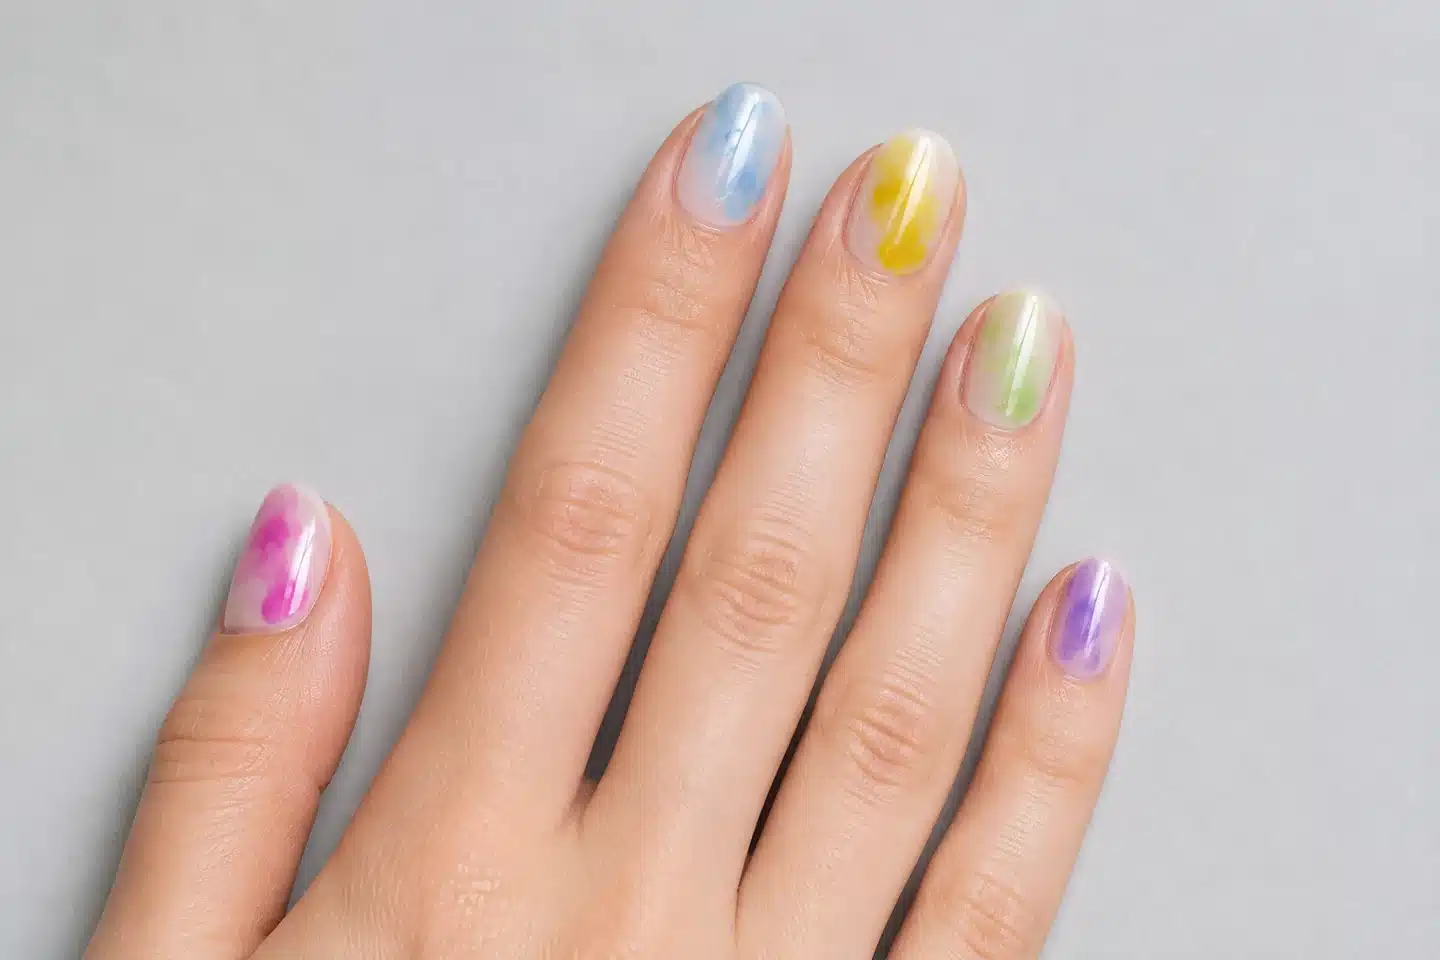
13. Blooming Gel on Short Nails, French Tips and Accent Nails
Design scale is a practical part of product presentation. Clients with short nails need to see an option made for them, and a narrow French tip needs a different layout from a full-cover pattern. Build sample boards around these real differences.
Short Nails
Try a partial flower, one small patch of marble or a single abstract focal area. Let the surrounding color remain visible. Reduce the number of elements before trying to shrink every detail of a long-nail reference. Check the finished result from a conversational viewing distance as well as in a close-up.
French Tips
Start by choosing how much of the nail should be patterned. A deeper tip gives a design more room, while a very narrow tip may be better served by a simpler pattern. The smile-line definition and the diffused decoration are separate visual tasks; use a compatible method that preserves the edge you want.
For a trial board, keep the base shade and tip depth consistent while changing the pattern. This makes it easier for a client to choose among effects without being distracted by different nail shapes and proportions.
Accent Nails and Full Sets
Offer a clear choice between a small decorative accent and a more detailed set. Repeat a color or motif across the hand so the result feels connected. You can vary placement from nail to nail without changing the overall palette.
Before building a press-on collection, test the design across the actual range of tip sizes. A pattern approved on the largest tip may need a simpler arrangement on the smallest. Make the finished sample set the reference for subsequent work, including the number and position of decorated nails.
14. Seasonal Blooming Gel Color Combinations
A small core assortment can support several collection stories through thoughtful color pairing. The ideas below are suggested design briefs, not a ranking of current best sellers. Select the combinations that suit your market and the product pairings you have tested.
| Collection direction | Palette idea | Pattern idea | Companion manicure |
|---|---|---|---|
| Spring floral | Milky pink, rose, soft lilac | Partial flowers or scattered floral accents | A plain pink or lilac set |
| Summer color | Light neutral, coral, turquoise | Open abstract compositions | Single-color accents from the palette |
| Autumn warmth | Amber, caramel, dark brown | Tortoiseshell-inspired patches | A warm neutral manicure |
| Winter contrast | Soft white, gray, charcoal | Stone or smoky abstract directions | A simple light or dark finish |
| Holiday statement | Neutral background with a deep red or green accent | Selected patterned nails | A coordinated plain statement color |
Use the same background shade in more than one concept where the results support it. That gives the color a clear role across your range. Keep the seasonal accent as the element that changes, rather than rebuilding the entire assortment for every release.
For a first launch, choose one main palette and one alternative. Present both as complete sample sets so customers can compare their mood. If the collection includes separate refill shades, identify which ones are essential to the signature look and which ones offer optional variations.
Your seasonal photography can change without changing every bottle. Show the manicure on a consistent hand model or sample format, then adapt the styling around it. The nail effect should remain easy to inspect; lighting and background should not disguise the actual color or pattern.
15. Why Is My Blooming Gel Not Working?
Start with the symptom you can see, then change one part of the setup. Confirm the exact materials and their application order before adjusting your design. The table below helps you decide what to test next.
| What you see | What to check | What to try next |
|---|---|---|
| The color barely spreads. | Was a wet-layer product cured before the color was added? Is the color pairing recommended? | Repeat the prescribed sequence on a tip with a demonstrated compatible color. |
| The pattern becomes too large. | Compare the amount placed, spacing and elapsed design time with a successful sample. | Test smaller marks or wider spacing, changing one variable per trial. |
| Separate shapes merge. | Does the layout leave room for the final expanded marks? | Simplify the pattern and compare it on the actual nail size you intend to offer. |
| One shade works, another does not. | Are the gels different in consistency or product type? | Test the second shade as its own pairing; request a demonstrated alternative if needed. |
| The five nails look inconsistent. | Were tools, quantities and time before curing consistent? | Practice a repeatable one-nail sequence before building a full set. |
| The result does not match the reference. | Was the reference created with gel, ink, hand painting or an airbrush? | Choose a reference made with the same technique, or adjust the product system. |
When asking a supplier for help, send the product names, lamp model and a short application video. A clear view of the stage where the result changes makes the discussion more productive than sending only the finished nail. Avoid correcting a compatibility problem by adding an unapproved thinner or blending liquid to the gel.
A Simple Troubleshooting Sequence
First, return to the manufacturer's basic demonstration using its stated companion materials. If that produces the intended result, introduce your preferred color and repeat the exercise. If the problem appears with the new color, investigate that pairing before changing the lamp or entire manicure system.
Next, compare a small, spacious pattern with the layout you originally attempted. A successful simple sample can reveal whether the difficulty lies in the arrangement rather than the basic method. Finally, repeat the successful version on the intended nail size and assess whether the same spacing is practical.
Keep the comparison focused on the unresolved question. A video showing color placement and development is useful for a spread problem. Photos of the completed surface from several angles are more useful when discussing the finish. Tell the supplier what changed between a successful attempt and the unsuccessful one.
16. Finishing, Aftercare and Removal
The finished manicure should communicate the same effect that attracted the client to the sample. Review the top-coated result for its appearance, outline and overall balance before making it the reference for a service or collection.
Judge the Completed Finish
Compare your sample before and after the specified finishing stage. Look at the design under consistent lighting and from more than one angle. Check whether a glossy reflection hides a detail in photographs and choose a camera angle that shows both the surface and the pattern clearly.
Keep all finishing layers within the product system's recommended application. A photograph of a smooth surface is useful for visual approval, but it is not a way to verify curing. Use the selected products' lamp and curing instructions throughout the service.
Make Aftercare Part of the Service
Give the client clear instructions for maintenance and professional removal, and explain when to contact the salon about a change in the manicure. Arrange upkeep around the actual service provided. Encourage clients to return for removal rather than picking or filing away the finished design themselves, and keep the care advice consistent with the complete product system.
For a brand, include care guidance for the complete system customers are using. Blooming nail art names the decorative technique; it does not establish the removal method for every foundation beneath it. Direct the user to the instructions for the actual gel or enhancement system instead of applying one removal time to every manicure.
Set wear expectations through the product testing and service guidance you actually provide. The useful buying question is how the finished combination performs under its intended use, not how long another brand's unrelated demonstration claims to last.
17. How to Choose Blooming Gel for Your Salon or Brand
The best sample is the one that fits the designs and working pace you intend to offer. Evaluate the whole application, including the companion colors and final finish, rather than choosing from a bottle photograph or a dramatic close-up alone.
| Buying question | A useful sample check | Why it matters |
|---|---|---|
| Can we create our target look? | Reproduce one floral, abstract or patterned reference with the proposed materials. | Connects the purchase to an actual service or collection. |
| Does the working pace suit our team? | Ask the intended user to complete the design, not just watch a supplier demonstration. | Reveals how the product fits your application routine. |
| Which colors belong in the assortment? | Test each proposed companion shade in the blooming layer. | Creates a smaller, more purposeful selection. |
| Is the finished presentation right? | Review the completed and top-coated sample under consistent lighting. | Shows what customers will actually buy or wear. |
| Can customers follow the instructions? | Have another user follow the proposed step card. | Finds missing steps before packaging or content is finalized. |
A sample review should also distinguish visual approval from wear performance. An attractive display tip helps approve a design; it does not establish a wear-duration claim. Agree on any additional performance checks required for your finished product offer.
For a salon, start with the looks that fit your existing service menu. For a distributor, consider how easily retailers can explain the product. For a private label brand, ask whether the palette and finished imagery feel recognizable alongside the rest of your range.
18. How to Compare Samples Before a Bulk Order
A good sample comparison helps you choose between real options. Ask each supplier to provide the product name, intended companion colors and application instructions with its sample. Use a small set of reference designs to keep the comparison relevant to your business.
Agree on the Brief Before Testing
Choose two or three target looks and identify the intended user. A trained salon team and a first-time retail customer may need different levels of guidance. Share the nail length, palette and presentation you want, along with the lamp setup you intend to use.
Make the request concrete: a soft floral accent on a short oval tip is a clearer brief than "a good blooming gel." If a design requires additional materials, ask for those to be listed in the sample proposal so you can compare the whole cost and application path.
Use a Side-by-Side Review
| Review item | What to compare | Decision to make |
|---|---|---|
| Target design | Completed samples against the same reference brief | Which option best fits the intended look? |
| Working sequence | The intended user's experience with the supplied method | Can the team follow it consistently? |
| Companion shades | Each color proposed for the actual assortment | Which shades belong in the launch? |
| Presentation | Bottle identification, instructions and sample board | Can a buyer understand what is included? |
| Repeat supply | Approved sample identity and reorder specifications | How will the same selection be requested again? |
Use simple ratings such as preferred, usable with changes or unsuitable for this brief. Attach a specific reason to each rating. "The floral sample is too crowded on our short tips" gives a supplier a useful revision target; "quality needs improvement" leaves the next step unclear.
Compare the Whole Offer
Include companion products, packaging, demonstration materials and any required development work when comparing quotations. A lower bottle price can be less relevant if the proposed kit is missing the shades needed to reproduce its advertised design.
Before approving production, agree which sample, shades, packaging and instructions form the order. Keep an approved physical sample where practical and use consistent lighting for its photographs. For repeat orders, refer to the established specifications, including any changes you deliberately requested.
19. Build a Blooming Nail Art Service Menu
A focused menu helps a client choose without needing to understand every product behind the design. Organize the options by the finished service: a small accent, a coordinated patterned set or a more detailed custom composition.
Offer Three Clear Levels of Design Work
Accent option: a selected decorative nail or small motif alongside a simple manicure. Use a sample that clearly shows the number and placement of accents included.
Coordinated set: a defined arrangement of patterned and companion nails, using an agreed palette. This is a useful option for clients who want a complete look they can choose directly from the sample board.
Custom design: a more individualized layout, extra details or an expanded color selection. Discuss the reference and the scope before starting so the booked service matches the work required.
Price from Your Actual Service Time
Run the complete design during a practice service and measure the additional work it requires. Include consultation, setup, decoration and finishing. Use that information alongside your salon's normal pricing structure, materials and overheads rather than copying a price from a short social video.
Display the choices with comparable photographs. If one option is shown on a long extension and another on a short natural nail, explain the foundation separately so the client understands what the price covers.
Make the Next Appointment Easy to Choose
Develop related variations using colors already in the salon. A client who likes a warm patterned accent might choose a softer neutral variation next time. Show those alternatives together and make their differences easy to see. You can broaden the service menu through thoughtful design without making every new look depend on a completely new product range.
20. Plan Your Blooming Nail Art Selection with JTING
You do not need a large specialty range to build an attractive nail art offer. A focused selection can begin with a defined effect, a few coordinated colors and a clear demonstration of the finished result.
Explore our Blooming Marble Inks collection for classic watercolor, metallic and pearlescent design directions. These are naturally drying decorative inks: allow the ink layer to dry fully before applying the compatible finishing system. For backgrounds and companion manicures, browse JTING's gel nail polish color collections.
JTING supports custom colors, packaging, labels, color charts and product photography and video. These services help connect the product itself with the way a salon, retailer or brand presents it. A clear application video and a well-chosen sample board can make a compact assortment easier to understand and promote.
To begin, send the looks you want to create, your preferred palette and whether you need JTING-branded products or your own packaging. Our team can help develop a sample plan around that brief.
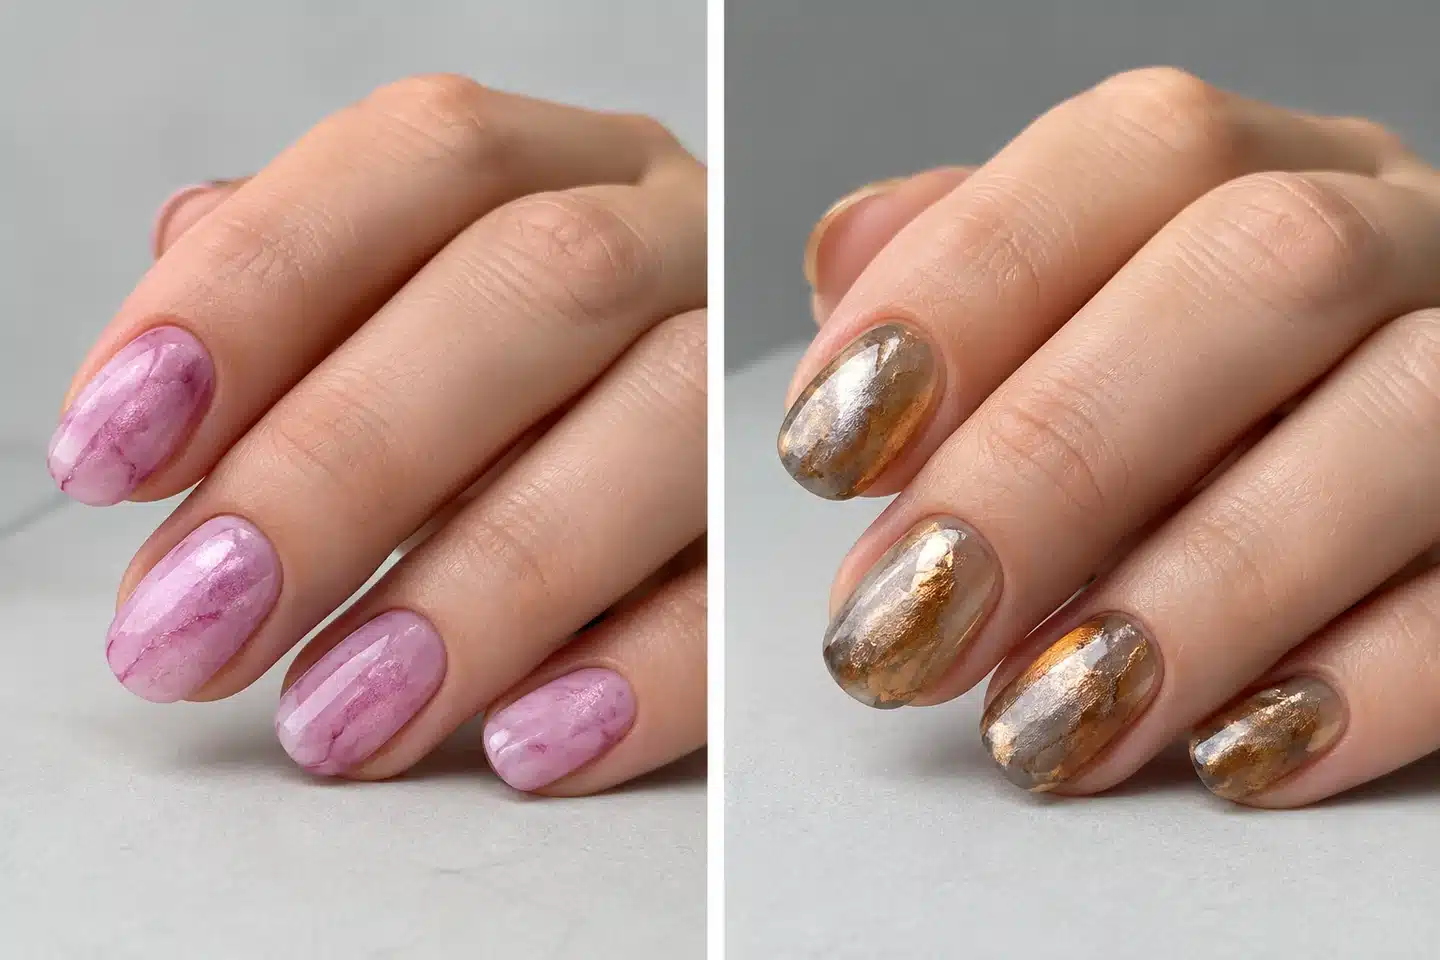
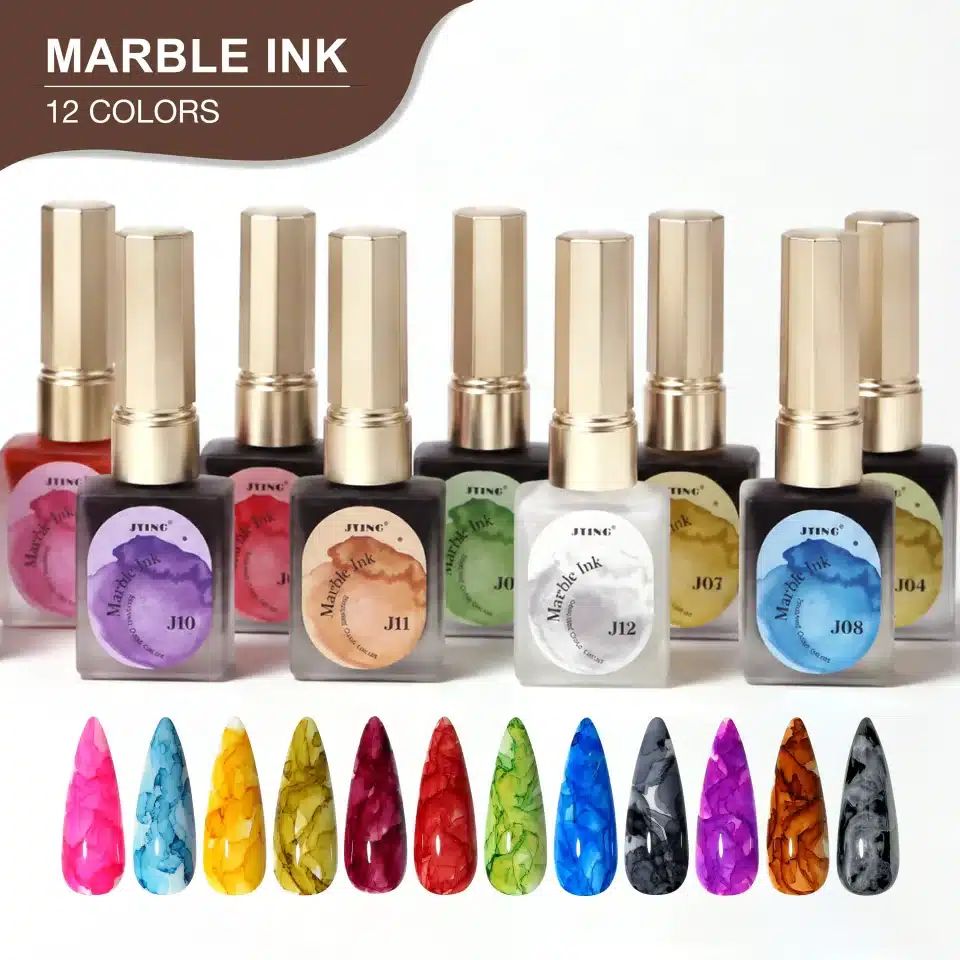
JTING 12-Color Blooming Marble Ink: Salon Edition
Build watercolor and marble looks around a 12-color selection in 15 ml square bottles. The range brings colorful translucent accents into a compact nail art assortment, with sample imagery showing both glossy and matte design presentations.
Explore the square-bottle collection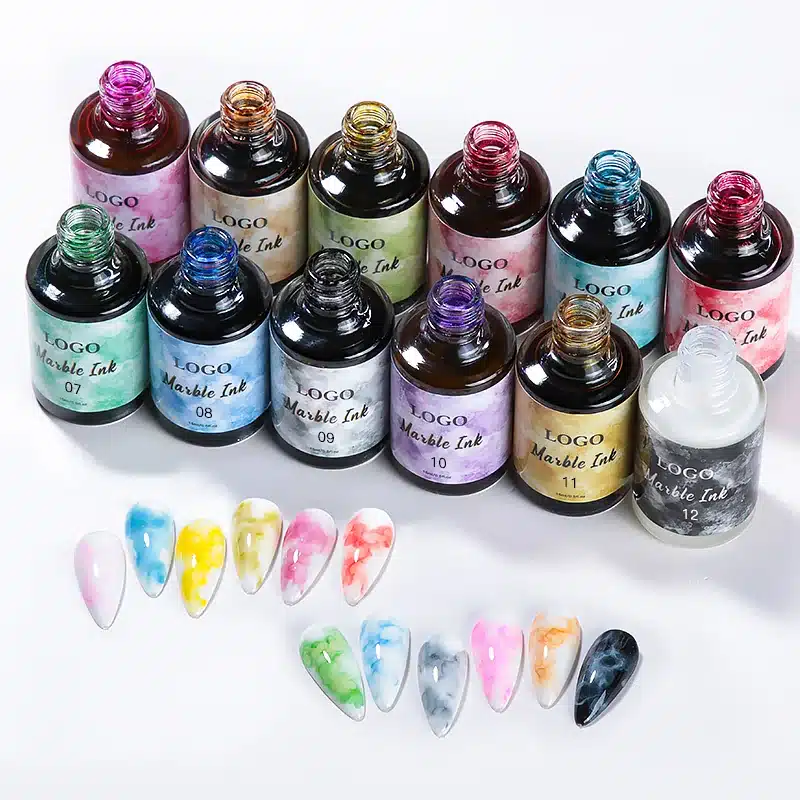
JTING 12-Color Blooming Marble Ink: Premium Collection
Explore the round-bottle presentation for a watercolor nail art range. This 12-option, 15 ml assortment offers another packaging direction for salons and private label projects, with matching samples to help plan the finished color story.
Explore the round-bottle collection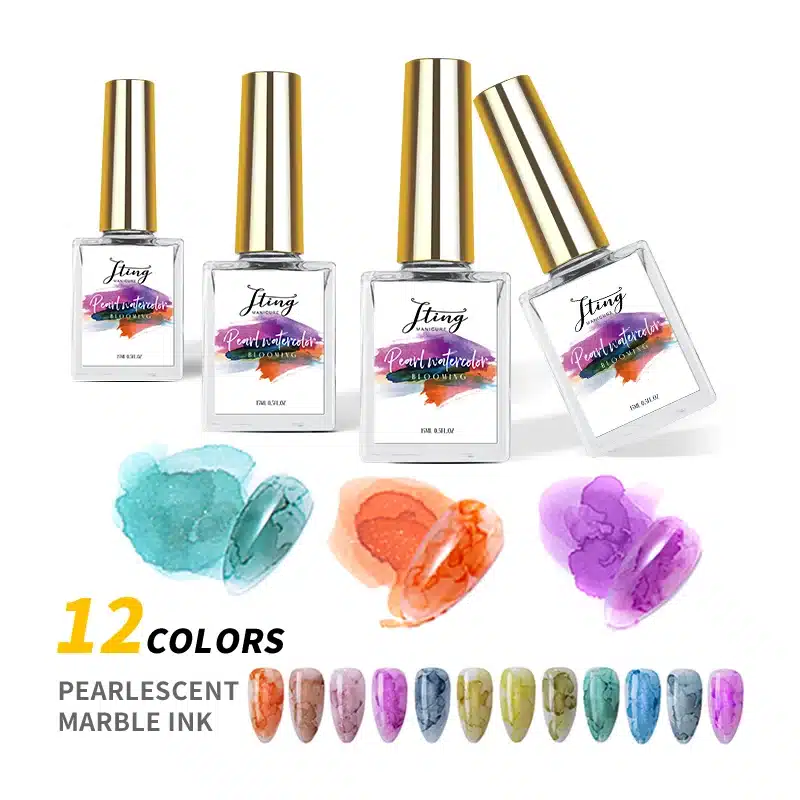
JTING 12-Color Pearlescent Blooming Marble Ink
Add a pearl-finish direction with twelve shades in 15 ml bottles. Create colored stone-like patterns with a soft pearlescent response, giving brands a distinct alternative to a classic translucent watercolor collection.
View the pearlescent collection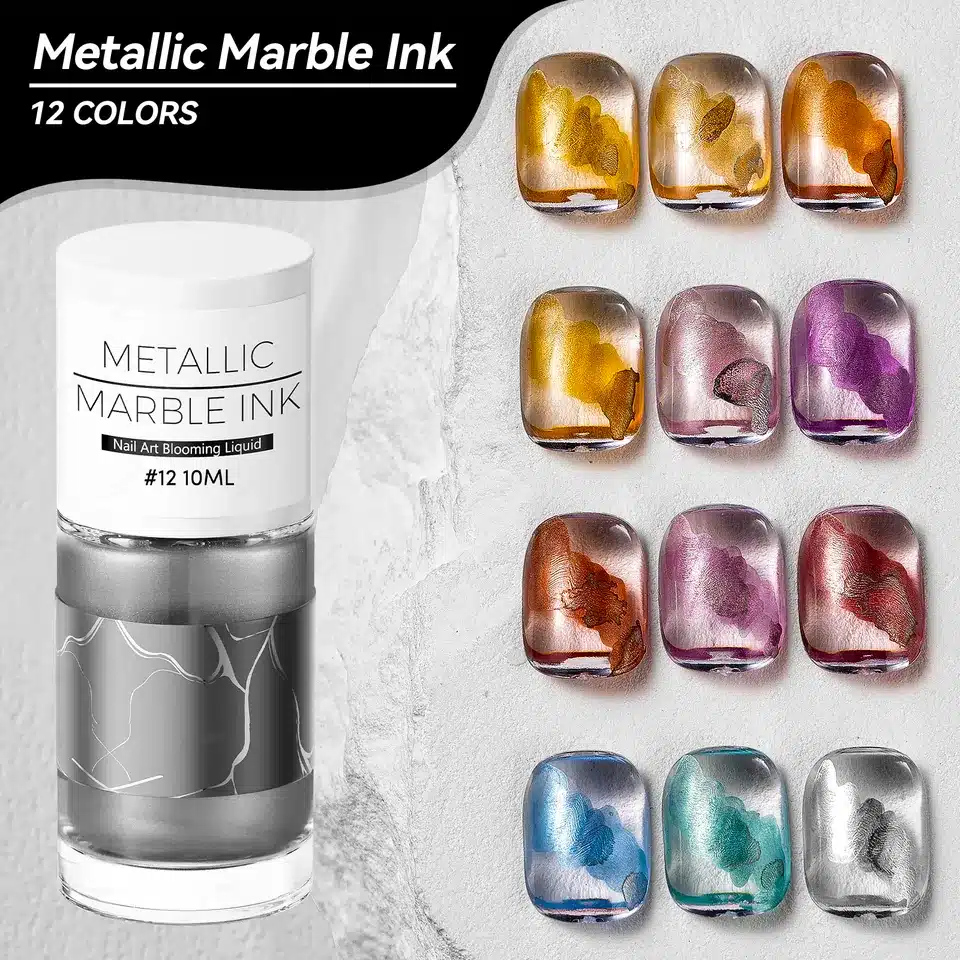
JTING 12-Color Metallic Marble Ink
Choose a more reflective mineral-inspired finish with the 12-color metallic collection in 10 ml bottles. Gold, bronze, rose, blue, teal and silver sample directions give the range a different visual role from soft watercolor and pearl designs.
View the metallic collection21. Build a Focused Blooming Nail Art Collection for Your Brand
A collection is easier to sell when it has a clear purpose. Instead of offering many loosely related shades, organize the selection around a small number of finished looks. The following are collection-planning ideas, rather than fixed JTING kits.
A First Nail Art Selection
Center the offer on one decorative system, a light background and a few contrasting colors. Include a simple floral or abstract reference and a step card using those exact materials. The aim is to make the first design approachable and the next purchase easy to understand.
A Coordinated Seasonal Palette
Build a palette around a specific visual mood, then carry selected shades into simpler companion manicures. A warm amber pattern, for example, can sit alongside plain caramel or deeper brown designs. This lets the collection support customers who want either a patterned accent or a quieter full set.
A Salon Demonstration Set
Prioritize a finished sample board, shade identification and a short demonstration video. Show the real nail length and shape most relevant to the intended salon. Consistent photography across the board, packaging and product page helps customers recognize what each shade contributes.
For private label development, confirm the selected materials and sample appearance before completing the packaging story. JTING can discuss bottle and cap choices, logo application, labels and color charts through our private label and OEM/ODM service. Start with an assortment your customers can understand, then expand around the effects and colors they ask for.
Give Every Item a Clear Role
List the background colors, decorative materials and finishing products required for each featured look. Identify what comes in the kit and what the customer needs separately. If the photography shows an optional accent color or accessory, make that distinction clear on the product page.
Choose names and shade identifiers that work across the bottle, color chart and tutorial. A customer should be able to match a tutorial step to the correct bottle without relying on the apparent color of a small photograph. This becomes especially useful when two shades are visually similar in their packaging.
Plan Reorders Alongside the First Launch
Decide whether customers will reorder the whole set or individual items. A core decorative medium and its companion shades may be used at different rates. Discuss separate replenishment options as part of the assortment plan so that a missing item does not make an otherwise usable kit difficult to continue using.
For a new private label range, agree on the launch selection first and keep later seasonal additions purposeful. Use customer questions and actual reorder patterns to guide the next expansion. A small collection with strong imagery, clear use and easy replenishment can present a more complete offer than a larger range with little guidance.
22. Frequently Asked Questions About Blooming Gel
Do you cure blooming gel before adding color?
In the uncured-layer method described above, no: the pattern color goes into the wet blooming layer, and the design is cured afterward. Check your exact product instructions, because a different system or technique can use a different sequence.
Can you use any gel nail polish with blooming gel?
Choose a color gel that disperses well in the selected blooming medium. A thick detail-painting gel may behave differently from a flowing color gel, so compare the actual pairing on a practice tip. Approve the finished effect before building the full palette around it.
Can a regular base coat replace blooming gel?
A base coat has a different intended role. Unless the manufacturer specifically supports that use, choose a purpose-made blooming medium for a repeatable blooming service. A substitute producing some movement on one tip does not establish equivalent performance.
Can you use blooming gel over different background colors?
Yes, where the selected system supports it. Trial the same pattern on the backgrounds you plan to sell or use: the visual contrast can make one combination much easier to read than another.
Do blooming gel designs need a top coat?
The wet-layer gel method in this guide finishes with a gel top coat. Use the top coat and curing procedure recommended for the selected system. Decorative inks may require their own drying and sealing sequence.
What should you test before ordering in bulk?
Review the exact color pairings, target designs, working sequence, finished appearance and instructions. For branded products, also approve packaging, shade identification and the images customers will use to choose the product.
Is blooming gel the same as blooming ink?
No. Identify the actual product type and its instructions. The gel method in this guide uses an uncured gel layer; some decorative inks air-dry and use a separate blending method. Similar finished effects do not make their application sequences interchangeable.
Does clear blooming gel make the pattern transparent?
The finished appearance depends on the background, pattern color and selected combination. Clear medium is not a guarantee of a specific final transparency. Compare completed samples over the background you intend to use.
What is a good first blooming gel design to practice?
Start with one compatible design color on a simple background and a few well-spaced marks. Repeat the same arrangement until you can recognize its finished appearance. Then move to a basic floral or abstract layout before adding more colors.
Why do my blooming flower petals merge?
Compare the final footprint of each petal with the space in your layout. Try fewer marks, wider spacing or a different amount on a practice tip, changing one variable at a time. Check the pairing and working sequence if the basic method is also inconsistent.
Can I use blooming nail art on short nails?
Plan the composition for the available area. A partial flower, single abstract accent or simplified pattern is a useful starting direction. Choose a short sample tip for approval rather than judging only from long display nails.
Can blooming gel replace an airbrush for aura nails?
It can be explored for a diffused accent, but an airbrushed gradient is a different technique. Judge the actual sample against the appearance you want. Choose the method that produces that result rather than treating the names as equivalent.
How many colors do I need for a first collection?
Begin with the materials needed for a few defined looks. One background and a compatible design color are enough for a focused initial trial. Expand the commercial assortment when each additional shade adds a clear design option.
How should I store blooming gel?
Use the storage conditions on the selected product's label or instructions. Keep product identification available so the correct guidance can be checked. Ask the supplier about an unexpected change in behavior rather than trying to restore it with an unapproved additive.
Can JTING help develop a branded nail art selection?
JTING supports coordinated gel colors, labels, packaging, color charts and product photography and video. Send the finished effects you want to offer and the intended sales format so our team can discuss a suitable product and sampling direction.
Start with the Effect You Want to Create
A successful blooming nail art selection starts with a clear visual goal. Choose the pattern, test the materials together and develop a small set of looks that your customers can recognize and repeat. Good instructions and coordinated colors give that selection a purpose beyond a single trend.
Whether you are adding a new salon service or planning your own branded collection, send JTING your nail art reference images and sourcing requirements. Tell us the effects, colors and packaging direction you have in mind so we can discuss suitable options and a sample plan.