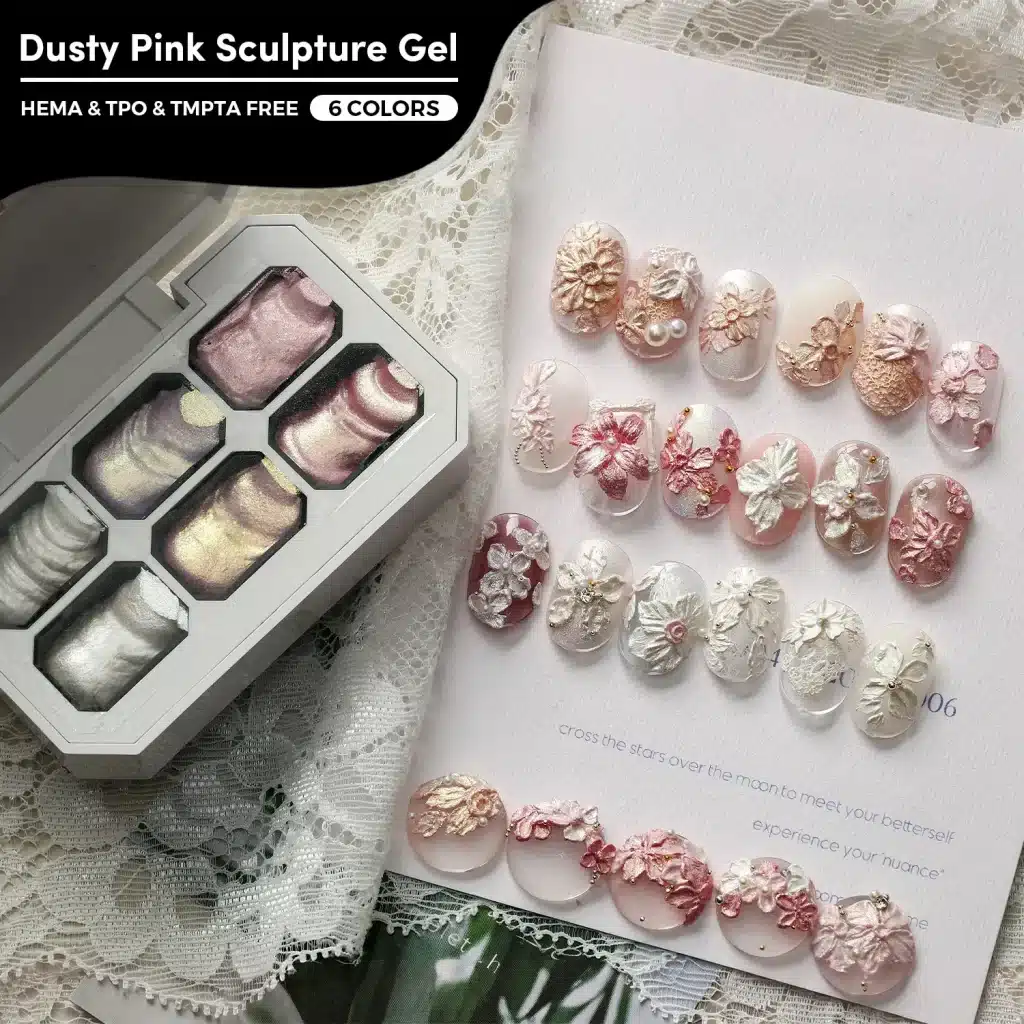
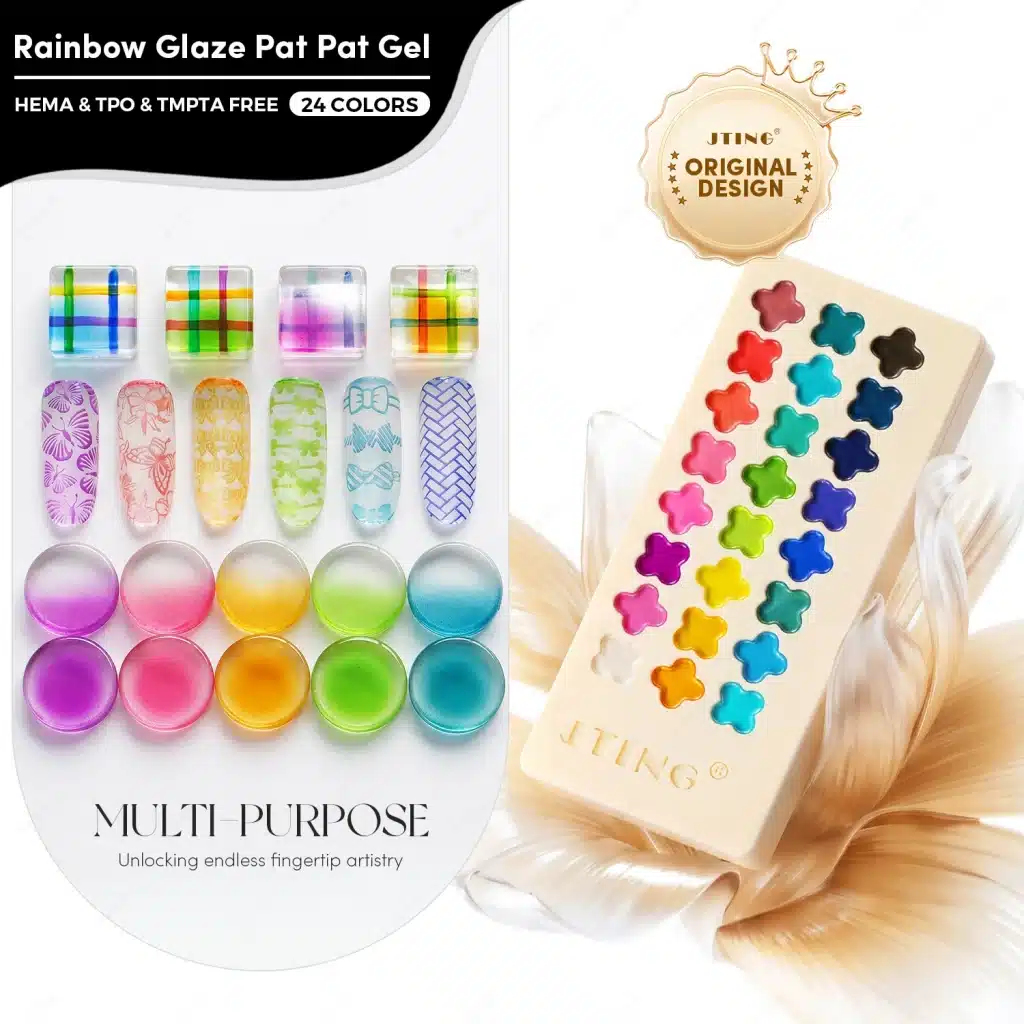
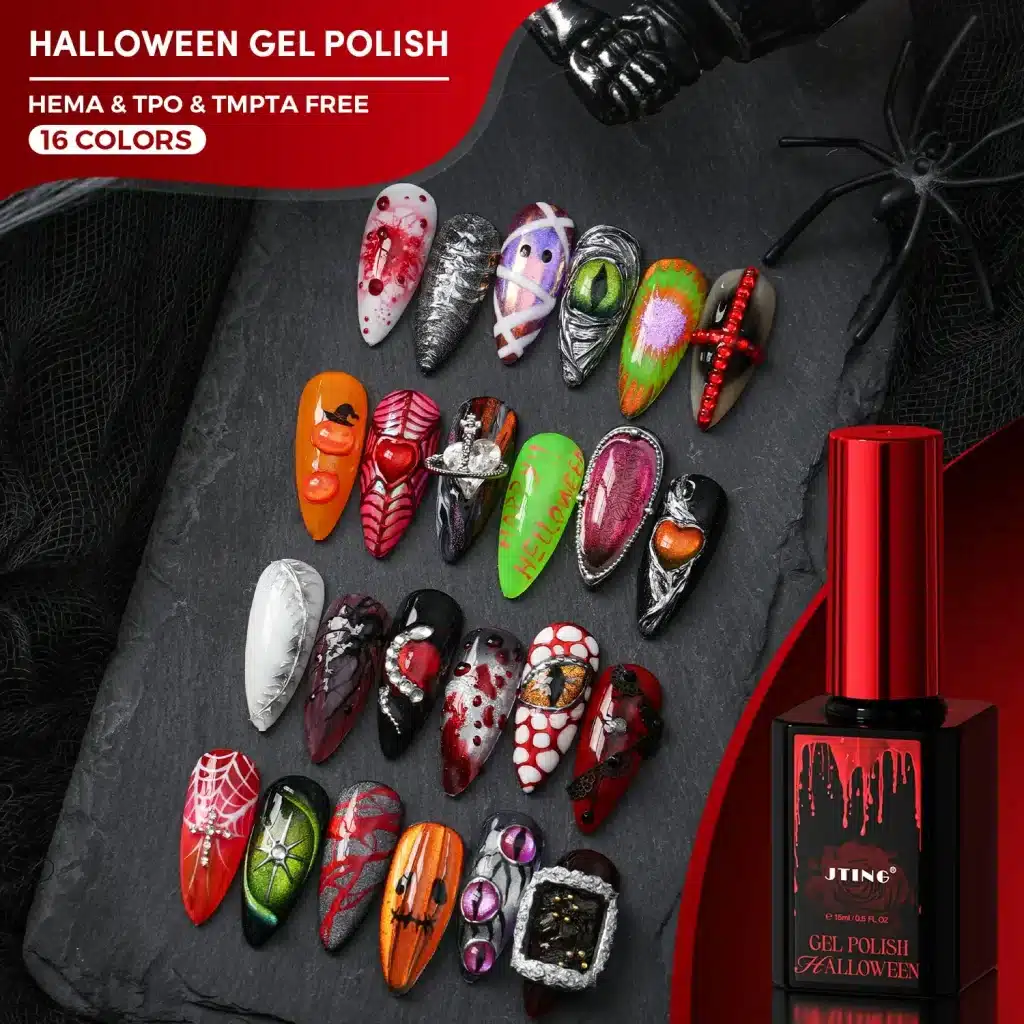
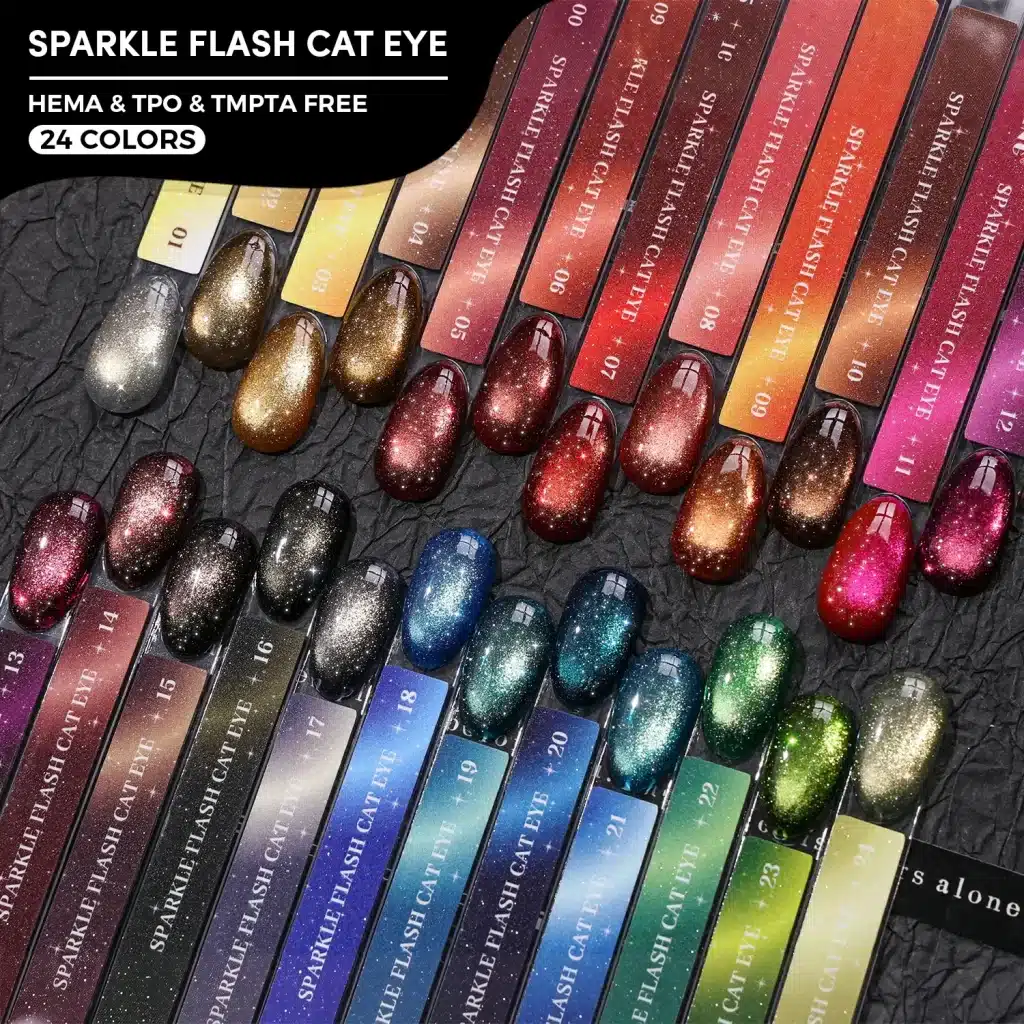
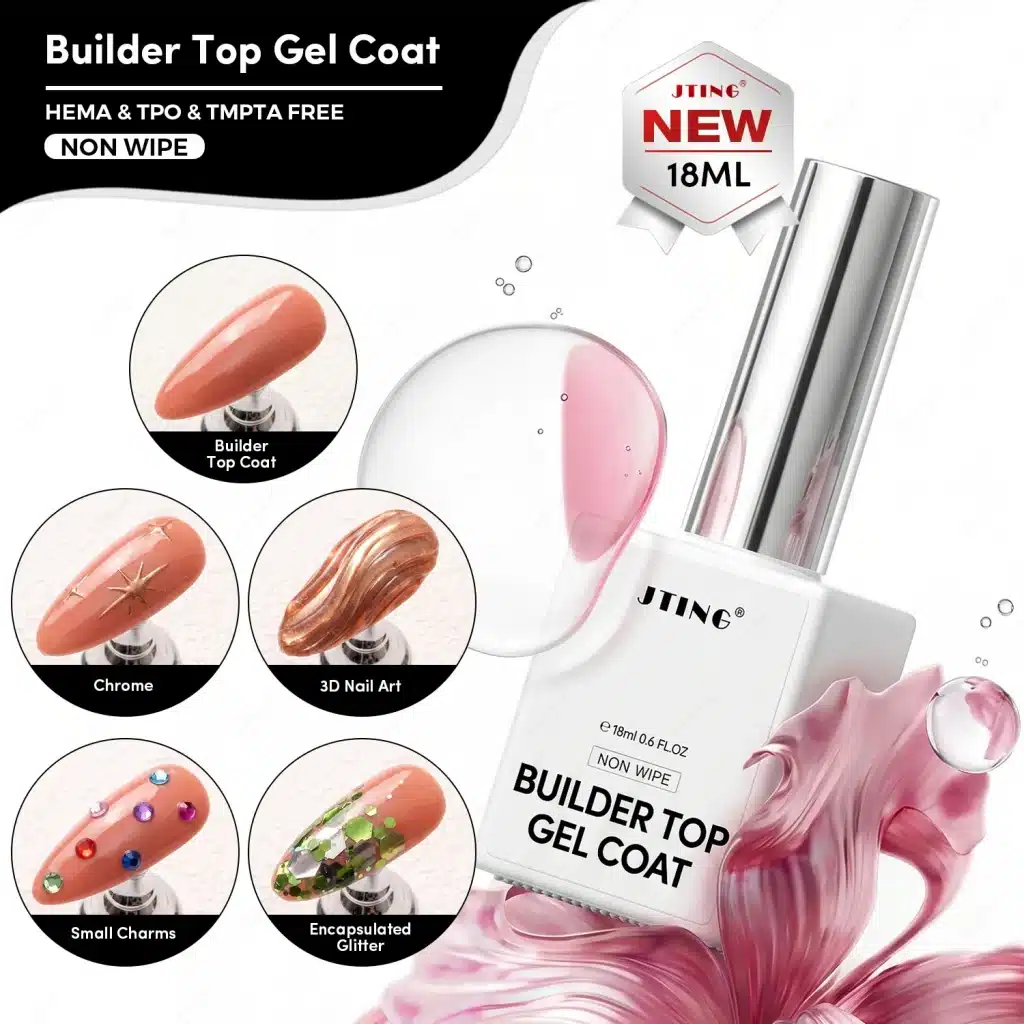
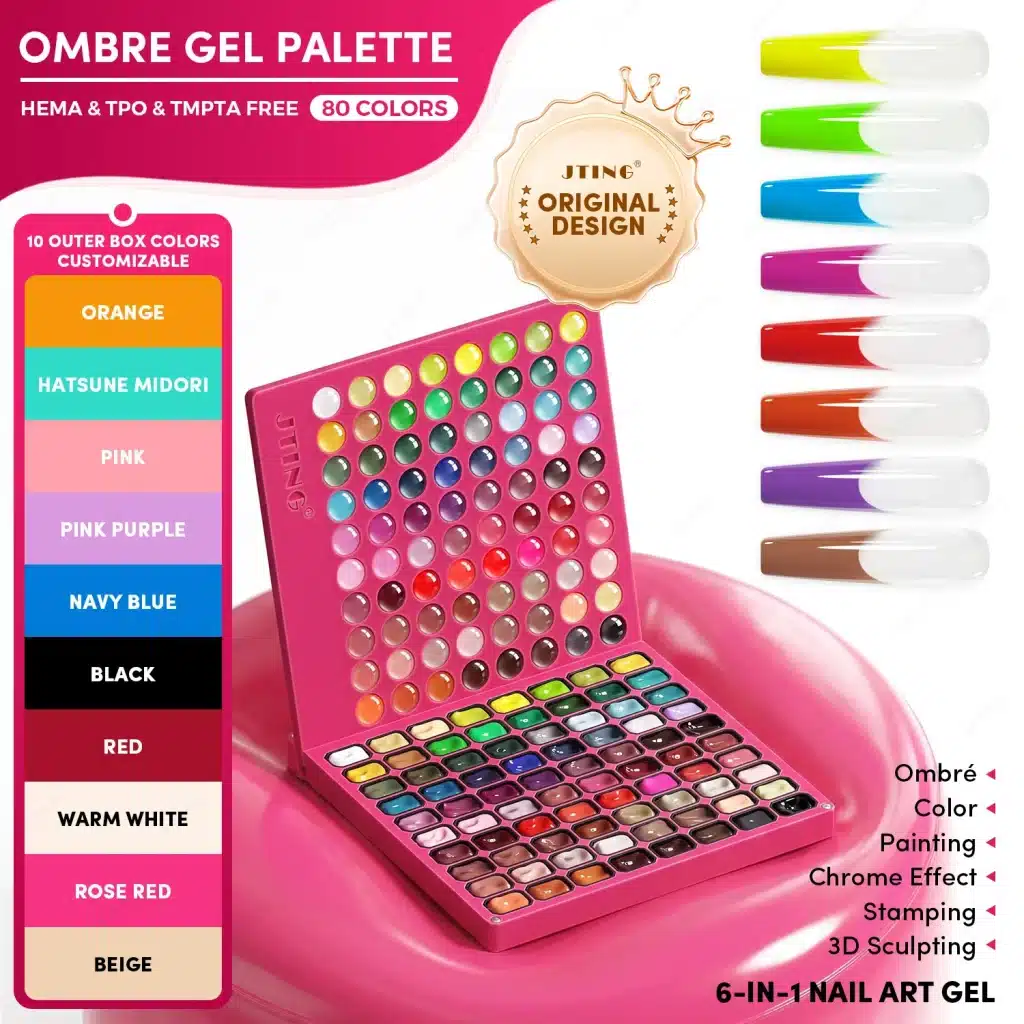
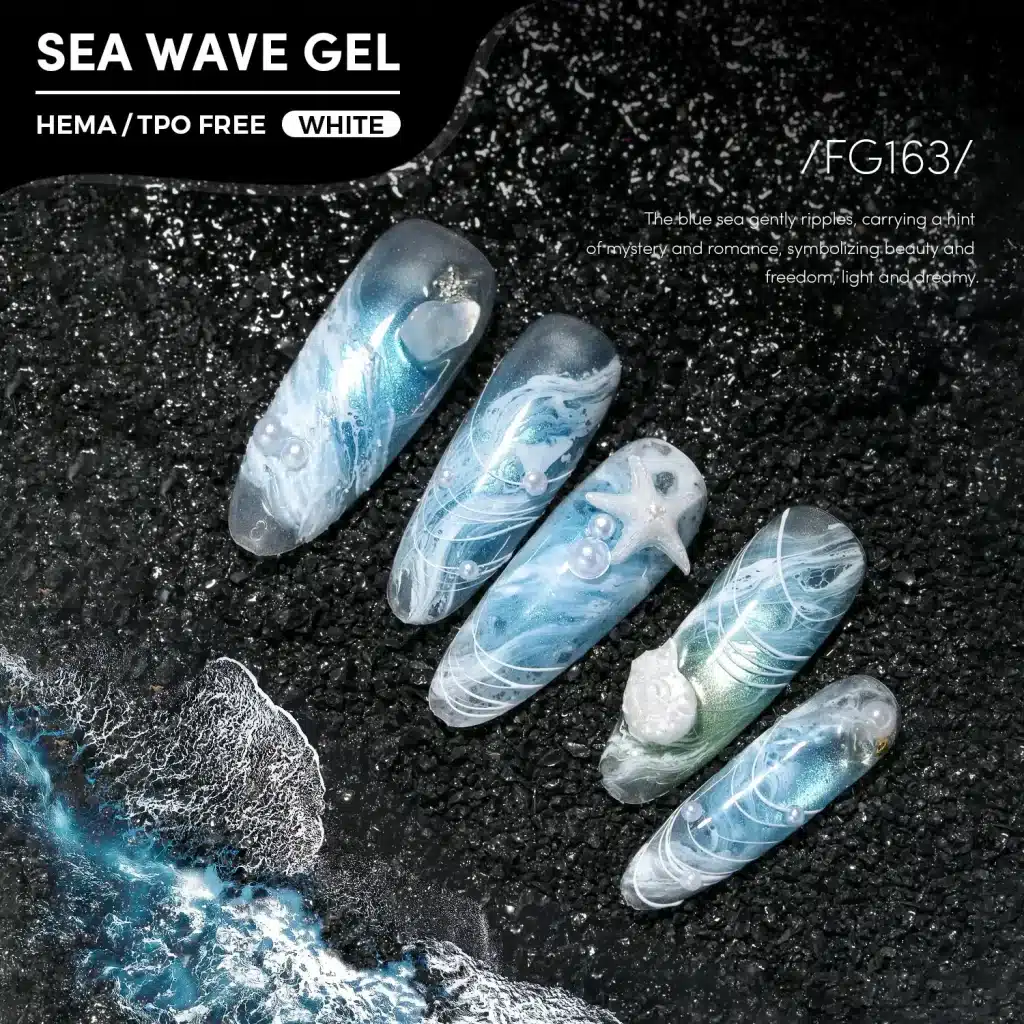
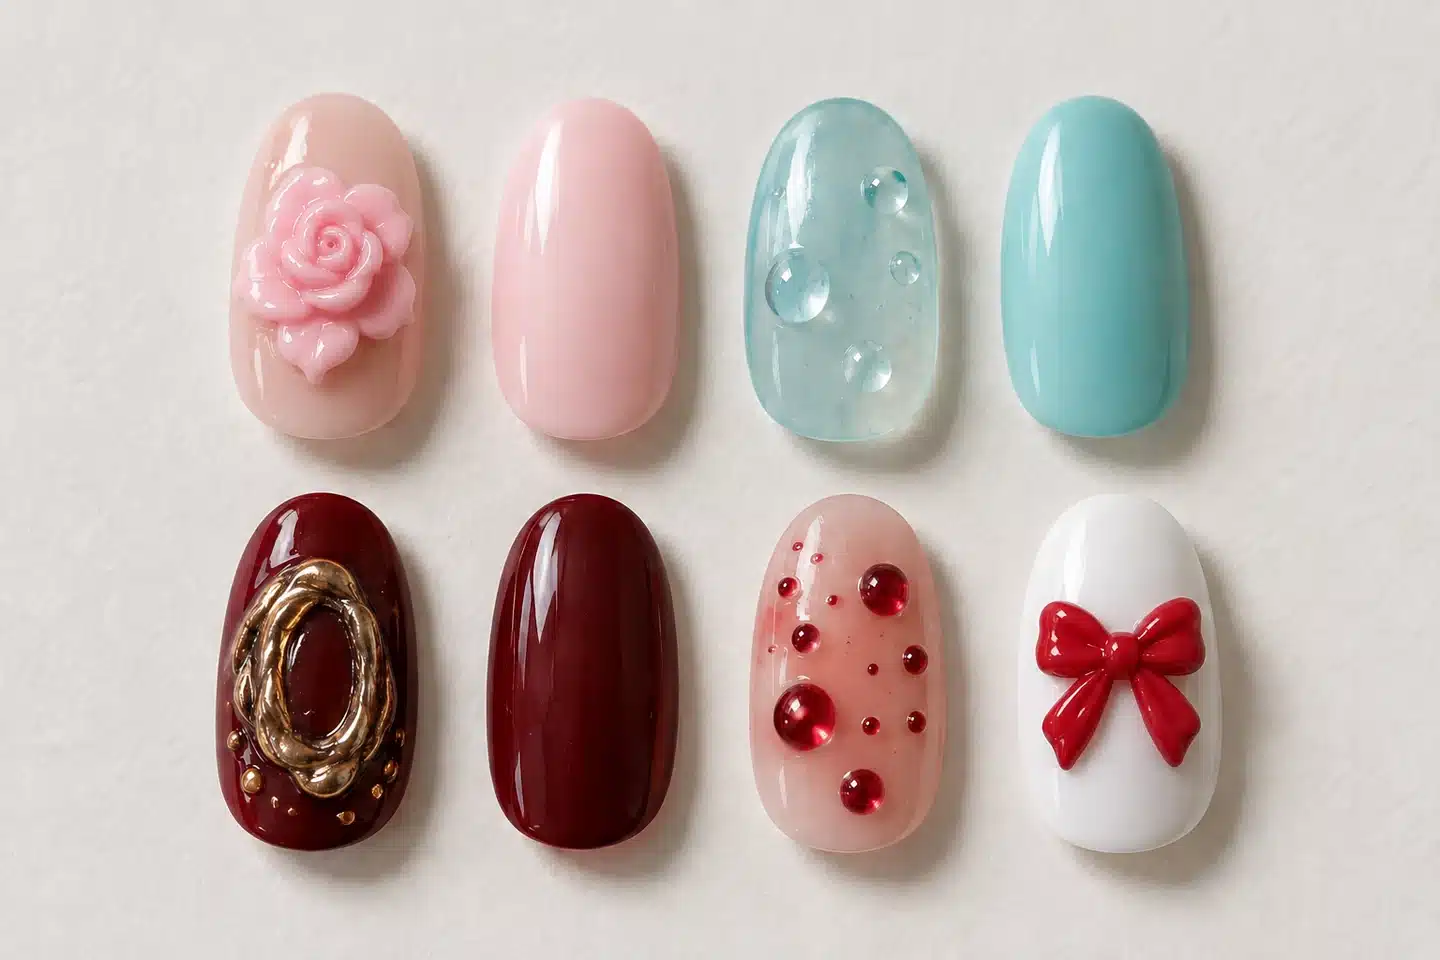
A clear water drop, a sculpted flower or a fine metallic wave can change the character of an entire manicure. The appeal of 3D nail art gel is not simply extra height. It is the ability to add a different surface, a focal point and a recognizable style to an otherwise familiar color.
The challenge is choosing a material that behaves the way the design needs it to. A gel that makes a beautiful rounded droplet may be frustrating when you want a crisp petal. A sculpting texture that holds a bow may not produce a smooth, transparent bubble. Once you understand those differences, product selection and technique become much easier to connect.
This guide brings together 3D gel types, step-by-step design workflows, troubleshooting, salon collection planning and wholesale buying considerations. Whether you are developing your first accent-nail service or a private label nail art range, start with the effect you want to create and build the product system around it.
1. Quick Answer: Which 3D Nail Art Gel Do You Need?
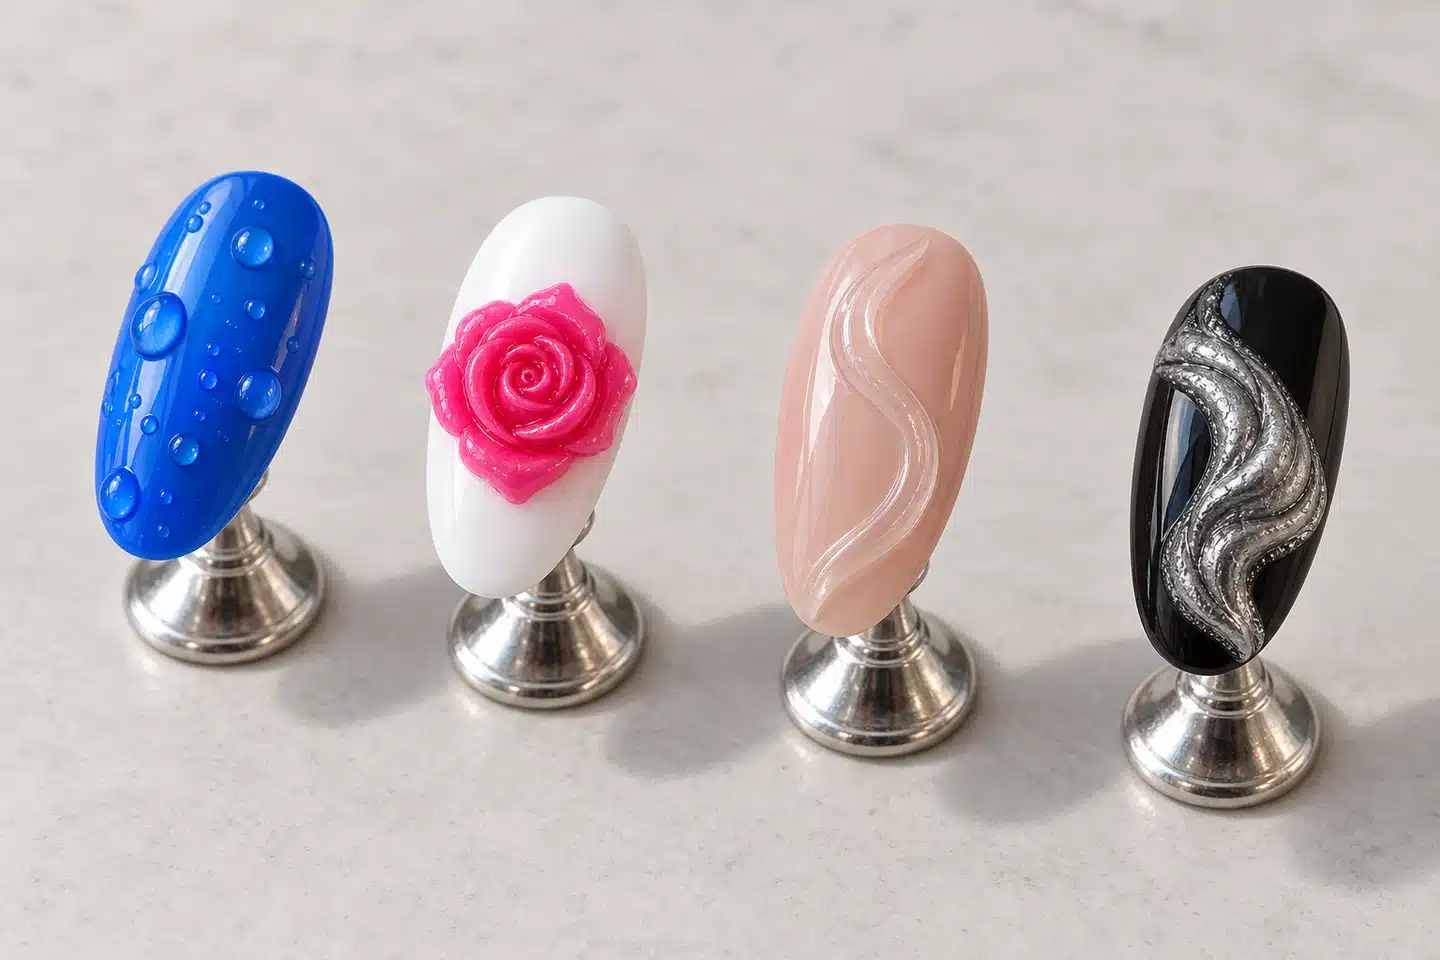
Choose 3D nail art gel by the shape you need it to hold. Rounded drops call for a clear gel with controlled movement; sculpted petals need a texture that can be pressed and shaped; raised lines need a material that follows the tool without flattening too quickly. The name on the pot is a starting point, not a complete description of its behavior.
| Desired effect | Material direction to explore | What to compare on a sample |
|---|---|---|
| Transparent water drops and bubbles | Clear water drop or raised-art gel | Clarity, rounded profile and spread before curing |
| Flowers, bows and shaped petals | Molding, carving or sculpting art gel | Tool release, crease definition and shape retention |
| Raised waves and narrow ridges | Embossing or controlled-line 3D gel | Line width, continuity and control at the ends |
| Metallic relief | Raised-art material with a compatible chrome-finishing system | Surface preparation, powder pickup and sealed finish |
| Attached crystals or ready-made charms | Adhesive intended for the particular embellishment | Attachment method and access for the required cure |
If you are just starting, choose one simple effect and practice it across several nail tips. Repeating the same drop or line reveals much more than making five unrelated designs. You will quickly see whether the material is too mobile, too resistant to the tool or simply unfamiliar.
For a salon collection, the most useful starting pair is often a clear raised-effect option and a shapeable art option, provided each matches your intended services. Add specialized colors and finishes when they introduce a genuinely different result. More pots do not automatically produce a more useful nail art kit.
2. What Is 3D Nail Art Gel?
3D nail art gel is a broad description for light-curable nail products used to create raised decoration. Instead of making only a flat colored layer, the artist builds a visible profile above the nail surface. That profile may be a small glossy dome, a thin ridge, a shaped petal or a more elaborate sculpted detail.
The category contains different textures rather than one universal formula. Some products move under their own weight and settle into rounded shapes. Others stay close to the position in which they are placed. Shapeable materials can respond more like a soft modeling medium, while brush-applied products may be better suited to continuous lines.
Raised art is different from nail structure
In this guide, sculpting refers to decorative shape-making unless stated otherwise. Creating an extension, reinforcing a natural nail and building a decorative flower are different jobs. A product described as sculpting gel may belong to either structural nail enhancement or decorative nail art, so look at its intended use before choosing it.
There is also a difference between sculpting directly on the nail and attaching a pre-made decoration. The first involves shaping the material; the second involves securing an object. Both can produce a three-dimensional manicure, but they need different tools, attachment decisions and removal plans.
For buyers, this distinction makes a catalog easier to understand. Describe the actual application beside the product name: clear drops, shaped petals, raised lines or charm attachment. Customers can then select a function instead of guessing from words such as solid, hard, sculpture or builder.
3. Types of 3D Nail Art Gel Explained
Clear water drop and rounded-effect gels
These are the direction to explore for transparent domes, dew-like accents and glossy raised details. The useful balance is enough movement to create an attractive curve without losing the intended footprint. A sample should be judged from the side as well as from above, because a wide, shallow patch can look like a drop in a photograph but feel quite different on the nail.
Molding, carving and sculpting art gels
These names commonly describe materials used to shape flowers, bows, folds and other defined forms. Compare how easily a tool presses a crease, how cleanly it lifts away and whether neighboring details remain separate. Do not assume that every product sold as solid gel has this function: solid can also describe the packaging texture of a color product.
Embossing and raised-line gels
For waves, outlines and ribbed patterns, the priority is a continuous raised line. You need to control where the line starts, its width through a curve and its finish at the end. A material that works well for a thick abstract band may not be the best choice for fine shell ridges.
Colored and special-finish art gels
Colored sculpting products can simplify the construction of petals or graphic details, while clear materials allow the background to remain visible. Metallic-looking raised art may be created with a dedicated product or a compatible finishing process. Keep these routes separate when comparing results: the photograph alone may not tell you how the surface was made.
The practical question is not which type is universally best. It is which material gives you the intended finish with a repeatable workflow. For a buyer, an application video showing tool contact and the uncured shape can be more useful than another photograph of a closed jar.
4. 3D Art Gel vs Builder Gel, Painting Gel and Rhinestone Glue
Products can look similar in a jar while serving different purposes. Comparing them by thickness alone is misleading. Consider what the product is designed to do, how it is applied and what instructions accompany it.
| Product family | Main purpose | Key distinction for raised art |
|---|---|---|
| 3D nail art gel | Decorative raised forms | Choose a texture suited to the specific shape |
| Builder gel | Overlays or structural enhancement within its instructions | Structural suitability does not automatically make it a carving medium |
| Painting or liner gel | Colored details, strokes and outlines | A visible painted line is not necessarily a stable raised ridge |
| Rhinestone or charm adhesive | Attachment of compatible embellishments | Attachment instructions differ from sculpting instructions |
| Top coat | Surface finish and protection | Not automatically intended for thick decorative shapes |
Can you use builder gel for 3D nail art? Some products may support particular decorative uses, but there is no reliable category-wide yes. A gel selected for leveling an overlay may soften the edges you want to preserve in a petal. Use the intended application and manufacturer instructions to decide, not a social-media shortcut.
The same applies to rhinestone glue. Its ability to hold an embellishment does not prove that it is suitable for an exposed sculpted decoration. Nor should a dense art gel automatically become an adhesive under an opaque charm.
When assembling a complete kit, choose related products for their individual roles: builder gel for the structural side of a service, liner gels for painted outlines and fine details, and rhinestone gels for compatible embellishment attachment. The art material then supplies the raised effect instead of being expected to do every job. A liner gel's ability to paint a fine line does not automatically make it suitable for building a raised ridge.
5. How to Choose Texture, Viscosity, Clarity and Color
A useful product comparison begins with the tool, not the marketing adjective. Words such as thick, easy and professional mean little until you observe the material moving through an actual design. Use a prepared nail tip and a consistent amount so that differences are visible.
Movement and shape retention
Place the same small bead on two tips and watch what happens during your normal working interval. Does it remain compact, relax into a dome or spread toward the edge? This is an application comparison, not a laboratory viscosity measurement. It helps you choose the behavior that fits your pace.
Tool response and detail
Press a shallow petal crease and draw a short curve. Notice whether the material pulls away with the tool, strings between positions or resists shaping. Keep the tool and technique consistent. Changing both the product and the tool at once makes the result harder to interpret.
Clarity, color and background
Test clear gel over both a light and a dark base. Test colored gel on the background you plan to sell with it. A subtle tint that is attractive over nude may be almost invisible over a deep shade. Equally, a strongly colored detail can overpower a miniature design.
Finish matters as much as color. Gloss can emphasize a rounded surface; a restrained matte background can make that same detail stand out. Compare the completed system, including any required finishing step, rather than judging the raw material alone.
For purchasing, turn these observations into a short brief: the intended shape, preferred tool, desired transparency, background colors and typical design scale. This gives a supplier something more useful to match than a request for the thickest gel available.
6. Build Your 3D Gel Selection Around the Design Effect
A well-organized collection lets the customer move from an inspiration image to a practical product choice. Grouping every item under one broad 3D label forces the buyer to do that work alone. An effect-led selection makes both shopping and salon training more straightforward.
Transparent and glossy accents
Begin with water drops, rounded bubbles and clear raised motifs. Show them over at least two backgrounds so the customer can understand the transparency. Include a side view to communicate the profile; a top-down photograph tends to hide how much the decoration projects.
Shaped decorative details
Group flowers, bows and sculpted folds by the type of shaping they require. A beginner should be able to see a simple petal beside a more developed flower, rather than being shown only advanced display work. This helps a retailer explain what can be learned first and what requires more practice.
Lines, texture and metallic relief
Keep raised outlines and ribbed textures together, then show the different finishes that can be applied through a compatible system. This separates the shape-making product from the surface effect without making the buying journey complicated.
When reviewing the JTING nail art gel collection, start with these visual outcomes and build a shortlist around your intended services. A clear drop, an opaque petal and a metallic wave should earn their places through different uses, not simply different packaging.
For a branded range, use the same logic in naming and merchandising. Short benefit-led descriptions such as rounded clear accents or sculpted floral details are easier to understand than an unexplained sequence of product codes. Keep the exact technical instructions with the selected item.
7. Tools and Nail Preparation for 3D Gel Art
You do not need every tool in a catalog to begin. You need tools that let you place a controlled amount, shape it cleanly and keep the work away from skin. A small, repeatable kit is easier to learn than a crowded desk of unfamiliar accessories.
- Dotting tool: useful for placing small rounded amounts and comparing drop sizes.
- Fine art brush: useful for controlled lines and finishing detail when suited to the material.
- Shaping or silicone tool: useful for pressing folds and contours in compatible molding products.
- Practice tips and a holder: allow repeated trials without using a client as the test surface.
- Compatible curing lamp: selected according to the product instructions, not wattage alone.
Prepare the nail and background using the instructions for that system. Decide whether the decorative material is applied to cured color, a prepared finished surface or another specified layer. Cleaning, buffing and wiping are not interchangeable universal steps; the correct surface depends on the materials being combined.
Lay out the intended decoration before opening the pot. Mark the focal area mentally and leave a clear margin around skin and sidewalls. For an accent nail, deciding what stays empty is just as important as deciding where the gel goes.
Keep containers closed when they are not in use and away from the operating lamp. Use tools rather than bare fingers to handle uncured gel. If a technique seems to require repeated skin contact or an improvised solvent to make it workable, revisit the product instructions and tool choice before continuing.
8. How to Use 3D Nail Art Gel: The Core Workflow
The most reliable way to learn how to use 3D nail gel is to repeat a simple process while changing only the design. Practice with a low-profile detail first, then move toward more complex forms as control improves.
- Complete the foundation. Prepare the nail and cure the base and color layers according to their instructions. Establish the surface required for the chosen art gel.
- Plan the footprint. Decide where the decoration starts and ends. On a short nail, reduce its footprint before increasing its height.
- Take a controlled amount. Use a clean tool to place a small portion. Add material only within the product's application limits.
- Shape with purpose. Form the main contour before chasing tiny details. Repeated unnecessary contact can undo an otherwise clean shape.
- Inspect from more than one angle. Check the top view for placement and the side view for unwanted projection or unevenness.
- Cure as directed. Use the specified lamp and schedule for the product and application. Follow any staged-layer instructions.
- Finish the surface. Apply the compatible finishing process without filling the details you worked to create.
For a multi-element design, organize the order so your hand does not brush against uncured work. Separate adjacent details into manageable stages if the product instructions support that workflow. One clean element is a better foundation than a nail covered with shapes that keep merging.
Do not treat a short positioning cure as the final cure. Equally, avoid adding extra bulk because you assume a longer lamp exposure will solve every curing problem. Follow the selected system rather than transferring timings from another product.
9. How to Create Clear Water Drops and Raised Bubbles
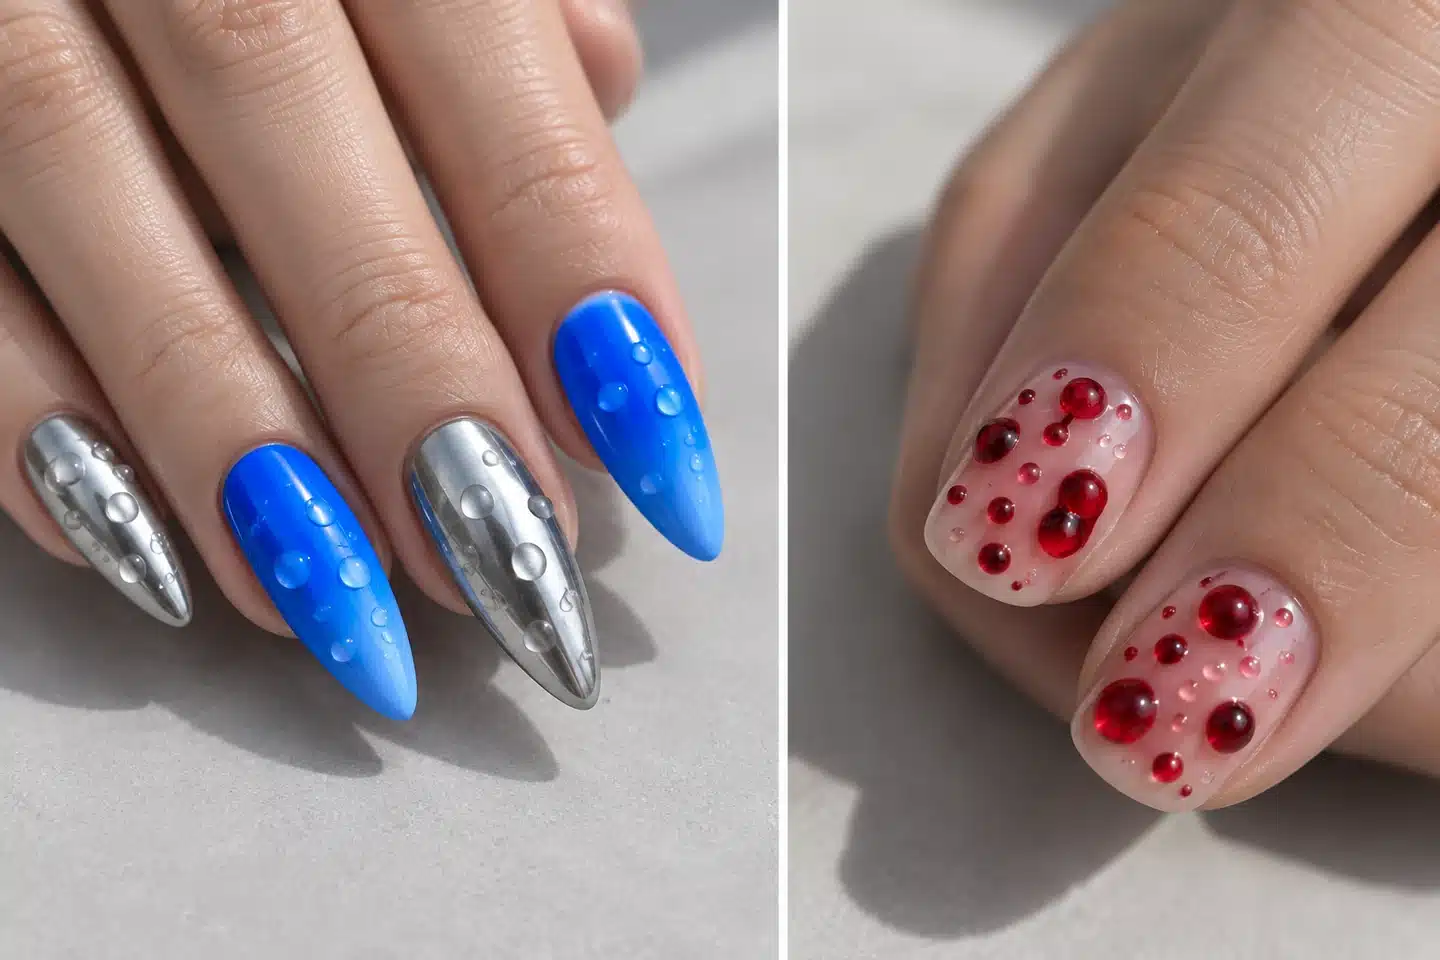
Water drop nail art is a useful first exercise because every decision remains visible: placement, amount, spacing and roundness. It can be delicate over a sheer base or more graphic against a matte background. The most successful version usually relies on a few intentional drops rather than random coverage.
JTING Water Drops Gel: Let the Droplets Form Naturally
For a dewy manicure without individually sculpting every rounded detail, JTING Clear Water Drops Gel offers a self-forming water-drop effect. Used with the matching JTING water drop top coat, the gel naturally forms rounded, raised droplets after application. The product creates the rounded form, leaving you to focus on the placement and overall design rather than repeatedly shaping each bead with a tool.
The transparent finish keeps the background color visible, making this a versatile accent for sheer tints, clean solid colors and coordinated nail art. It is an approachable way to introduce dimensional detail to a salon menu while keeping the visual result fresh and uncluttered.
Use the paired water drop system: the self-forming effect requires the matching water drop top coat. Follow the system's application and lamp-curing instructions; natural bead formation is the shaping stage, not a replacement for curing. For a colored variation, explore the JTING 6-Color Water Drops collection when planning your palette.
Self-Forming Effects vs Individually Placed Drops
These are two different ways to create dimensional water-drop nail art. With the JTING self-forming system, the paired products create the rounded effect. With a conventional placement technique, the artist places individual amounts of a suitable clear art gel. The practice exercise below describes that second approach, not a requirement to manually sculpt the JTING effect.
Build a simple three-drop composition
Prepare a practice tip with the intended background and required surface finish. Place one small drop near the focal area, then two smaller accents at different distances. Keep them far enough apart that their footprints remain distinct during the working interval.
Lift the placement tool deliberately rather than dragging a tail across the base. Watch the profile before curing. If the drop spreads beyond the intended boundary, reduce the amount or select a more suitable material instead of repeatedly pushing the same oversized pool back into place.
View the tip from the side. A rounded, restrained profile can communicate the water-drop effect without making the whole nail bulky. Cure and finish according to the product's directions; some finishes will change the visual edge of the drop, so judge the completed result.
Make the background work for the design
A plain color makes the silhouette easy to read. A sheer tint can create a softer impression. A busy pattern may compete with the drop rather than enhance it. Choose one of those goals before deciding how many accents to add.
For a salon menu, show two versions of the same technique: a minimal accent and a more expressive arrangement. This gives customers a clear choice without requiring a different application system for every photograph. Label the design by effect and placement rather than promising a particular wear period.
10. How to Make 3D Gel Flowers, Petals and Bows
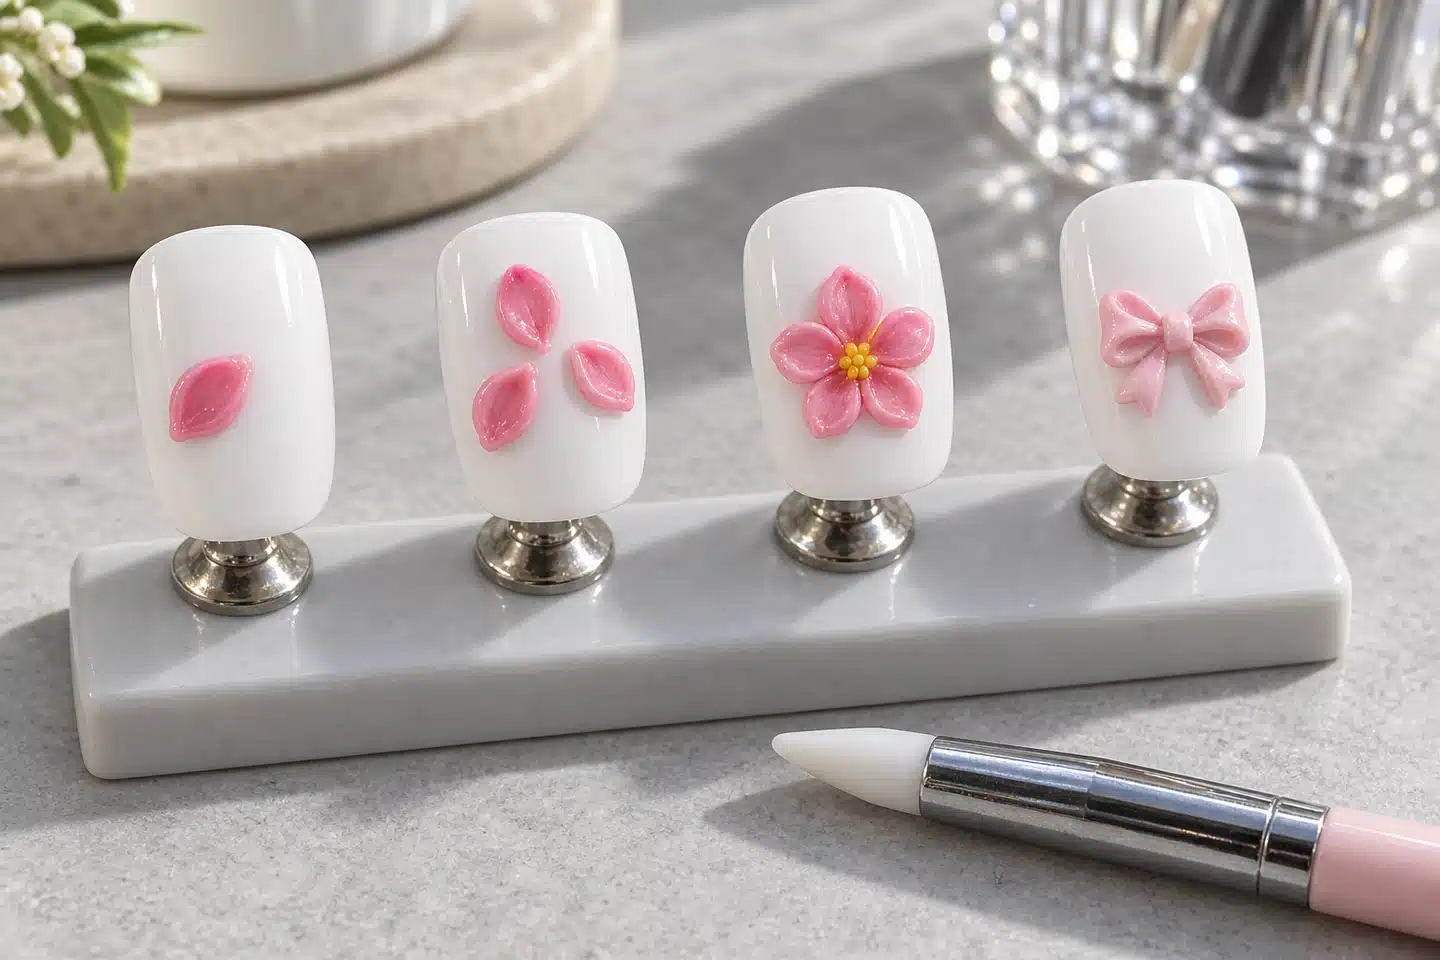
For 3D gel flower nail art, the important skill is controlling the relationship between a raised center and a thinner-looking edge. You do not need a complicated rose to make an attractive floral accent. A few well-spaced petals often read more clearly on a wearable nail.
Start with individual petals
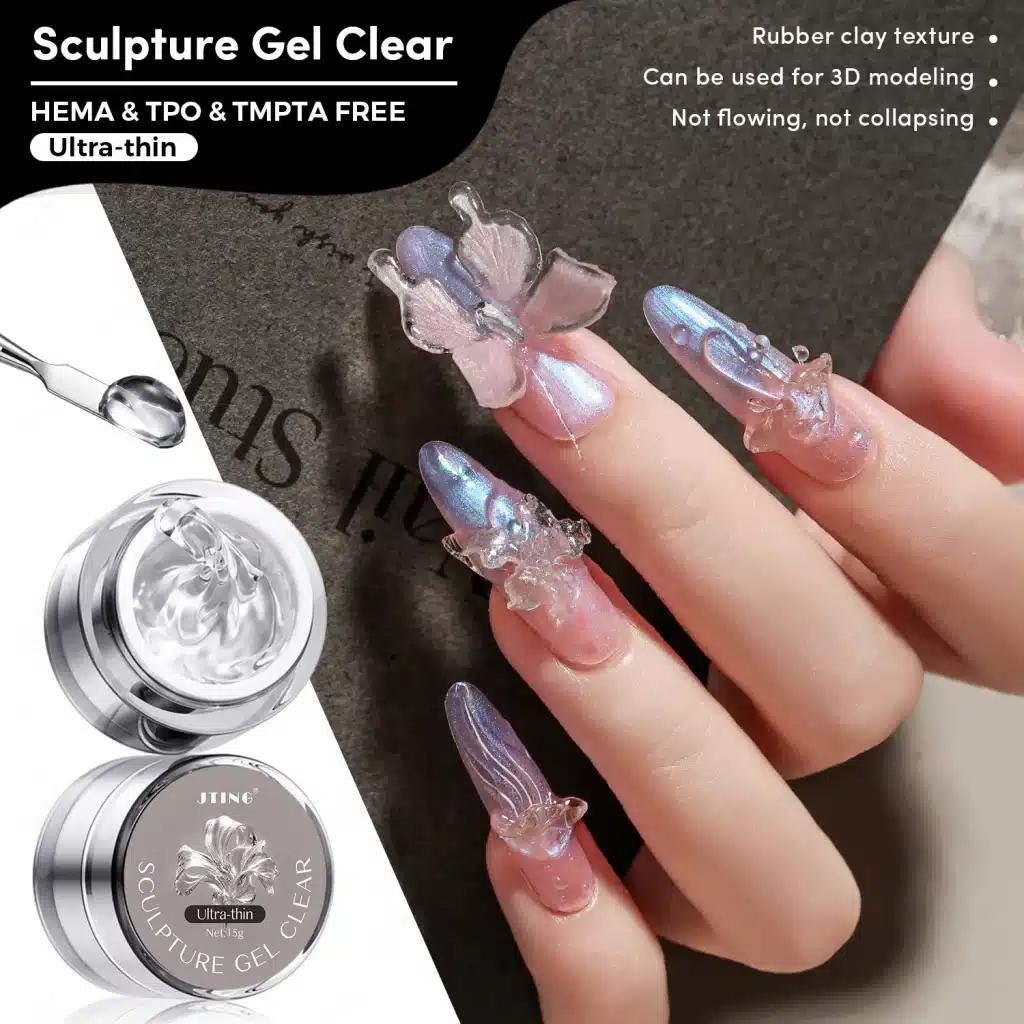
For a white sculpted accent, explore JTING White Sculpture Gel. If color is central to the design, the JTING 12-Color 3D/4D Carving Gel collection provides a colored carving direction for floral and decorative work. Choose the palette to suit the composition: a white flower can provide a clean focal point, while colored petals can carry an entire seasonal theme.
Use a molding or carving product intended for this application. Place a small amount on the prepared surface, establish its footprint and press a shallow contour with the recommended tool. Work within the manufacturer's permitted shape and thickness rather than trying to make an unsupported deep form.
Practice several petals separately before arranging a flower. Compare their size, direction and spacing. Once those become consistent, organize them around an open center. Leave room for the center detail instead of crowding all the material into one high mound.
Move from petals to bows
A bow uses a similar approach to silhouette: two balanced loops, a center and optional tails. Start with a compact relief version rather than tall, projecting loops. Define the separation between the parts so the shape remains recognizable after finishing.
Color contrast can help a small design read clearly. A soft flower on a related background creates a quieter look; a stronger contrast makes the same shape more graphic. Decide whether the flower should be the focal point or an accent before adding leaves, glitter or additional ornaments.
For a collection, prepare a simple flower, a more detailed flower and one bow using the same material. This shows the range of the technique without suggesting that every customer should begin with the most elaborate design. Avoid bare-hand molding of uncured gel, even when a product has a putty-like texture.
11. Raised Lines, Waves and Abstract Sculpted Designs
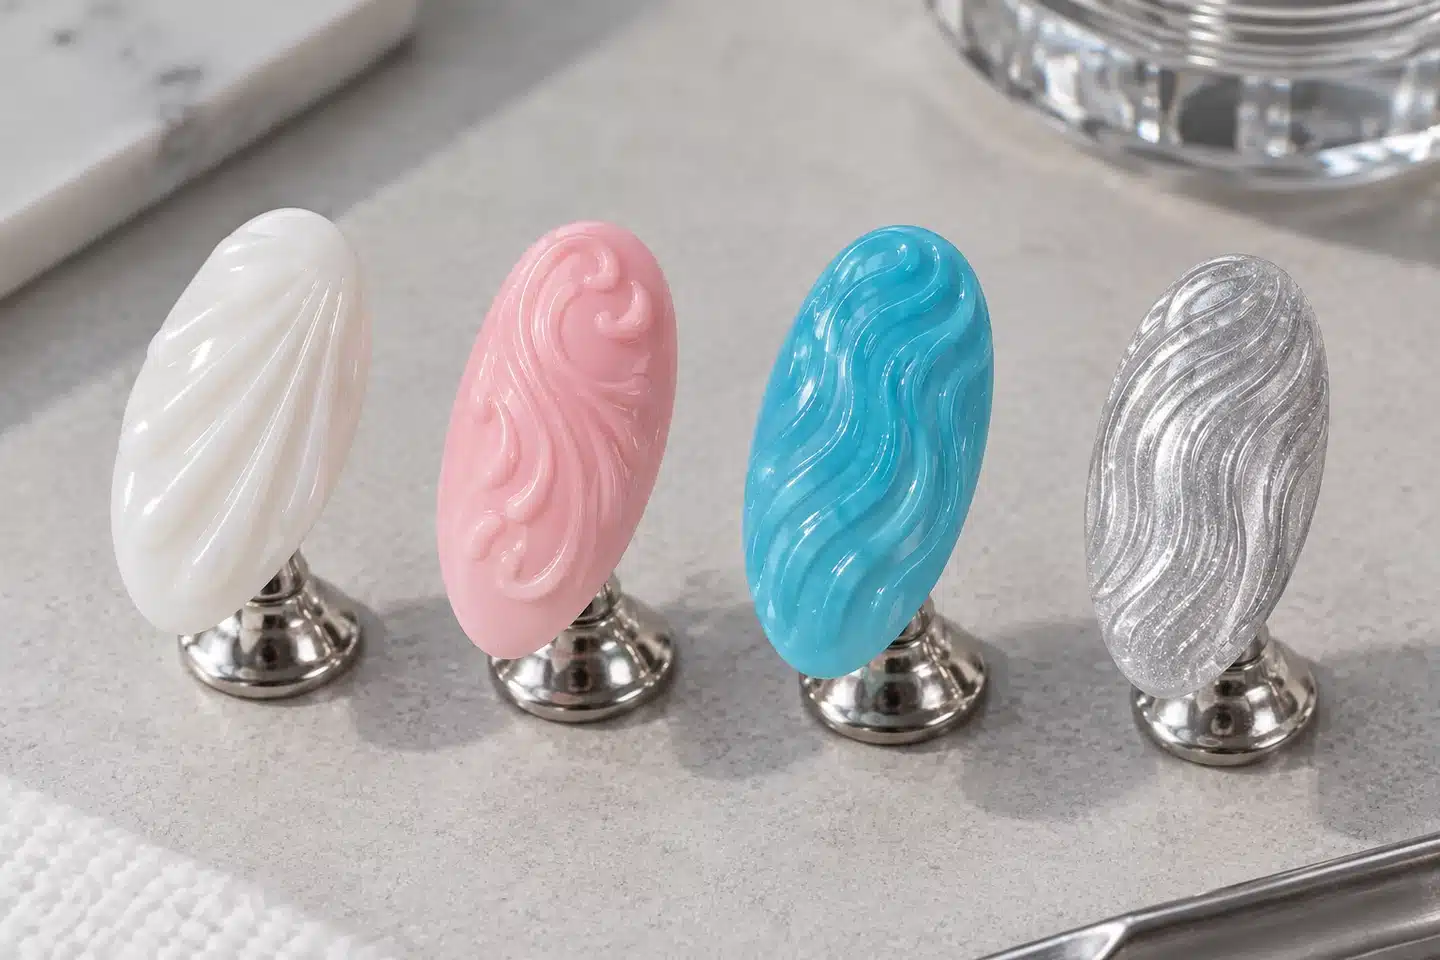
Raised-line nail art can be more restrained than a flower while still looking unmistakably three-dimensional. One curve can follow the side of a nail, frame a French tip or divide two color areas. The design depends on line quality rather than the number of details.
Start on a practice tip with a short, open curve. Use a material intended for controlled raised application and a tool suited to it. Establish a consistent tool angle and amount before attempting a long line. A straight practice stroke helps separate handling problems from the difficulty of the design itself.
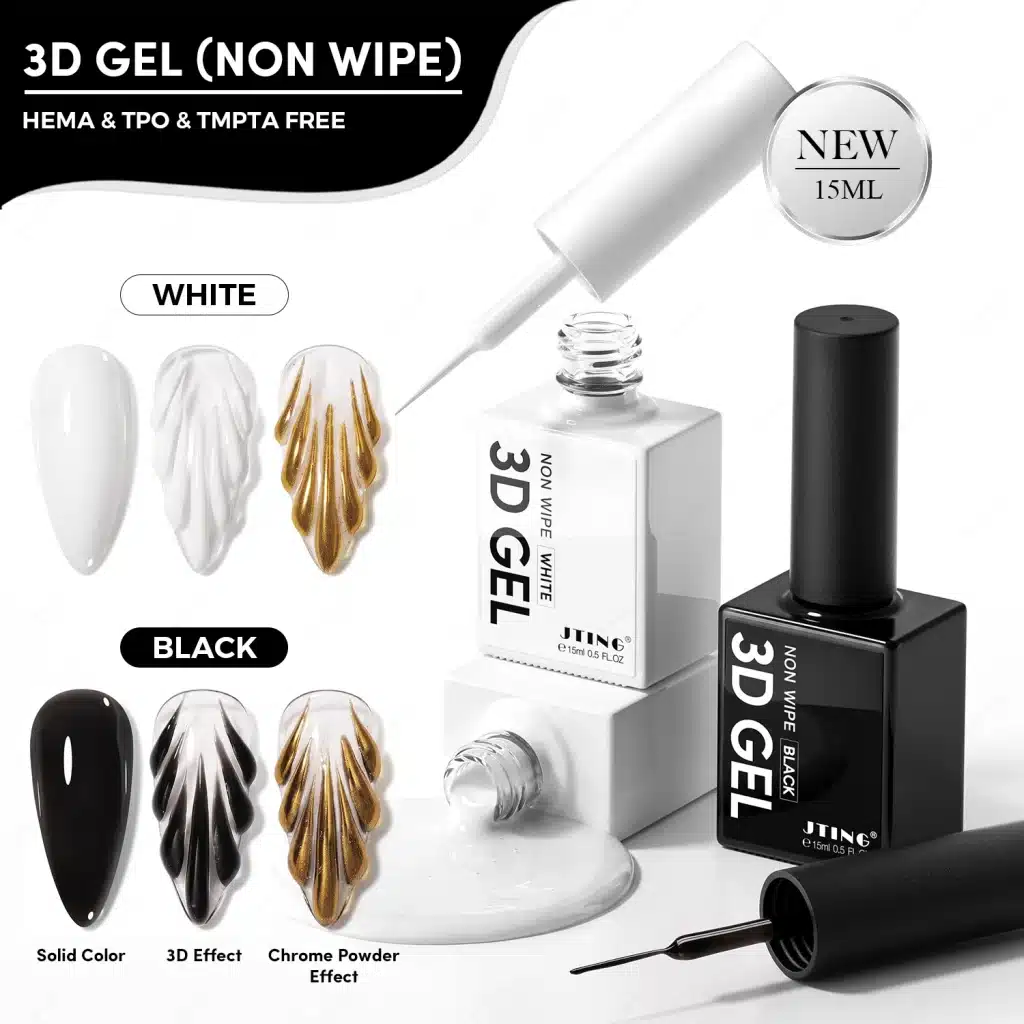
For a transparent raised-line direction, explore JTING Clear 3D Wave Liner and Modelling Gel. A clear curve lets the background remain part of the design, while an opaque embossed line makes the contour itself the focal point.
Control the beginning and the end
An oversized starting bead and a trailing end can make a narrow line look untidy. Practice placing the initial amount slightly inside the intended path, then shaping the boundary deliberately. Do not run the ridge onto the skin or create a projecting end at the free edge.
For abstract waves, use one dominant curve and a smaller supporting detail. Parallel lines should keep enough separation to remain distinct after finishing. If the surface becomes crowded, remove a line from the plan rather than trying to shrink every gap.
Height and visual weight are different. A broad raised band may dominate the nail even when it is not particularly high. A thin metallic line may attract attention through reflection alone. Plan the effect in relation to the background instead of increasing bulk to make the design noticeable.
This is a useful family for a salon sample board: a single side wave, a double curve and a raised French outline. Customers can understand the progression immediately, and the artist can offer several looks while refining the same core handling skill.
12. Seashell and Ribbed Nail Art Designs
Seashell nail art uses a repeated line pattern to create a recognizable surface. The design can be literal, with radiating shell ridges, or abstract, with parallel ribs that catch the light. A subtle pearl-toned background is one option, but the same structure can work in opaque, transparent or metallic styling.
For a colored relief palette, explore the JTING 12-Color Non-Wipe Emboss Gel collection. Consider whether the raised lines should blend with the background for a tonal texture or stand out as a contrasting pattern.
Plan the ridge pattern first
Choose the point from which the ridges will fan outward. On a practice tip, imagine the center ridge first, then distribute the others to either side. Starting at one edge and filling the remaining space often leaves the final ridges crowded.
Use a product suited to raised lines. Keep the footprint of each ridge controlled and the gaps visible. If adjacent ridges merge before curing, adjust the material amount and working sequence in line with the instructions. Do not compensate by making every ridge progressively taller.
Check the result under ordinary room light as well as a close-up lamp. The purpose of the texture is to remain readable outside a magnified photograph. A few clear ridges may work better on a short nail than an intricate fan that disappears at normal viewing distance.
Use decoration selectively
A small pearl-like accent or a contrasting outline can finish the composition, but it should not hide the ridge work. Where an actual embellishment is attached, use the correct attachment system rather than assuming the sculpting material also functions as adhesive.
For a non-seasonal version, present the same technique as a ribbed accent rather than a beach-themed nail. Changing the palette and placement extends the value of the technique beyond one summer collection.
13. How to Create 3D Chrome Nail Art
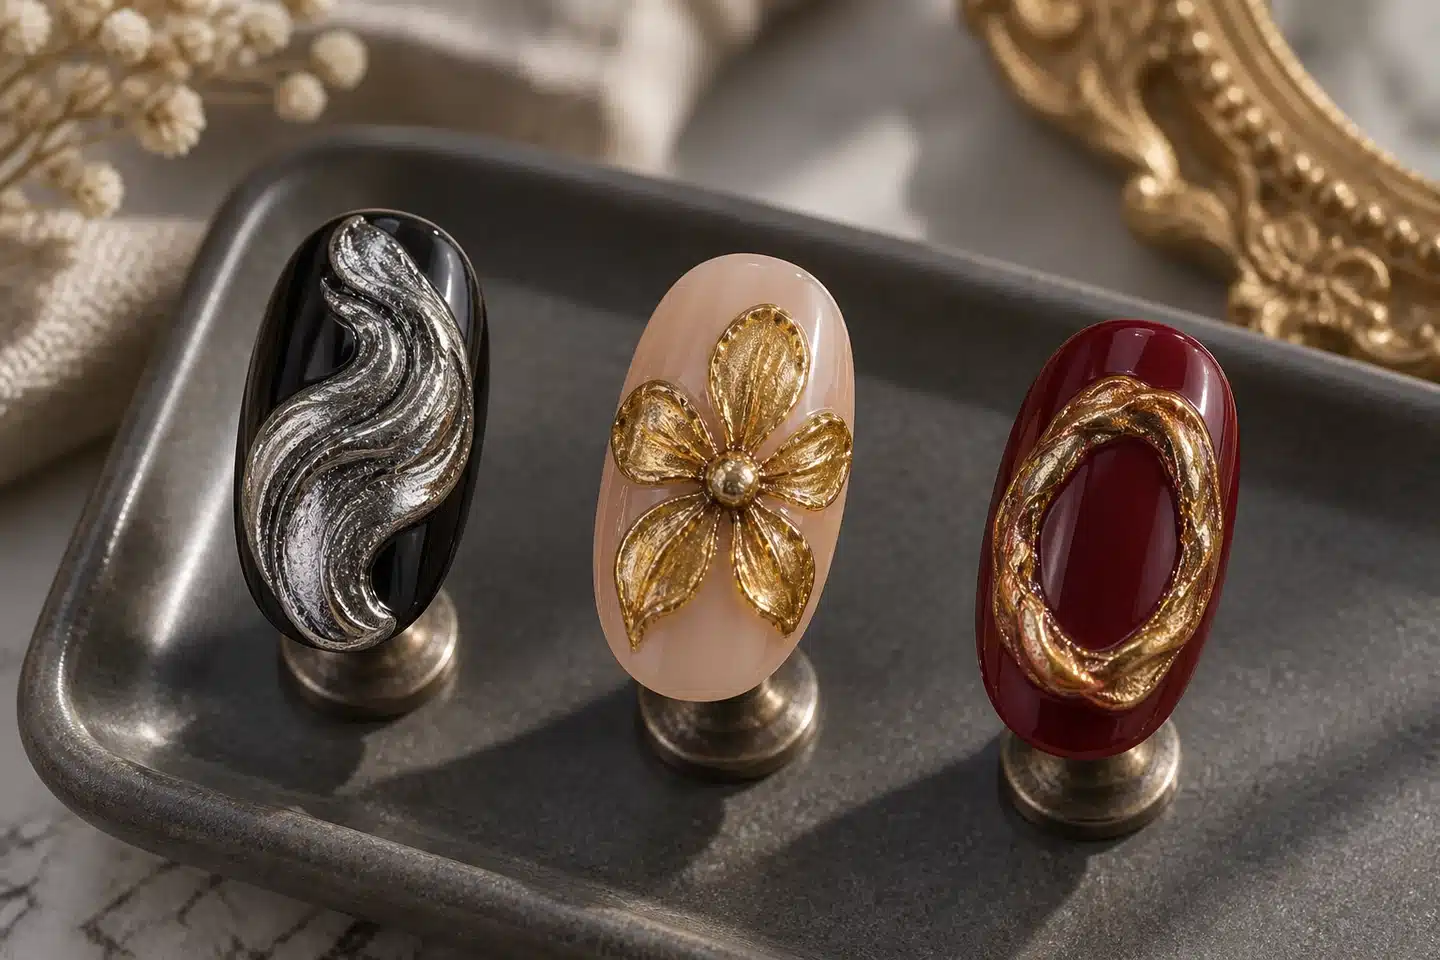
3D chrome nail art combines two separate decisions: the raised shape and its reflective surface. Keeping those decisions separate makes the process easier to troubleshoot. A clean metallic finish will not rescue a poorly controlled ridge, and a well-shaped ridge can still look patchy if the finishing system is unsuitable.
First create the raised design with an appropriate art material and complete its required cure. Then follow the compatible chrome system's instructions for the receiving surface, powder application and sealing. Some systems use a separate finishing layer; others have a different intended sequence. Do not shorten the art gel's required cure merely to encourage powder adhesion.
Keep chrome where you want it
For selective chrome, plan how the background and the raised detail will be treated before beginning. Use the surface preparation and cleanup process specified for the finishing products. Apply the powder carefully and remove loose excess before sealing so it does not turn the surrounding base into an unintended shimmer.
A narrow reflective outline can be particularly effective over a soft base because the contrast comes from finish rather than a large color difference. For a stronger look, use a broader sculpted wave as the focal point and keep the rest of the manicure simpler.
When sealing, preserve the line separation and contours. Pooling a finishing layer into every groove can reduce the definition of the original work. Test the entire process on a sample tip so the finished appearance, not just the freshly rubbed powder, becomes the reference.
A Separate Route: Metallic Modeling Gel
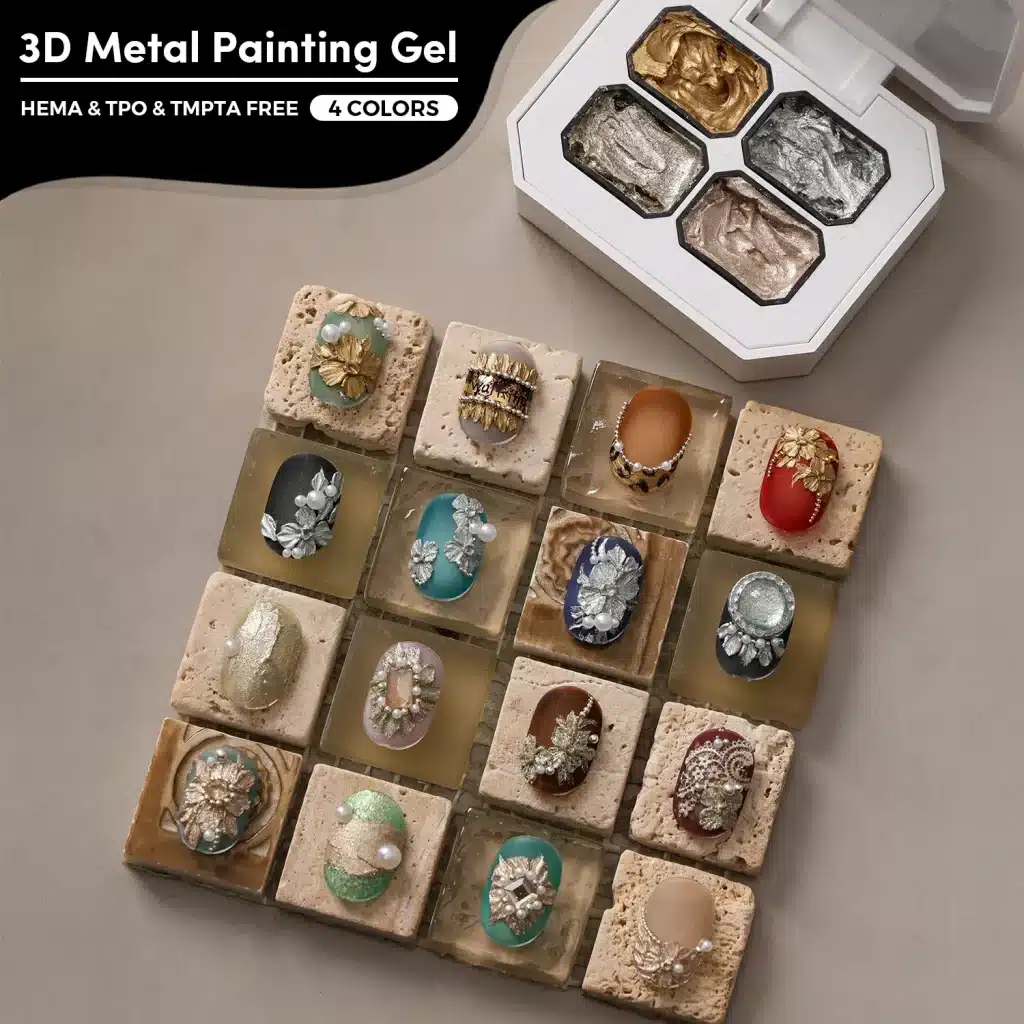
When planning a metallic design collection, distinguish a chrome powder finishing process from a gel that already has a metallic appearance. JTING 3-Color Metal Solid Modeling Gel offers a metallic modeling direction for sculpted accents. Treat it as a separate product route, not as an instruction to add chrome powder. Compare the complete workflow and final surface rather than assuming that similar-looking sample photographs show an identical technique.
14. Curing and Finishing 3D Gel Designs
Raised art adds another variable to a gel service: the shape is not a uniform thin coating. The application method, amount, color and access to the lamp all matter. Keep the product's stated limits and lamp requirements beside the design instructions rather than treating curing as an afterthought.
Use the selected product's instructions
There is no single curing time that covers every 3D gel, every color and every raised shape. A lamp's advertised wattage alone does not establish compatibility. Use the recommended system and do not assume that a hard-feeling surface proves that every part of a bulky design has cured as intended.
Build only the forms supported by the product's application guidance. Where a layered process is specified, complete each required stage. A dense decoration or an opaque object can complicate access to light; do not rely on extra exposure time as a substitute for an appropriate construction method.
Choose a finish that preserves the design
Some art systems require a separate finishing layer and others have their own surface instructions. When a top coat is used, apply it with attention to the contour rather than flooding the decoration. Inspect grooves, borders and the transition to the background.
Keep uncured product off skin and do not proceed over irritated or damaged skin. If a client experiences discomfort during the service, stop and assess rather than asking them to tolerate it. These are basic working practices, not reasons to make the design visually timid.
For collection development, provide one clear instruction set for each selected product. A beautiful sample becomes more useful when a salon can reproduce it with the intended lamp, application method and finishing products.
15. 3D Nail Art Ideas for Short Nails and French Tips
Short nails do not need a miniature version of every long-nail design. They benefit from a different composition. One raised detail with room around it can look more deliberate than a full nail covered with tiny competing objects.
Low-profile accents for short nails
Try a small cluster of clear drops, a single petal arrangement or one open wave. Keep the focal area inside the nail boundary. View the nail with the fingers relaxed, not only stretched into a photographic pose, to judge the real balance of the manicure.
Let the base color remain part of the design. A nude, translucent or simple opaque background creates breathing room around a raised feature. If the background already includes a strong pattern, simplify the sculpted element instead of adding another detailed layer.
Raised French details
A 3D French nail can use a small sculpted accent near the smile line, a controlled border or a wave that echoes the curve of the tip. It does not need a thick ridge projecting over the free edge. Keep the design within a comfortable profile and follow the art product's application limits.
Across a full set, repeat a visual element rather than covering every nail identically. For example, use one sculpted accent, two quieter line details and plain supporting nails. This produces a coordinated manicure without making all fingers compete for attention.
For a salon or retail sample board, photograph the same idea on a short and a longer tip. Customers will understand what changes with scale, and the collection will feel more accessible than a display made exclusively from long exhibition nails.
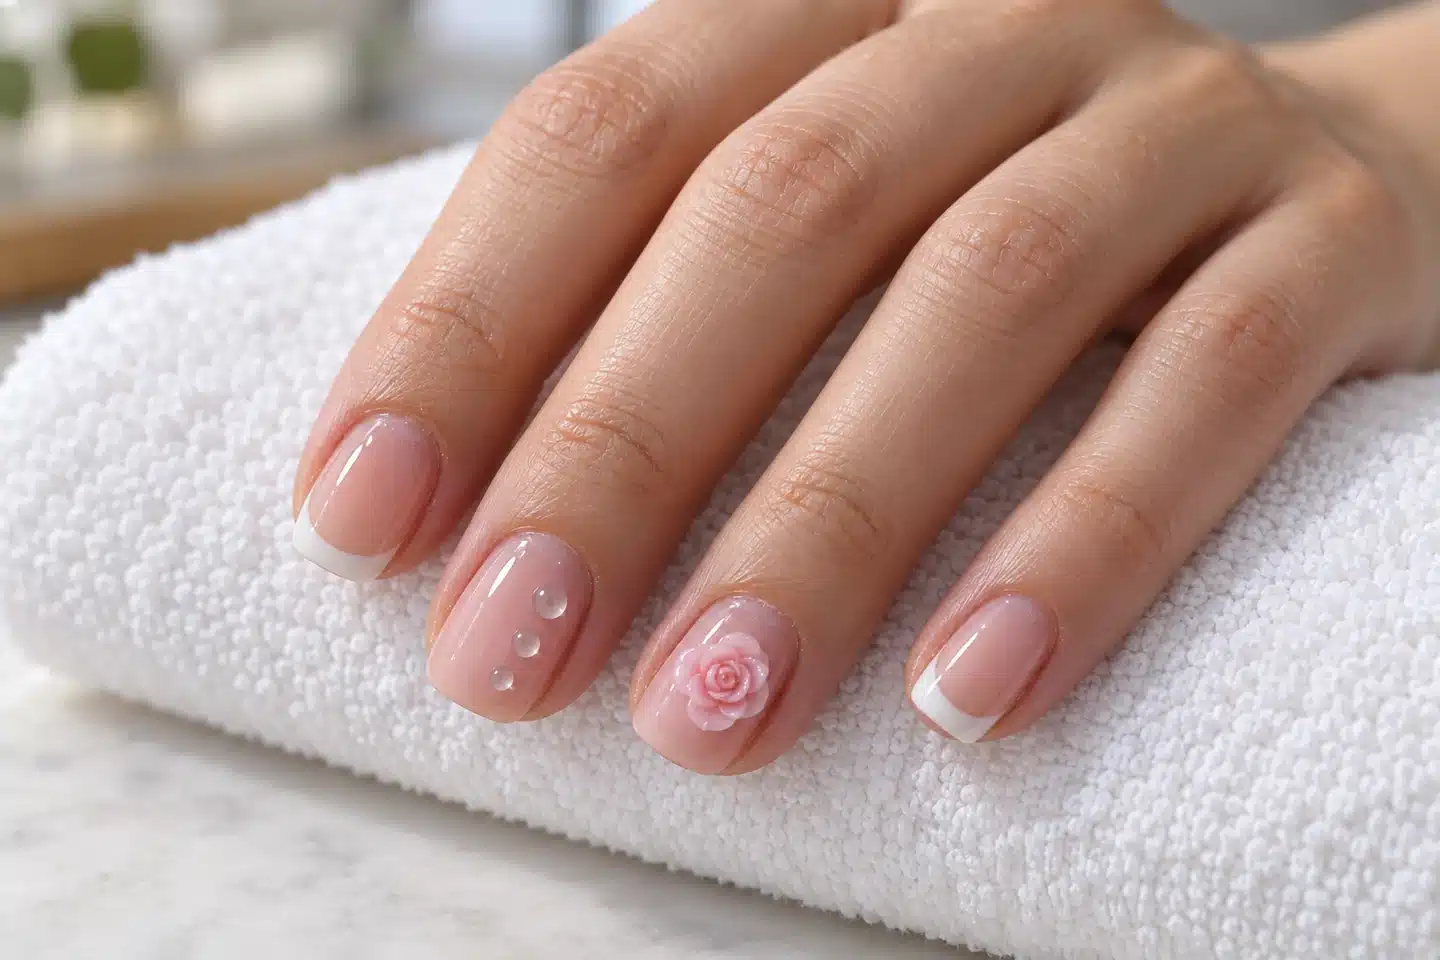
16. Jelly, Cat Eye and Chrome Bases for 3D Designs
The background determines how a raised detail is perceived. A transparent dome over a flat color, a sheer tint or a magnetic effect can look like three different designs even when the shape is unchanged. This makes background pairing one of the most efficient ways to expand a small art collection.
Jelly and sheer color backgrounds
Sheer color leaves visual space for clear raised accents. Choose the background depth intentionally: a very light tint gives a quiet result, while a richer translucent color creates stronger contrast at the decoration's edge. Avoid building unnecessary layers simply to make the base darker; use a color product that fits the desired finish.
Cat eye backgrounds
A magnetic background already contains movement and a focal area. Decide where that effect should sit before adding the raised decoration. A small clear accent or a restrained metallic line may complement it better than a dense opaque flower that hides the underlying pattern.
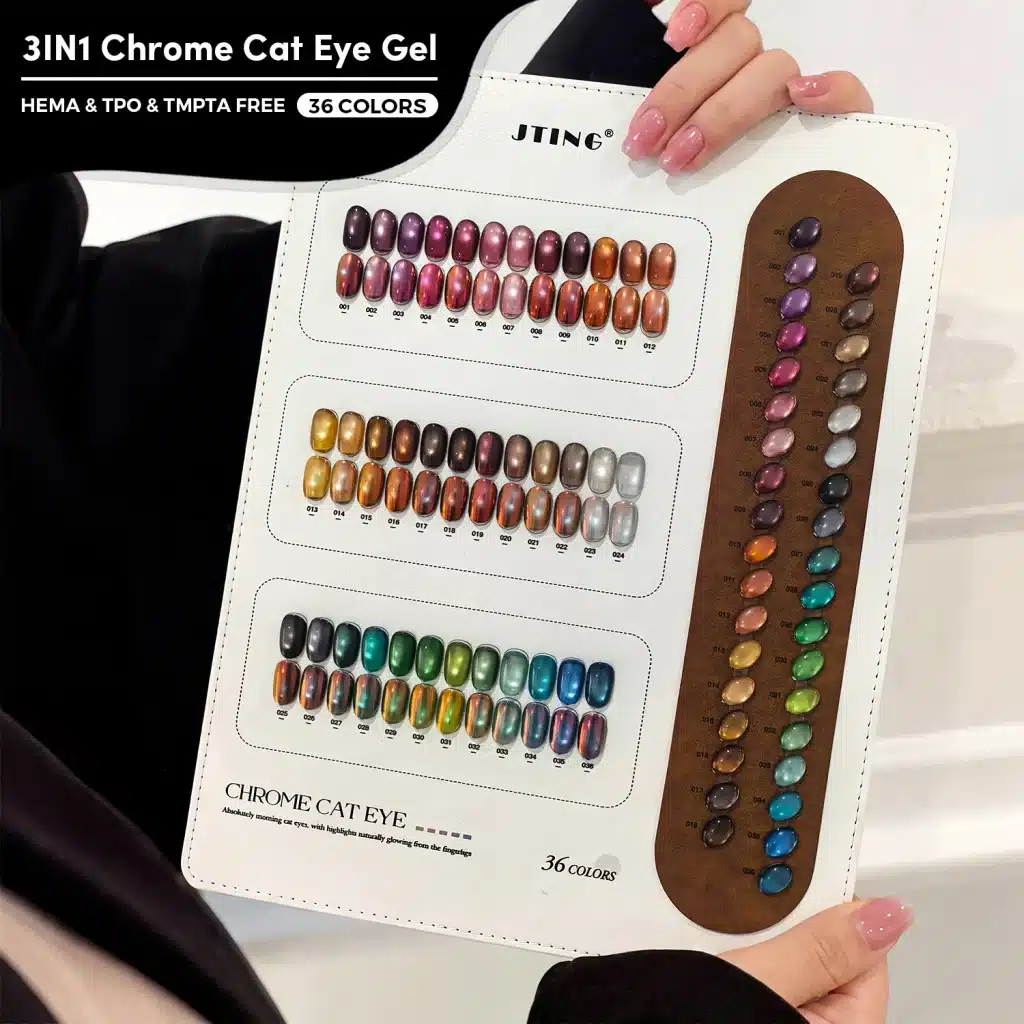
Explore the JTING cat eye gel category when planning coordinated backgrounds. Establish and cure the magnetic color effect according to its own instructions before moving to the art stage.
Plain and reflective backgrounds
On a chrome-like or highly reflective base, contrast can come from a soft-colored sculpted detail. On a plain base, contrast can come from a reflective ridge. Using both intense reflection and complex sculpture everywhere can make the design harder to read.
Choose a leading effect and a supporting effect. For a retail bundle, show the base and the art material together on an actual sample tip, with clear application order. This is more helpful than grouping products only because their packaging colors look coordinated.
17. Seasonal and Occasion-Based 3D Nail Collections
Seasonal collections work best when the technique remains manageable and the palette does the seasonal work. You do not need an entirely new sculpting method for every launch. Keep a few repeatable forms and change their colors, spacing and supporting backgrounds.
| Collection direction | Design language | Useful product pairing |
|---|---|---|
| Fresh spring | Small petals, soft bows and open compositions | Shapeable art material with pastel or nude backgrounds |
| Transparent summer | Clear drops, waves and shell-inspired lines | Clear raised-effect gel with sheer color |
| Autumn texture | Restrained relief and warm or deep color contrasts | Controlled-line material with brown, plum or olive backgrounds |
| Holiday detail | Small stars, ribbons and reflective accents | Shaped art plus a compatible metallic finish |
| Bridal styling | Low-profile flowers and pearl-toned details | Soft-colored sculpting material with a quiet base |
These are design directions, not a requirement to carry every color or shape. A compact launch can use one leading motif, a few supporting colors and a simpler version for customers who prefer subtle nail art.
Plan holiday releases around customer preparation time rather than the event date alone. A distributor needs time for samples, photography, training and delivery before salons start promoting appointments. An attractive concept that arrives too late can be harder to sell than a simpler collection launched at the right time.
Keep a non-seasonal version of your strongest designs. A ribbon does not have to be exclusively festive, and ribbed relief does not have to be exclusively beach-themed. This gives remaining inventory a natural place in the continuing range rather than forcing every item into a short-lived theme.
18. Common 3D Gel Problems and How to Fix Them
When a design fails, identify the first point at which it changed. A drop that spreads before curing is a different problem from a decoration that separates after finishing. Keeping those moments separate helps you make a useful adjustment rather than changing the entire system at once.
| Problem | What to investigate | Practical next step |
|---|---|---|
| The shape flattens before curing | Material behavior, amount and working interval | Repeat a smaller test shape; compare an art texture suited to that profile |
| Material follows the tool | Tool type, pressure and lift direction | Use the recommended tool and practice one consistent shaping motion |
| Clear drops contain visible bubbles | How the material is collected and placed | Reduce repeated stirring or folding; compare a fresh controlled application |
| Petals lose their definition | Initial spacing and finishing-layer amount | Leave clearer gaps and prevent finishing product from pooling in grooves |
| A raised detail separates | Surface preparation, compatibility and contact footprint | Review the application sequence before repeating the service |
| Chrome looks patchy | Receiving surface, application sequence and loose powder | Test the complete compatible finishing system on a practice tip |
| Cure quality is uncertain | Product instructions, lamp and shape limits | Stop using that application on clients until the supplier's guidance resolves it |
| The decoration catches during wear | Projection, placement and sharp contours | Redesign as lower relief with a better-contained outline |
Do not solve every handling problem by adding an unapproved liquid, powder or another gel. That changes the material you are trying to understand. If a technique requires a shaping medium, use only what the product instructions specify.
For systematic practice, photograph the uncured shape, the cured shape and the finished shape. Those three views often reveal whether the problem began during placement, curing or surface finishing. Keep the base, tool and working conditions consistent while testing one change.
19. Wear, Aftercare and Removal
A 3D manicure should be planned for the person wearing it. Someone who regularly wears gloves or works extensively with their hands may prefer a small, contained accent to a projecting sculptural feature. Discuss shape and placement before choosing the most dramatic reference image.
Inspect the completed design for uncomfortable edges and areas likely to catch. Keep decorative projections away from places where they interfere with normal movement. A visually bold result does not require every detail to stand high above the nail.
Aftercare that fits the service
Advise clients not to pick at raised details or use their nails to pry objects open. If a decoration lifts or becomes uncomfortable, arrange an assessment rather than encouraging the client to pull it away. Lifting should not simply be hidden beneath fresh material.
How to remove 3D gel nails
The removal method depends on the actual products, not the word 3D. Some systems include soak-off materials; others require professional file-off removal. A mixed-material design needs a removal plan for its different layers and any attached embellishments.
Do not tear, peel or lever off a raised feature. Follow the manufacturer's removal instructions and use professional assistance where filing or complex embellishment removal is required. Keep the natural nail protected rather than treating speed as the main objective.
For a retail or private label range, include removal information alongside application instructions. Customers should know the service implications before purchasing. A clear removal route is part of a complete product offer, just as the shape and finish are.
21. How to Build a 3D Nail Art Gel Collection
A collection should make the next purchase obvious without making the first purchase overwhelming. Begin with the customer's skill level and most likely design requests. Then choose products that introduce new functions rather than slight variations that are difficult to explain.
| Collection level | Suggested focus | Supporting materials |
|---|---|---|
| Starter selection | One clear raised effect and one simple shaped effect | Essential tools, practice tips and clear instructions |
| Salon working range | Drops, flowers and controlled-line designs | Coordinated background colors and compatible finishing products |
| Creative specialist range | More detailed sculpture and multiple finishes | Additional textures, focused color choices and advanced sample designs |
| Retail seasonal set | One recognizable motif with several wearable variations | Color story, packaging and easy-to-follow sample references |
Separate essential items from optional creative additions. A beginner should not have to buy a large decorative assortment before learning a controlled drop or petal. An experienced artist, on the other hand, may value texture differences more than another set of similar colors.
For distributors, organize shelf information around function and experience level. Put a finished sample beside the material and show the recommended tool. This makes the product easier for staff to explain and reduces dependence on technical jargon.
Think about replenishment when designing kits. The clear base material may be used differently from a niche seasonal color. Make it possible for customers to reorder working essentials without buying the entire set again.
A coordinated range can also draw from gel nail polish color collections and base and top coat options. Select the actual compatible combination during sampling rather than assuming every product in a category forms one system.
22. How to Evaluate Samples Before a Wholesale Order
A useful sample test recreates the way the product will be sold and used. Asking only whether a gel is thick or clear leaves too much unanswered. Give each shortlisted material a small set of relevant tasks and compare the completed results.
Use an effect-specific sample board
For a clear raised-effect material, compare a single drop and a small arrangement over light and dark backgrounds. For a carving material, compare a simple petal and a compact flower. For a line product, compare a short curve and a repeated ridge pattern. Do not reject a product for failing a task outside its intended use.
Record the product, background, tool, lamp and instructed application sequence. Keep a reference image for the target effect. If more than one person tests the material, have them use the same task before collecting broader creative feedback.
Compare handling and finished appearance separately
A product can create an attractive sample but require a workflow that does not suit your customers. Note how easy it is to control the amount, place the material and repeat the shape. Then separately judge clarity, contour, color and finishing compatibility.
Review packaging as part of the test. Can the intended tool access the product comfortably? Does the closure remain clean during normal use? Is the label readable when several products are arranged together? These details affect daily usability even when the gel itself performs well.
Before bulk approval, agree on the selected sample and the essential acceptance points. Keep an approved physical sample and the matching product information. A reference makes repeat discussions about color, handling or packaging more concrete than relying on memory or differently lit photographs.
23. Private Label 3D Nail Art Gel with JTING
A distinctive 3D nail art range starts with a clear customer use case. You might be building an accessible salon accent collection, a texture-focused professional range or a seasonal retail kit. That decision should guide the material direction, color selection, packaging and supporting design examples.
JTING supports private label development across product performance direction, coordinated colors, labels and packaging. For a 3D art project, bring the discussion back to the designs: the shape you want to retain, the transparency you want to show and the tool handling your customers expect.
Turn inspiration into a development brief
Share several reference designs and explain what you like about each. Separate the shape from the finish: a metallic wave may involve a raised material and a finishing system, while a clear drop depends heavily on the material's own visual appearance. This helps focus sampling on the right characteristics.
Packaging should follow the working method. Tool access, product identification and closure are practical decisions, not just visual choices. Match the label and collection name to the function so a customer can distinguish a shaping product from a painting or finishing product at a glance.
JTING can support packaging mockups, color-chart planning and product photography or video as part of brand development. Use those assets to explain the range consistently: show the material, the tool action and the finished effect rather than relying on a bottle image alone.
Explore JTING private label and OEM/ODM development to plan your collection. Bring your target market, intended effects and packaging direction so the sample brief connects directly to the product you want to launch.
24. Wholesale Ordering, Packaging and Replenishment
Wholesale 3D nail art gel buying becomes easier when each item has a clear role. Before comparing quotations, list the selected product type, colors, pack size, packaging, artwork and sample requirements. Quotes based on different combinations are not directly comparable.
Define the first order
Separate core items from optional additions. A focused first order can establish demand for the main effects before expanding into many specialized colors. For private label work, confirm the MOQ for the selected art material and packaging rather than applying a general gel nail polish minimum to every format.
Build the schedule backward from your intended launch. JTING's typical standard sample timing is 7-10 business days; custom color or exclusive formula development typically takes 2-4 weeks. Bulk production is typically 15-20 days after sample and packaging approval. Use those as planning starting points and confirm the schedule for the selected project, including delivery.
Prepare packaging and product information together
Have the product name, intended use, application instructions, removal route and target-market information ready before artwork approval. A well-designed label should not force important instructions into unreadably small text. Outer packaging or accompanying instructions can carry additional information where appropriate.
For documents, ask for the materials relevant to the selected formula and destination, such as ingredient information, SDS or applicable product assessment support. Include these requirements in your sampling brief so product selection and launch preparation can move forward together.
For replenishment, track actual item-level demand instead of reordering every set in the original ratio. Keep your approved samples and packaging references available, and distinguish a routine repeat order from a requested change in texture, color or presentation.
25. Frequently Asked Questions About 3D Nail Art Gel
What is the best 3D nail art gel for beginners?
The best starting choice matches one simple effect. For clear drops, look for controlled rounded application; for flowers, choose a shapeable art material with clear instructions. Practice on tips with the intended tool and lamp before offering the design as a service. A product that is easy for one effect may not be ideal for every other technique.
Is 3D sculpting gel the same as builder gel?
Not necessarily. Sculpting can describe decorative shaping or structural nail enhancement. Check the intended use. Builder gel is selected for an overlay or extension application within its instructions, while decorative sculpting gel is selected for forms such as petals and bows. Similar names do not establish identical functions.
Can I use rhinestone glue as 3D gel?
Only use an adhesive for decorative shaping if its manufacturer explicitly supports that application. Holding an embellishment and forming an exposed raised design are different uses. Choose an art material for the shape and an attachment system for the charm rather than treating thickness as proof that they are interchangeable.
What gel is used for 3D flowers on nails?
A molding, carving or sculpting art gel intended for shaped decoration is a useful direction to explore. Compare petal definition and tool response on a sample. Start with a compact flower and a clear gap between petals before moving to more intricate forms.
How do you make water drop nails?
You can use a self-forming system or place individual drops with a suitable clear art material. JTING's self-forming water-drop effect requires its matching water drop top coat, allowing rounded droplets to form naturally after application. Follow the paired system's application and curing instructions. For manually placed drops, control the amount and spacing before curing as directed.
Does 3D nail gel need a top coat?
Follow the selected product's finishing instructions. Some systems require a separate finishing layer, while others have a different surface process. Where top coat is used, preserve the contour and avoid filling the spaces between petals or ridges. Do not assume that every clear art gel is itself a top coat.
How long do you cure 3D nail art gel?
Use the time, lamp and application limits specified for that product. There is no category-wide curing schedule. A short positioning cure is not automatically the final cure, and extending exposure does not justify an unsupported thick shape.
Why does my 3D gel flatten?
The material may be too mobile for the intended shape, the amount may be excessive or the working interval may not suit the technique. Compare a smaller controlled application on a practice tip. If the shape still relaxes too much, select a texture designed for better retention of that particular form.
Why does carving gel stick to my tool?
Review the tool, pressure and lift motion recommended for the product. Repeated dragging can distort the shape. Do not improvise with random solvents or liquids; use a shaping medium only if it is specified. Practice a single petal until the tool releases predictably.
Can you put chrome powder over 3D gel?
A compatible chrome system can create a reflective finish over raised art. Complete the art material's required cure, prepare the receiving surface as instructed, apply the powder and seal correctly. Not every raw gel surface receives powder in the same way.
Can you do 3D nail art on short nails?
Yes, the composition can be adapted with a compact accent, a low-profile flower or a single raised line. Keep the design inside the nail boundary and leave room for the background. A short nail often benefits from fewer elements rather than a compressed version of a complex long-nail design.
How long does 3D gel nail art last?
There is no single wear period for every product and design. The material system, preparation, construction, placement and daily use all affect the result. Choose an appropriate profile for the client and arrange assessment if a detail lifts or becomes uncomfortable rather than making a universal duration promise.
Can 3D gel be soaked off?
That depends on the product. Some materials belong to soak-off systems and others require file-off removal. Check the removal instructions for the entire design, including embellishments and finishing layers. Never pull a raised decoration away from the natural nail.
How should I choose wholesale 3D nail art supplies?
Start with the effects your customers request, then compare suitable samples using consistent tasks. Review handling, finished appearance, packaging and instructions together. Keep an approved sample for each selected item and plan replenishment around actual demand rather than buying every available variation.
Can JTING help develop a private label 3D nail art collection?
JTING supports private label nail product development, including performance direction, colors, labels and packaging. Share your intended effects, market and collection format to start a focused sample discussion. Coordinated design references help connect the product selection to the range you want to sell.
26. Build Your 3D Nail Art Collection with JTING
A strong 3D nail art collection does not need to do everything. It needs a clear reason for each product: rounded transparent accents, controlled raised lines, shaped floral details or a distinctive finishing effect. When those roles are easy to understand, customers can select more confidently and salons can develop repeatable designs.
Start with a small set of reference looks, decide which effects lead the collection and build your sample plan around them. Compare the finished design and the working experience together. Then connect the selected products with coordinated colors, practical packaging and instructions that make the range easier to use.
Ready to develop your next nail art range? Share your 3D nail design references and sourcing requirements with JTING. Tell us the effects, target market and packaging style you have in mind, and start building a collection around the looks your customers want to create.