Soft watercolor washes, flowing marble and graphic pastel details give a nail art range a lighter, expressive finish. For brands, distributors and salon suppliers, one coordinated ink palette opens several design options alongside the gel colors customers already use.
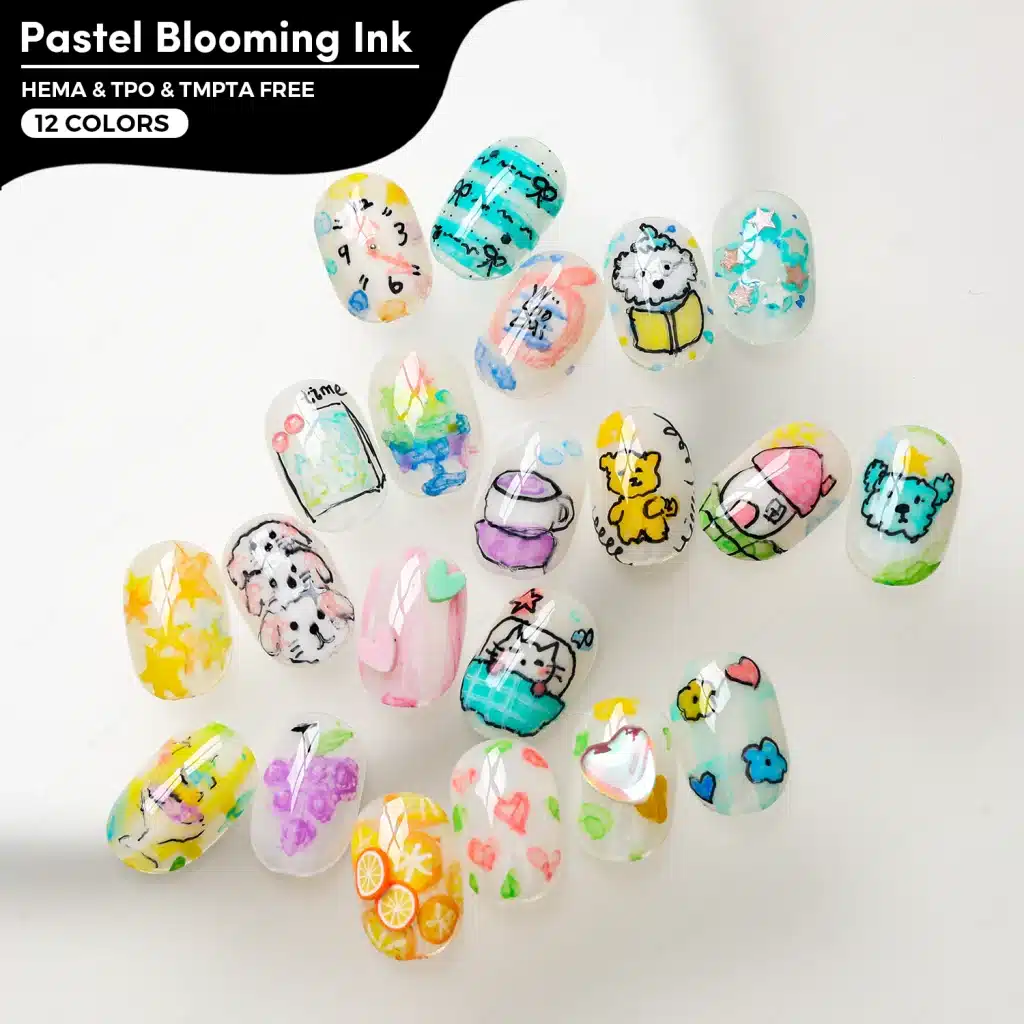
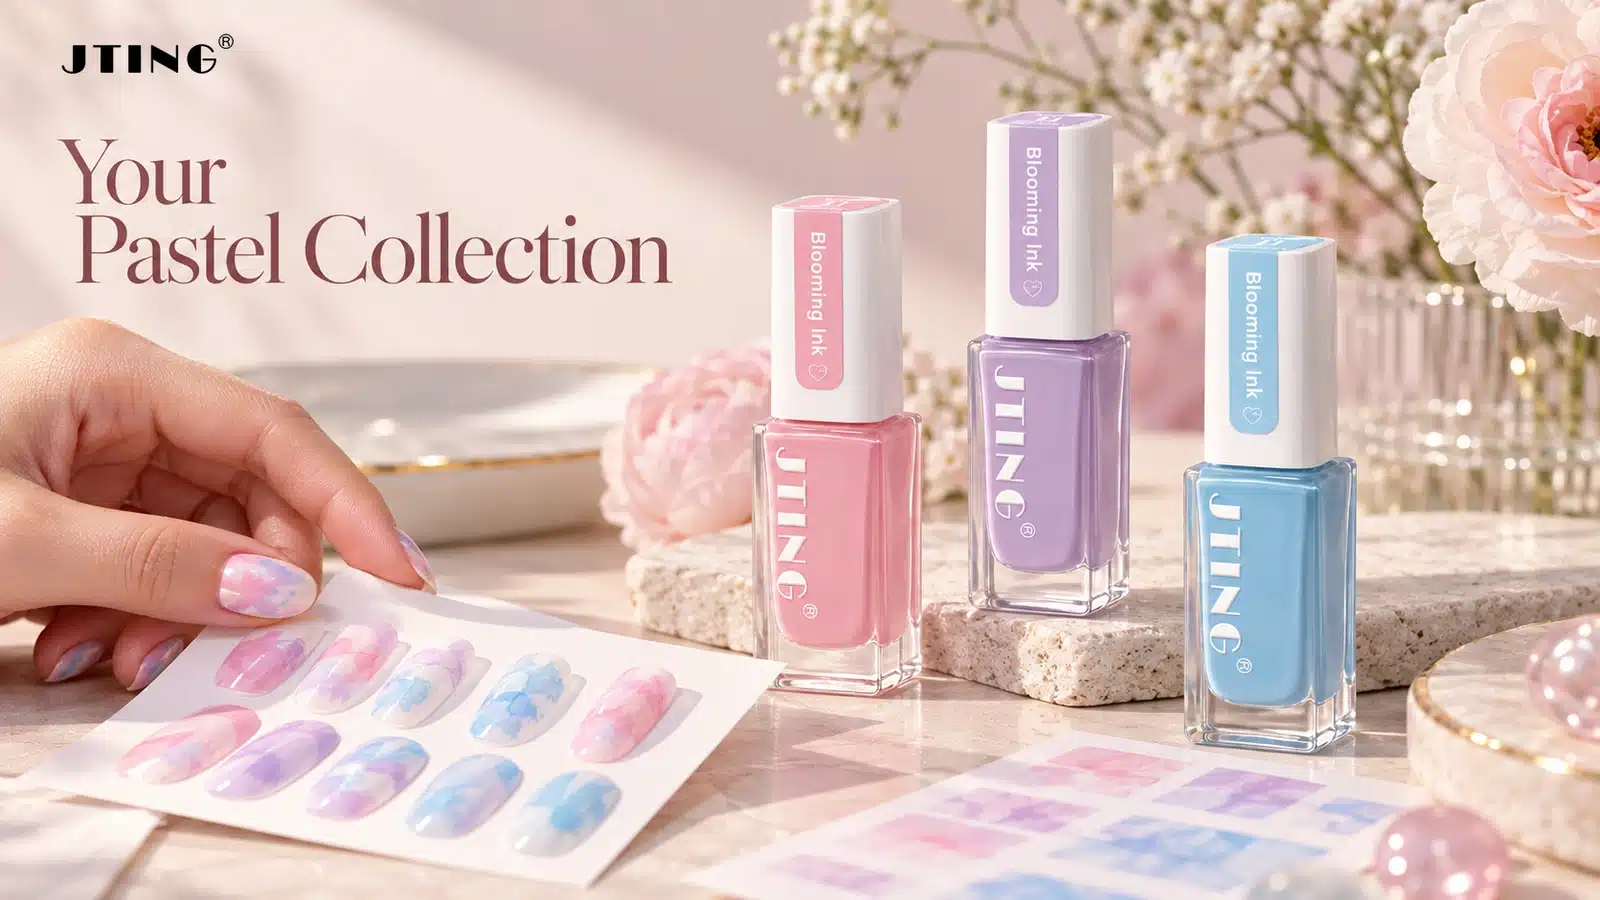
JTING Pastel Blooming Ink (G94) combines 12 translucent pastel shades with a pointed brush in each 12 ml bottle. Its HEMA-, TPO- and TMPTA-free formula air-dries over cured gel color before the design is sealed with top coat.
Explore how to use pastel blooming ink for watercolor nail designs, build balanced color combinations and translate the effects into salon services, training displays and a wholesale or private label collection.
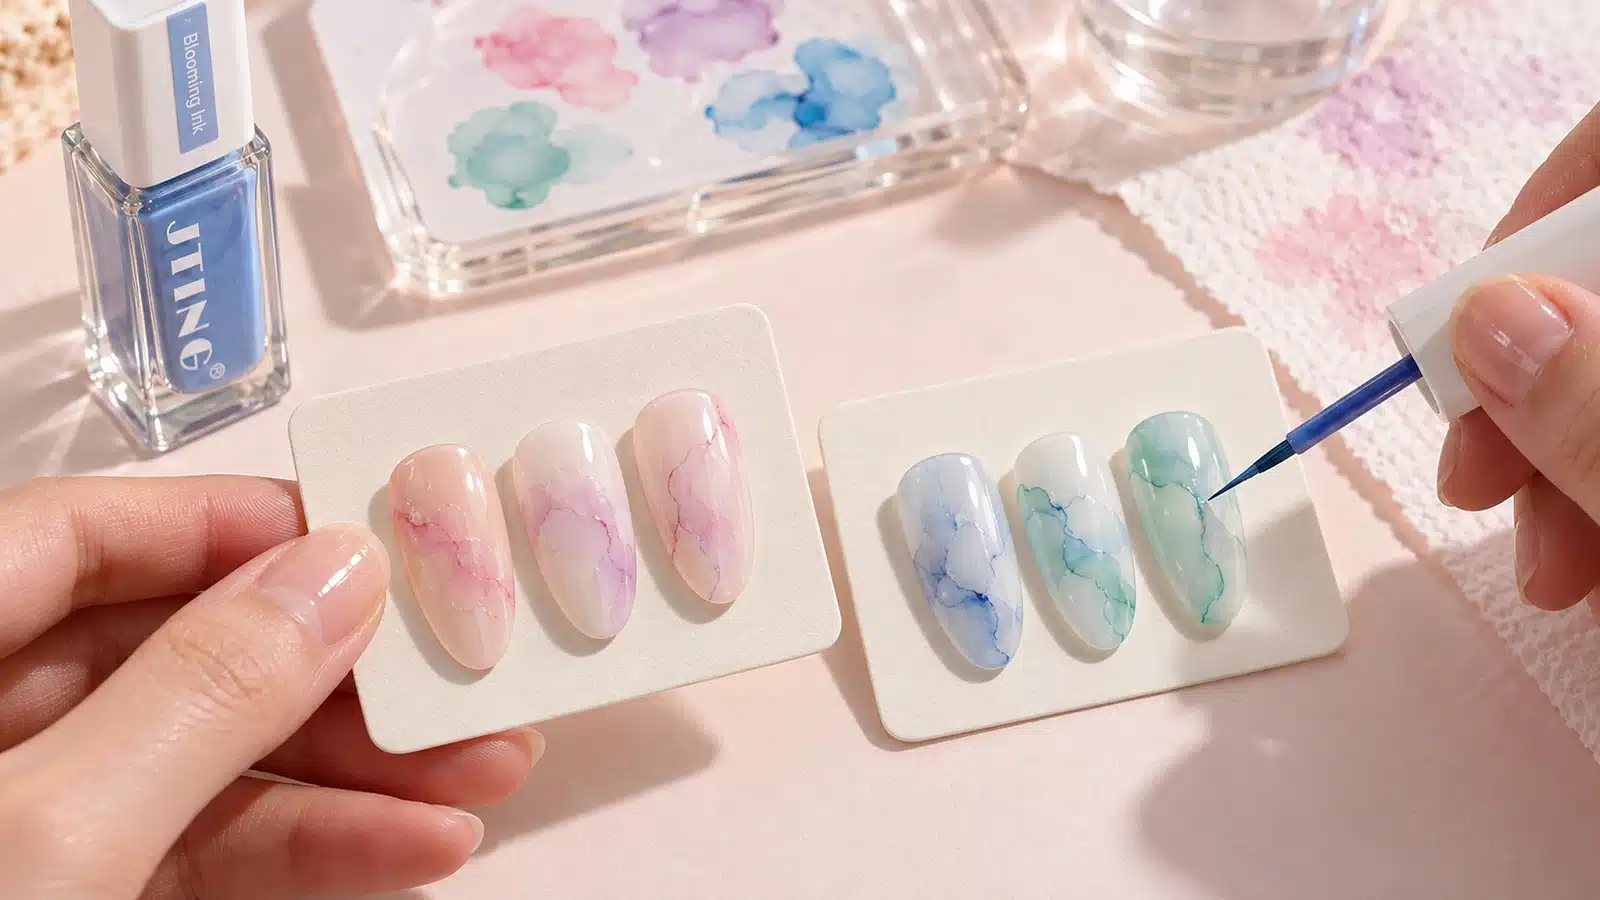
Use a limited palette to develop both restrained watercolor accents and more expressive flowing designs.
1. What Does Pastel Blooming Ink Add to a Nail Art Range?
Pastel Blooming Ink brings translucent color and fluid pattern-making into a professional nail art range. Milky pink, lilac, peach and cooler accents create a soft wash over the base, while overlapping color gives the design depth. The underlying shade remains part of the finished look. This makes the ink particularly useful for customers who want detail without a heavy block of opaque color.
The commercial opportunity is a family of connected services: a watercolor accent beside plain nails, flowing marble across a complete set, or a pastel background beneath painted details. A salon supplier can demonstrate several looks using the same ink collection alongside existing gel colors. A nail brand gains a distinct art product with recognizable applications for its catalogue and tutorials.
2. Pastel Blooming Ink vs Clear Blooming Gel and Gel Color
These products occupy different positions in a nail art system. Pastel Blooming Ink supplies the colored design layer and air-dries. Clear blooming gel provides a transparent gel medium for compatible color to spread into. Gel color supplies the background or a more solid painted area. Choosing the correct product starts with the effect the technician wants to create.
Scroll horizontally if needed to view all columns.
| Product | Role in the Design | Working Sequence |
|---|---|---|
| Pastel Blooming Ink | Translucent pastel washes, flowing patterns and painted accents | Apply over cured gel color, allow to air-dry, then seal |
| Clear blooming gel | A clear medium for blooming nail art with compatible colors | Follow the specific blooming gel system instructions |
| Gel color | Background color, tonal nails or painted coverage | Cure according to the gel color instructions |
Choose nail art ink when the design needs translucent colored washes over a cured background. Choose a clear blooming medium for a gel-based spreading technique. For that approach, read the blooming gel application guide.
3. Choose Pastel Colors by Their Role in the Design
The collection contains 12 shades, numbered No.01–No.12. Use the real numbered chart to connect bottle selection with finished washes and patterned samples. A bottle shows the product color; the swatch shows how that color participates in a design. Keep the number attached to both when developing a branded range.
Build a Background, a Bridge and an Accent
Start a soft palette with white, pink, lilac or peach. Use neighboring tones to link the nails, then introduce yellow, green or blue where the design needs a focal point. A limited combination often makes the flowing texture easier to read than using every available color in one manicure.
A soft pink-and-lilac combination suits a gentle everyday manicure. Yellow, green or blue brings a brighter accent into the same pastel range. Select the palette around the intended look, then use No.01–No.12 to identify the individual shades in your order.
Pair each flowing swatch with its more defined pattern example. A shade that looks delicate in a wash can make a clearer graphic mark when placed in a deliberate stroke. That difference helps buyers select colors for both backgrounds and details.
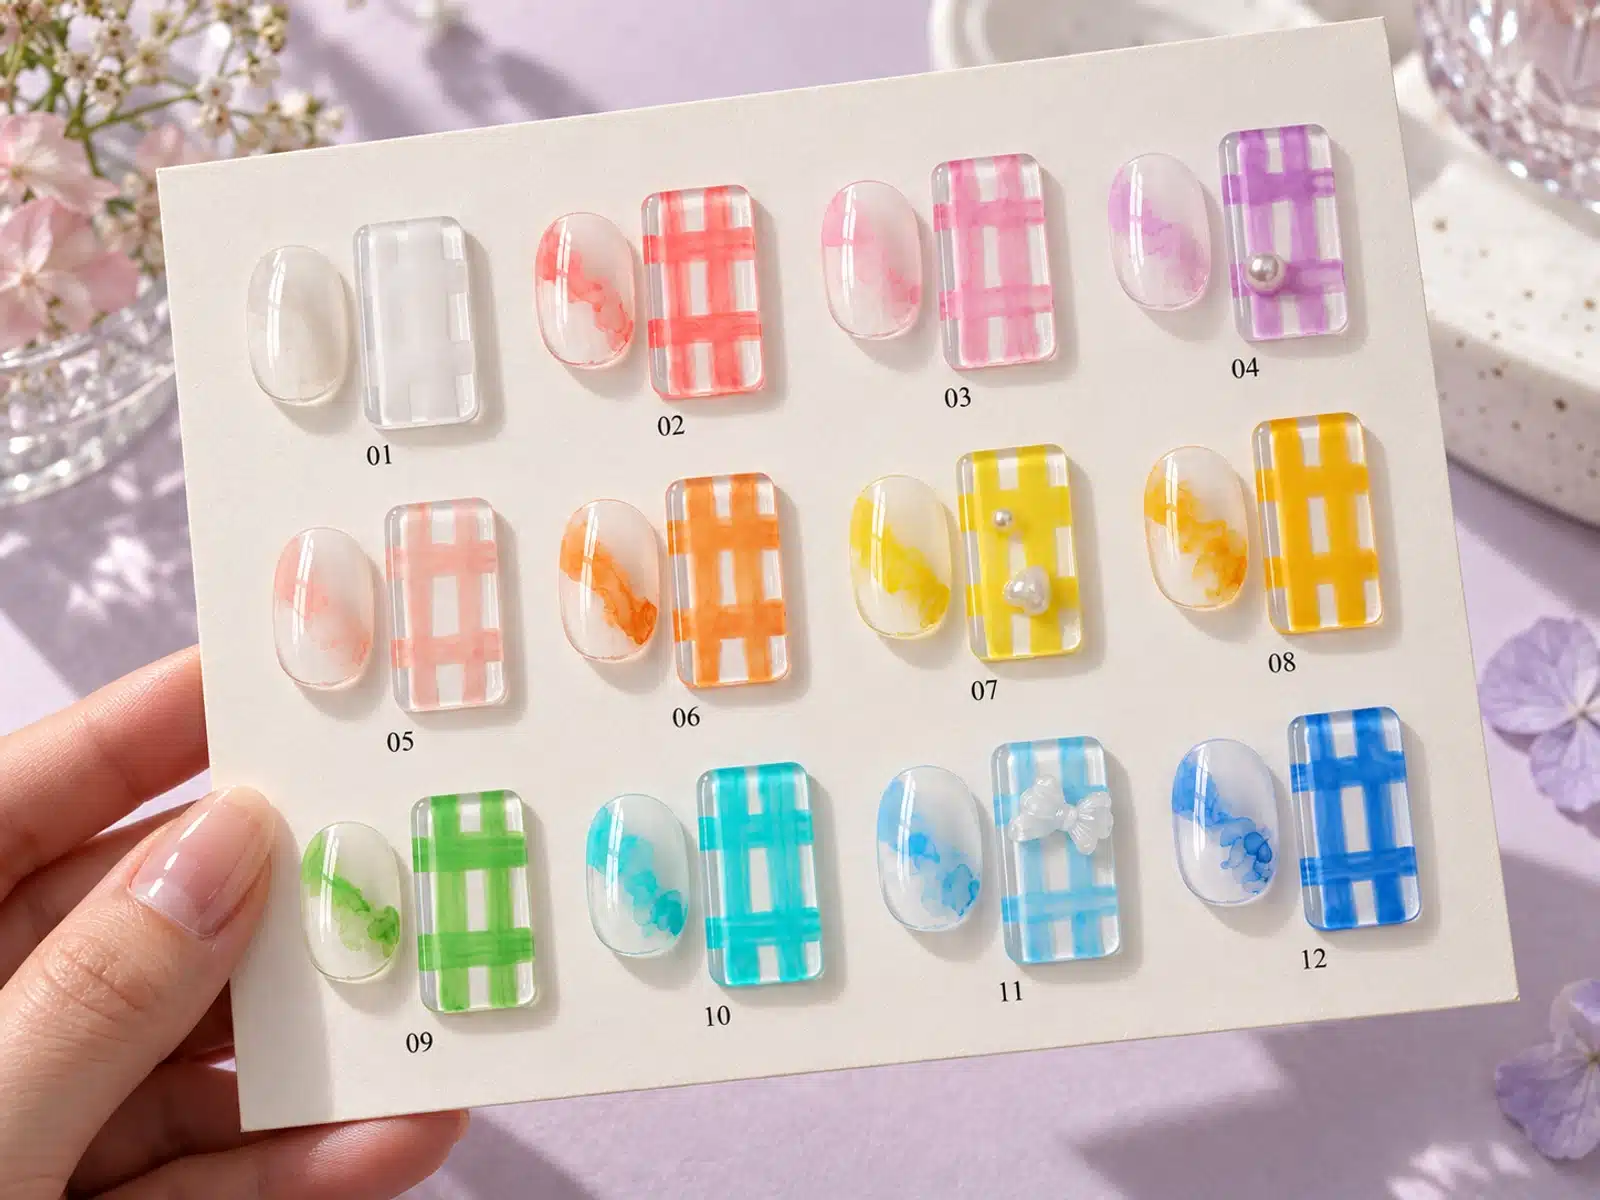
Read each shade through its wash and patterned application when choosing colors for the collection.
4. Choose the Base for Watercolor, Marble and Layered Designs
The base is part of the color story. A nude background gives pastel watercolor nails a quiet, open appearance. A sheer base emphasizes translucency, while a solid background creates a more deliberate contrast. Cat eye gel adds its own moving reflection beneath the ink.
Scroll horizontally if needed to view all columns.
| Base Direction | Design Opportunity | How to Keep the Look Clear |
|---|---|---|
| Nude or sheer | Airy watercolor accents and softly layered color | Leave some base visible around the wash |
| Light solid color | Readable pastel marble and graphic detail | Balance the colored area with open space |
| Contrasting solid color | A stronger background for a selected pastel accent | Limit the palette so the focal area stands out |
| Cat eye | Translucent detail over a reflective background | Keep part of the magnetic finish uncovered |
For an airy everyday design, combine a nude background with localized pink and lilac washes. For a brighter art set, place yellow, green or blue accents over a light solid base. With a cat eye background, reserve an uncovered area so its reflection remains visible alongside the pastel detail.
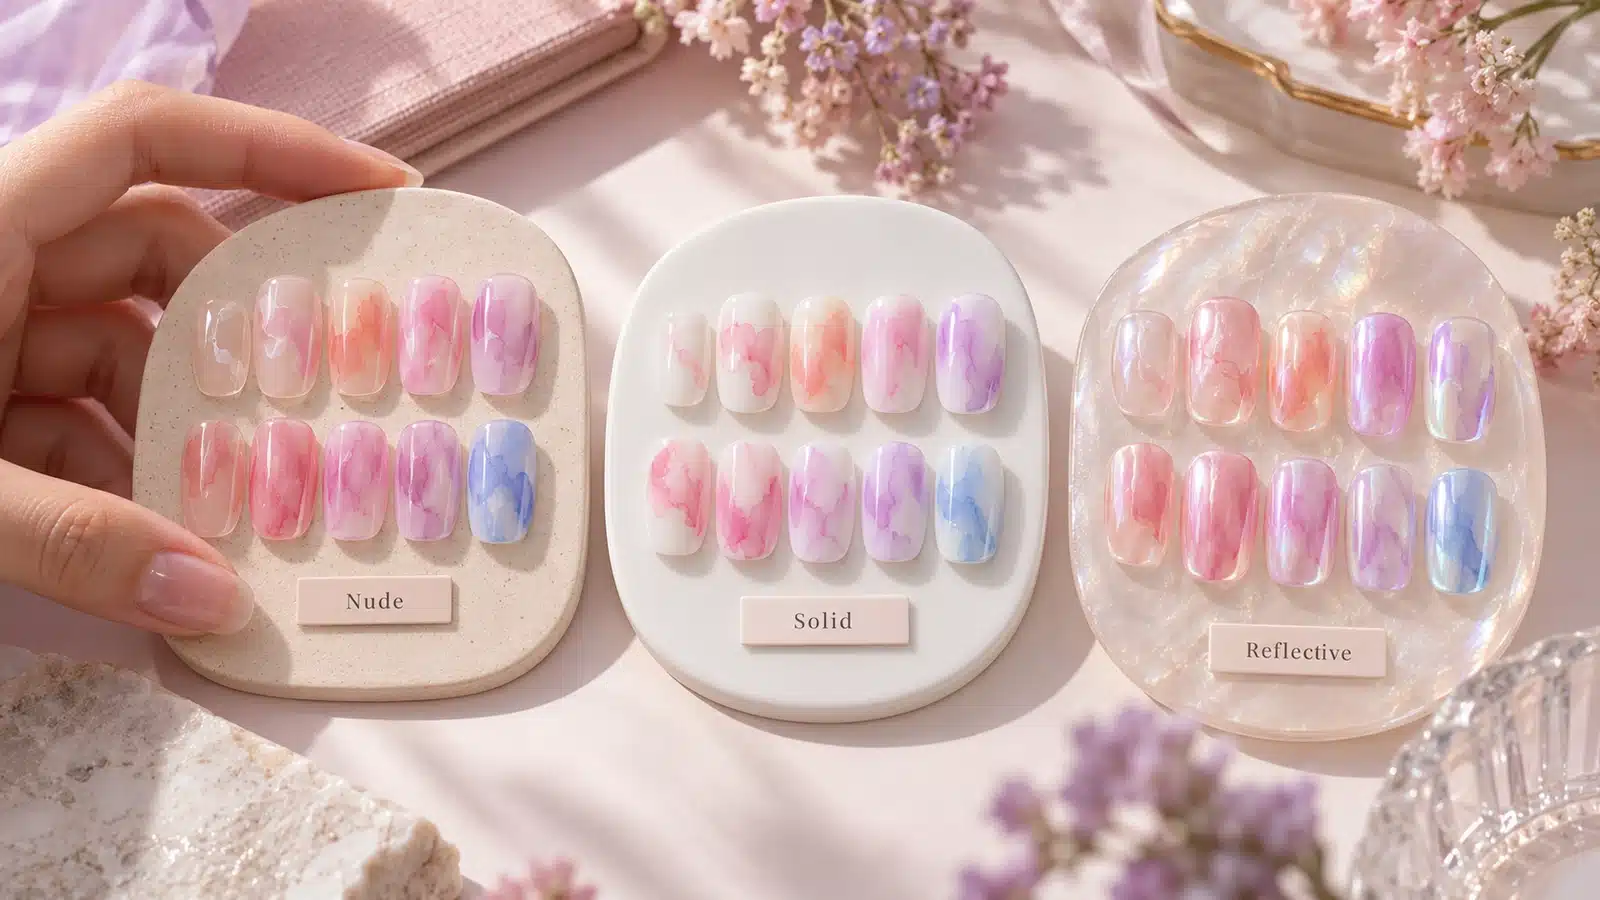
The background contributes to the finished look; keep the intended base visible around translucent accents.
5. How to Use Pastel Blooming Ink over Gel Color
The working sequence combines cured gel layers with an air-drying nail art layer. The ink itself does not need a UV or LED lamp. Base coat, gel color and top coat retain their own curing instructions.
- Prepare the base. Complete nail preparation, apply the base coat and cure according to its instructions.
- Finish the background color. Apply the chosen gel color and cure. Select nude, sheer, solid or cat eye color to suit the design.
- Place the ink. Use the pointed brush to add color in the intended area. Let the fluid pattern develop, keeping the design away from the skin.
- Allow the design to air-dry. Complete this stage before applying top coat. A lamp is not a replacement for the ink's air-drying step.
- Seal the finished design. Apply the top coat and cure according to the top coat instructions.
When learning how to use nail art ink, complete the background first so color placement begins on the cured gel color. Keep the wash within the intended design area, allow it to air-dry fully and finish with the chosen top coat. This preserves the distinction between the ink application and the surrounding gel curing stages.
The gel nail polish curing guide explains the surrounding gel workflow in more detail.
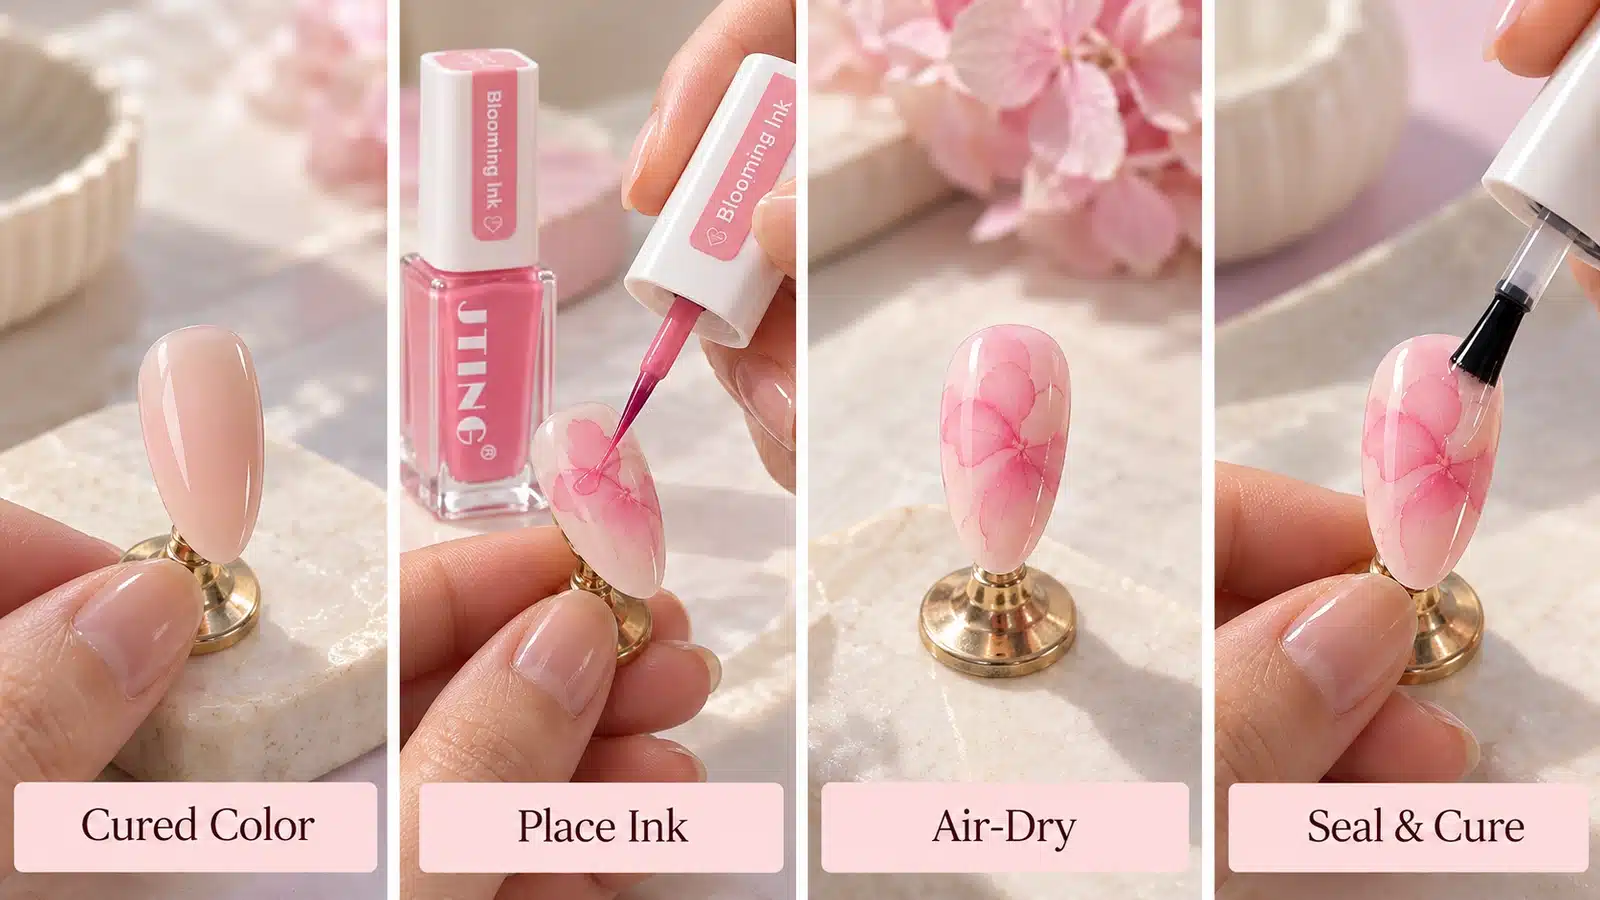
Apply the ink over cured gel color, let it air-dry, then seal and cure the top coat.
6. Control Color Placement and Build Translucent Layers
The pointed brush makes the starting point of the pattern accessible: the center, one side, the free edge or a small corner. Begin with a localized placement and watch the colored area develop before adding more. This preserves space for the next color and keeps the overall composition intentional.
Choose the Area to Color
For an off-center watercolor nail design, place the first color near one side and leave the opposite side open. For a stronger central accent, concentrate the color in the middle and keep a visible border of background around it. Both arrangements create detail without covering the whole nail.
Build Layers with a Clear Color Plan
Choose a dominant color and use the second color to connect or contrast with it. Judge each addition against the whole nail, not only the wet area under the brush. Overlapping transparent color changes the visual depth, so reserve stronger overlap for the focal area.
Use a localized dab for a flowing wash and an intentional brush stroke for a more defined mark. The pointed tip reaches small areas, so the same bottle works for a soft background or a graphic accent. Choose the action to match the part of the design being created.
7. Create Watercolor Washes and Soft Cloud Effects
Soft watercolor nails combine translucent color with visible background. A pink-and-lilac wash gives a gentle tonal impression; a cooler blue or green accent changes the mood without requiring a densely decorated manicure. Keep the outer areas light so the wash reads as floating color rather than a full-coverage coating.
To plan how to create watercolor nails across a set, choose where the strongest color will sit first. One or two pink-and-lilac watercolor accents beside coordinating plain nails create a restrained service. For a fuller art set, repeat those shades across more nails while varying the placement and scale of the washes. These distinct service choices share the same ink colors without requiring identical patterns on every nail.
Cloud-like designs benefit from soft transitions and quieter spaces between the colored areas. On short nails, a small off-center wash leaves the nail shape visible. Longer nails provide room for more than one color area, but the design still needs a clear focal point.
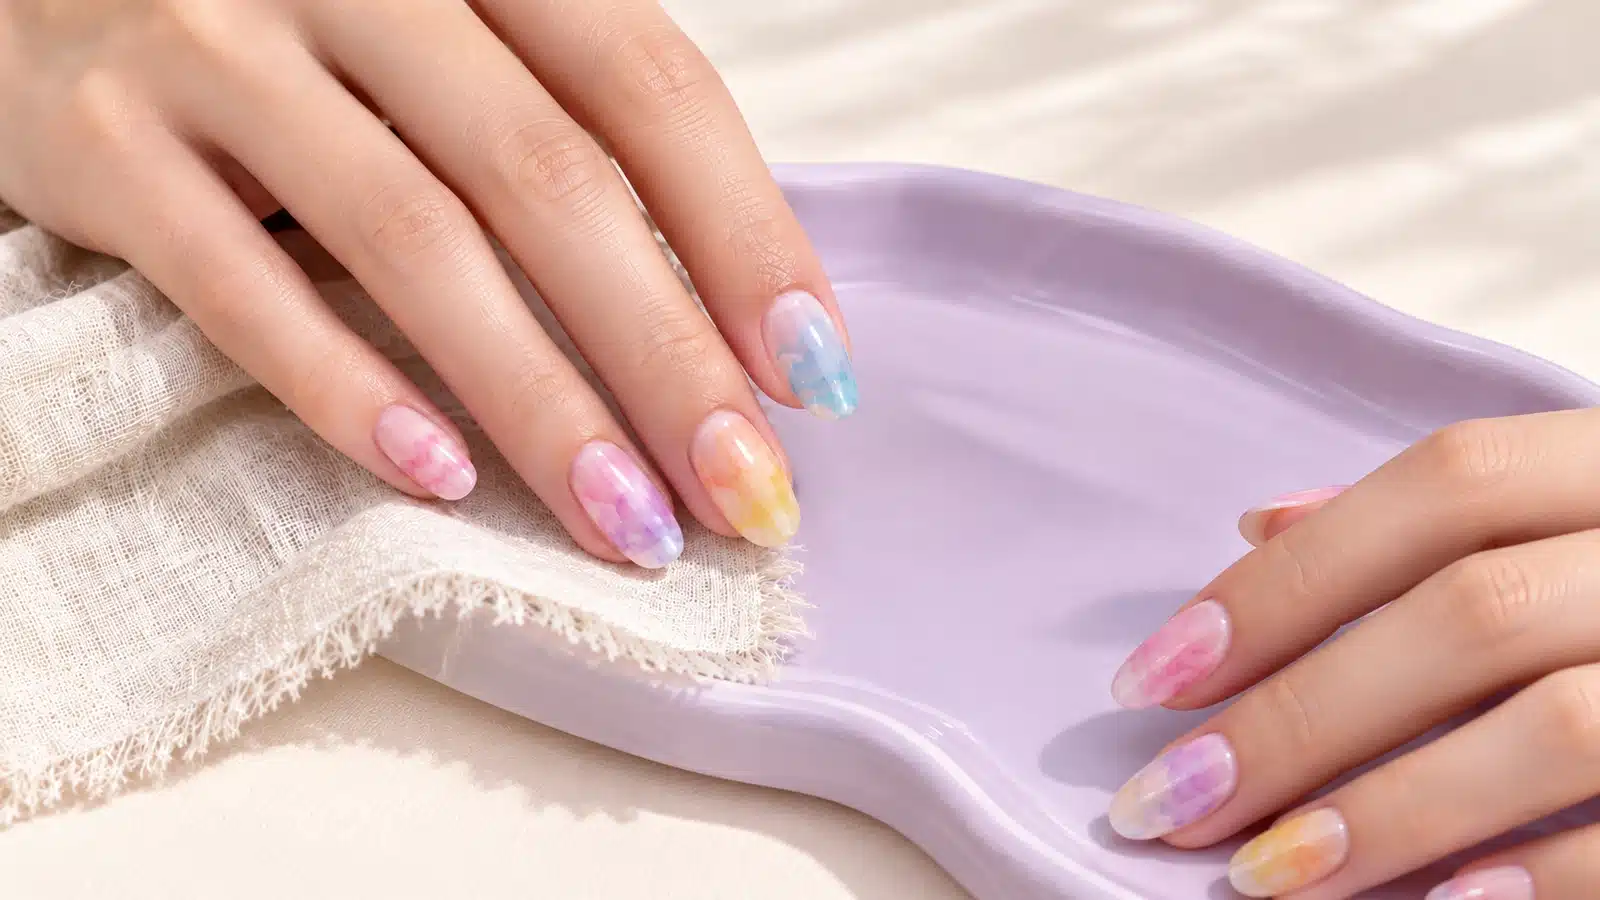
Coordinate a watercolor manicure by repeating related colors while varying the position of the washes.
8. Build Flowing Marble and Abstract Nail Designs
Pastel marble nails use flowing color to suggest movement across the nail. The ink creates irregular washes and contours, reducing the need to paint every vein individually. For marble ink nails, carry a light pastel flow diagonally across a nude background and leave a clear area beside it. A smaller wash near the tip creates a more understated look.
For abstract nail art, separate two contrasting pastel areas with visible base color. Marble emphasizes a continuous flow; the abstract arrangement emphasizes the relationship between colored shapes. Both use the same fluid color with a different composition.
Fine metallic outlines or painted veins are additional design work. Use them selectively around the dried color when the finished look calls for more definition, with the appropriate supporting materials and their application instructions.
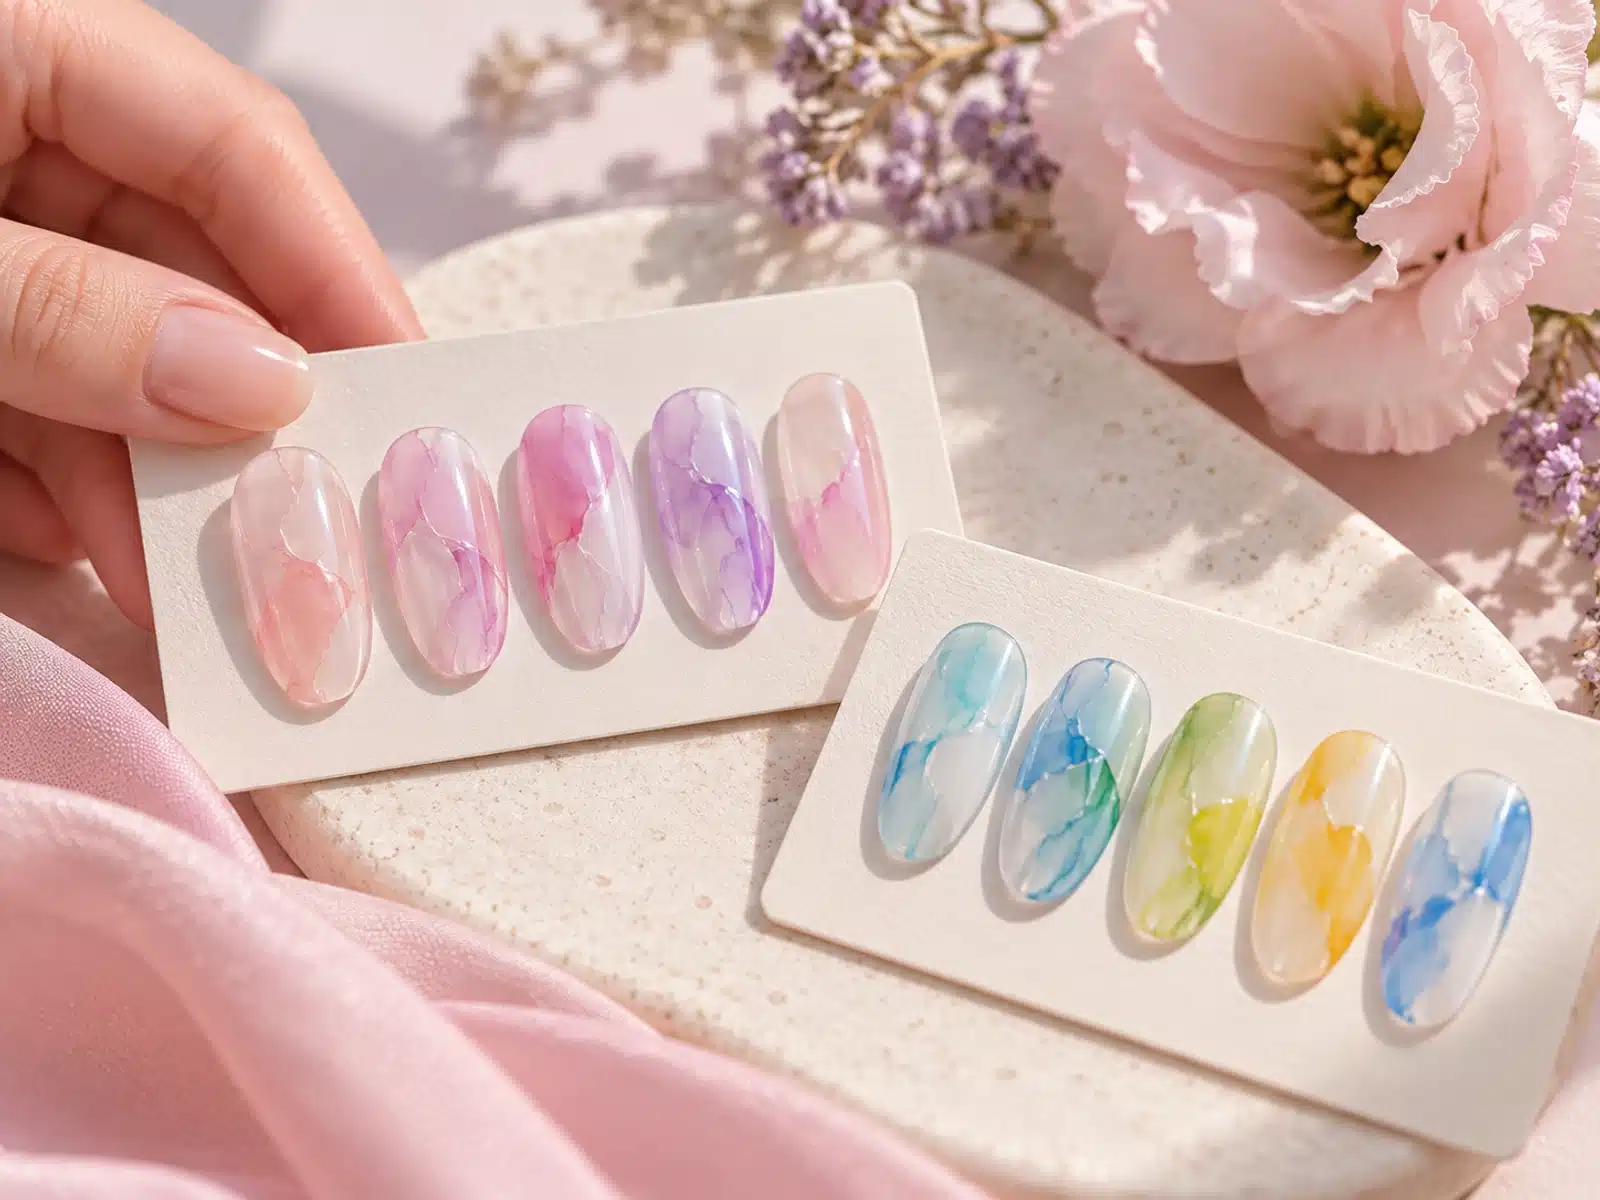
Organize flowing color around a clear direction or separate abstract areas with visible background.
9. Add Pastel Plaid, Bubble Patterns and Painted Details
Pastel plaid nail art provides a graphic counterpart to the fluid wash. Crossed color lines give the manicure structure, while alternating a patterned nail with a softer wash keeps the set from becoming visually crowded. Use the pointed brush for intentional marks and place the intersections where they support the nail shape.
Bubble-pattern nail art introduces circular motifs within the same soft palette. These are flat patterns in the design, distinct from raised water-drop nail art. Pair a circular-pattern accent with plain tonal nails or a light watercolor background to keep the shape readable.
Use circular motifs as a graphic accent alongside crossed lines or a simple wash. A single patterned nail gives a quieter set a point of interest; repeating the motif on selected nails creates a more coordinated graphic manicure.
Small painted details add another option for customers who prefer a more deliberate finish. A flowing background and a graphic accent can share a palette without sharing the same pattern.
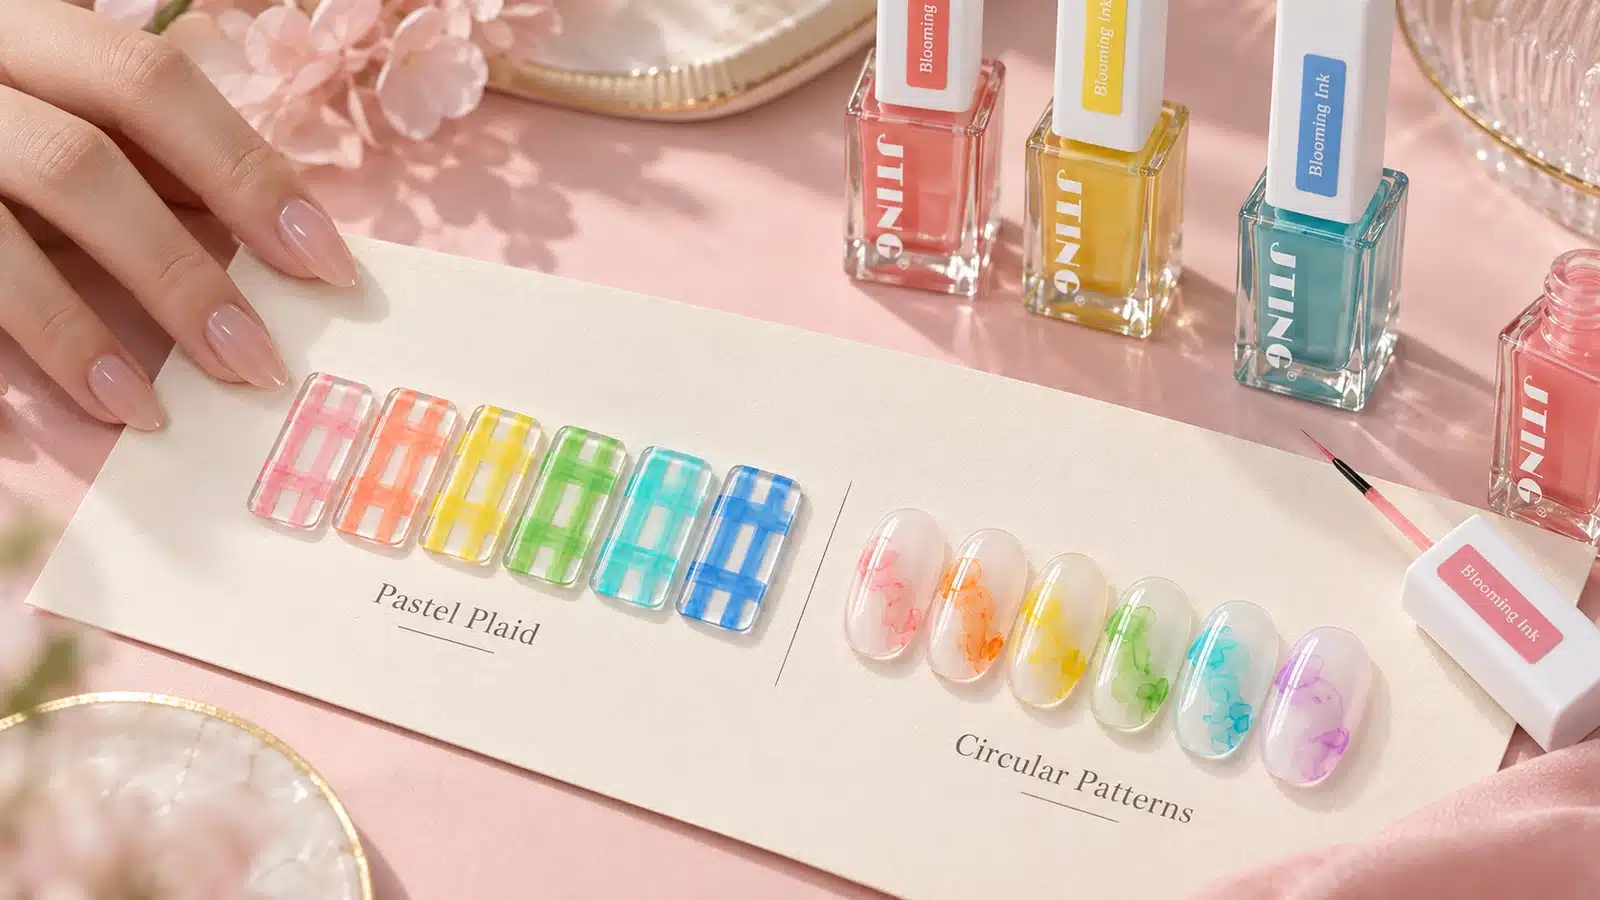
Pair defined pastel plaid with flat circular motifs for a more graphic nail art service.
10. Combine Pastel Ink with Cat Eye and Decorative Nail Art
A cat eye background adds reflective depth beneath translucent pastel detail. Complete the magnetic design and cure the gel color first, then place the ink over selected areas. Leaving part of the base visible keeps the reflective finish present in the finished manicure.
For decorated nail art, assign each material a clear role: the ink supplies the wash, a painting product supplies fine outlines, and added ornaments create raised detail. This makes the design easier to teach and helps a distributor explain the supporting products alongside the ink.
For a light layered design, place a small floral outline over a pastel wash and keep the surrounding nails simple. For a more detailed service, combine the background with selected ornaments. The extra painting and decoration add separate work and materials to the manicure.
The ink bottle includes its pointed brush for color placement and painted accents. Choose the gel background, fine-line product and ornaments to match the finished design, following the application sequence for those materials.
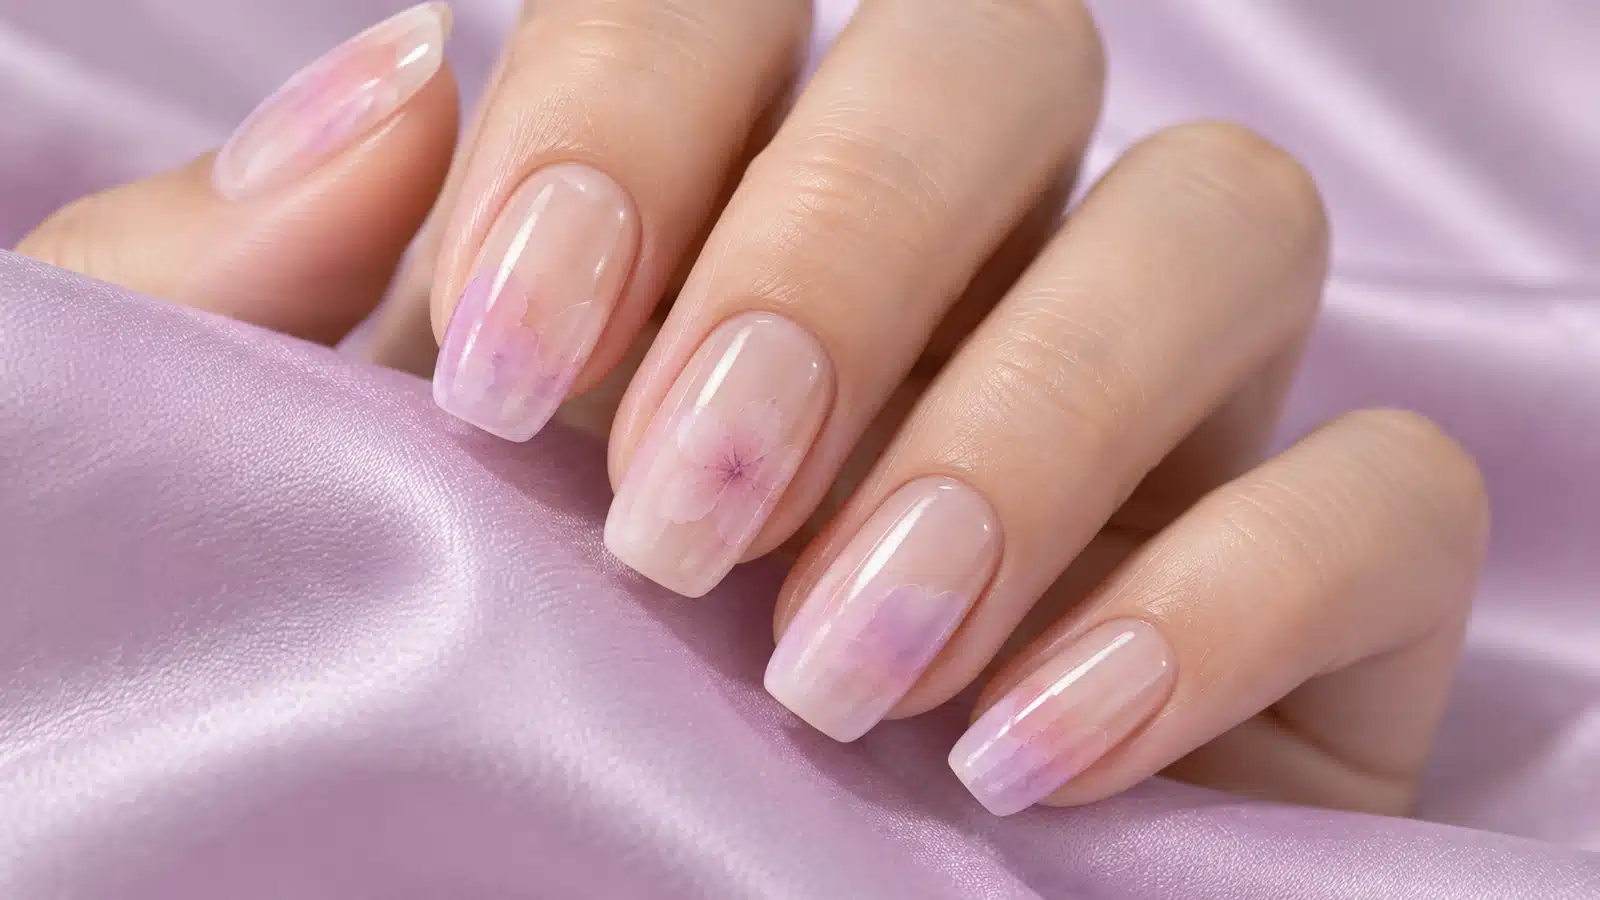
Layer a pastel accent over a reflective background and add separate painted detail where the design calls for it.
11. Troubleshoot Muddy Color, Over-Spreading and Smudged Designs
Start with the visible issue, check the relevant application variables and adjust one part of the method at a time. Keep the ink shade and background consistent so the effect of the adjustment is easy to see.
Scroll horizontally if needed to view all columns.
| Visible Issue | Variables to Check | Next Adjustment |
|---|---|---|
| Colors look muddy | Number of overlapping colors, amount placed and background shade | Simplify the palette and separate the main color areas |
| The wash fills too much space | Initial placement, amount and available open area | Begin with a smaller localized accent and observe before adding more |
| The detail disappears | Contrast against the base and density of surrounding color | Leave more background visible or reposition the accent |
| The design drags during sealing | Whether the ink has air-dried and the top coat application | Complete drying before sealing and review the sealing technique |
| Staff produce unrelated-looking sets | Color selection, placement plan and design reference | Standardize the palette and focal area while allowing natural pattern variation |
Keep the successful sample with its color combination and application notes. Record the amount, placement or background change that improved the result so the team can repeat the working method.
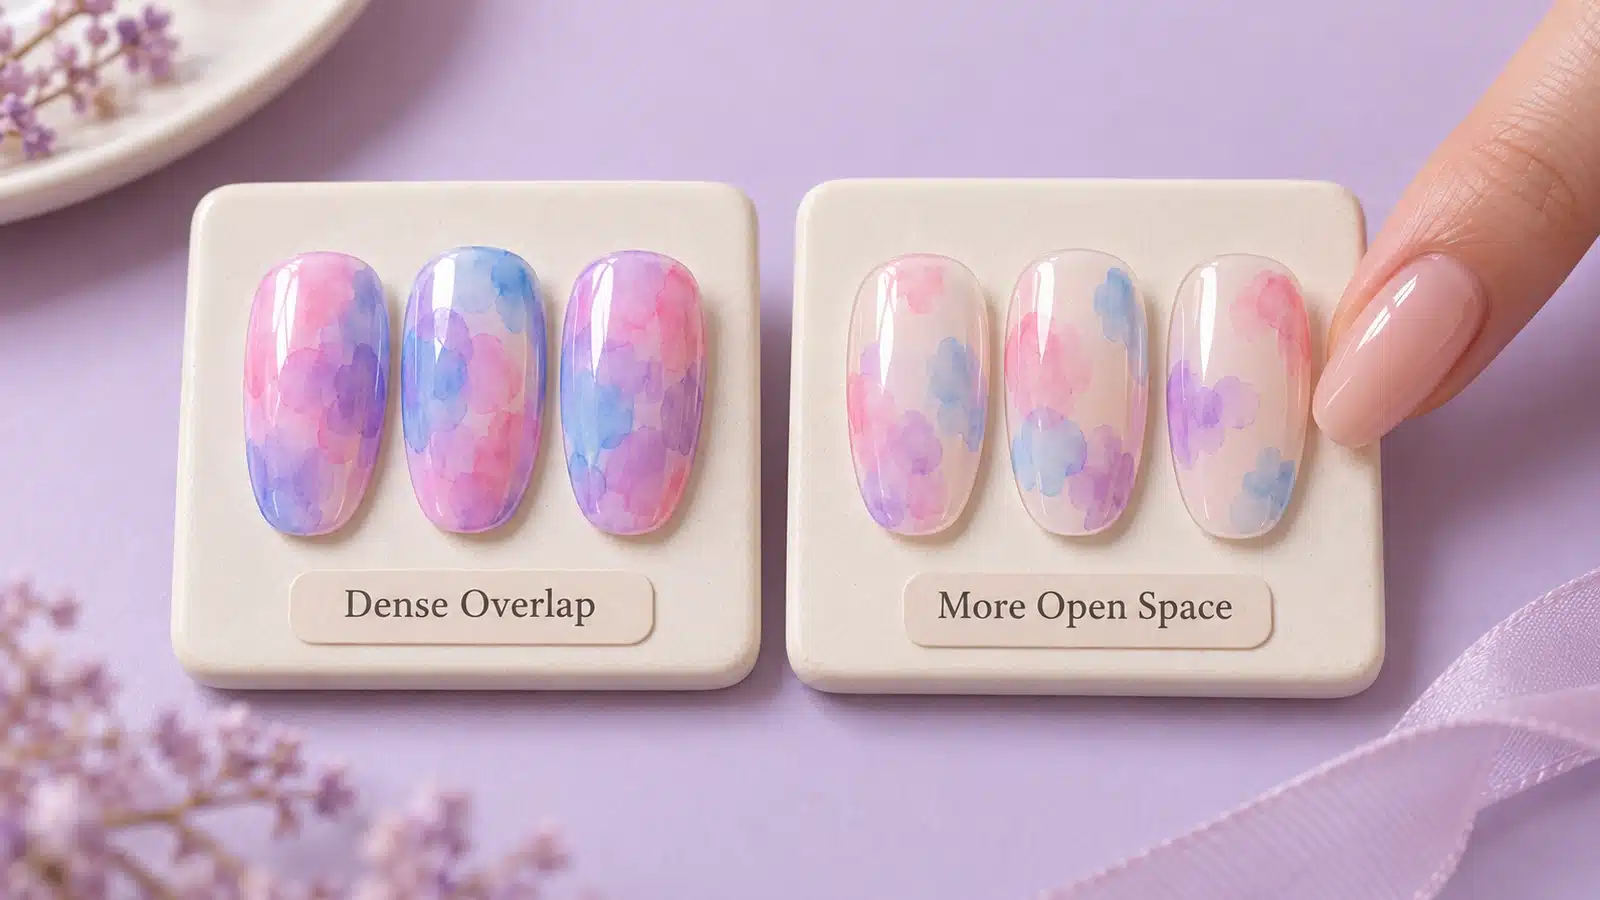
Reduce dense overlap and preserve open space when the design needs clearer color separation.
12. Build Salon Design Menus and Teaching Demonstrations
A useful service menu shows what changes with the design complexity. A simple accent introduces the translucent effect, a coordinated watercolor set extends it across the manicure, and a decorated design adds separate detail work. These are different services even when they share the same ink shades.
Scroll horizontally if needed to view all columns.
| Service Direction | What Customers See | What the Team Prepares |
|---|---|---|
| Pastel accent | One or two watercolor nails with simpler tonal colors | A limited palette and a clear placement example |
| Coordinated art set | Related washes, marble or plaid across several nails | A complete design board showing the color relationships |
| Detailed layered art | Pastel backgrounds with line work or ornaments | Supporting materials, additional steps and a finished close-up |
For educators and salon suppliers, pair the board with a concise technique demonstration. Show the cured background, brush placement, developing wash, air-drying stage and sealed finish. This answers practical questions before a technician attempts the complete look.
Photograph both the full set and the detail. A customer chooses the overall style; the technician needs to see where the colors start and how much background remains visible.
13. Calculate Service Costs and Plan Resale Pricing
Service cost depends on the complete manicure, not only the price of a 12 ml ink bottle. A small watercolor accent and an elaborate layered set use different amounts of working time, background color and decoration. Cost them separately so the menu reflects the service being delivered.
Service material cost = ink used + base and gel color + top coat + added decoration + consumables. Add the team's measured preparation, application and finishing time at the salon's labor rate. Record the actual design and number of art nails with each timing result; otherwise a simple service and a detailed service become difficult to compare.
For a wholesaler or brand, work from landed unit cost: product, customization, packaging, freight and applicable import charges. Then account for channel fees, fulfilment, sales materials and any distributor margin. Use the same unit of sale throughout the calculation, whether the offer is a bottle, selected assortment or agreed collection.
Gross margin (%) = (net sales revenue − cost of goods sold) ÷ net sales revenue × 100. Use revenue and cost for the same quantity and calculate cost of goods sold consistently. Gross margin is not the final profit after channel, fulfilment and other operating expenses. Measure ink consumption in the actual service workflow when estimating material cost per manicure.
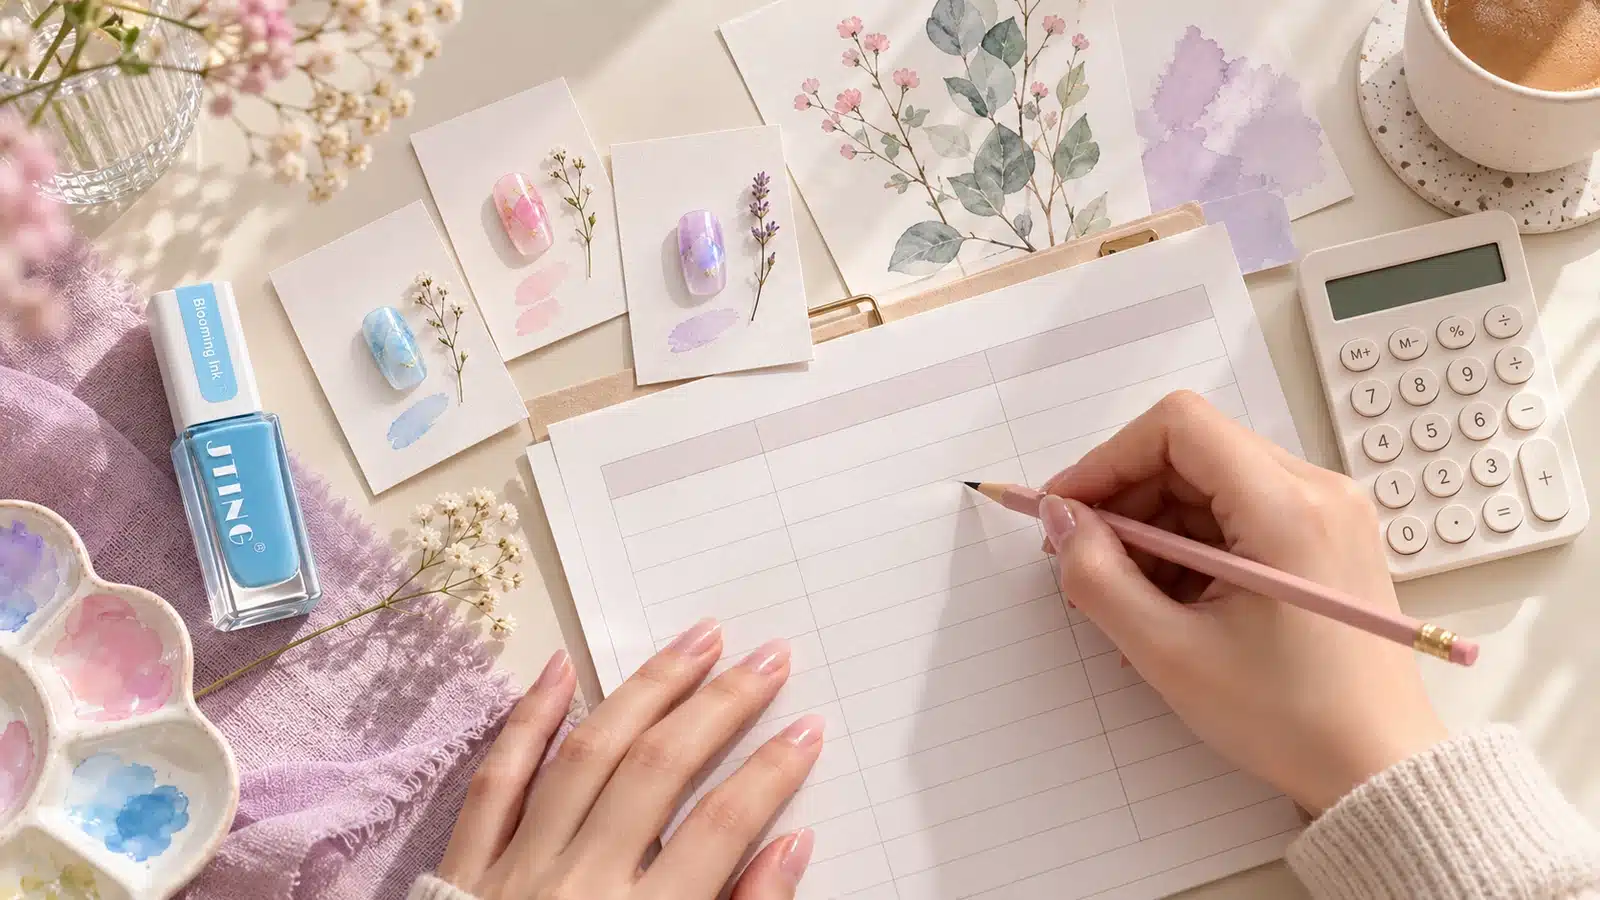
Record the materials and working time for each service before planning its price.
14. Evaluate Samples with a Practical Comparison Sheet
Sample evaluation connects the finished effect to the method used to create it. Use the applications you intend to sell: a light wash, a more layered design and a defined pattern. Keep a finished sample together with its shade number and application notes so the order has a clear reference.
Scroll horizontally if needed to view all columns.
| Sample Record Field | Entry to Complete | Review Focus |
|---|---|---|
| Shade and base | Ink No.__; base color __; base/top coat products __ | Color in the intended manicure system |
| Design and placement | Wash / marble / plaid / layered detail; starting area __ | Coverage area, translucency and color separation |
| Application record | Colors combined __; amount and brush action __ | How the finished pattern was created |
| Drying and sealing | Observed drying behavior __; top coat application __ | Design appearance after sealing |
| Brush and bottle | Brush access __; handling and closure observations __ | Everyday technician use |
| Result and adjustment | Keep / adjust; requested change __; sample reference __ | A clear reference for the order |
Keep the completed sheet beside the finished sample. Describe a requested adjustment in terms of the result—softer color, clearer separation or easier localized placement—and link the revised sample to the final shade list and artwork.
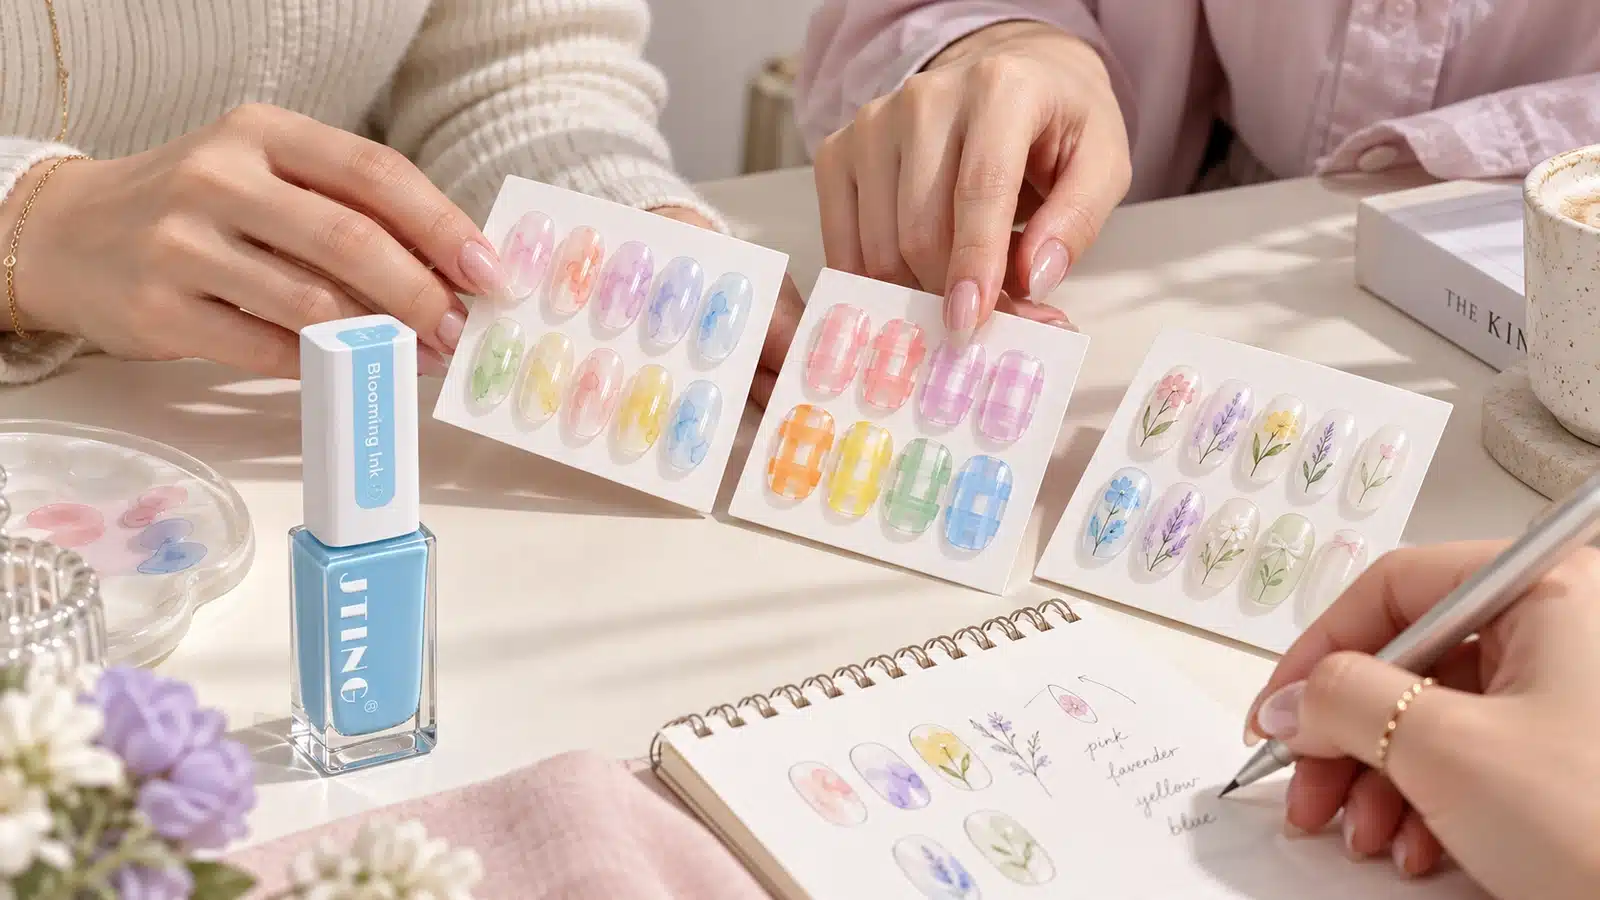
Review the finished appearance alongside shade identification, application notes and supporting materials.
15. Plan Shade Quantities, Product Bundles and Reorders
Build the first order around the designs and sales channels it will serve. Use the complete numbered palette to identify the range, then plan quantities by the expected role of each shade. Frequently used wash colors and small graphic accents can have different consumption patterns.
- Salon supply: connect the selected inks with the gel backgrounds and top coat used in the service menu. Prepare simple accent and fuller art examples so technicians see the available service choices.
- Own-brand retail channels: link bottle labels, shade names, color charts and listing images. Plan the assortment and packaging around the agreed sales format.
- Training and education: prioritize shades used in the lesson designs, with demonstration samples, a materials list and an application video.
Planned replenishment quantity = expected demand until the next delivery + safety stock − usable stock on hand − confirmed incoming stock. Use the calculation as a planning balance, then adjust positive requirements to the agreed order quantities and configuration. Set safety stock from your own demand variation and supply schedule.
Track unopened-bottle sales separately from salon usage feedback. Both inform shade demand, but they measure different activity. Keep the previous shade references and artwork with the reorder so JTING can identify the established collection.
16. Build Your Brand with Labels, Packaging and Sales Materials
JTING provides private label nail art ink with branded bottle labels, packaging, color charts, product photography and videos. These materials turn a color selection into an identifiable range that customers can browse, learn and reorder.
Connect Your Brand with Clear Shade Identification
JTING customizes bottle labels with your logo and product information and adapts the design for your collection. Shade names and numbered references connect the bottle to the color chart and order records, making selection and replenishment straightforward. Explore the label and sticker customization options.
Build Packaging for the Offer
JTING customizes packaging boxes with brand artwork and product information for the selected bottle quantities and sales format. The box organizes the collection for your channel and carries the information customers need to identify it. Explore the Build Your Brand service for product and packaging customization.
Give Customers Useful Launch Content
JTING produces color charts for shade selection, manicure photography for online listings and catalogues, and product videos for application demonstrations. Full-set images show the style; close-ups show the translucent finish; videos explain brush placement and the air-drying stage. Shared shade identification connects these materials with the bottles customers order.
Connect bottle identification with color charts and branded sales materials for the collection.
17. Compare Wholesale Quotes and Prepare Your Order
For wholesale nail art ink, compare quotations against the same shade list, quantities and packaging specification. A product-only price and a branded collection price cover different work. Separating those items makes the quotation easier to understand and the launch budget easier to manage.
- Product selection: reference G94 Pastel Blooming Ink, shade numbers and quantity per shade.
- Branding: specify JTING-branded supply or your logo, product information and label requirements.
- Packaging and materials: identify the sales format, boxes, color charts, photography and video requirements.
- Delivery: include the destination and intended launch schedule.
- Market documents: identify the destination market so the applicable product information and document support can be addressed.
JTING supports samples, artwork preparation and bulk supply. MOQ and scheduling for this ink order depend on the selected quantities and customization. Include approval of the design samples and packaging in the launch plan before fixing the final delivery schedule.
18. Questions About Pastel Blooming Ink
Does Blooming Ink Need a UV or LED Lamp?
JTING Pastel Blooming Ink air-dries and does not require a UV or LED lamp. The base coat, gel color and top coat are cured according to their own instructions.
Is Pastel Blooming Ink the Same as Clear Blooming Gel?
No. Pastel Blooming Ink supplies translucent pastel color for the design. Clear blooming gel is a transparent gel medium used in its own compatible nail art system.
Should the Gel Color Be Cured Before Applying the Ink?
Yes. Apply and cure the base coat, then apply and cure the gel color. Add the ink, let the design develop and air-dry, then apply and cure the top coat.
How Long Does Nail Art Ink Take to Air-Dry?
Let the ink design air-dry fully before applying top coat. The ink air-dries naturally; the surrounding gel layers follow their own curing instructions.
Can I Use the Pointed Brush for Plaid and Painted Details?
Yes. The pointed brush supports localized color placement, crossed lines and freehand details as well as flowing washes. Use deliberate brush strokes for the more defined pattern work.
Can Pastel Ink Be Used with Cat Eye Nail Designs?
Yes. Use a cured cat eye gel background beneath selected translucent pastel details. Leave part of the reflective background visible to retain its contribution to the design.
How Many Colors Are Available, and What Is the Bottle Size?
The G94 collection contains 12 shades, numbered No.01–No.12. Each bottle contains 12 ml and includes a pointed brush.
Is G94 HEMA-, TPO- and TMPTA-Free?
Yes. JTING Pastel Blooming Ink has a HEMA-, TPO- and TMPTA-free formula.
Does JTING Offer Private Label Nail Art Ink?
Yes. JTING provides branded labels, packaging, color charts, product photography and videos for a private label pastel nail art ink collection, together with samples and bulk supply.
How Should I Store Pastel Blooming Ink?
Close the bottle tightly after use and store it in a cool place away from direct light.
19. Start Your Pastel Nail Art Ink Collection with JTING
Bring soft watercolor washes, flowing marble and pastel pattern work into your professional nail art range with JTING Pastel Blooming Ink. The 12-color collection combines translucent color with a pointed brush for fluid placement and deliberate detail.
Choose JTING-branded supply or build your own collection with customized labels, packaging, color charts and launch photography. Contact JTING for samples and a wholesale quotation for G94 and the shades you want to introduce.