01. Introducing JTING Dusty Pink Sculpture Gel
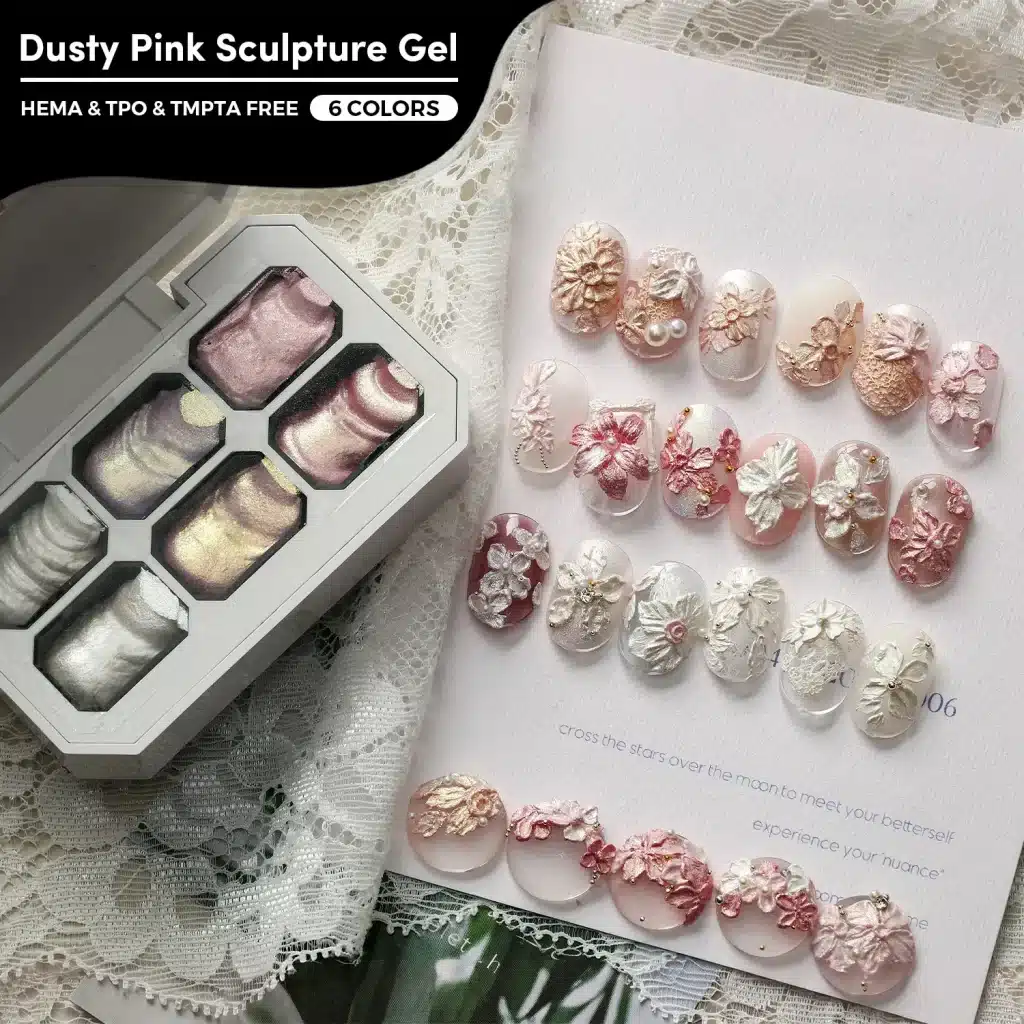
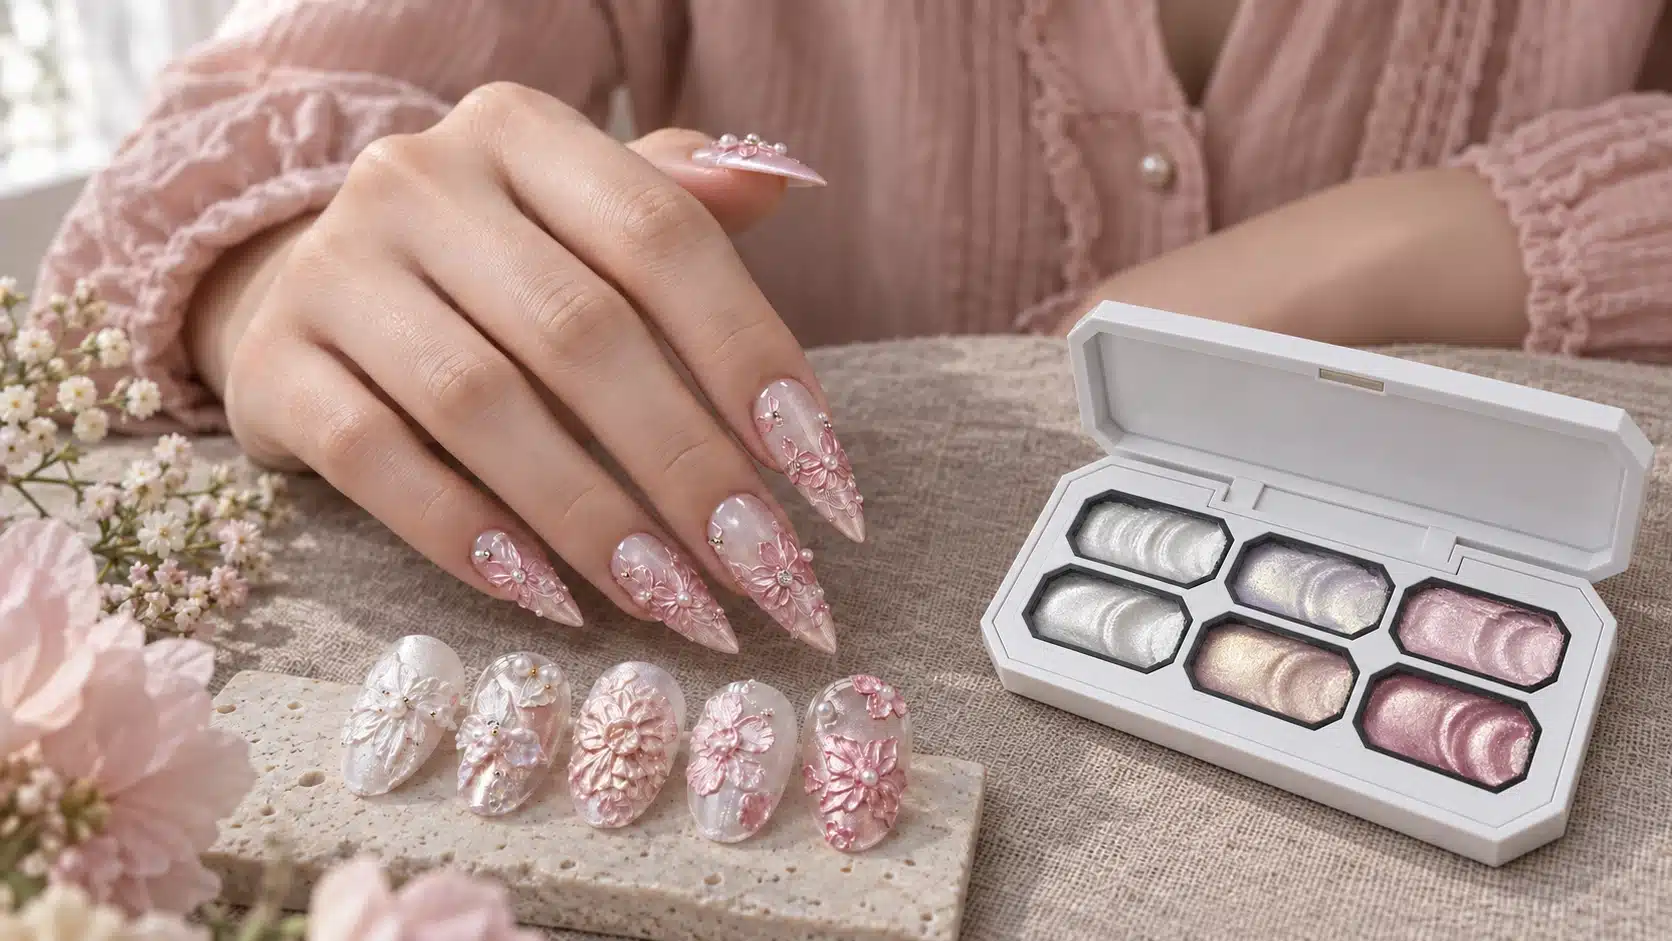
JTING introduces Dusty Pink Sculpture Gel, a six-shade collection for sculpted flowers, leaves, lace and fine decorative nail art. Creamy whites, warm champagne and pink tones combine with built-in shimmer to give the relief its own color and finish. For brands, distributors and salon suppliers, the palette offers a focused floral addition to an existing gel nail polish range.
Its clay-like, high-viscosity, non-flowing texture supports both fuller petals and finer painted details. Technicians can shape a flower as the focal point or work with smaller amounts for lace, decorative lines and French edges. After curing, the relief has a glossy, no-wipe surface and needs no additional top coat over that relief.
A100 Dusty Pink Sculpture Gel comes in an 82 × 50 mm palette with six separate compartments, each containing 3 g. The collection includes Milky White, Pearl Silver White, Aurora White, Champagne Gold, Cherry Blossom Pink and Rose Pink. JTING supports wholesale supply and private label discussions covering your logo, labels and outer packaging.
The compact assortment lets your team explore several looks within a related color family: a pale bridal flower, a deeper pink rose, a champagne accent and a shimmer French edge. Purchasing can evaluate the six shades together, while salon education can focus on the techniques your customers actually use. A clear first selection connects the palette's decorative possibilities with your brand, professional service range and launch plans.
02. Where Fine-Shimmer Sculpture Gel Fits in Your Nail Art Range
Dusty Pink Sculpture Gel adds shaped floral volume and fine-shimmer detail to a nail art range. Its decorative role becomes clear when a painted flower outline is placed beside a flower with raised petals: one draws attention through marks on the surface, while the other also uses height and overlap. Consider that distinction when deciding whether the collection fills a gap in your existing offer.
Compare the Way a Design Is Made
Flat painting works through line, color and the space around a motif. Sculpted flowers introduce a petal edge, a fuller interior and layers that remain visible from different angles. Preformed decorations arrive with their shape already established. Sculpture gel gives the technician material to form the decoration on the prepared nail, allowing the arrangement to be developed around the chosen flower size and position.
These approaches can serve different customers within the same professional range. A salon wanting a restrained floral accent may favor a small shaped blossom; a more elaborate service may center on a layered rose. Someone seeking a drawn floral pattern may be more interested in the palette's fine-line work. Start the buying discussion with the desired design and the technician's working method, then assess the sample handling and service requirements together.
Give the Palette a Recognizable Category
This is a decorative 3D nail art gel for flowers, leaves, lace, fine lines and French edges. Its sculpting purpose concerns ornamental relief on a prepared surface. Extension and structural building remain separate jobs with their own product requirements. That distinction helps customers choose sculpture gel for nails according to the artwork they want to create. JTING’s 3D nail art gel guide explores the broader range of decorative gel applications.
Within a well-stocked color line, the six-shade palette can become a flower-and-detail collection supported by selected background colors and art tools. Where raised flowers are already familiar, lace and French-edge work provide another reason to explore it. A distributor can present those uses as separate design choices within one palette; a salon supplier can choose a leading technique that matches its customers' services. The resulting offer is easier to understand when each design has a clear role.
03. Give Each of the Six Shades a Clear Design Role
The three whites, champagne and two pinks give the palette a coordinated direction without making every design look the same. Shade selection begins with the relationship between the flower, its smaller details and the background. White petals can lead a pale composition, champagne can supply a warm accent, and the pinks offer a choice between a light blossom and stronger rose color.
Compare the Three Whites Side by Side
01 Milky White is a creamy white with fine white shimmer. It is a useful starting point for pale petals where the shape carries the design. Try a single flower with open background around its edges, then consider a smaller leaf or lace detail as a companion. A cream-and-white pairing creates a restrained direction; a more contrasting base makes the petal boundary easier to distinguish during training.
02 Pearl Silver White is a cool white with silver shimmer, offering a cooler direction for flowers and highlights. 03 Aurora White has shifting purple-green iridescent highlights within its white color. Keep the flower and base similar when choosing among the whites, then inspect both the overall tone and the shimmer as the tip turns. Their differences can be useful in a collection even when all three are used for pale floral relief.
Use Champagne and Pink to Organize Accents
04 Champagne Gold brings a warm champagne tone with fine gold shimmer. Consider it for one petal, a stylized leaf or a short line beside a white flower. The amount of visual emphasis is a design choice: a small accent can connect companion nails, while a larger champagne flower gives the warm tone a leading role. Choose its position before adding more decorative elements, so the main flower remains easy to identify.
05 Cherry Blossom Pink is a soft pink with silver shimmer. 06 Rose Pink is a deeper rose tone with pink-gold shimmer. Cherry Blossom Pink can lead a light floral group, with Rose Pink repeated in selected petals or a companion motif for a stronger accent. For a deeper collection direction, reverse that balance and make Rose Pink the main flower. The placement of the two shades matters as much as their inclusion.
For your shade selection, use the same simple petal shape across all six colors before choosing finished combinations. This makes the actual color and shimmer easier to assess independently of elaborate artwork. Keep Nos. 01–06 visible on the shade chart and selected designs, including when a theme name is added. A white flower with a champagne leaf and the same flower with a pink leaf can then be discussed as two specific arrangements, with the relevant shades immediately clear to purchasing and salon staff.
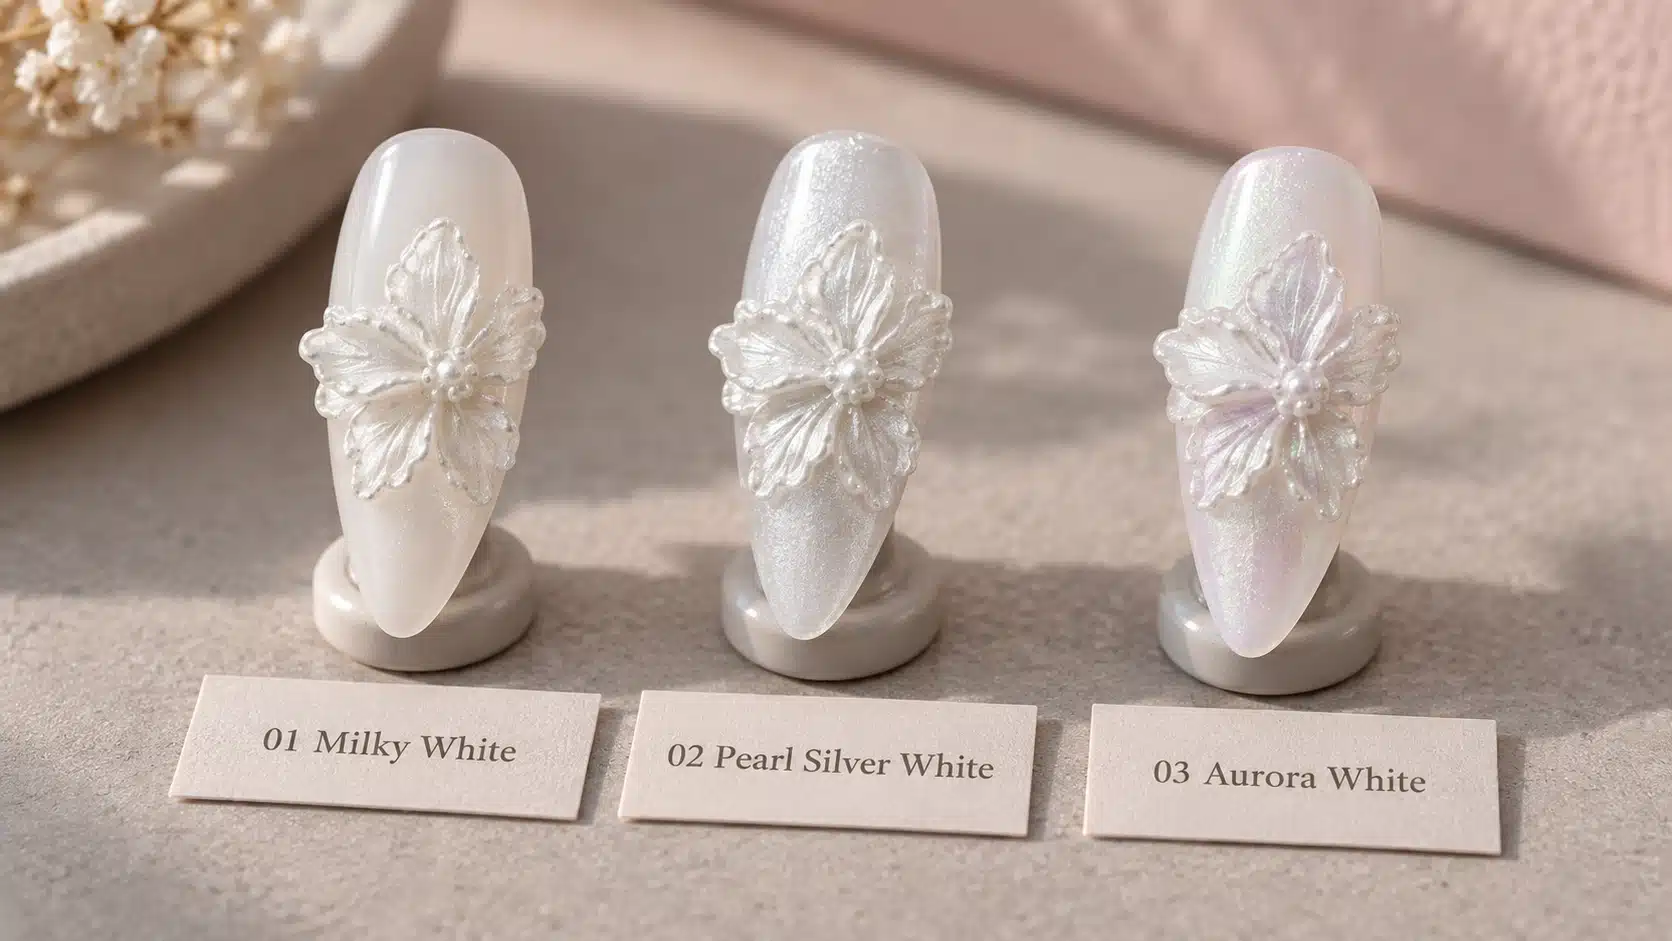
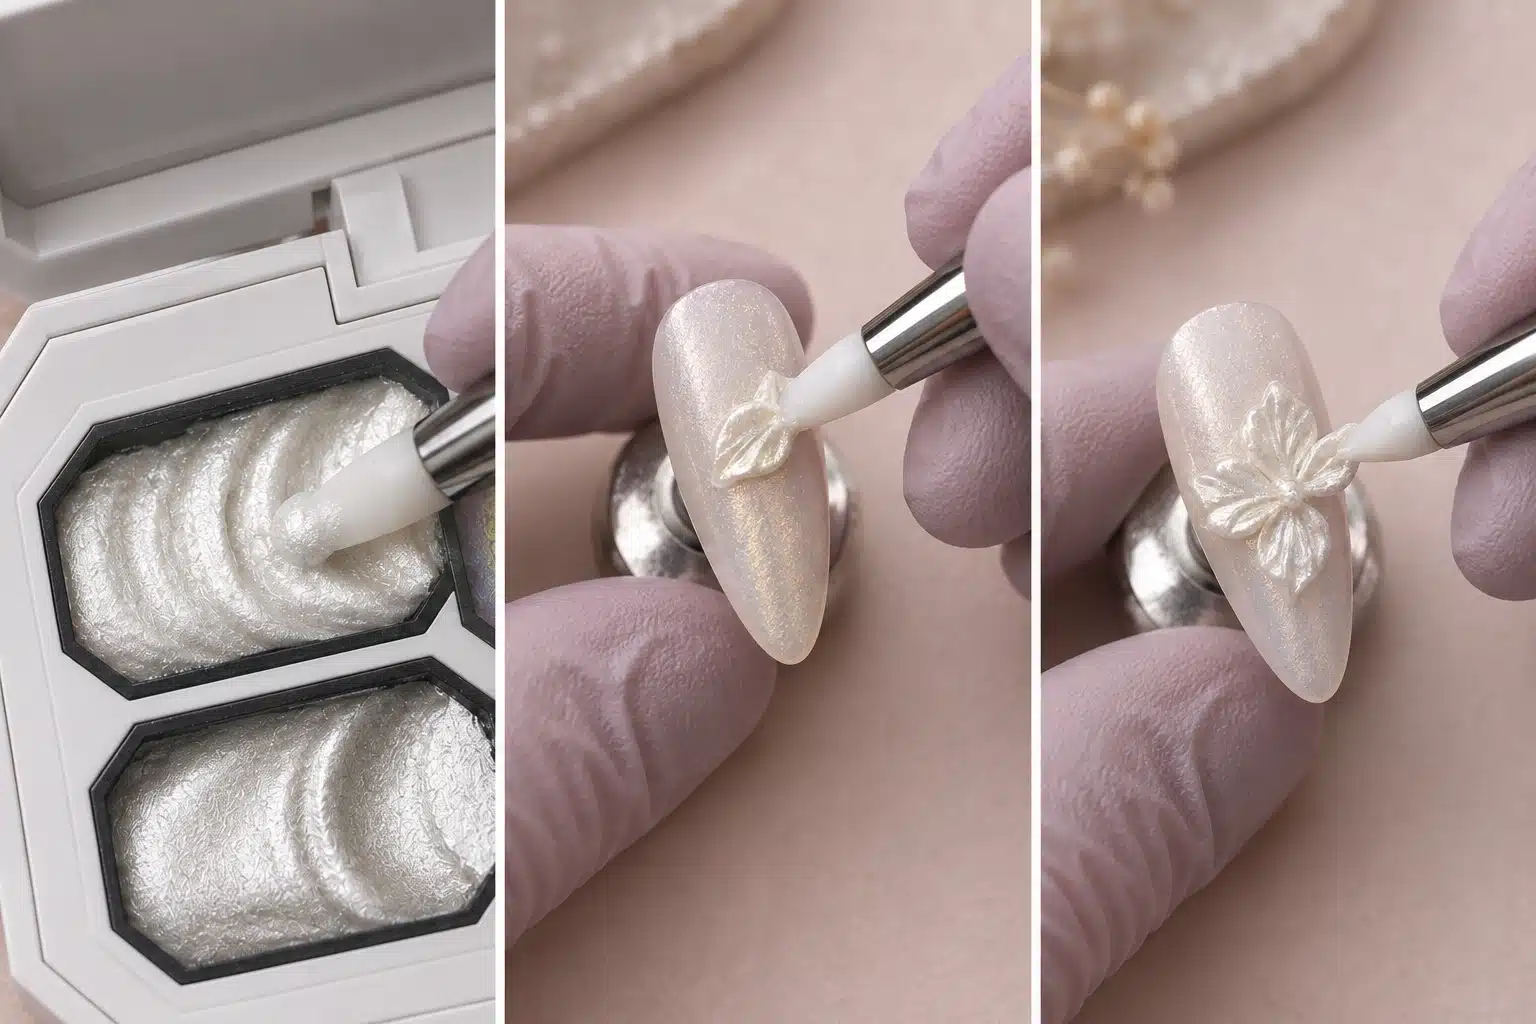
04. Control Gel Pickup, Petal Edges and Raised Detail
With a clay-like sculpture gel, the amount picked up and the way the tool contacts it are central to the shape being made. A full petal, a pointed leaf and a fine line ask for different amounts of material and different contact areas. Begin by deciding which part should be raised, where its boundary should sit and how much room the detail has on the nail.
Choose the Pickup for the Intended Shape
On a practice tip, place a small pickup in the planned petal area and inspect its footprint before refining the outline. If the intended petal is broad, consider how much of the nail it will cover once shaped. For a narrower petal, pay attention to the space left beside its tip. This exercise helps the technician relate the pickup to the actual design instead of treating every flower as the same size.
A fuller pickup provides material for a raised petal; a smaller amount is used for fine lines and French-edge painting. Develop these as distinct applications with the tools your customers intend to use. For petal work, inspect the fuller area and the edge together. For a line, concentrate on the width and continuity of the mark. A quantity that suits one task should be reassessed when the intended shape changes.
Refine the Edge before Adding Complexity
Try a petal with a more slender outer edge and a fuller interior, using a suitable shaping tool to develop the outline. Examine the boundary before adding neighboring petals. Where the edge looks broad or uneven, adjust the individual petal on the practice tip rather than trying to disguise it with a larger flower. The visible transition between edge and volume is part of the petal's character.
Where petals meet, choose between a visible gap and a planned overlap. Inspect the whole flower before adding another detail. If several edges gather in the same small area, try repositioning a petal to clarify the arrangement. More volume is only useful when it contributes to the intended shape.
Compare a broader petal with a narrower one in the same shade and on the same nail shape. The broader form may occupy the center, while the narrower form may suit a smaller supporting flower or side arrangement. Choose according to the intended composition. This is also a useful exercise for customers learning how a change in petal proportions affects the flower's footprint.
Make Tool Contact Part of the Demonstration
Customer training should show the pickup, the contact area and the edge being refined. Let the learner see where the tool touches the gel and which part of the petal changes after that contact. A brief pause between adjustments is often more informative than continuous movement that conceals the outline. Use the customer's selected shaping tool so the lesson is tied to the working setup.
Inspect the petal from above for its outline and from the side for its raised profile. A simple petal beside the finished flower gives customers an accessible starting point. They can judge its shape before considering the spacing, color and layers needed for the complete design.
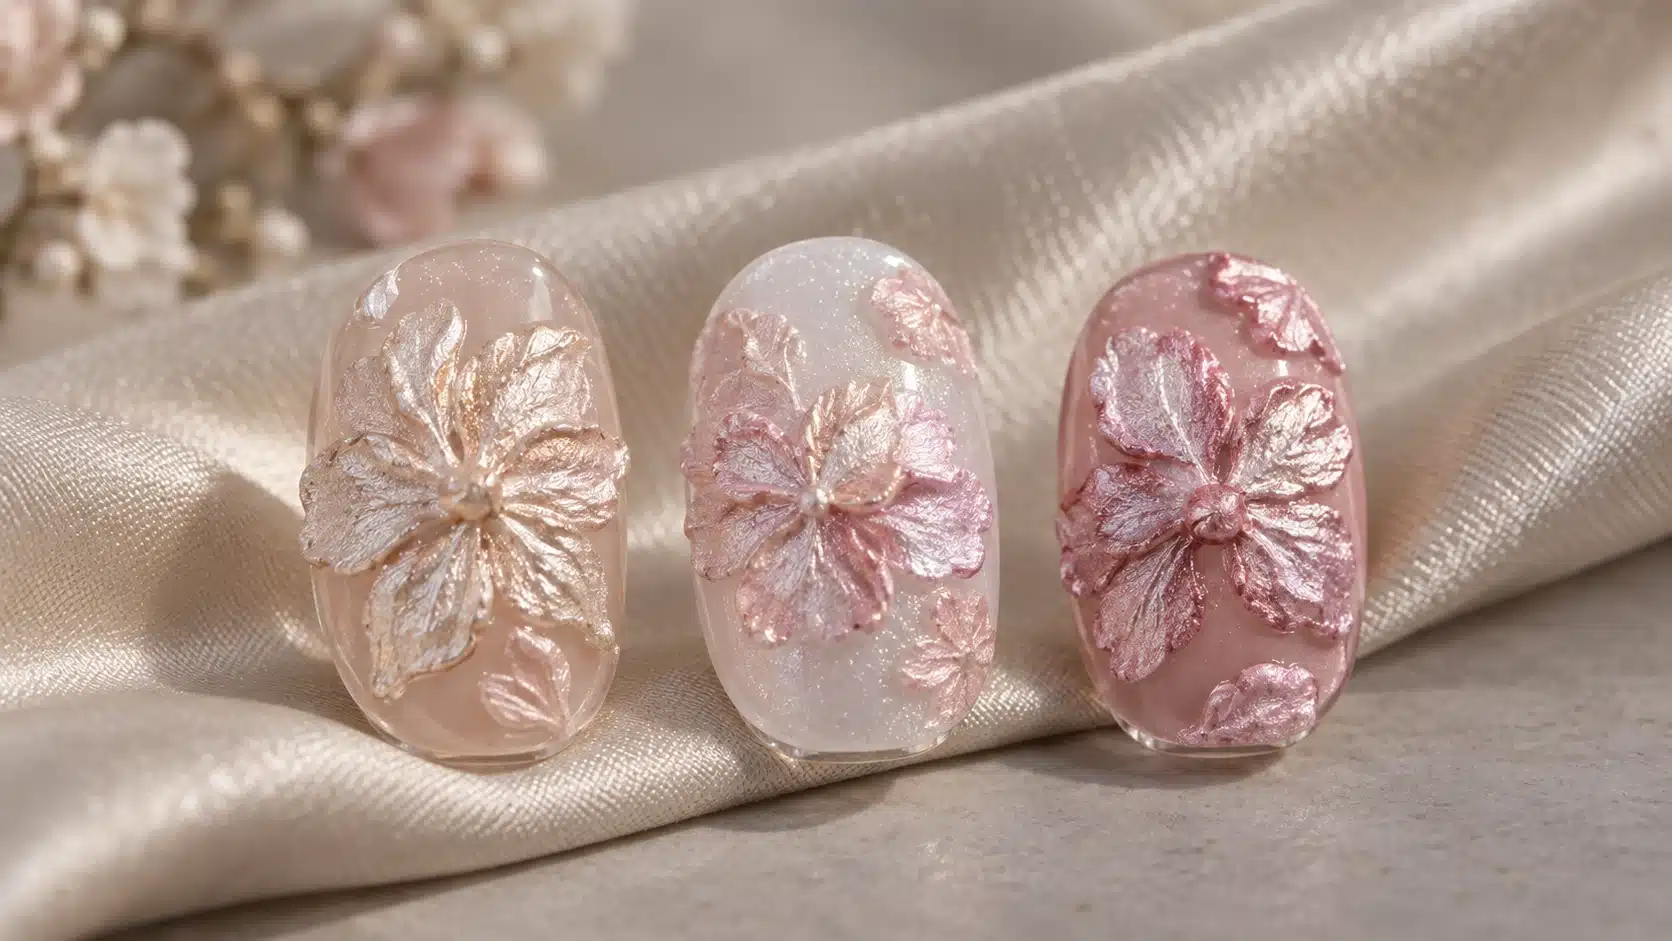
05. Show the Built-In Shimmer without Losing Sculpted Detail
The fine shimmer and pearlescent detail are part of the gel itself, giving each sculpted shape color and light-catching detail without a separate shimmer powder. That finish becomes most useful when the petal outline remains clear. For a pale flower, consider the base color and the space around the petals together; for champagne or pink detail, consider how strongly the accent should stand out within the design.
Show the Surface and the Silhouette Together
A flower's appearance depends on more than the shade in the well. The prepared background, shaped thickness, viewing angle and light all affect what the customer sees. Inspect the entire tip first, then look closely at the petal surface. A visible highlight should complement the form. If the flower loses its outline against a very similar background, consider a clearer contrast or a simpler arrangement before adding more decoration.
Different parts of a petal can present the shimmer differently as the tip turns. The edge, fuller center and overlap each occupy a different position in the relief. Explore those areas on a simple flower before choosing a detailed collection image. This helps you decide whether the design's emphasis comes from the color, the raised shape or the shimmer, and whether those elements support the same visual idea.
Give Moving Highlights an Honest View
Aurora White benefits from being viewed through several angles because its iridescent highlights shift purple-green. The other shades also deserve a view that keeps their color and shimmer recognizable. For online selling, pair a full-tip image with a short turning view under consistent lighting. Keep the overall shade readable in both, so a professional customer can choose from the collection without relying on an isolated bright reflection.
Pearls and crystals can accompany the floral work as additional decorative materials. Decide whether they support the gel flower or become the main focus. A restrained sample using the gel alone shows the built-in finish; a styled version can illustrate a more elaborate service. Keep the additional materials identifiable in your sales presentation, allowing customers to choose the effect they want and understand what they need to create it.
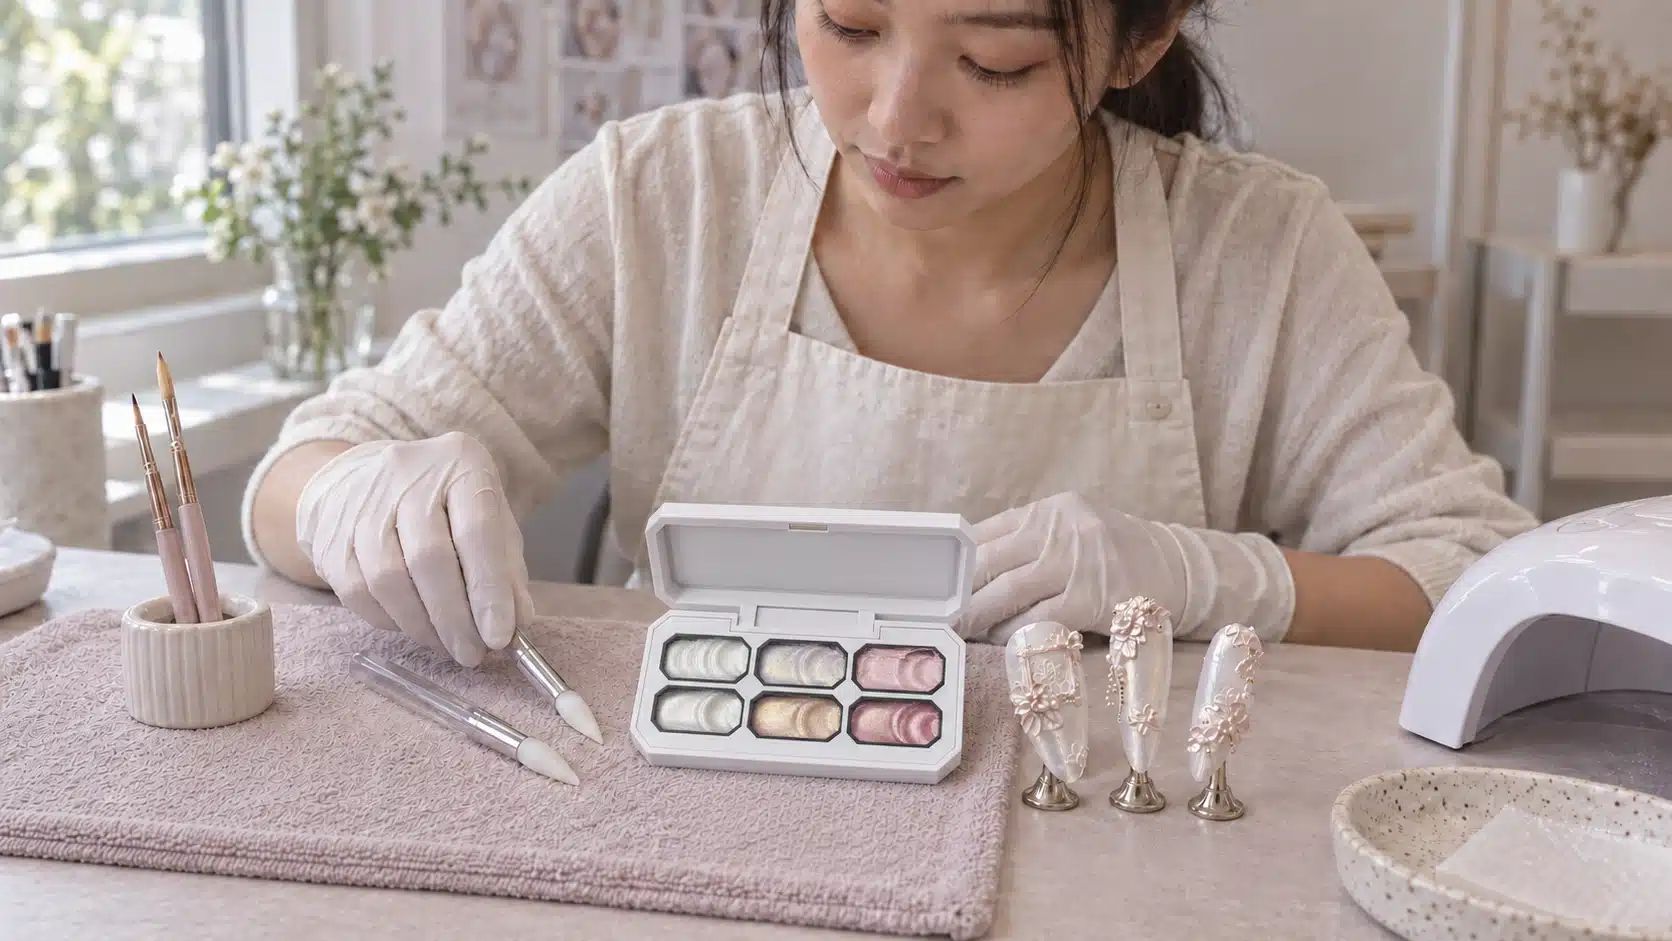
06. Prepare the Tools and Base System for Professional Use
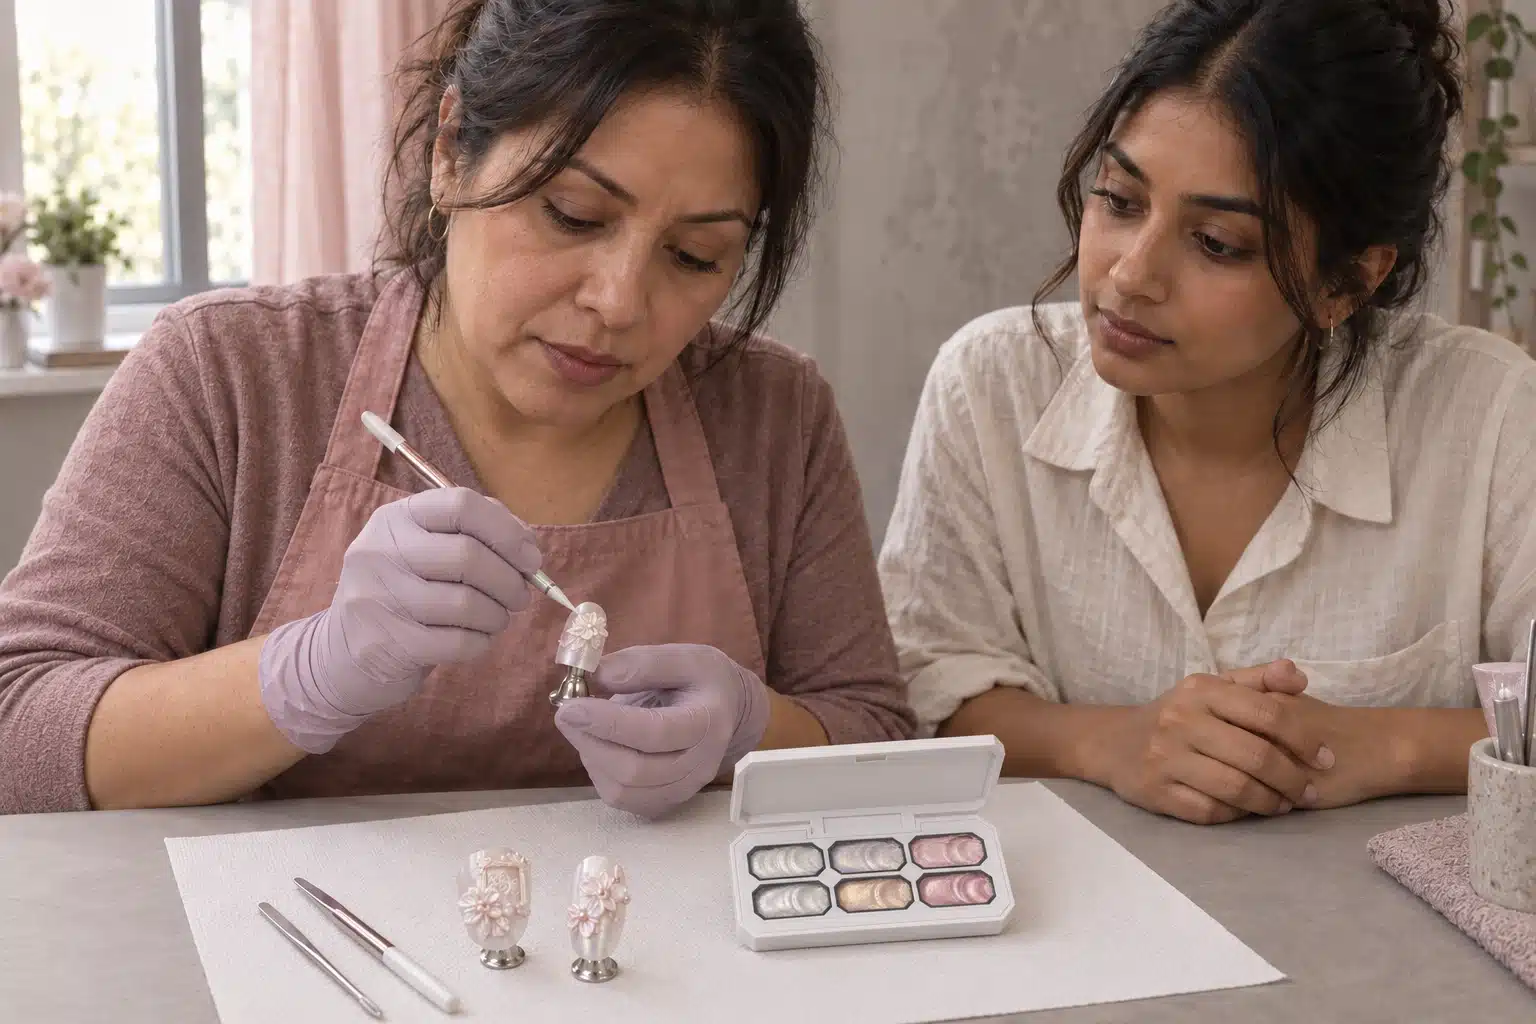
Prepare the workstation for the technique your customers will learn first. A suitable shaping tool is needed for placing and refining petals, while a detail tool supports lace, fine lines and French-edge work. Practice tips and a stable holder let the technician inspect the shape from different angles. Include the lamp and the selected base products from the start, so the exercise can be completed as a whole.
Assemble the Complete Working Combination
The working combination includes the base gel, any background color, Dusty Pink Sculpture Gel and the finishing materials required for that background. Apply and cure the base products according to their own instructions before developing the relief. Choose the lamp and sculpture gel conditions for the intended design. Knowing which product belongs at each stage helps the technician concentrate on shaping instead of improvising the preparation or finish.
For an introductory petal exercise, choose a background that makes the edge easy to distinguish. A tonal pairing may suit the collection, while clearer contrast can help with learning tool placement. Prepare a tip for the flower and another for fine-line work, giving each technique its own working area.
Keep the Palette and Supporting Materials Clear
Position the open six-compartment palette close enough for controlled pickup and keep the selected shade easy to identify. Use suitable clean tools between colors so the white, champagne and pink tones retain their separate identities. Place any pearls or crystals to one side of the working gel. The technician can then follow the intended order and find the needed material without disturbing the developing relief.
Check the tool's access to the chosen compartment with the tip holder in place. Leave room to turn the nail and inspect its side profile, particularly for a fuller flower. Keep the contact point and petal outline accessible, so the technician can inspect both while refining the shape.
Confirm the tools and accessories included in your offer and identify what customers need to prepare separately. Supply or recommend a suitable tool for the applications you support, or work with the salon's existing option. Keep the palette, companion base products and optional decorations clearly identified.
07. Create Layered Flowers and Leaves with Sculpture Gel
Individual petals, stylized leaves and layered roses provide three useful starting points for floral work. The petal teaches outline and volume, the leaf introduces a longer shape, and the rose combines several shapes into a layered composition. Begin with the simpler elements on prepared practice tips, then develop the arrangement that suits your professional customers' services and level of experience.
Start with a Petal and a Leaf
Apply and cure the selected base and background according to their instructions. Choose one sculpture gel shade, place the pickup within the intended petal area and refine its boundary with a suitable tool. Retain the raised area that gives the petal its volume while working on the outline. Look at the whole nail before curing, checking the petal's position as well as its individual shape.
For a stylized leaf, try a longer outline with a narrower end and decide which direction it should point. The white, champagne and pink tones can support a coordinated decorative leaf beside the flower. A slender leaf may continue the arrangement along the nail, while a broader one occupies more of the background. Add a restrained central detail only where it strengthens the chosen form and leaves its silhouette clear.
Develop a Readable Floral Arrangement
Decide where the main flower will sit before shaping several petals. A centered placement makes the flower the focal point; a side cluster can leave more visible background elsewhere on the nail. A smaller flower toward the free edge offers another balance. Consider the nail's length and width when choosing among these arrangements, allowing room for the planned leaf or fine-line accent instead of adding it wherever space remains.
A supporting leaf should contribute to the direction of the flower. Try placing it along the nail to continue the composition, or angle it away when the arrangement needs a wider footprint. Look at the gap between the leaf and nearby petal as part of the design. The most useful position keeps both shapes recognizable and gives the remaining background a deliberate role.
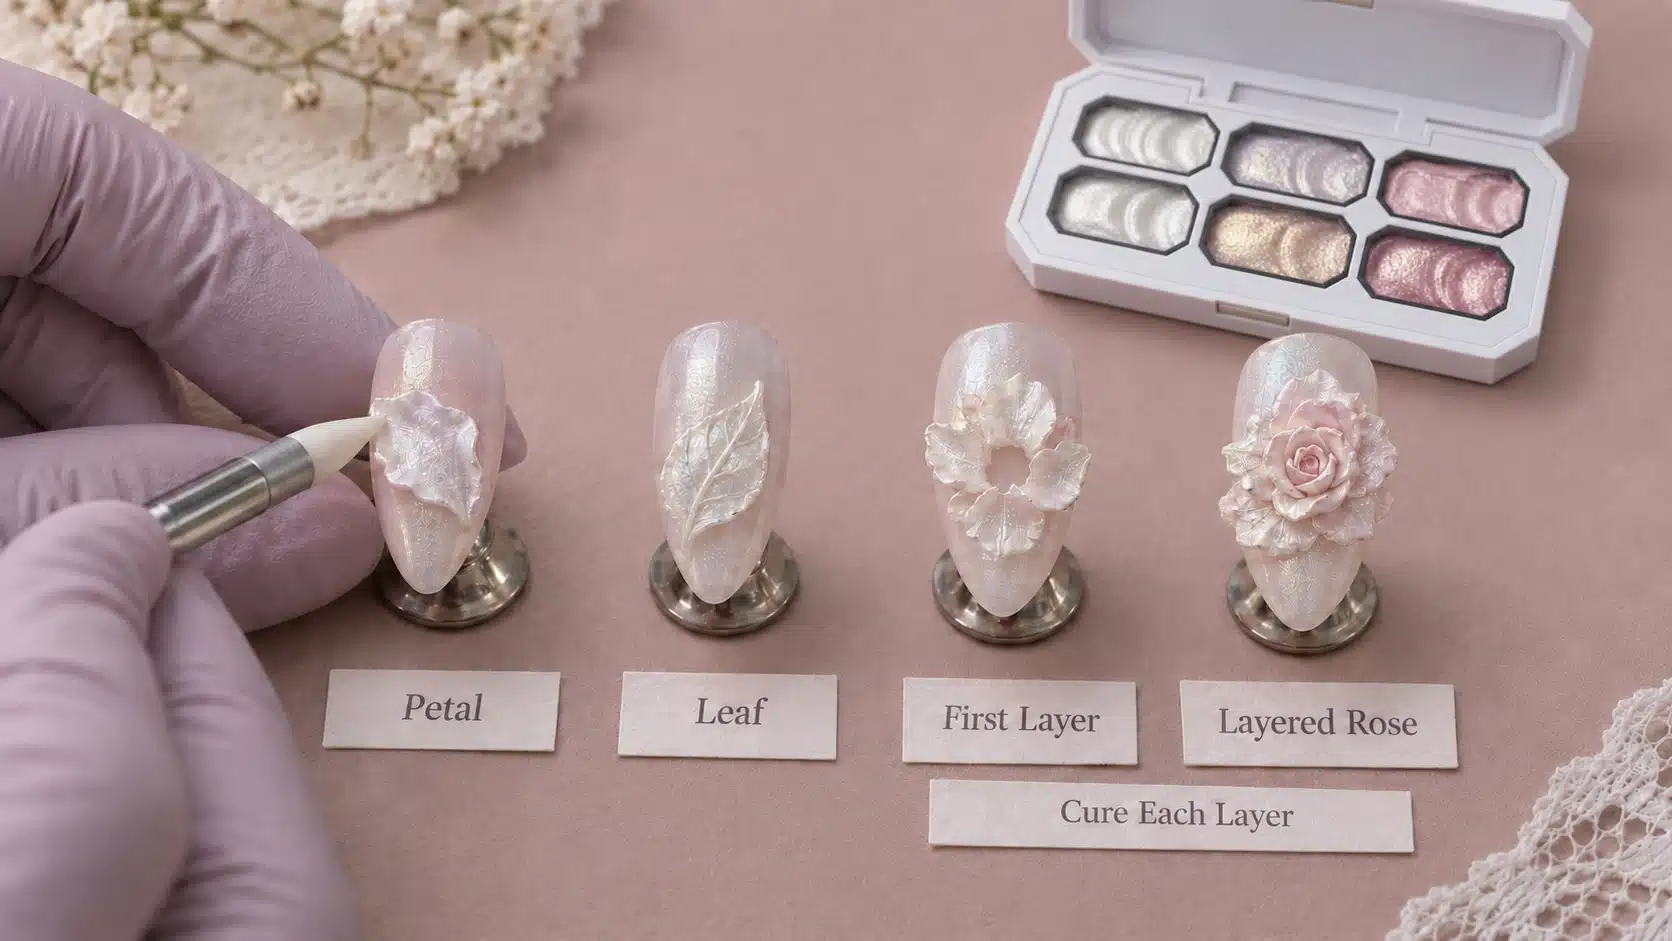
For a larger rose, build two to three layers and cure each completed layer before adding the next. Refine the first petal group's spacing and outlines before curing, then develop the following group around the planned overlaps. Keep some of the lower petals visible where they contribute to the finished rose. The layer sequence is an opportunity to assess the developing flower before more detail conceals its earlier shapes.
Choose the later layers according to the flower you want to make. A second layer can develop the depth and overlap of a restrained rose; a third can support a more developed arrangement when appropriate for the design. Follow the product's thickness and curing instructions at every stage. Examine the raised profile as well as the top view, and avoid letting the desire for a fuller flower determine the whole composition.
Use Color to Explain the Layers
A single-shade white rose lets the outline and overlaps carry the design. For pink floral work, try Cherry Blossom Pink as the leading color and place Rose Pink in selected details for a stronger accent. Champagne can be used as a separate petal or supporting leaf in a warmer arrangement. Keep the role of each color clear: a main flower and its accents usually need different amounts of visual emphasis.
Offer a restrained blossom and a fuller layered rose, accompanied by a leaf or smaller floral detail. These give a salon different options for its art services. During training, complete one layer before moving to the next, allowing learners to inspect the petals. The finished 3D nail art flowers connect color selection with the technique they have seen.
08. Use One Gel for Lace, Fine Lines and French Edges
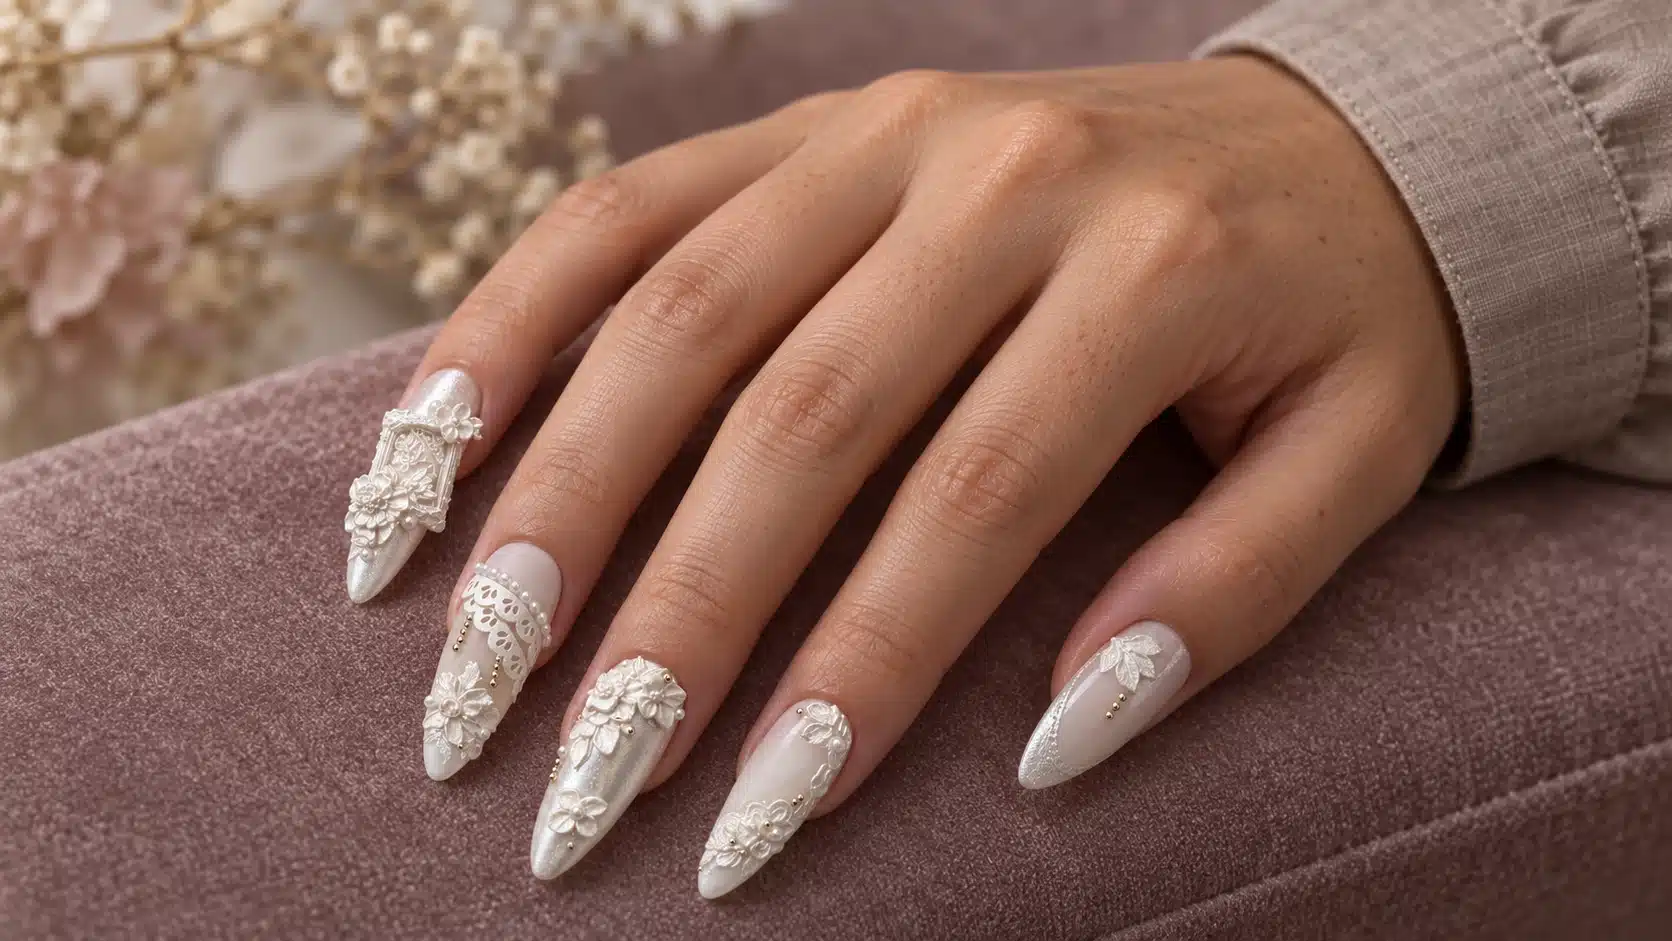
Lace, fine decorative lines and French edges use the palette on a smaller scale than fuller flowers. Their appeal comes from the relationship between the marks and the open background around them. For salon suppliers, these applications offer another way to introduce the six shades to customers who want shimmer detail without making a large rose the center of every design.
Develop Fine Lines as a Separate Exercise
Choose a suitable detail tool and begin with a smaller pickup than you would use for a fuller petal. Try short straight lines, gentle curves and separated accents on a prepared tip. Inspect the beginning, middle and end of each mark. A line that looks consistent in the center may have a heavier start or a different finish, making those areas useful points for the technician to refine during practice.
Consider the line's width together with its place in the design. A narrow accent beside a flower should support the flower's outline; a repeated line pattern can become the main motif. Leave enough room between neighboring marks for their individual shapes to remain visible. When the composition becomes crowded, reduce the number of marks or change their spacing before deciding that the line itself needs more material.
Build Lace from a Motif the Customer Can Read
Try a small row of loops, curved details or a repeated floral outline as the starting lace motif. Establish one unit, then develop the repetition while watching the gaps between marks. Those gaps are part of the pattern. A simple repeat can give the nail a lace-inspired edge; a denser motif can occupy a larger area. Choose the scale that suits the nail shape and the desired balance with the background.
Intersections and tight turns deserve attention because several marks may gather in a small space. Inspect whether each part of the motif remains distinct before completing the decorative stage. Pale lace on a contrasting base makes the outline prominent, while a closer tonal pairing creates a more restrained direction. Both can work within a collection, provided the customer can still recognize the intended lace pattern at normal viewing distance.
Plan the French Edge around the Nail Shape
A French-inspired design can use a curved edge, a narrow line or an edge accompanied by a small floral accent. Work with the complete nail outline in view and consider the balance between both sides and the center. Champagne can supply a warm detail, while a white or pink shade gives the edge another color direction. JTING’s French manicure gel guide offers additional ideas for organizing this part of your professional range.
Pay attention to where the decorative curve reaches the sides of the nail. A well-planned center still needs transitions that suit the complete outline. If the edge is made from repeated short details, decide their spacing along the curve before adding a floral accent. The accent can sit on a companion nail instead when the edge already carries enough detail. This choice keeps the collection coordinated without crowding one tip.
Teach flower shaping and fine-line work as distinct applications, showing their different pickup and tool contact. A flower alongside a French or lace design gives purchasing a fuller view of the palette. Salon customers can then choose the white, champagne and pink applications that fit their services.
09. Cure Layered Designs and Finish the Relief Correctly
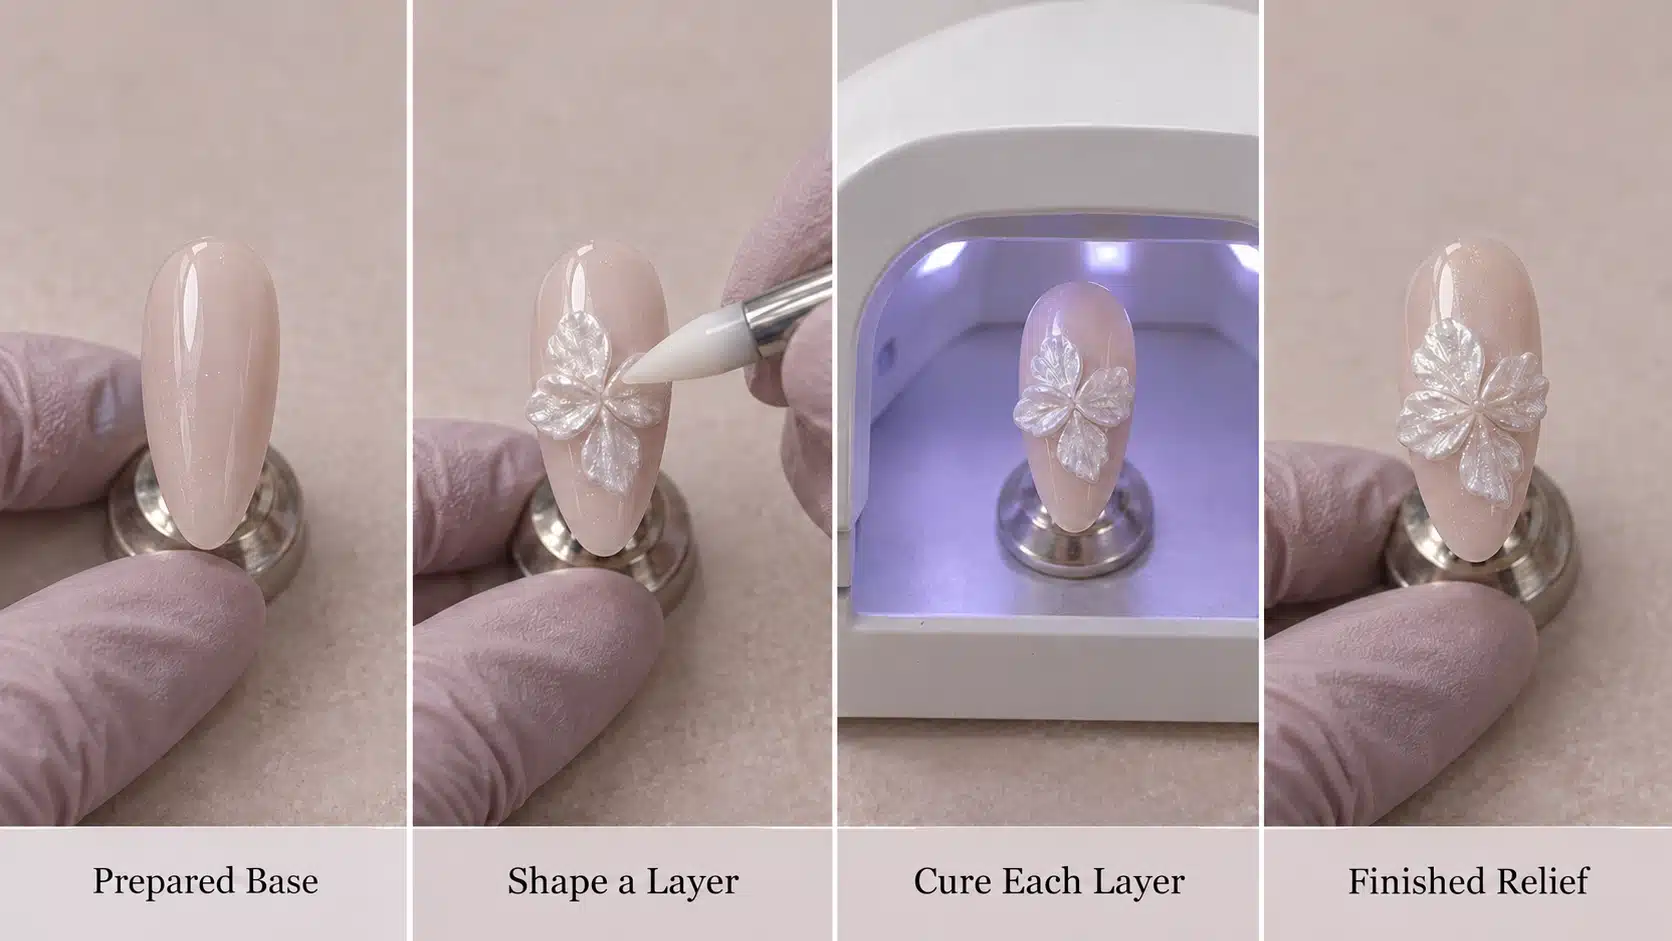
Shape and inspect the current decorative layer, then cure it before adding the next. Larger roses use two to three layers with curing between stages. This sequence gives the technician a defined point to complete one group of petals before continuing the flower. It also belongs in customer training: learners need to understand when curing happens as well as how the finished rose is shaped.
Match the Guidance to the Actual Design
The curing range for Dusty Pink Sculpture Gel is LED 30–60 seconds or UV 60–120 seconds, subject to the actual lamp, gel thickness and product instructions. Confirm the conditions for your chosen design and use them consistently through sample review and training, including each curing stage of a larger rose.
A fuller petal and a fine decorative line have different application profiles, even when they use the same shade. Identify the intended thickness and shape before deciding the applicable cure from the product guidance. Where a customer changes the lamp or develops a substantially different relief, review those conditions for the new application. Keeping the cure tied to the actual design is more useful than reducing the entire palette to one remembered number.
Separate the Relief Finish from the Background Finish
After curing as instructed, the Dusty Pink Sculpture Gel relief is glossy and no-wipe, with no additional top coat needed over that relief. The flower, leaf or line is the finished sculpted surface. Completion of the surrounding products is a separate part of the service.
The base color around the relief follows its own system's finishing requirements. Establish the sequence for the selected base, background and any finishing product together with the sculpture gel instructions. JTING’s gel top coat guide can help with background-finish selection. In a floral design, identify both surfaces during training, so customers know how the surrounding color is completed and which raised areas have the sculpture gel's no-wipe finish.
Make Necessary Stages Visible in Training
Teach a large rose in stages: prepared background, first petal layer, cure, following layer or layers with curing between them, then the finished relief. At each pause, let the learner inspect which petals have been completed and which areas remain available for the next layer. This keeps the flower's development clear, particularly where a later petal will partly cover one that is already in place.
Inspect the completed rose from above and from the side. The top view shows the arrangement and overlapping edges; the side view shows the raised profile. Use both when discussing whether the flower suits the proposed design. A full-tip view also allows the customer to judge how the relief sits within the complete nail instead of focusing only on its most detailed area.
Keep curing stages visible in customer training even when a video is shortened. Retain the chosen lamp and application conditions with the instructions. Staff can then answer questions about the rose or line using its actual sequence, including the completed layers and the finish on the surrounding base.
10. Build Bridal, Floral and French-Inspired Collections
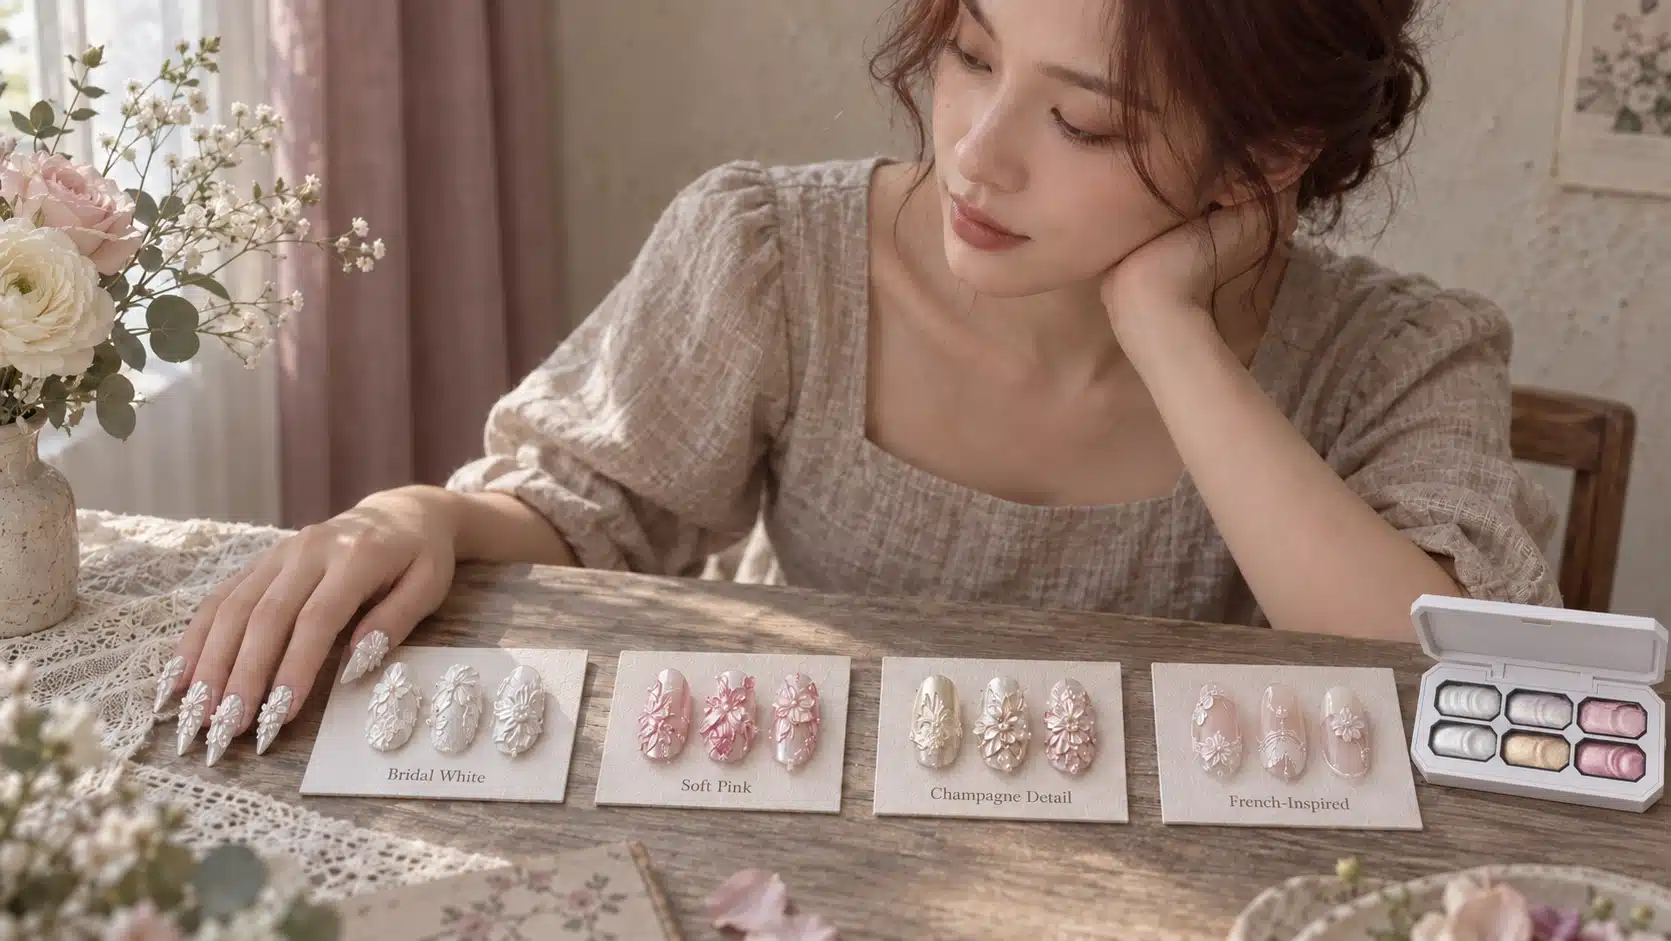
The palette can support pale bridal florals, pink flower arrangements and shimmer French-inspired work. Choose a theme that fits your brand and professional customers, using a main design, a restrained companion and a simple detail to connect the group.
Create a Pale Bridal Floral Direction
Milky White can lead a pale floral group with a main flower, a stylized leaf and a smaller lace detail. Pearl Silver White gives the collection a cooler white option, while Aurora White introduces shifting highlights. Choose among them with the intended base color in place. A tonal background can support a soft composition; a clearer contrast can give the same petal arrangement more visible definition.
Let one nail carry the larger flower and use the others to repeat a smaller detail or shade. This gives the group a focal point without requiring a full rose on every nail. If pearls are part of your styled bridal look, decide where they belong in relation to the gel flower. Keep the relief easy to see, with enough background around it to preserve the pale composition's shape.
Give Pink Florals a Distinct Color Story
Cherry Blossom Pink can lead a light floral collection, with Rose Pink appearing as a stronger detail or on a companion nail. For a deeper direction, make Rose Pink the main flower and use the softer pink to vary the supporting motifs. A leaf, short line or smaller blossom can repeat the chosen accent. The group stays connected through color while giving each nail a distinct purpose.
Choose the amount of deeper pink according to the overall look. One Rose Pink flower beside lighter companions creates a different balance from several deeper flowers across the group. Consider the clients your professional customers serve and the designs they are comfortable offering. A smaller blossom and a layered rose can belong to the same pink collection, giving the salon options for different art preferences.
Connect Champagne Detail with French-Inspired Work
Champagne Gold can connect a pale flower to a warm French detail elsewhere in the group. Try a champagne leaf beside the leading white flower, then repeat the shade in a narrow decorative edge or short line on a companion. Decide which element should take attention first. When the champagne detail is intended as an accent, its position and scale can support the collection without giving every nail equal visual weight.
Pair a detailed French edge with a simpler companion and small floral accent. A white edge, champagne line and pink blossom can be developed separately or within a coordinated selection. Keep the curve visible across the nail, placing the flower on a companion when the edge already carries enough detail.
The main flower establishes the theme, the companion repeats its color or motif, and the simpler detail provides a restrained option. Keep shade numbers with each design for sample approval and purchasing. Staff can then move from the customer's preferred look to the relevant colors and technique.
A theme such as pale floral relief, rose-colored petals or champagne French detail gives the group a concise identity. Pair the finished designs with their material requirements, allowing customers to choose the visual direction and understand what they need to develop it.
11. Troubleshoot Petal Shape, Fine Lines and Finished Appearance
Identify the detail that needs attention: a rounded petal edge, crowded lace or a pale flower that disappears against its background. With Dusty Pink Sculpture Gel, changes in pickup, shaping, decorative scale and presentation deserve separate comparisons because they answer different questions.
Clarify an Indistinct Petal Edge
For a petal that looks like a mound, examine the outline before curing. Look for a fuller center, a thinner edge and a clear boundary between neighboring petals. On another practice tip, use the same shade and tool with a smaller pickup. Shape the edge deliberately and compare the silhouettes. If the smaller petal has the intended definition, the exercise gives your technician a more useful handling example than a general instruction to press harder.
For a crowded flower, assess the spacing before changing the gel quantity again. Fewer petals within the same footprint can make the individual shapes easier to see. A single petal may already have a clear edge, while the complete flower looks indistinct because its neighboring shapes overlap too heavily. An overhead view shows spacing; a side view shows the height and relationship between layers.
Separate Petal Volume from Layer Count
A rose can become visually bulky through large individual petals, a wide footprint or the arrangement of its layers. Compare those features with the size of the nail. Reduce the pickup on a separate tip when the petals themselves are too heavy; adjust their placement when the flower occupies too much of the background. Larger roses are built in two to three layers, with each completed layer cured before the next. The actual lamp, thickness and product instructions govern curing; a glossy surface alone cannot establish that an unusually thick design has cured throughout.
Bring Fine Lines Back to the Intended Scale
For a line that overwhelms the pattern, compare a short straight stroke, a curve and a French-edge study with the intended detail brush. A smaller pickup lets you evaluate line width without changing the color or background. Inspect the start and end of the mark as well as its center. In lace work, judge the spaces between repeated details: even individually neat lines can create a dense pattern when placed too closely together.
Check Contrast and Shimmer Presentation
Compare pale relief on two backgrounds when its outline is hard to read. The same petal size and light position make the background comparison more useful. If fine shimmer is visible on the physical sample but absent in a photograph, examine the light direction, viewing angle and exposure. The flower needs enough shape definition to remain recognizable alongside its highlights.
For a technical enquiry, provide the shade name, tool, base products, lamp and application sequence with clear process images. A finished photograph can show the design issue but cannot identify the complete method.
12. Turn Application Demonstrations into Customer Training
Professional customers need to see what the gel does under the tool, not only the finished manicure. A useful introduction to Dusty Pink Sculpture Gel includes three exercises: a petal or leaf for basic shape control, a layered flower for construction of decorative detail, and a fine-line design for smaller-scale work. Each exercise should answer a different practical question.
Begin with a Single Petal and Leaf
The first exercise can show one shade on a prepared practice tip. The important moments are pickup from the well, placement on the tip and edge shaping before cure. A close view of the tool contacting the gel helps the learner relate the movement to the changing outline. A finished image alone cannot show how the rounded pickup became a thinner petal edge.
Follow the petal with a leaf made using the same shade and tool. Ask learners to compare the rounded and pointed outlines, then attempt both shapes. This gives the educator a clear way to discuss placement and proportion. The aim is a deliberate shape the learner can explain, rather than an elaborate flower produced by copying movements without understanding them.
Teach a Layered Flower as a Sequence
For a larger rose, show the first completed layer, its cure and the addition of the next layer. Repeat for a third layer when it belongs to the selected design. A side view helps explain how the later petals sit in relation to the earlier ones. Seeing those intermediate stages makes the two-to-three-layer method understandable without requiring the learner to infer the structure from a completed bloom.
The demonstration needs the actual lamp and thickness guidance used for that sample. The supplied ranges are LED 30–60 seconds and UV 60–120 seconds, subject to the product instructions and working conditions. At completion, explain that the cured relief needs neither wiping nor an additional top coat over it; finish the surrounding base color according to its own system.
Give Fine Detail Its Own Exercise
Use a smaller pickup and the intended detail tool for a narrow line, repeated lace motif or French edge. A useful comparison places the fine-detail exercise beside the flower so professionals can see how quantity and decorative scale change. The same palette supports both directions, but the large-petal movement does not teach line control.
Let a second technician try the exercises from the instructions and demonstration. Hesitation at pickup may call for a closer view; confusion about layers may call for clearer intermediate stages. Their questions identify the explanation needed. Discuss the shade charts, photography or video required for your collection with JTING as part of the supply project.
13. Choose a Sales Approach for Brands, Distributors and Salon Suppliers
The buying conversation should reflect how the customer will sell the palette: a recognizable collection for a nail brand, an understandable offer for distributor accounts, or practical applications for salon professionals. Those commercial roles determine the most useful demonstration.
For Nail Brands: Define the Collection’s Identity
Compare the palette with the decorative products your customers already buy. If your range concentrates on flat painting, a sculpted rose or leaf shows an additional design direction. If you already offer floral materials, assess what the coordinated white, champagne and pink shades add to that offer. The built-in shimmer and six-well presentation can be part of the comparison, alongside the actual technique and finished appearance.
Choose a lead design that belongs to your brand’s visual language. A soft floral collection might introduce white petals with pink accents; a more restrained range might lead with lace and a fine French edge. A second sample can show the other application scale without changing the collection’s identity. This gives the release a clear focus while showing why the palette is useful beyond one featured manicure.
An existing customer may ask, “How does this fit the colors I already own?” Answer with a sample made on a background from your current range. The customer can then judge the relationship directly instead of being asked to accept a broad claim that the palette suits every collection.
For Distributors: Make the Offer Easy to Explain
Representatives need a concise product description and a clear purchase unit: six fine-shimmer sculpture gel shades in one palette, for raised flowers and finer decorative work. An open-palette view, numbered shade chart and two technique samples can support that explanation. The account buyer should also be able to identify the packaging included in the quoted offer.
Different accounts may need different emphasis. A beauty retailer may want a compact presentation customers can recognize on a shelf. An educator may need the shaping sequence. A salon group may want to compare the three whites on its preferred backgrounds. Offer the material relevant to that account’s task, then discuss its expected palette quantity. This makes a wholesale sculpture gel proposal more useful than sending every account the same elaborate nail image.
For Salon Suppliers: Connect the Palette to Professional Use
A larger rose, a small floral accent and a fine-line design give salon buyers a comparison of decorative scale. Their technicians can assess which application suits their current services and which needs additional practice. The smaller accent may be the more relevant introduction for a team exploring relief detail for the first time.
Ask which designs the salon already offers, which tools its team uses and which technique it wants to learn next. Those answers guide the trial and teaching material, while helping the supplier distinguish a training need from a request for another color.
14. Estimate Usage and Plan a Practical First Order
The 3 g in each well is consumed differently in a narrow French edge, a small petal accent and a larger layered rose. Use your own trials to understand that variation, then separate sellable palettes from the units needed for demonstrations and training.
Measure the Designs You Intend to Offer
Choose representative examples from the offer you actually plan to introduce. For each one, identify the wells used, the material picked up and any material left unused during practice. A finished tip shows the successful design, while the trial also includes the attempts needed to reach it. Both matter when estimating the resources required for your own education program.
If you weigh the palette, use a suitable scale and the same conditions before and after the exercise. A trial using one identified shade can help estimate its consumption. A weight change after using several wells describes their combined use and cannot allocate that quantity to each shade. Repeat the exercise where the measurements are small or approximate rather than turn one reading into a fixed purchasing rule.
Measure shaping time separately from curing and preparation. A learner may spend longer refining an edge than a trained demonstrator, while a salon service has its own preparation and design choices. Use the observations for your training plan rather than a universal service count per well.
Track the Six Wells as Well as the Complete Palette
Use a shade-level usage sheet for Milky White, Pearl Silver White, Aurora White, Champagne Gold, Cherry Blossom Pink and Rose Pink. Useful entries include the design being taught, the shade selected, practice use and the remaining material. Beside it, maintain the number of complete unopened palettes available for customer orders. A partially used demonstration palette and a complete sellable unit have different inventory roles.
If your flower-focused offer uses Milky White frequently while Champagne Gold appears only in accents, the demonstration stock may become uneven. That pattern can influence how many palettes you allocate to education and which additional designs deserve attention. A less-used shade may have a useful role in a sample your team has not yet shown. For individual-shade replenishment needs, discuss the available arrangement with JTING.
Review usage by purpose as well as shade. A palette consumed in repeated staff practice tells you about the training program; it does not by itself show which complete palettes customers want to buy. Customer orders, account requests and demonstration use should therefore inform different parts of the first-order estimate.
Build the Opening Quantity from Actual Commitments
Start with palettes required for customer commitments, add the units allocated to demonstrations, and decide a separate stock allowance for expected enquiries. Each part has a different basis. Customer commitments come from your accounts, demonstration units come from the planned sessions, and the allowance reflects your own appetite for holding inventory.
A cost worksheet can show the quoted palette cost, requested packaging, teaching materials and any companion products your offer requires. Identify items purchased once for the introduction separately from items supplied with every palette. This makes the opening budget easier to compare with a later order. Revisit the stock allowance when actual customer enquiries arrive, using the agreed supply schedule to judge when another order would be needed.
15. Evaluate Samples before Approving Bulk Supply
Assess all six shades, both decorative scales and the physical palette to decide whether Dusty Pink Sculpture Gel fits your offer. A consistent background supports color comparison; selected designs, packaging and documents complete the purchasing review.
Review Every Shade before Selecting Showcase Designs
Compare the three whites together on the intended background. Milky White provides a creamy white direction with fine white shimmer, Pearl Silver White has a cooler silver-shimmer character, and Aurora White introduces shifting purple-green highlights. Examine the differences as the sample angle changes. The shade you prefer in a closed-palette photograph may not be the shade that gives your chosen petal the intended appearance.
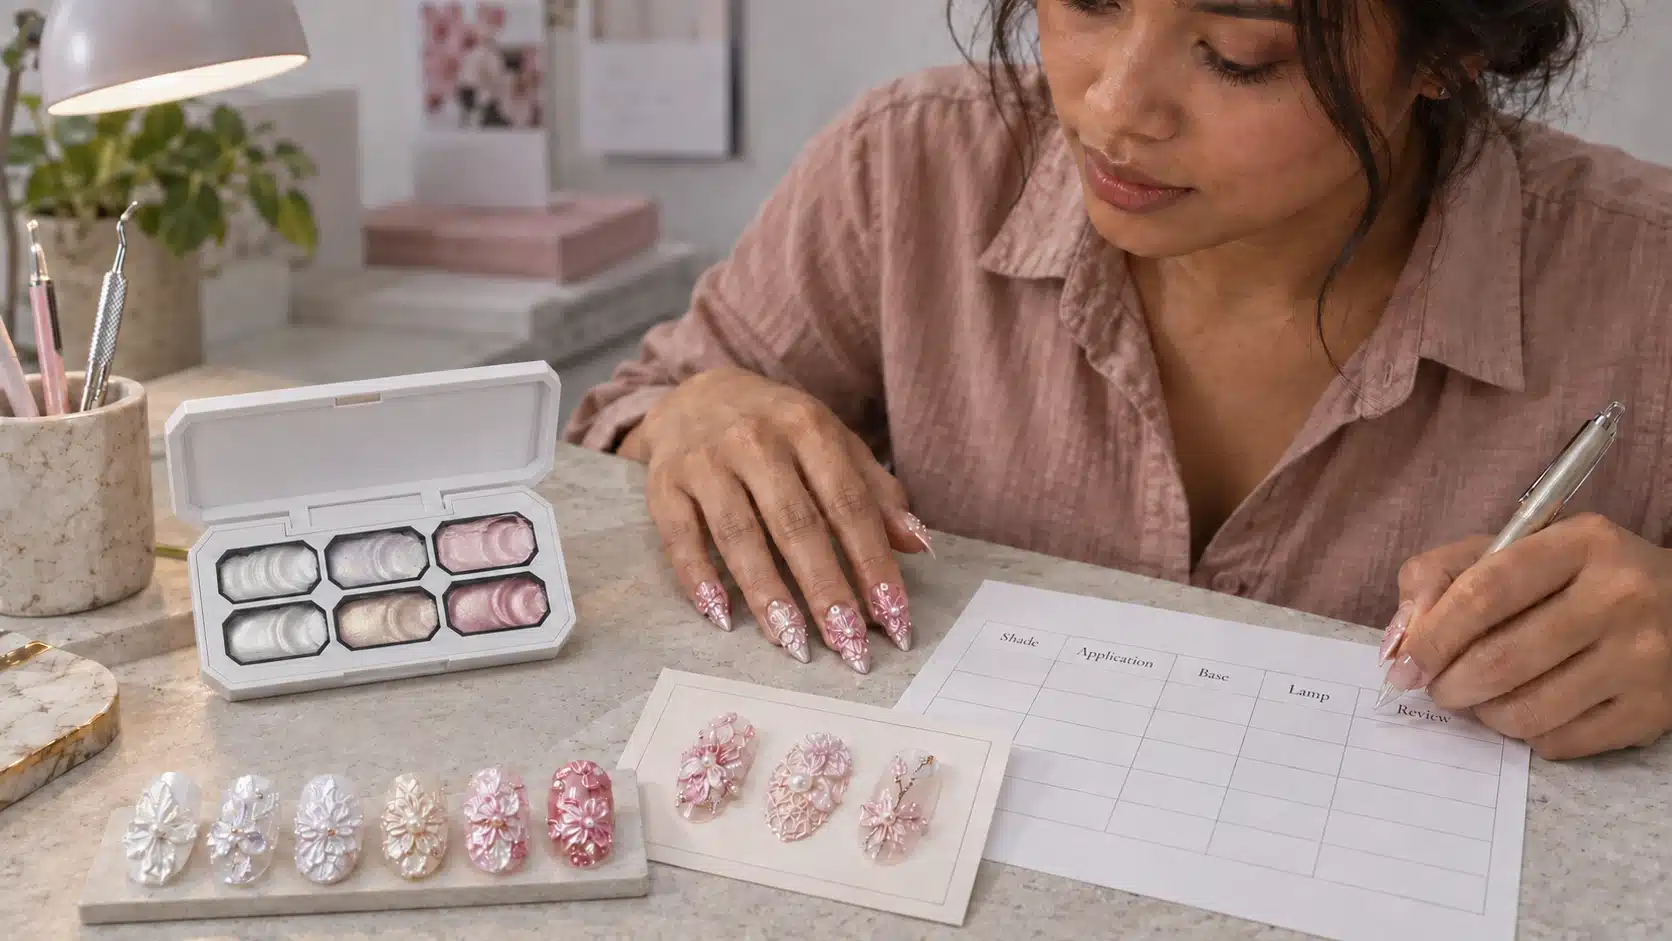
Include Champagne Gold, Cherry Blossom Pink and Rose Pink in the same reference set before choosing complex designs. Then use selected colors for the floral and fine-line trials. This separates the decision about the six-shade assortment from the decision about which applications belong in your launch. The matrix below connects each sample check to a concrete purchasing choice.
| Review Area | Practical Comparison | Decision to Record |
|---|---|---|
| Color and shimmer | Six shades on the intended background; the three whites at different angles | Physical colors and shade names for the collection’s chart |
| Raised flowers | A single petal and a rose with separately cured layers | Your team’s ability to shape the intended floral examples |
| Fine decoration | A narrow line, lace motif and French edge with the tools your customers use | Which smaller-scale applications belong in the introductory offer |
| Complete application | The chosen base, background, lamp and finishing sequence used for the sample | Which application conditions will accompany the accepted examples |
| Physical presentation | Lid operation, well access, shade identification and the proposed outer packaging | Which palette presentation and supplied items purchasing will approve |
Examine the Palette during Actual Pickup
The 82 × 50 mm palette has six separate 3 g compartments. Open it on the surface planned for demonstrations and access each shade with the intended tool. Assess whether the technician can locate the color easily, reach the well comfortably and close the unit after use. These checks concern the physical format a professional will handle, rather than only the appearance of the closed lid.
For branded supply, inspect label readability on the actual unit and review the outer packaging with the palette inside. Check whether opening the package gives access to the product and whether the label, chart and well numbers identify the same shades. If an instruction card or accessory is requested, include it in the packaging review so the sample reflects the quoted contents.
Approve a Reference That Purchasing Can Use
Your approved samples should include the physical color tips, selected applications and the accepted palette presentation. Attach the base, tool and curing conditions to the application examples. A later comparison then has a clear starting point if another sample looks different. An image is useful for discussion, while the physical sample remains valuable for color and viewing-angle assessment.
Agree any remaining adjustment before bulk approval. A label correction, a packaging-fit question and a gel-handling question require different responses, so describe the item and the decision needed. Confirm requested ingredient information and product documents with JTING for the destination market. The final approval should identify the accepted samples, artwork version, packaging and included items that the order will supply.
16. Develop a Private Label Six-Shade Sculpture Gel Palette
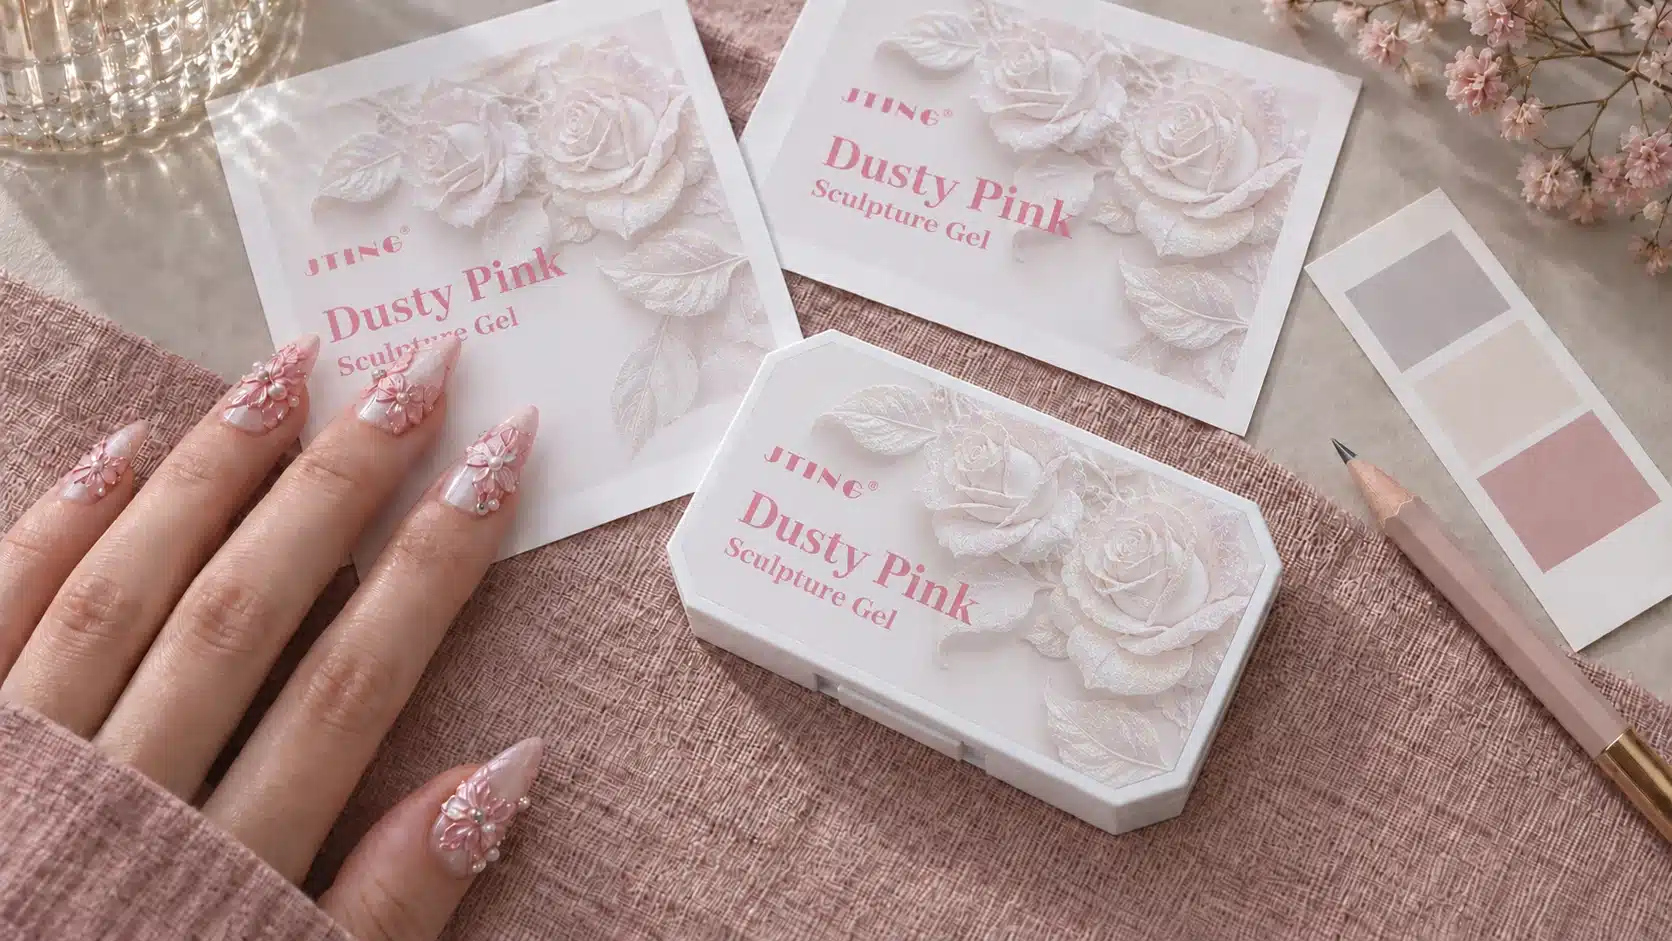
Dusty Pink Sculpture Gel provides a six-shade format with a floral lid and separate wells for your branded collection. JTING’s private label and brand development support includes discussions about logo, label and outer packaging requirements for this palette.
Use the Existing Palette as the Design Starting Point
The compact 82 × 50 mm unit needs a clear information hierarchy. A customer viewing the closed palette should recognize your brand and the product category. When it is open, the shade references should help connect the wells to the color chart. Examine both views when deciding logo placement and the information assigned to the product label.
Your collection name can express a floral theme or a particular visual direction, while Dusty Pink Sculpture Gel identifies the product in the purchasing brief. For example, a soft floral series may emphasize white and pink application samples, with Champagne Gold used as an accent in its imagery. That theme can guide the exterior graphics without implying that the six supplied shades have changed.
Provide the logo artwork and relevant brand colors, then review their placement at the actual palette size. Check the name’s readability, the balance with the existing floral presentation and space for the required product information. A large design file is useful for inspecting detail; the physical-size proof shows whether the customer can read it on the compact unit.
Coordinate Labels, Shade Names and Product Information
Match Nos. 01–06 to the six accepted shade names across the palette and color chart. If your brand uses a separate collection theme, the purchasing specification should still identify the original shade mapping. This is especially useful when marketing chooses a creative name while the receiving team needs to compare supplied stock with the approved samples.
Discuss the product label and sticker requirements with JTING as part of the product order. Depending on your presentation, the label and accompanying material may need the product name, 3 g per compartment, language versions and the information requested for your destination. Identify where each item will appear so essential product information is available when the outer pack is removed.
Ingredient information, SDS/MSDS and other product documents can be discussed according to the product and destination market. Send the document needs early enough for your team to review them alongside packaging. A clear request identifies the product, market and intended use of the file, such as ingredient review or preparation of the product label.
Fit the Outer Packaging to the Approved Unit
Plan custom outer packaging around the physical palette and the experience of opening it. Review internal fit, the way the unit is held and the space required for any agreed instruction card. The outer design can introduce the collection while the floral lid carries its recognizable product presentation. An opening sample lets you assess that relationship more directly than a flat box design.
Approve the packaging sample and final printable artwork together. Specify any card, sleeve or other presentation item in the quoted contents. Different shade groups or a changed palette structure require a separate development review, with their own sampling and approval needs.
17. Confirm the Quote, Launch Plan and Reorder References
The quotation defines the supply offer, the launch plan sets your channel’s ready date, and the reorder reference identifies what to repeat. Connect those decisions to the same palette configuration so price, availability and repeat supply remain clear.
Compare Quotes for the Agreed Palette Configuration
Request Dusty Pink Sculpture Gel in the required number of complete six-color palettes. The quotation should state 3 g per compartment, the branding and the proposed outer packaging. Where “piece” is used as the unit, ask that it be defined as one complete palette. That simple clarification makes both quantities and price comparisons easier to understand.
Compare the contents of each proposal before comparing its total. A palette-only price and a price including branded packaging or an application card cover different purchases. Ask for the included items, any separately priced sample or packaging work, and the agreed transport scope. One-time development charges should remain visible so you can distinguish the opening-order budget from the likely scope of a straight repeat.
Confirm the minimum order quantity and sample and production timing for the selected configuration. JTING’s private label gel nail polish buying guide provides a broader overview of samples, costs and launch preparation. The project quotation should establish the terms for this six-color palette, including the approvals required before production and the delivery arrangement relevant to your destination.
Purchasing needs the palette count, approved sample reference, packaging version, supplied material and commercial terms on the same offer. If one proposal includes an instruction card and another excludes it, decide whether the card belongs in your customer offer, then compare equivalent contents.
Prepare the Collection for Release
Start with the date stock needs to reach your own selling channel. Work backward through receiving, transport, production and the relevant approvals using the schedule agreed for the project. Allow your team time to inspect delivered stock and prepare account shipments. A factory production interval and the date a distributor can supply its customers are separate points in the plan.
Packaging approval and commercial imagery need to converge before release. If the final label changes, the product images and account sheet should show that label. If the offer includes an application card, the contents description should identify it. This makes the product customers see in the launch match the product they can order.
For a distributor, channel readiness may include sending the final price and contents sheet to representatives before account orders open. For a salon supplier, it may include giving educators the selected demonstration samples. For a brand, it may include completing the listing with the full shade chart and agreed packing description. Choose the preparation that your channel needs, then set availability messages against the supply position.
Review Feedback and Prepare Reorders
Customer feedback is most useful when it identifies a specific decision. “Which white was used in this flower?” calls for a shade answer. “Where is the cure between these layers?” calls for a clearer technique explanation. “Can I replace this well?” calls for a supply discussion. Respond to the question raised before changing the assortment.
For a repeat order, reference A100 Dusty Pink Sculpture Gel, the previous order or approved sample, the palette quantity and the accepted label and packaging version. State requested changes separately. Repeating the existing six-shade collection is a different brief from developing a revised color group.
Compare complete palette stock with customer commitments and the agreed replenishment schedule. Demonstration-well depletion can inform education needs, while account orders inform sellable stock. Where individual-shade supply is important, obtain the available arrangement from JTING before offering that option to customers.
18. Questions Professional Buyers Ask about Dusty Pink Sculpture Gel
Is This Sculpture Gel Intended for Decoration or Nail Building?
It is intended for decoration: flowers, petals, leaves, lace textures, fine lines and French edges. Its clay-like, high-viscosity texture is used to shape raised detail within your selected nail system. For purchasing, focus on the decorative applications your customers need, including both larger floral work and finer accents. Nail building is a separate product selection.
How Should I Choose between the Three White Shades?
Choose by the appearance you want on the intended background. Milky White gives a creamy white direction with fine white shimmer; Pearl Silver White has cooler silver shimmer; Aurora White adds shifting purple-green highlights. Compare actual petal samples at different angles. A white that looks distinct in the well may relate differently to the base color of your finished design.
Should I Evaluate Flowers and Fine Lines Separately?
Yes. A flower sample shows volume, petal edges and layering. A line or French-edge sample shows control with a smaller pickup and a detail tool. Include both if you plan to offer both applications. A beautifully shaped rose does not answer whether your team can produce the narrow marks needed for a restrained lace or French design.
Why Should a Larger Rose Be Cured Layer by Layer?
The larger-rose method uses two to three layers, curing each completed layer before the next is added. This is the application sequence to follow for the design. Use the supplied LED 30–60-second or UV 60–120-second guidance in relation to the actual lamp, gel thickness and instructions. Layer count should describe the flower’s construction, rather than become a reason to increase uncured thickness.
Which Parts of the Design Need Wiping or an Additional Top Coat?
The cured sculpture gel relief has a glossy, no-wipe finish and needs no additional top coat over it. The surrounding base color follows its own system’s finishing instructions. For example, a background made with separate color products still needs the completion steps specified for those products. The relief’s finish describes that decorative surface, not every product used on the nail.
What Training Samples Should Accompany a Professional Introduction?
A petal or leaf, a layered flower and a fine-detail example provide a useful starting set. The first teaches shape, the second shows the separately cured layers, and the third explains smaller-scale tool control. Select designs appropriate to your customers’ skills and service interests. Their initial questions will help you decide which close-up or intermediate stage needs a fuller demonstration.
Are Tools, Pearls and Crystals Included with the Palette?
The gel contains its own fine shimmer; pearls and crystals visible in styled designs are additional decorations. Tools, base products and accessories are included only when the quotation expressly lists them. If you want to sell a coordinated bundle, specify each requested item with the palette so the contents, price and customer description refer to the same offer.
How Should I Describe the Net Content and Buying Unit?
The format is one six-color palette, measuring 82 × 50 mm, with 3 g in each compartment. State the required number of complete palettes in your enquiry; the quoted price and quantity should use that same unit. For usage planning, estimate material consumption from your own selected designs, including practice use, instead of assigning a service count to each well.
Can I Replenish a White or Pink Well That Runs Out First?
A separate replenishment format needs confirmation with JTING. The current product is the complete six-color palette. Tell the team which shade you need, its application and the quantity or arrangement you are seeking. Uneven use is a useful purchasing observation, but it does not establish that individual wells or refills are part of the available supply offer.
What Can Be Branded for a Private Label Collection?
JTING supports logo, label and outer packaging requirements for the current six-shade palette. Discuss the brand artwork and presentation you want, then approve their placement and physical packaging. A different shade group or a changed palette structure needs a separate development review. This distinction helps define whether your project is branding the existing collection or developing another format.
Which Product Documents Should I Request for My Market?
Request the information your importing and product-review process needs for this palette, identifying the destination and product clearly. Ingredient information, SDS/MSDS and other documents can be discussed depending on the product and market. Agree the available files and their scope with JTING, then assess them alongside your intended label and packaging before approving the product presentation.
What Should I Confirm before Placing My First Order?
Confirm the accepted samples, complete palette quantity, branding, outer packaging, included items, requested documents and project-specific minimum order and timing. Your target arrival date helps distinguish production planning from stock readiness in your channel. The final quotation should describe the offer you intend to receive, while the approved sample and artwork identify the product and presentation behind that offer.
19. Plan Your Dusty Pink Sculpture Gel Collection with JTING
Decide what you need to evaluate first: the six-shade assortment, floral shaping, fine-detail work or a branded palette presentation. That priority gives your sample request a clear purpose and helps JTING focus the discussion on the collection you want to introduce.
Explore the JTING six-color Dusty Pink Sculpture Gel product page, then contact JTING about your project with your sales channel, destination, estimated palette quantity and target timing. For private label supply, include your logo and label or outer packaging direction. If a particular flower, lace or French-edge application matters to the offer, describe that sample requirement as well.
You can then discuss the sample scope, product presentation, available documents and quotation for the actual six-color palette. A defined request gives you something concrete to review before deciding the opening order and the materials your own customers will receive.