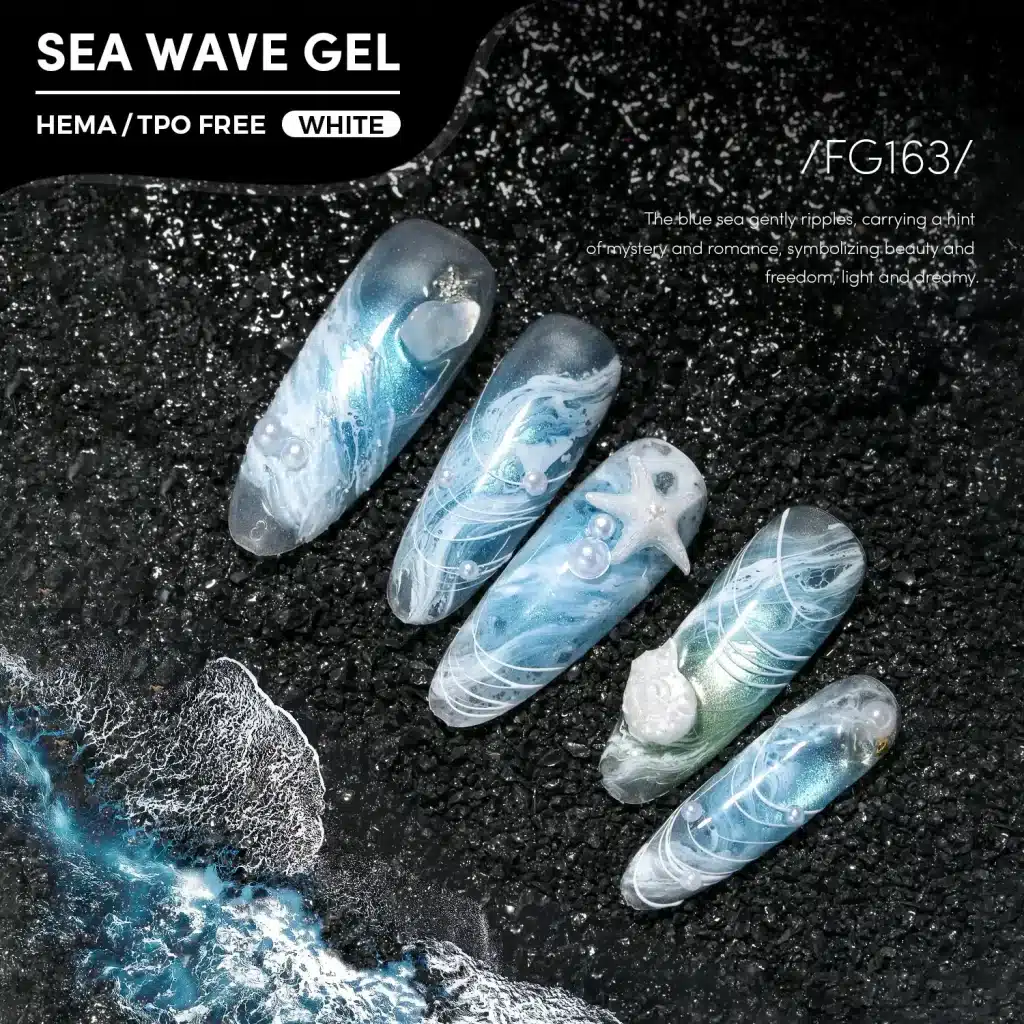
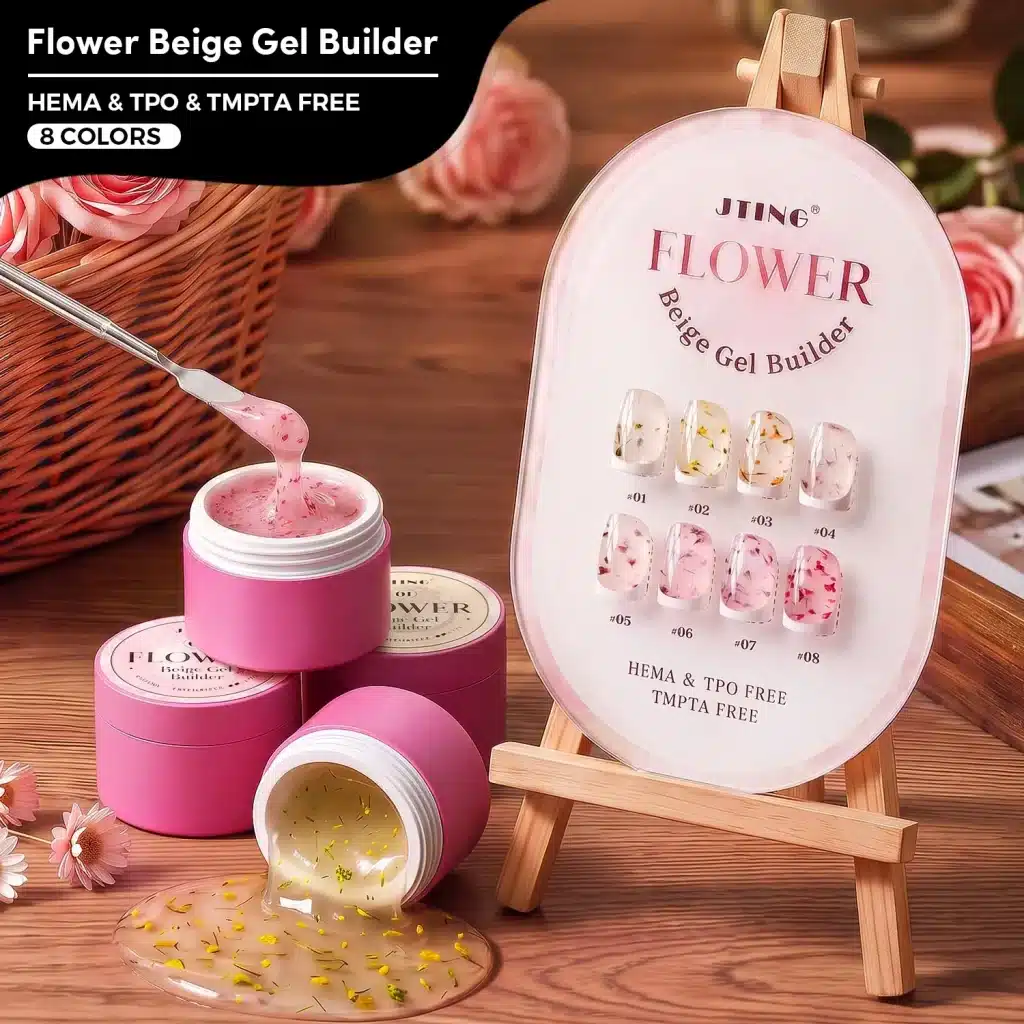
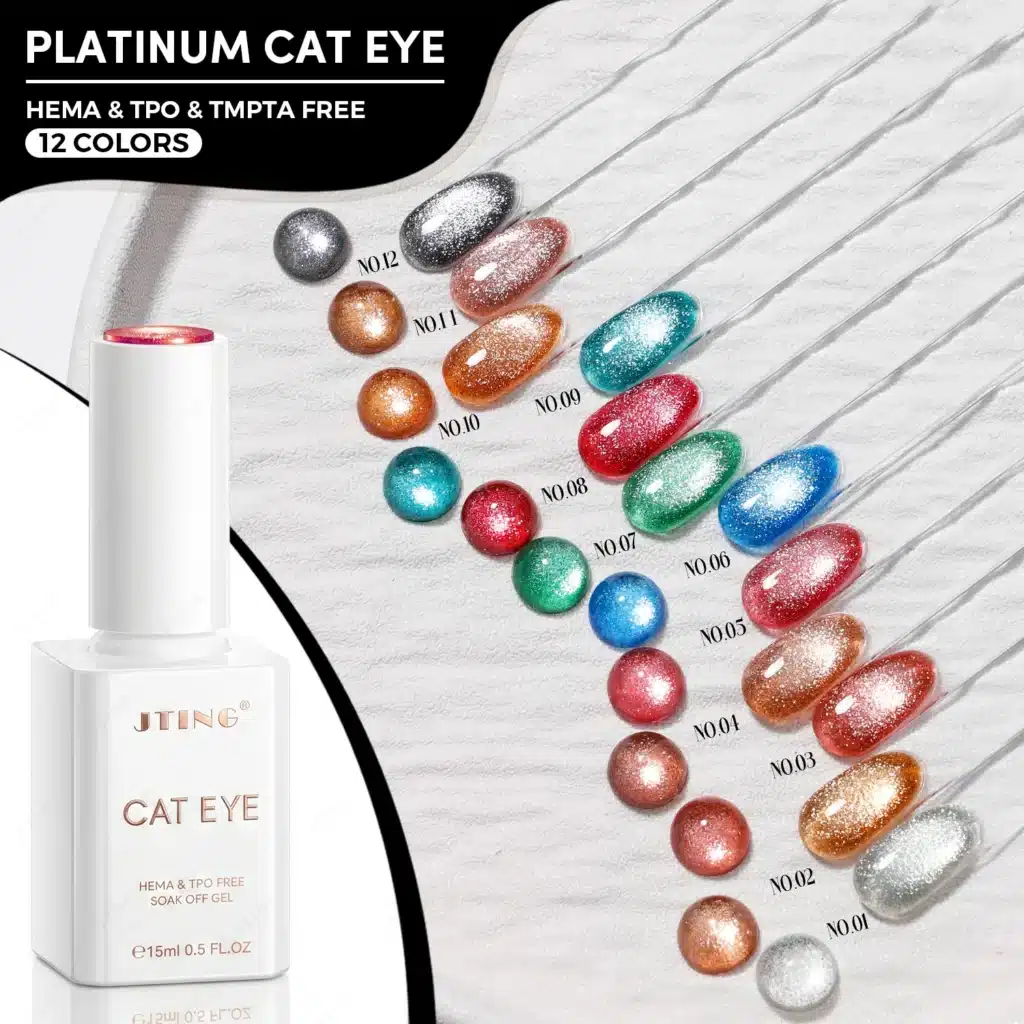
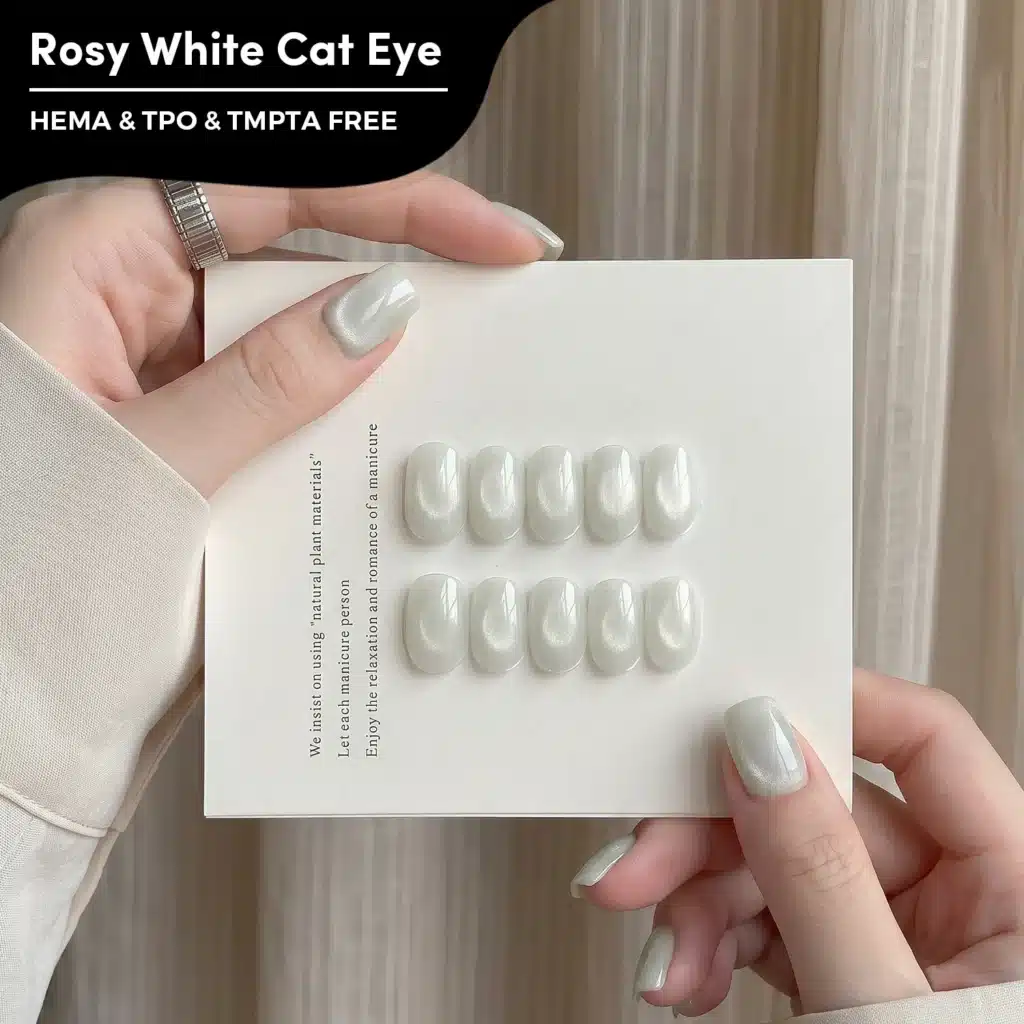
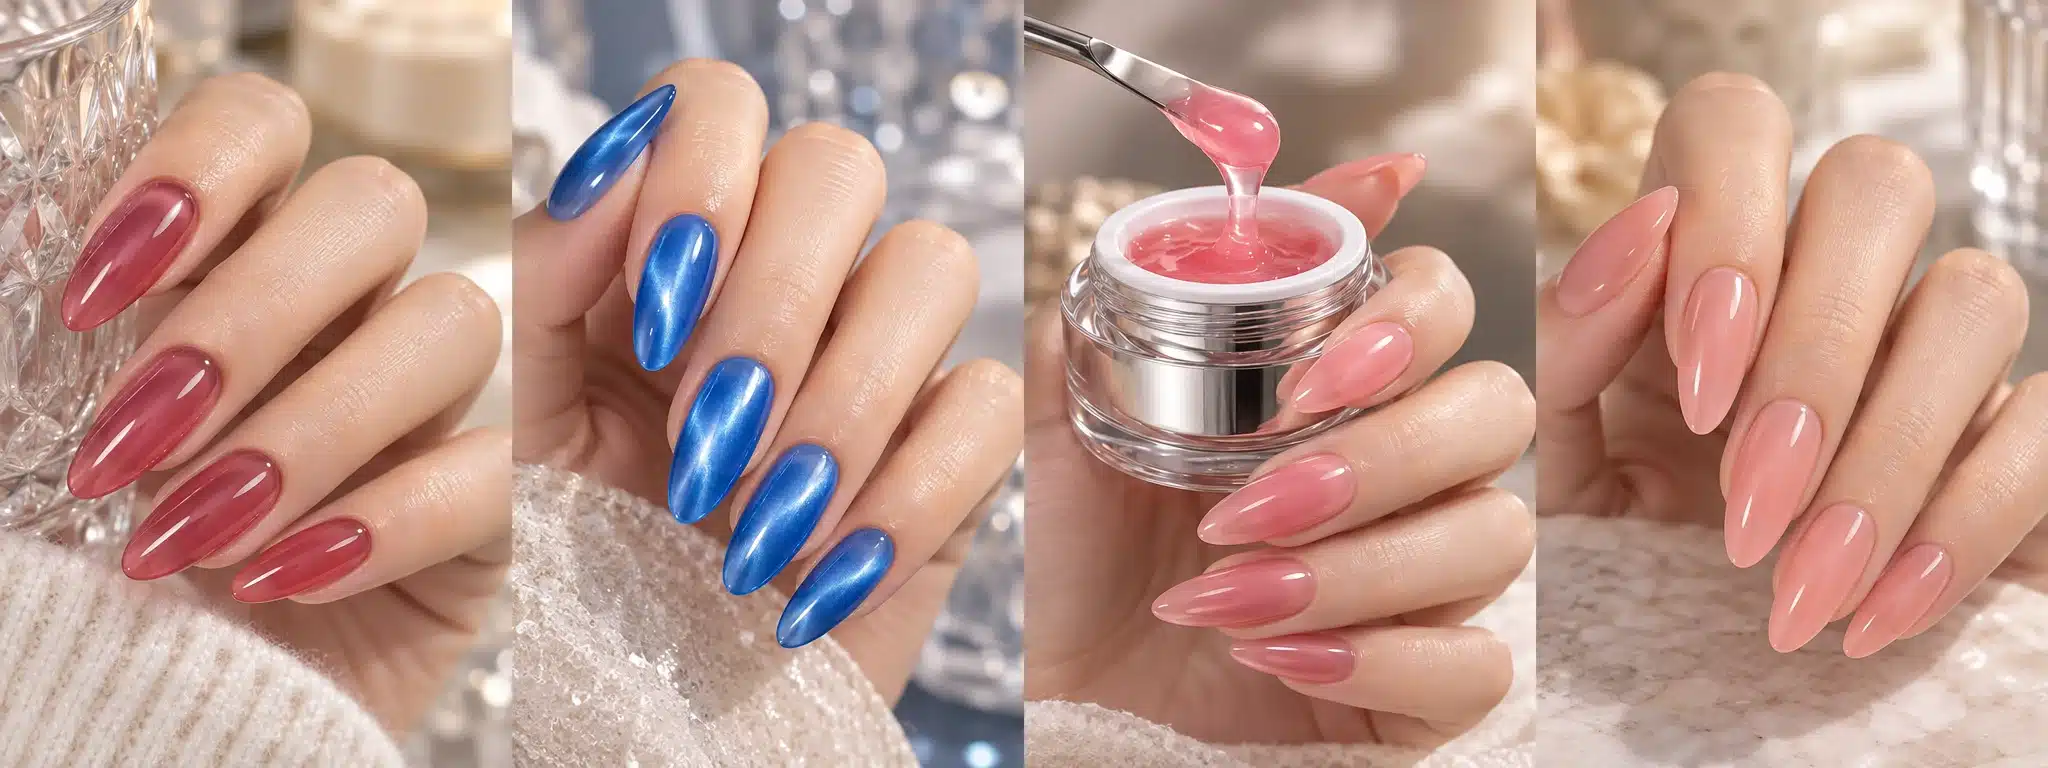
A cherry-red manicure can look rich without becoming opaque. A nude overlay can soften the natural nail while keeping its character. A magnetic shade can show a moving ribbon of light through translucent color. These looks belong to the same visual family, but they do not necessarily come from the same type of gel.
Jelly gel nail polish is about color with depth and transparency. Choosing it well means looking beyond a shade name: the base underneath, the amount applied and the job the product needs to do all affect the result. A beautiful color coat is not automatically a builder, and a tinted base is not simply another bottle of pink polish.
This guide brings those decisions together: jelly colors, cat eye effects, sheer builders and tinted rubber bases, followed by application, troubleshooting, nail designs and collection planning. Whether you are choosing your next salon set or developing a private label range, start with the finish you want and choose the right product to create it.
1. Quick Answer: What Is Jelly Gel Nail Polish?
Jelly gel nail polish is a translucent color gel that leaves some of the natural nail or underlying design visible. Instead of building immediately toward solid coverage, it produces a tinted, layered appearance. Pale pink can look like a light veil; red, orange and violet can resemble colored glass. The finished manicure is often glossy, but transparency is the more useful identifying feature.
There are two separate questions in the name. Jelly describes the look. Gel nail polish identifies a light-cured product system. Ordinary air-drying nail polish can also have a jelly finish, so a bottle described only as jelly polish does not tell you whether a lamp is required. Check the actual product type rather than judging by the shine in a photograph.
Within professional gel ranges, that translucent look can appear in color gel, magnetic cat eye gel, builder gel and tinted rubber base. JTING offers jelly-color directions across these categories, giving salons and brands more than one way to build a sheer collection. The key is to choose by both appearance and function: what should the nail look like, and what must the material do?
If you only want a change of color, begin with a jelly color gel. If you need magnetic light, choose a cat eye formula. If the service involves a structured overlay, evaluate a suitable builder. If you want a tinted foundation, look at the appropriate rubber base system.
2. What Makes a Gel Color Look Jelly?
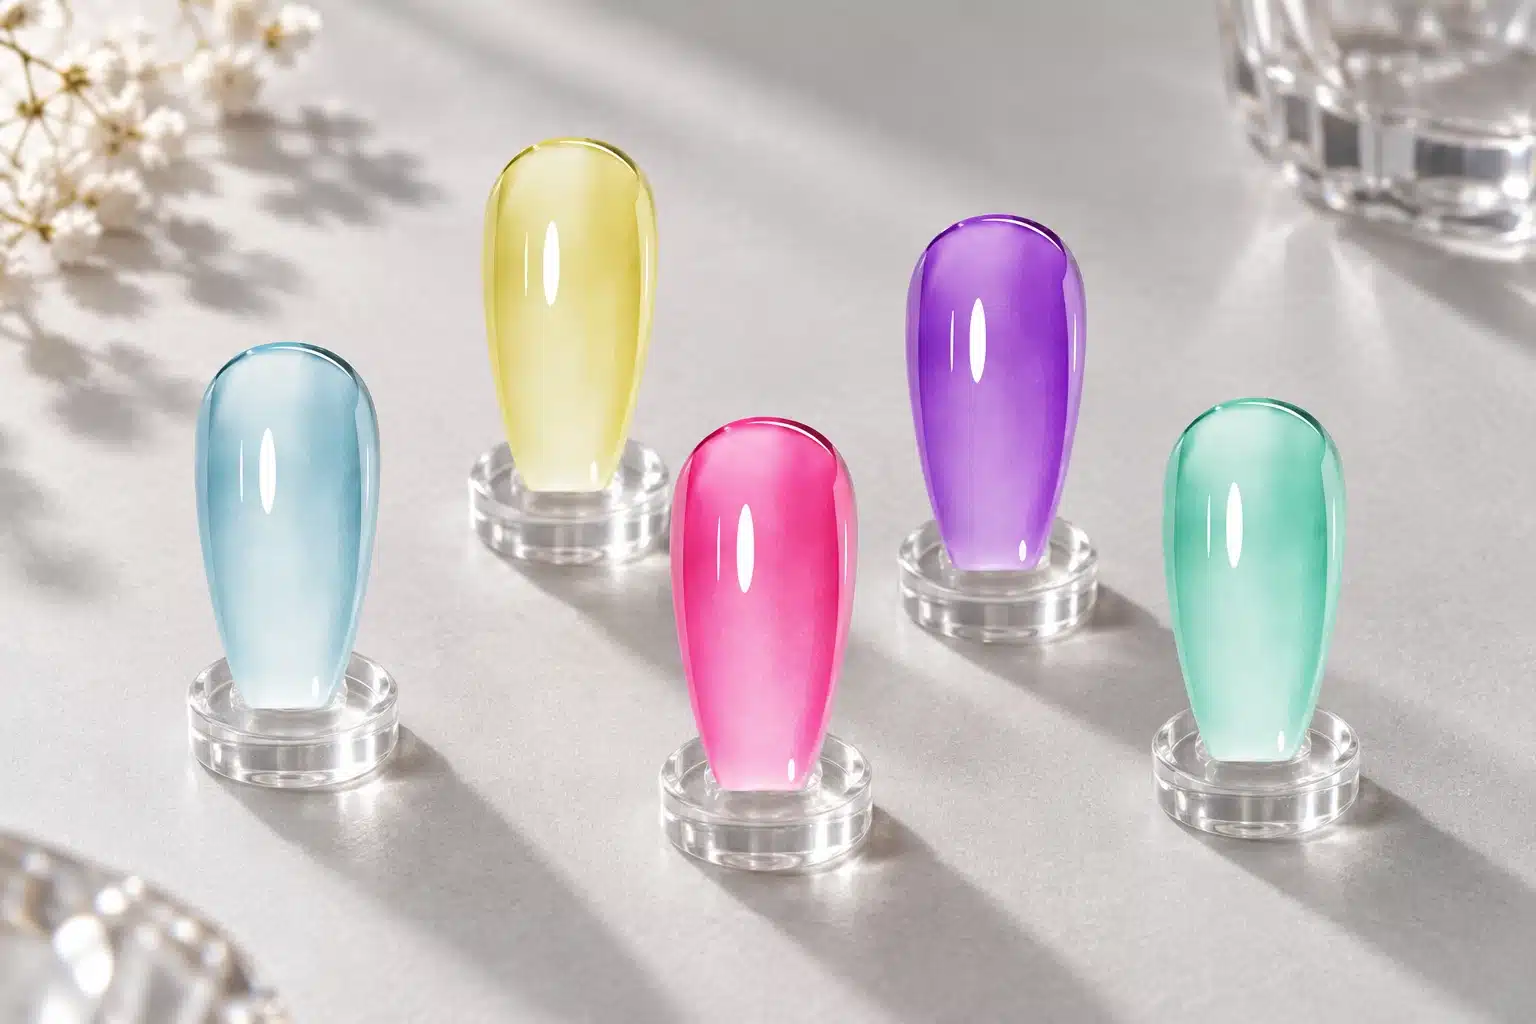
A convincing jelly finish lets the viewer see color and something beneath it at the same time. On a natural nail, that might be the nail bed and free edge. On a clear extension, it might be the light passing through the tip. Over nail art, it can be a darker mark that appears beneath a colored layer instead of sitting flat on the surface.
Transparency, saturation and shine are different choices
Transparency describes how much of the background remains visible. Saturation describes the strength of the color. Shine describes the surface reflection. A bright red jelly can be highly saturated and still translucent; a pale beige can look soft but cover the nail much more completely. A glossy opaque red does not become jelly simply because it has a reflective top coat.
For practical shade selection, ask to see the product on a consistent background. A swatch held against a dark display can look much deeper than the same swatch against white. A clear tip photographed with backlighting may appear more luminous than the product will look on a natural nail. Neither view is enough on its own to choose a working salon color.
A full-looking finish does not require a thick color layer
The rounded, polished appearance associated with jelly nails comes from the whole manicure: its underlying shape, smooth color application and surface finish. It should not be achieved by piling color gel into a thick mound. For a manicure that needs a shaped surface, create that structure with a product intended for the job, then use translucent color to finish the look.
When assessing a collection, compare color depth and transparency separately. Two shades can look equally light in the bottle but behave very differently over a white free edge.
3. Jelly vs. Sheer vs. Milky vs. Opaque Gel Polish
These terms help describe a finish, but they are not a universal grading system. One range may call a pink shade jelly while another calls a similar shade sheer or syrup. Use the description as a starting point, then compare the applied result. The question is not whether a label sounds fashionable; it is whether the product creates the finish your client expects.
| Finish | What you usually see | Useful when you want | Selection question |
|---|---|---|---|
| Jelly | Visible color with a translucent background | Fruit tones, colored-glass effects and layered designs | How much of the base remains visible? |
| Sheer | A light wash of color; a broad descriptive category | Natural nails, subtle tint and flexible layering | Is it clear-toned, cloudy or softly covering? |
| Milky | A softened, cloudy appearance rather than clear color | A diffused background or gentle camouflage | Does it soften the free edge enough? |
| Opaque or cream | A more solid color surface | Coverage, graphic art and consistent background color | Does it cover evenly at the prescribed application? |
A milky jelly shade can sit between categories. It may keep some translucency while giving a softer, less glass-clear result. That is not a contradiction; it simply means the range uses jelly in a broader visual sense. Similarly, syrup gel is often used for translucent, buildable color, but the name alone does not specify viscosity, curing requirements or structural capability.
Do not substitute a color description for a technical instruction. A sheer nude builder and a sheer nude color gel may photograph alike on a display tip while requiring different application and removal methods. For ordering, record the product family next to the shade name so that the same visual vocabulary does not lead to the wrong material being supplied.
4. One Jelly Look, Four Different Gel Types
The most useful way to shop a jelly range is to separate the visual finish from the product's role. A customer asking for pink jelly nails may only need color. Another customer showing a similar photograph may expect length, a shaped overlay or magnetic movement. Those are different services even when the finished color appears close.
| Product family | Primary role | What to compare | Do not assume |
|---|---|---|---|
| Jelly color gel | Translucent decorative color | Shade, coverage pattern, brush feel and layering | That it can create structure or extensions |
| Jelly cat eye gel | Color with a magnet-responsive light effect | Body color, magnetic response and appearance in motion | That every shade needs a black base |
| Jelly builder gel | Structure combined with a translucent tint | Approved uses, handling, shape and removal system | That every builder is soak-off or suitable for every length |
| Tinted rubber base | A tinted foundation within its intended system | Application range, tint, flexibility and required layers | That it replaces every builder, base or top coat |
For a salon, this distinction helps the consultation stay simple: first identify the nail service, then choose the color. For a brand, it makes product navigation clearer. A customer should be able to find a rose-tinted builder without confusing it with a rose color coat packaged in a similar bottle.
A coordinated collection can therefore share the same mood across several formulas. You might pair a sheer pink color gel with a related tinted base and a pink magnetic accent. They do not need to be identical products or exact color matches to belong together. What matters is that their roles are easy to understand and their finished appearances work as a deliberate assortment.
5. Jelly Color Gel: For Buildable, Translucent Color
Jelly color gel is the most direct choice when the goal is a translucent manicure without changing the structural system. It gives you a color layer to use over the properly prepared nail system, an existing suitable overlay or an approved enhancement surface. The color does the visual work; the underlying products provide the required foundation.
Look for a shade that reaches your target appearance within its intended application. A pink that remains nearly invisible may be ideal for a barely tinted manicure but frustrating for a client expecting candy pink. A concentrated berry might create a beautiful dark jelly, yet need more careful distribution to avoid darker edges. Neither is automatically better; they suit different targets.
Choose a range with distinct jobs for its shades
For a useful jelly gel polish set, compare the colors after application rather than counting bottles. A balanced selection might contain a quiet nude, a warm pink, a cool pink, a bright red, a deeper berry and an amber tone. That is an assortment-planning example, not a fixed rule: the right mix depends on whether your customers want natural everyday nails or expressive nail art.
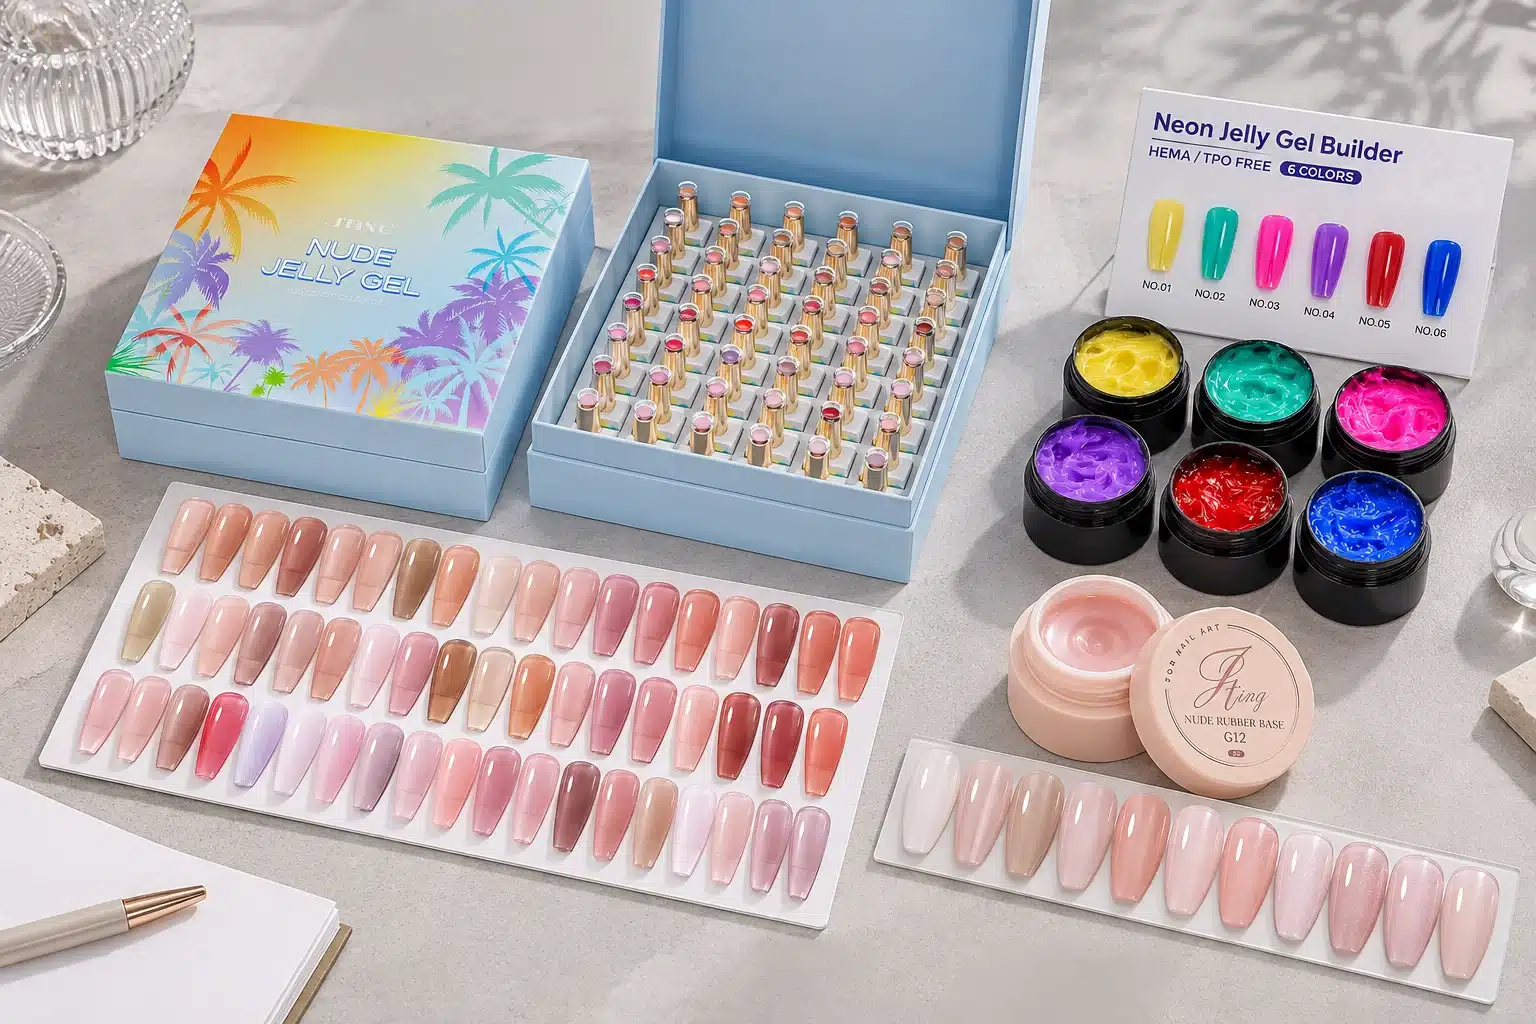
Explore JTING's gel polish color collections for broader assortment planning. For a dedicated jelly option, the JTING 48-Color Jelly Gel Polish Collection is a relevant starting point for choosing a coordinated translucent range.
When narrowing a set, place similar shades beside each other on the same style of tip. Keep both only if their difference remains useful at normal viewing distance, not merely under a close-up camera.
6. Jelly Cat Eye Gel: Translucent Color with Magnetic Depth
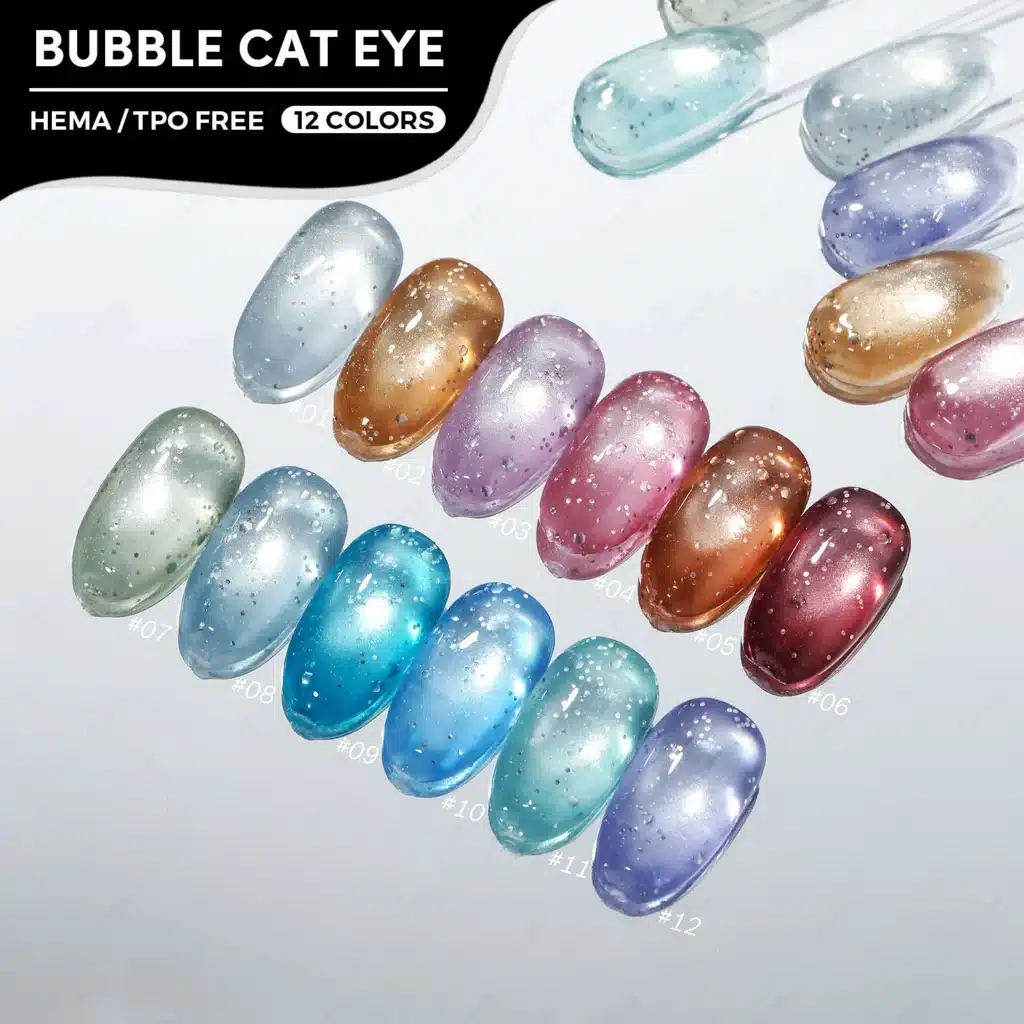
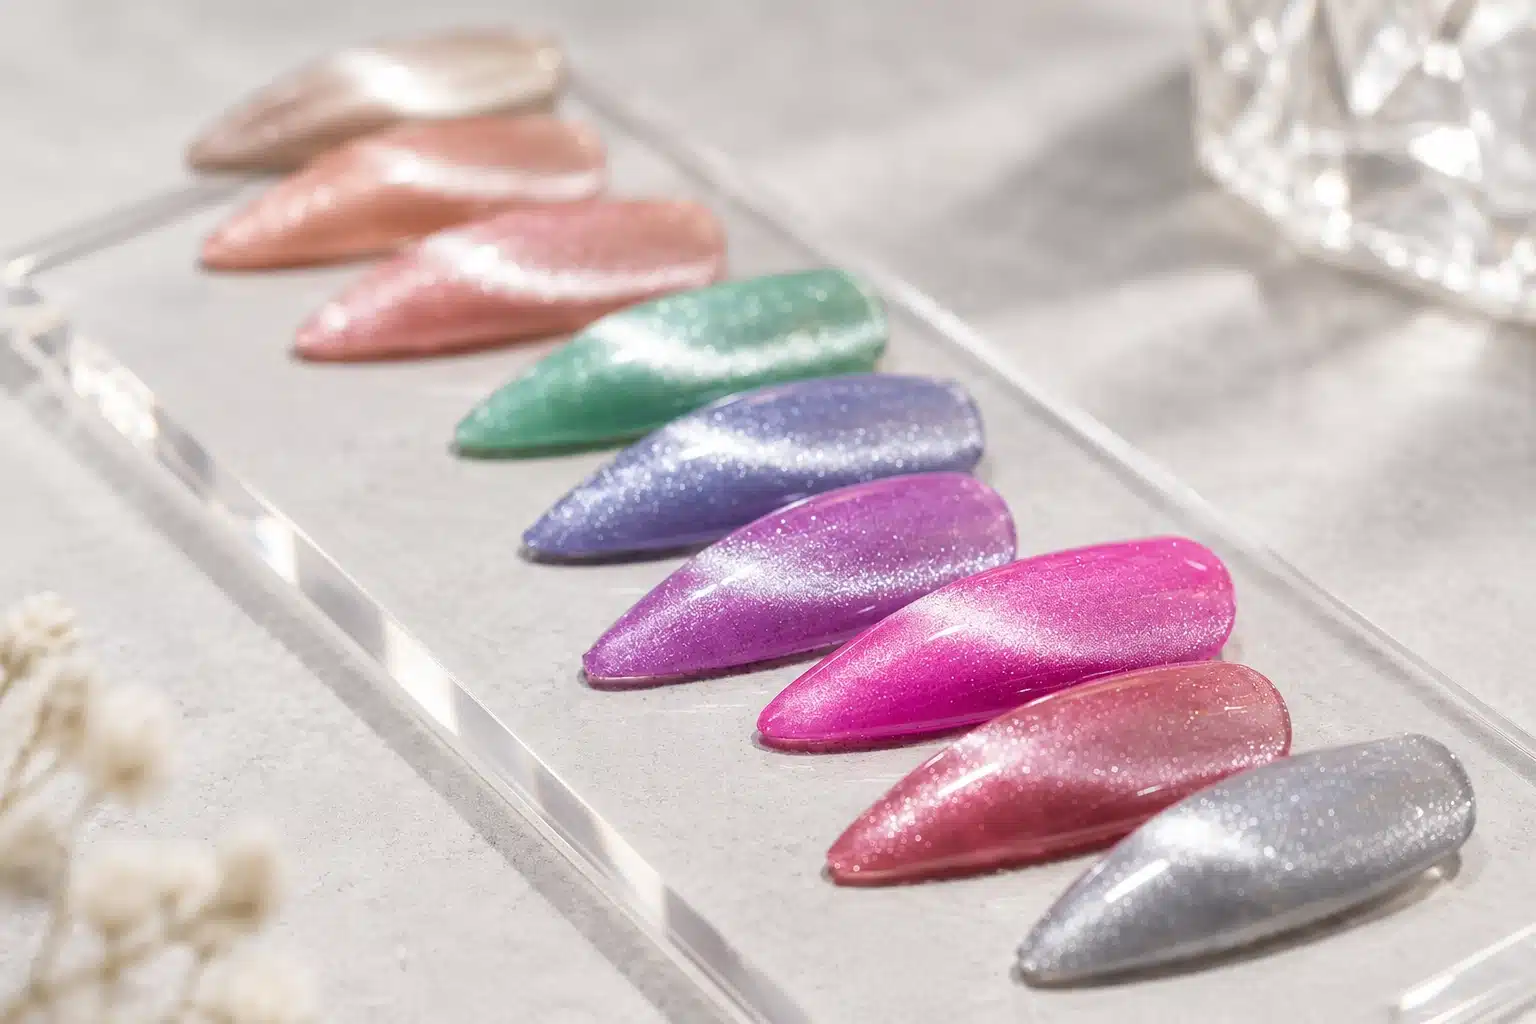
Jelly cat eye nails combine a translucent-looking body color with a magnet-responsive effect. The attraction is the change in appearance as the nail moves: the color remains part of the design while the illuminated area shifts with the viewing angle. A still photograph can show one attractive moment, but a short video is often more helpful when choosing the effect.
Evaluate the body color and the magnetic effect separately
First look at the shade without trying to judge it only by its brightest reflection. Is the background pink, grey, red or almost clear? Then examine the magnetic response: is the illuminated area fine and soft, broad and velvety, or more sharply defined? Finally, view the finished tip away from the strongest light. A practical salon shade should still have an appealing appearance between its most dramatic reflections.
A dark base can increase contrast, but it also changes the translucent character of the manicure. For a lighter jelly result, test the cat eye over the substrate or base actually intended for the service. Some products provide a complete effect on their own; others are designed for a layered system. The product instructions decide the workflow, not the word cat eye.
JTING's Cats Eye Gel collection is the relevant category for selecting magnetic options. When requesting samples, specify that you want a translucent body color as well as the desired magnetic finish, so the selection is not based on sparkle alone.
For a colorful magnetic direction, explore the JTING 24-Color Neon Jelly Moonlight Cat Eye Gel collection. Its color selection offers a starting point for coordinating vivid jelly tones with a magnetic highlight.
For an accent set, pair the magnetic nail with a nonmagnetic jelly in a related undertone. This creates contrast without making every finger compete for attention.
7. Jelly Builder Gel: Sheer Color with Structure
A jelly builder gel combines a translucent tint with a structural product. It is worth considering when the manicure calls for a shaped overlay rather than color alone. The tint can become the finished look or act as a background for additional art. Choose it because its intended use matches the service, not because a thick consistency looks reassuring in a jar.
Start by confirming whether the particular builder is intended for natural-nail overlays, specified extension lengths or both. Then check its removal method. Builder gel includes different systems, and a sheer appearance does not tell you whether a product is soak-off or file-off. A bottle format does not settle that question either.
The JTING 20-Color Jelly Gel Builder collection brings nude, pink and deeper neutral shade options into this selection process. Compare the supplied swatches to choose the color direction for your next builder service or collection.
Color depth follows the shape of the overlay
A translucent tinted builder can appear deeper where the structural layer is thicker and lighter near thinner edges. That visual change matters when selecting a shade. Evaluate it at an appropriate working thickness, not only as a thin brush-out. If a uniform surface color is more important than showing the structural tint, a separate suitable jelly color layer over a prepared structure may offer a different route.
JTING's Gel Builder range includes several builder directions. Select the exact product around the required service, handling preference and finish. A good sample request describes the intended length and whether the shade should look nearly natural or visibly tinted after shaping.
You may also encounter BIAB when researching this category. BIAB is The GelBottle's trademarked product terminology, not a generic name for every builder. For a wider comparison of materials and services, see the builder gel and base-system comparison guide.
8. Tinted Rubber Base Gel: A Sheer Foundation for a Natural Look
A tinted rubber base can bring color into the foundation stage of a manicure. Soft pink, nude and other translucent tones can support a natural-looking service, particularly when the client wants a finished appearance that is quieter than a separate bold color coat. The value is the combination of tint and the base product's intended role.
However, rubber base is a category name, not a promise that every formula has the same flexibility, thickness range or building capability. The number of required steps also varies. Confirm whether the chosen product needs another base underneath, whether a top coat is required and what type of overlay the manufacturer supports.
For a coordinated base assortment, the JTING 12-Color Jelly Rubber Base Gel collection includes clear, milky and nude-pink directions, alongside shimmer options. This gives buyers several distinct finish choices within a single product family.
Choose by the nail and the service, then by shade
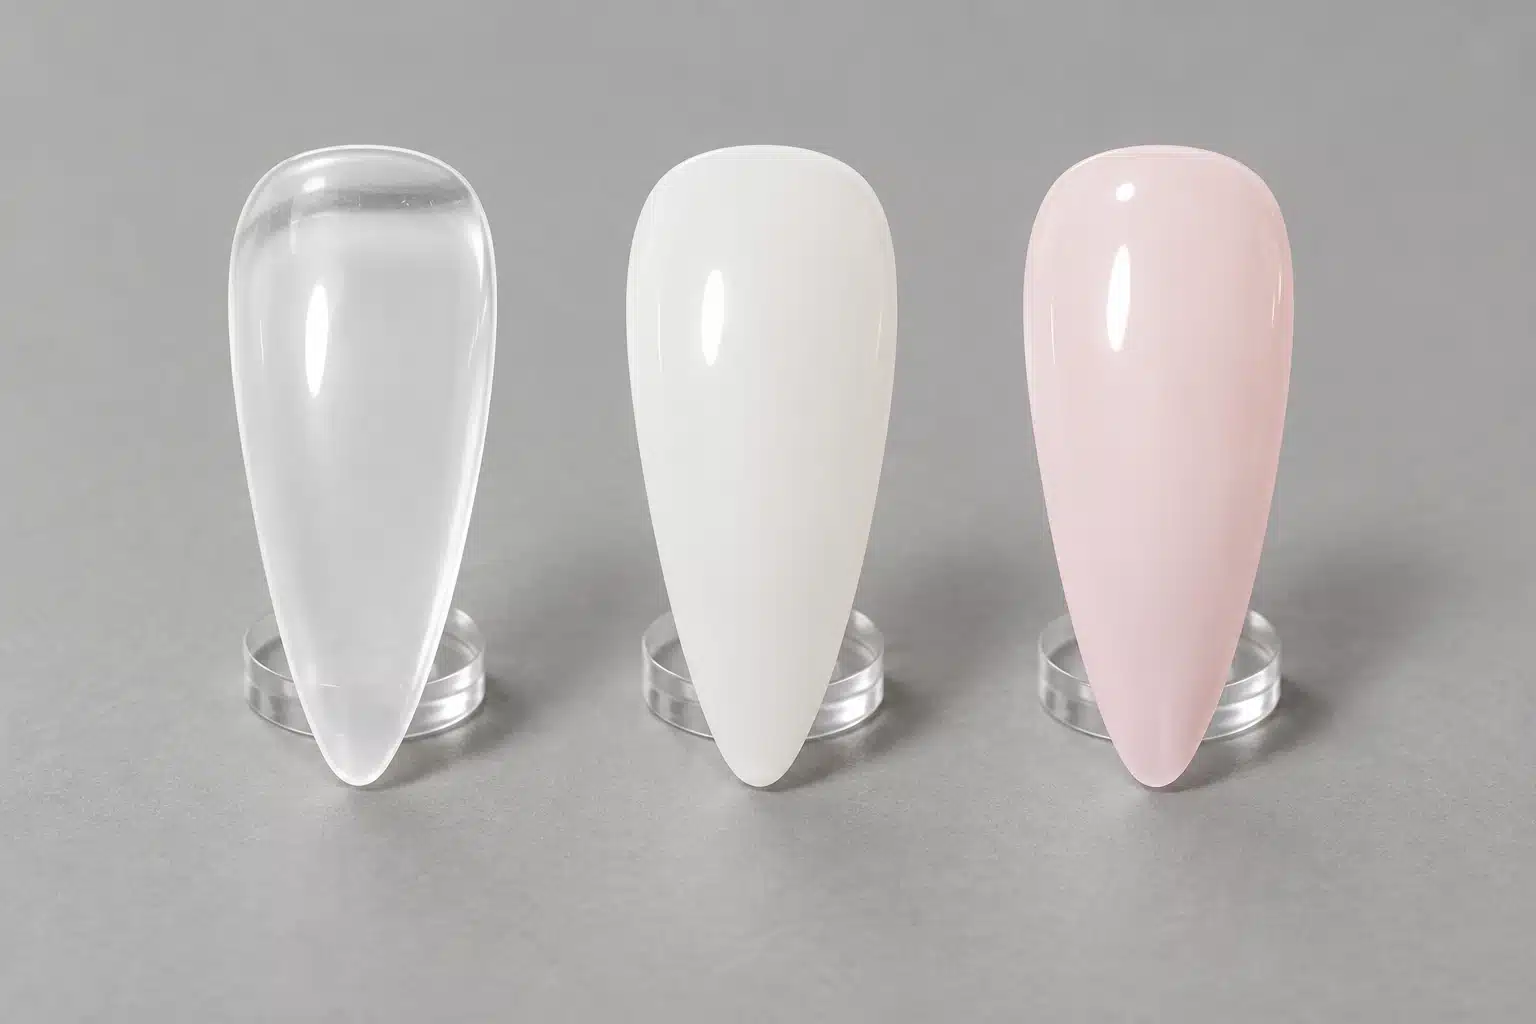
A very sheer tint leaves the natural nail clearly visible. A more softly covering nude can reduce visual contrast between the nail bed and the free edge. A milky tint creates a different result again. Show these differences in consultation rather than promising that every pink rubber base will produce the same clean, natural appearance.
Browse JTING's Rubber Base Gel category to identify relevant tinted options. Ask for a product whose application range matches your service and compare its color at the recommended thickness.
For a brand selling both tinted bases and jelly colors, make the label hierarchy clear. Put the product type where a technician can find it quickly; use the shade name as the second layer of information. A shared color story is useful, but identical-looking packaging should not leave the customer guessing which step the bottle belongs to.
9. Which Jelly Gel Should You Choose?
Begin with the part of the manicure that needs to change. If the structure is already right and only the color needs updating, a color gel is the straightforward starting point. If the client wants an optical effect, choose a magnetic product. If the service needs a structural overlay, settle the builder selection before choosing its tint.
- For translucent color over an established system: choose a jelly color gel and compare the shade on the actual base.
- For moving light and depth: choose a jelly-style cat eye and assess its appearance from several angles.
- For a shaped, tinted overlay: evaluate a builder with the required application range and removal method.
- For a tinted foundation: consider an appropriate rubber base and confirm its complete application sequence.
Next decide how visible the natural nail should remain. This single question can prevent a disappointing appointment. A client may love the shine in a jelly photo but dislike a visible white free edge. In that case, the best choice may be a softened background with a jelly color above it, rather than the clearest possible version of the trend.
Finally, compare the maintenance route. A color refresh over an existing enhancement is not the same service as a complete removal and reapplication. Match the product system to the technician's training and the client's planned appointments. The best jelly gel is the one that gives the intended look within a sensible, repeatable service, not necessarily the most transparent shade in the range.
10. How to Choose the Right Level of Transparency
Think about transparency as a design decision rather than a quality score. Very clear color is useful for tinted tips and visible layering. A slightly more covering sheer can be easier to present as an everyday nude. A cloudier milky shade may be the better choice when the aim is to soften contrast rather than show everything underneath.
Choose what should remain visible
Before applying a sample, decide whether you want to see the nail bed, the free edge, an underlying pattern or a magnetic reflection. Then assess the color against that target. Asking only whether a gel is sheer leaves too much room for different interpretations. A transparent red over clear tips and a softly covering rose over natural nails can both be described as jelly but serve very different customers.
Use consistent lighting when comparing options. View samples over a light background, then on the intended nail or base. Do not rely only on a display held toward a bright window. That view can show translucency beautifully while hiding how dark or uneven the same shade looks in ordinary indoor conditions.
For online product presentation, one strong detail image and one normal-distance manicure image are more informative than several heavily lit close-ups. Show enough context for buyers to understand the scale and overall color. If a swatch uses a camouflage base, identify that in the image caption rather than allowing customers to assume the color alone provides the coverage.
11. Jelly Gel Colors: From Nude and Pink to Rich Berry Tones
A useful jelly palette contains colors with different purposes, not just small variations of the same pink. Start with the finish customers will request most often, then add enough contrast to support distinctive looks. For a natural-nail salon, the everyday shades may lead. For an art-focused range, amber, red and unusual cool colors can have a larger role.
Nude, peach and pink
Sheer nude gel polish works best when its undertone is deliberate. Peach can bring warmth, rose can feel fresher, and a more muted beige can reduce obvious pinkness. Keep a warmer and cooler option rather than expecting one nude to suit every client. Pink jelly nails can range from a barely visible tint to a candy-colored finish; label the difference through applied swatches.
Red, berry and amber
Red jelly gel polish offers a different mood from an opaque red: it can look lighter at the edges and richer through the center. Berry and plum support deeper styles, while amber and warm brown are useful for tortoiseshell and layered designs. Compare adjacent deep colors in normal room light, where apparently distinct bottle colors may become difficult to tell apart.
Blue, green, lilac and playful brights
Cool translucent shades can give a collection a recognizable identity. Consider a blue, a lilac and a green with clearly different temperature or depth, rather than adding every possible pastel. The target is a set that supports intentional combinations. A vivid color does not have to be opaque, and a pale color does not automatically have to be jelly.
For purchasing, group swatches by both hue and transparency. Buyers should be able to find a light warm pink or a deeper clear red without guessing from a color name alone.
12. Choosing Jelly Shades for Different Skin Tones
Because some of the background remains visible, a jelly shade can look different on different hands. The natural nail tone matters as well as the surrounding skin. Treat undertone advice as a starting point for comparison, not a rule that limits which colors a person can wear.
For a discreet nude, hold several finished swatches beside the hand and compare how clearly each separates from the skin. One client may prefer a close match; another may want a deliberate contrast. A nude that disappears completely may be ideal for a barely-there look but less useful when the client wants the nail shape to stand out.
Compare warmth and contrast separately
Place a peachier pink and a cooler rose beside the hand before deciding how light or dark the final color should be. Then compare a softer and richer option within the preferred direction. This two-step comparison is often more useful than simply labelling shades for light, medium or deep skin.
For red and berry jelly nails, ask whether the customer wants freshness, drama or a polished everyday accent. An orange-leaning red and a blue-leaning berry create different impressions even when their transparency is similar. Use real hand samples when possible, and avoid filters that alter warmth.
For a product collection, photograph the same shade on more than one appropriate background or hand when resources allow. The goal is not to promise identical color on everyone; it is to help customers choose knowingly. Keep lighting and editing consistent so the comparison remains about the shade rather than photography.
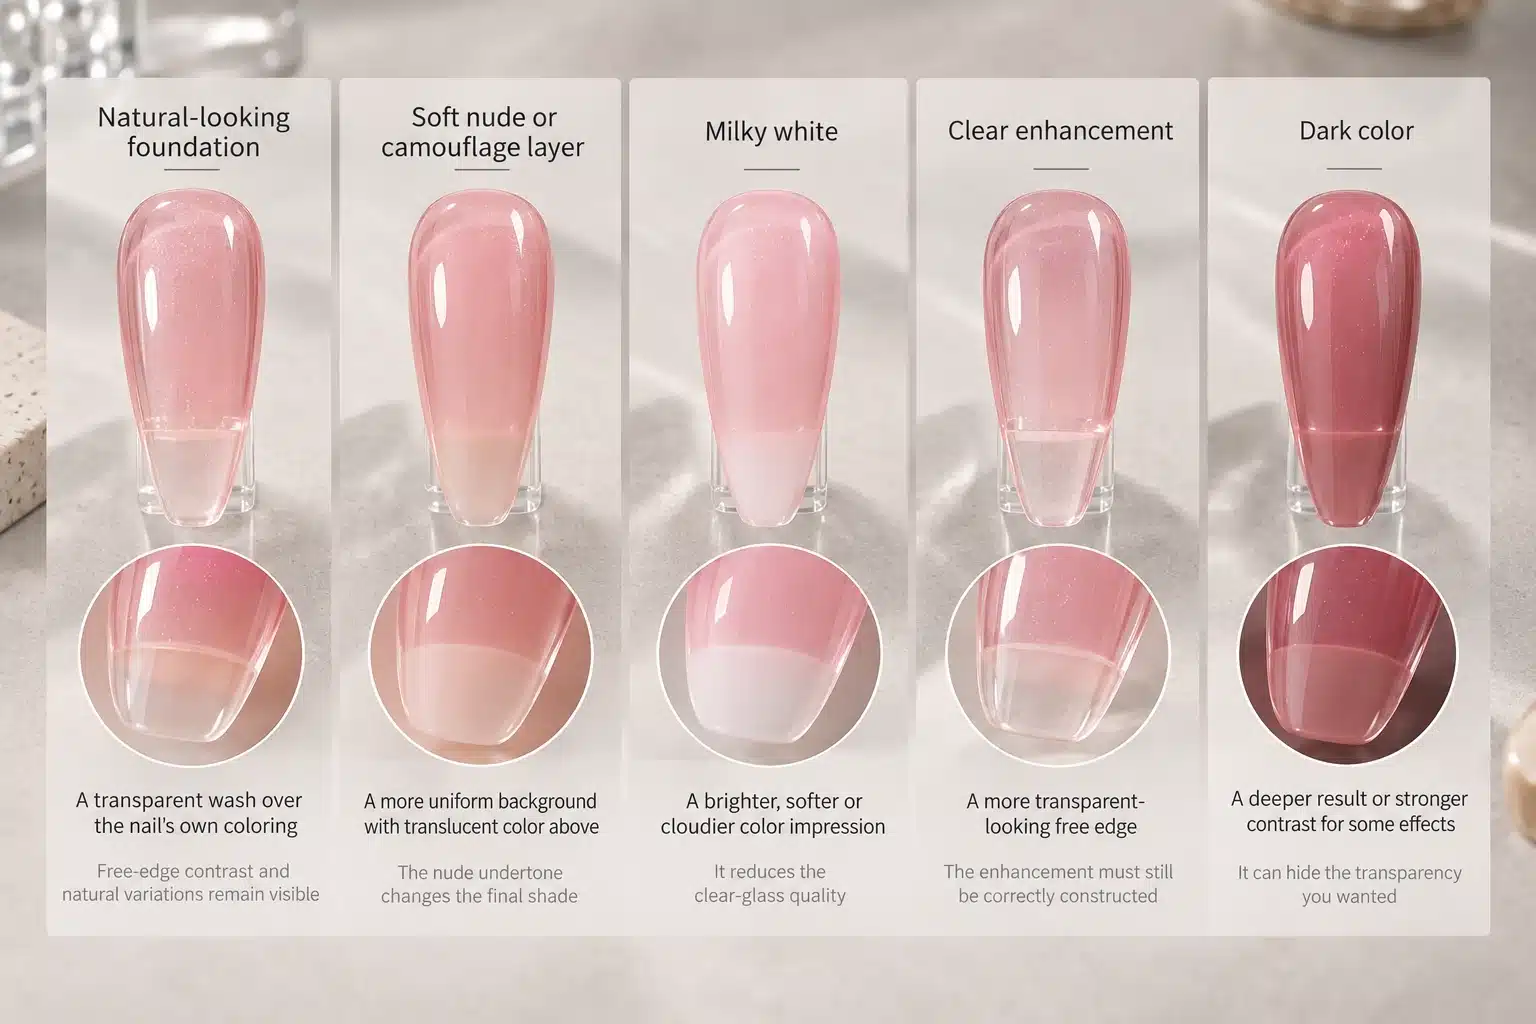
13. How the Base Color Changes the Finished Look
With translucent color, the background is part of the design. A bare-looking prepared nail, a nude overlay, a soft white base and a clear extension can all give the same jelly shade a different appearance. Before changing the bottle because the color seems wrong, compare the base used in the reference image with the base under your own application.
| Background | Visual direction | What to watch |
|---|---|---|
| Natural-looking foundation | A transparent wash over the nail's own coloring | Free-edge contrast and natural variations remain visible |
| Soft nude or camouflage layer | A more uniform background with translucent color above | The nude undertone changes the final shade |
| Milky white | A brighter, softer or cloudier color impression | It reduces the clear-glass quality |
| Clear enhancement | A more transparent-looking free edge | The enhancement must still be correctly constructed |
| Dark color | A deeper result or stronger contrast for some effects | It can hide the transparency you wanted |
For clients who dislike seeing the natural white line, offer a softly covering foundation rather than continuing to add clear-colored layers. The result can still have jelly-like depth, but it will not have the same see-through appearance as a clear-tip set. Showing both options before the appointment makes the choice much easier.
Base selection is also about the product system. Use a foundation appropriate for the color or enhancement rather than choosing an unrelated product only because its shade looks right. JTING's Top Coat and Base Coat range provides the relevant starting point for supporting layers.
14. One, Two or Three Coats: Building Color Without Losing Clarity
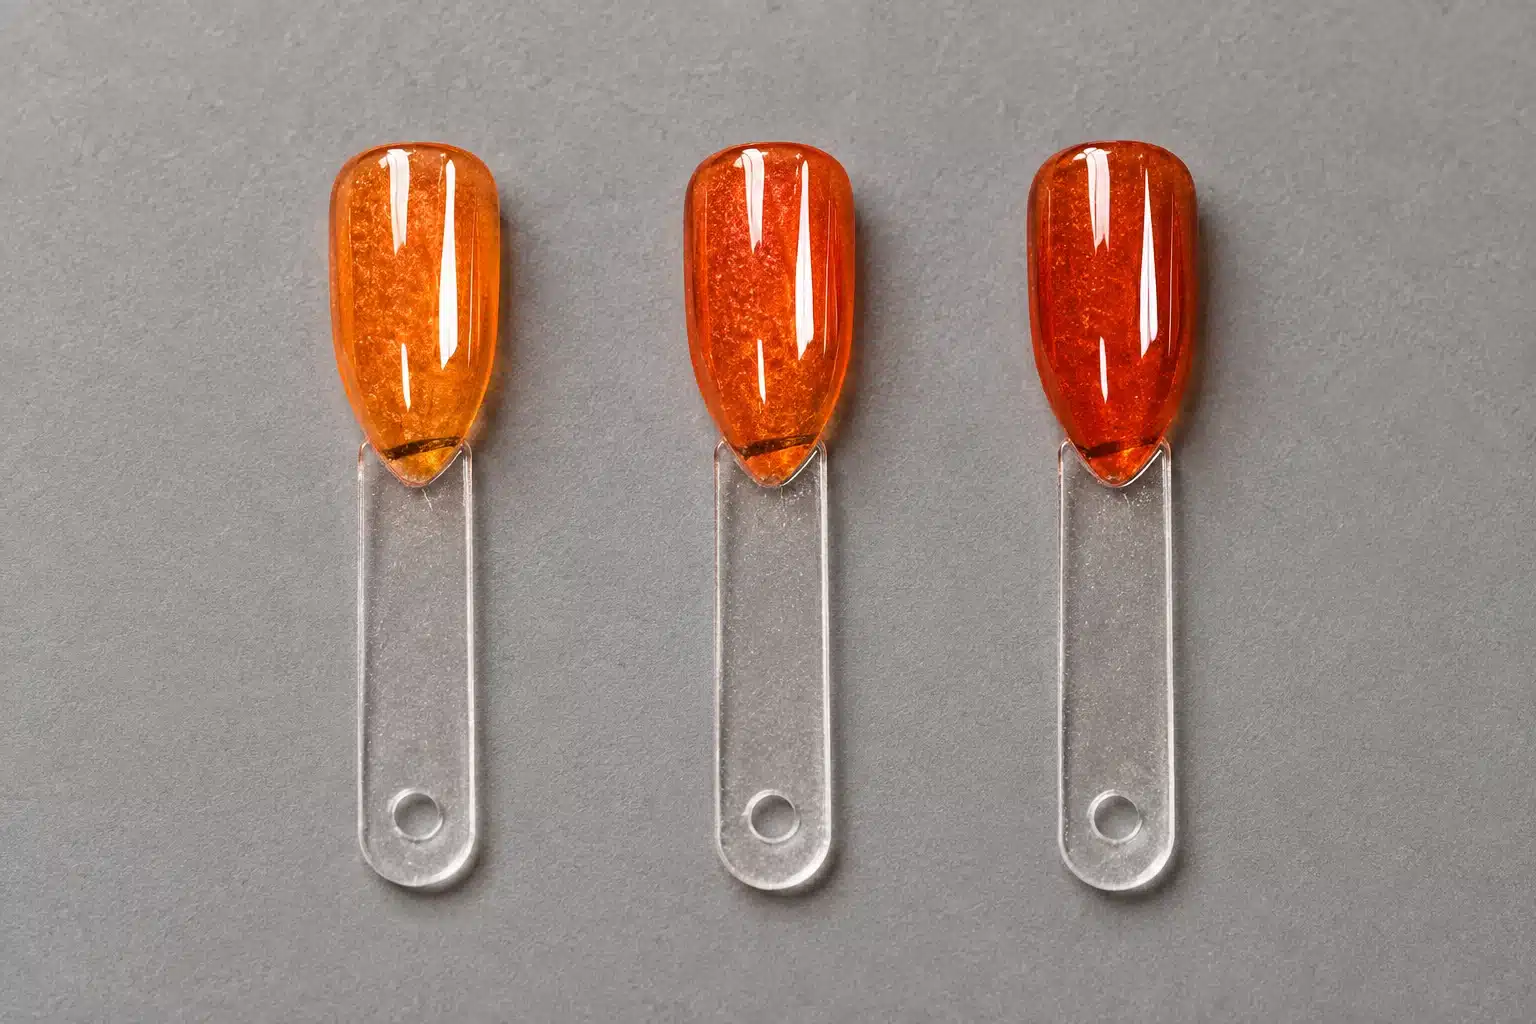
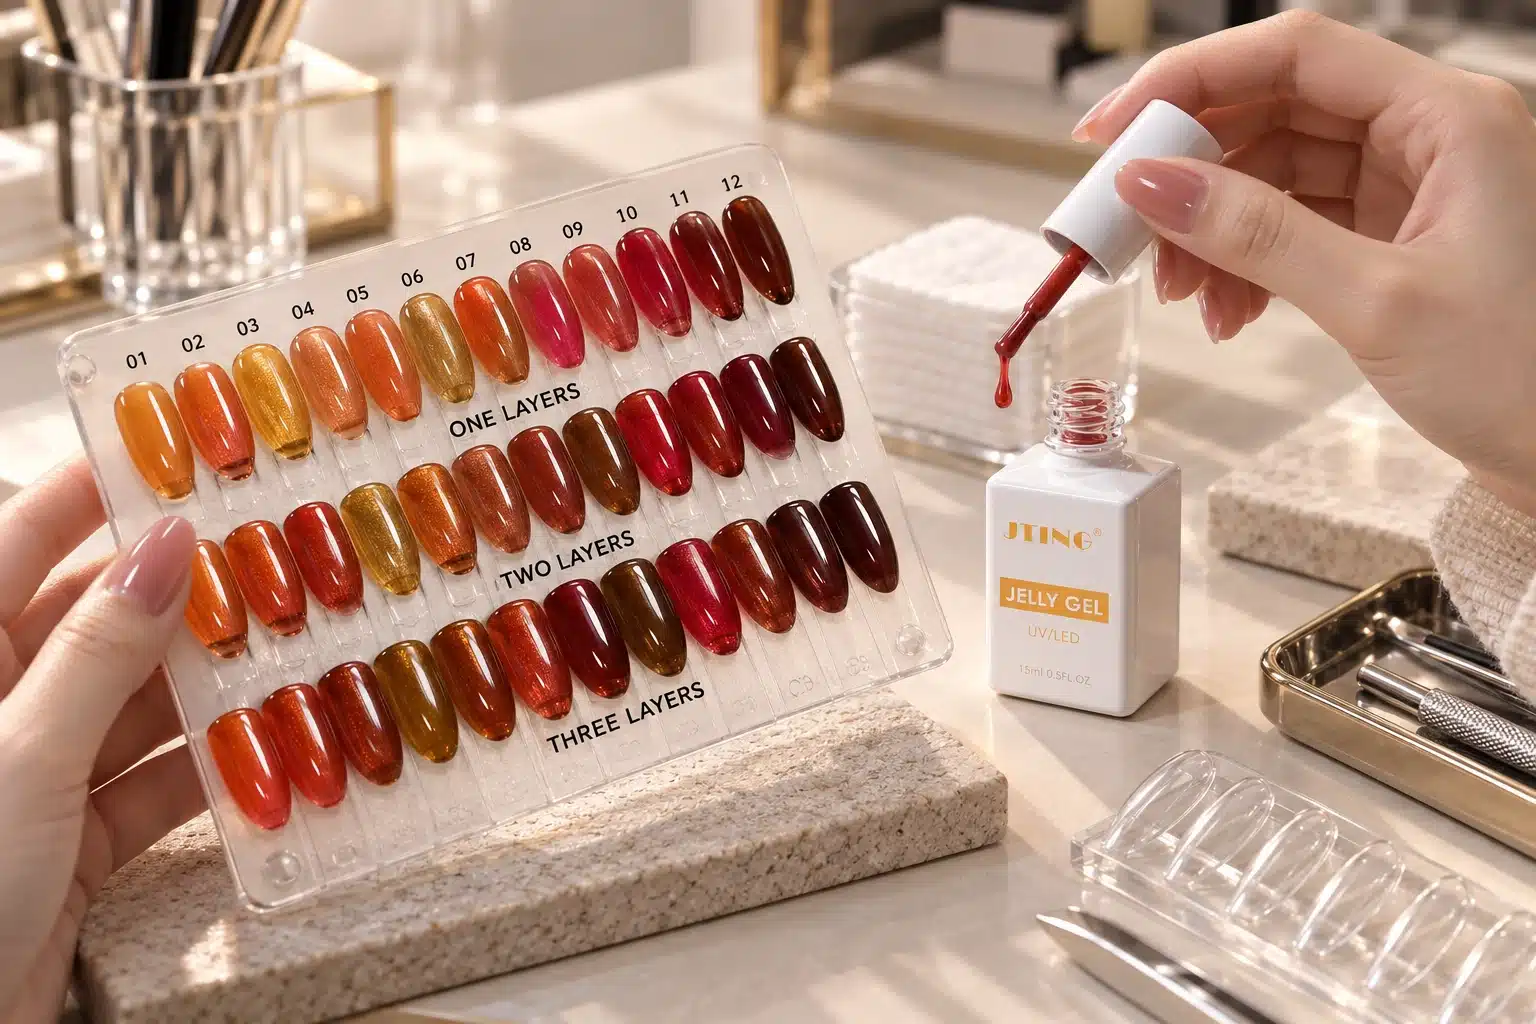
Coat count is a useful way to demonstrate a color, but it is not a universal recipe. Different formulas reach different depths, and the amount on the brush changes what a coat means. Use one-, two- and three-layer swatches only where that application is allowed for the particular color gel. Do not turn a display comparison into permission to add unlimited layers.
For ordinary jelly color gel, the first thin layer establishes the direction of the shade. A subsequent prescribed layer can increase depth and even out the appearance. Stop when the agreed result is reached within the product's application instructions. If the shade remains too faint, choose a more suitable color or background rather than trying to compensate with a heavy final layer.
Standardize the comparison
Use the same tip style, foundation, application method and finish when making a shade chart. Number the layers and label the background. A comparison between one coat over white and three coats over clear is not a clean demonstration of buildability because two variables changed at once.
Keep these color demonstrations separate from builder-gel demonstrations. A builder's thickness is chosen to create the required structure within its instructions, not to chase a particular color intensity. If its structural tint is too dark for the look, select another tint or use a different approved color-and-structure combination.
A useful customer-facing photo shows the same shade progressing in intensity without pretending that every jelly gel follows the same curve. A useful professional record adds the exact product, base and application details so the result can be repeated later.
15. How to Apply Jelly Gel Nail Polish Step by Step
This sequence is for a conventional jelly color gel used within its prescribed nail system. It is not a builder-gel extension tutorial. Gather the product instructions, compatible lamp, preparation products, base and top before starting, so you are not changing the system midway through the manicure.
Step 1: Agree on the finish and prepare the surface
Choose the shade on a relevant sample, including whether the free edge should remain visible. Complete the nail preparation appropriate to the system, keeping the surface free from dust and contamination. Do not aggressively thin the natural nail to make a translucent manicure look smoother. If an existing enhancement is being maintained, its condition and service requirements come first.
Step 2: Establish the correct foundation
Apply and cure the prescribed base or prepare the approved enhancement surface. Where the design needs a softly covering background, select that intentionally. Avoid adding an extra opaque layer by habit: it may remove exactly the transparent quality the client chose.
Step 3: Distribute a controlled color layer
Follow the product's directions for any mixing or stirring. Load the brush with enough material for a continuous thin layer, then distribute it with light, controlled strokes. Keep uncured gel off the surrounding skin. Look at the center, sidewalls and free edge before curing; a thick pool can appear as a darker color patch.
Step 4: Cure using the specified system
Use the lamp and curing schedule specified for that product, with the hand correctly positioned. Do not assume a translucent shade can be cured for less time. Lamp wattage alone is not a compatibility test, and a hard-looking surface does not establish complete curing.
Step 5: Build the chosen depth and finish
Apply any further color layer within the manufacturer's instructions, checking the result against the agreed sample. Finish with the appropriate top coat and its required cure and cleansing steps. Inspect the final color under ordinary light as well as your work lamp.
For professional services, skin contact, persistent discomfort or abnormal nail changes are reasons to stop and address the issue, not hide it beneath another layer. Protect hands from lamp UV exposure with appropriate fingerless UV-protective gloves or broad-spectrum SPF 30+ sunscreen on exposed skin, while keeping the prepared nail surface suitable for application.
16. How Application Changes for Cat Eye, Builder and Rubber Base
The color-gel sequence becomes misleading if it is applied unchanged to every jelly product. The finish may be related, but the working step that controls the result is different. Keep product instructions with the shade records so technicians do not have to infer the process from the bottle design.
For magnetic jelly: create the effect before the relevant cure
The magnet-responsive layer needs to be arranged at the appropriate stage before it is fixed by curing. Work with the magnet and sequence recommended for the product. A sample made with one magnet position may look quite different from a broad velvet effect made with another. Record the method used for the approved salon display so a client choosing the sample receives the intended design.
For tinted builder: create structure, not extra color coats
Use the preparation, foundation, working thickness and shaping technique appropriate to the builder. Evaluate the profile from more than one angle. Avoid removing necessary structure just to lighten a tinted area, or adding unnecessary thickness just to deepen its color. Resolve that mismatch through product or shade selection.
For rubber base: follow its particular application role
Some tinted bases are selected for a very natural foundation; others have a wider approved overlay application. Do not infer those limits from the word rubber. Use the specified preparation, amount and finishing steps, and keep the color expectation realistic at the supported thickness.
Across all three routes, a clear service menu helps: identify the product family, the final look and the maintenance method. This is more useful to a customer than listing several technical gel names without explaining why one was chosen. A translucent manicure can be simple to wear even when its underlying product selection requires professional judgment.
17. Why Jelly Gel Looks Streaky, Patchy or Too Dark
Translucency makes small differences in application easier to see. Instead of immediately blaming the color, identify the pattern of the problem. Long pale tracks, a dark rim, irregular gaps and a uniformly deeper-than-expected shade point to different things to check. Change one variable at a time on a practice tip before repeating the complete service.
| What you see | What to inspect | Practical adjustment |
|---|---|---|
| Long brush tracks | Brush loading, pressure and repeated passes | Use a controlled thin layer; avoid scraping material away with a dry brush |
| Dark sidewalls or a dark free edge | Pooling and inconsistent distribution | Correct the wet layer before curing; keep product away from skin |
| Color looks too dark everywhere | Base shade, chosen jelly shade and number of layers | Test a lighter background or a less intense shade |
| White free edge remains visible | Whether the chosen finish is genuinely translucent | Use a suitable camouflage background if coverage is the goal |
| Unexpected cloudiness | Milky underlayer, particles, bubbles or finish contamination | Compare each layer separately on a clean sample |
| Wrinkling, movement or suspected undercure | Thickness, lamp compatibility and cure instructions | Stop; do not cover the defect with top coat. Follow professional removal and correction guidance |
A darker line at an edge is an optical clue, not a diagnosis by itself. Check how the layer was distributed and what lies beneath it. If a color consistently pulls back from the prepared surface, investigate the foundation and compatibility rather than making the color layer thicker.
Do not use a top coat as a universal repair. It may improve the surface reflection, but it cannot correct an incompatible system or make an inadequately cured layer acceptable. For aesthetic unevenness, reproduce the issue on a tip and compare a lighter brush load, a different approved background or another shade.
For salons, photograph a successful sample under the usual work lighting and keep its application notes. That gives the team a reference for what even, intentional transparency looks like, rather than encouraging every technician to chase opacity.
18. Jelly Nails on Short Nails, Long Nails and French Tips
Jelly nails do not require long extensions. On short natural nails, a transparent tint can look clean and compact. On longer nails, the visible free edge can become a stronger design feature. Choose the layout around the nail that will actually be worn rather than shrinking a long-tip reference without changing its proportions.
Short jelly nails
For a short oval or squoval shape, start with one clear visual idea: a soft pink wash, a rich red jelly or a tiny accent on an otherwise uniform set. Keep details small enough to leave some open color. If the nail bed and white edge create a contrast the client dislikes, introduce an appropriate softened background rather than assuming a shorter nail needs more color layers.
Longer translucent nails
Clear-looking free edges can make colored-glass designs especially visible. The construction underneath still needs to match the required service. Treat transparency as a finish choice, not permission to make an extension structurally thin. Check how the set looks from the side and underneath as well as in a top-down photograph.
Jelly French tips
A translucent colored French tip can give a familiar layout a lighter character. Contrast is important: a pale pink jelly tip on a very similar nude base may disappear, while a berry or amber tip can remain clearly defined. Choose the smile-line width around the nail's length and the client's preference.
For a salon display, show the same color direction on both a short nail and an extended sample. This helps clients choose a wearable interpretation instead of thinking the effect only works on the dramatic length used in promotional photography.
19. Everyday Jelly Nails: Nude, Pink and Soft Translucent Looks
Everyday jelly manicures work best when the tint feels intentional rather than unfinished. The aim is a balanced wash of color with a clean shape and appropriate shine. A subtle result still needs a clear choice of undertone, background and transparency; using the palest bottle available does not automatically create a flattering nude.
Rose-tinted natural nails
Choose a rose that gives a visible but gentle change to the nail bed. Keep the overall application even and let the shade be the main feature. If adding decoration, a fine line or one small accent is often enough. This is a useful consultation option for clients who want polish to be noticeable at close range without dominating the hand.
Peach-nude and softly muted color
A warmer nude can create a different impression from a cool pink even at similar depth. Compare both against the skin before deciding. For clients wanting a more uniform background, a softly covering foundation can be paired with a compatible translucent color, but the additional layer should have a clear purpose.
Bridal and occasion variations
A light jelly or sheer nude can provide a restrained background for a fine French tip or a small pearl-like detail. Make the selection with the final outfit and lighting in mind. A shade that seems almost invisible in the salon may photograph differently against white clothing.
For your sample board, include an undecorated version beside the accent version. Customers can then see the color itself and decide whether the art is necessary. This also gives a brand two useful ways to present the same shade without pretending they are different products.
20. Colorful Jelly Nails: Fruit-Inspired Shades and Layered Color
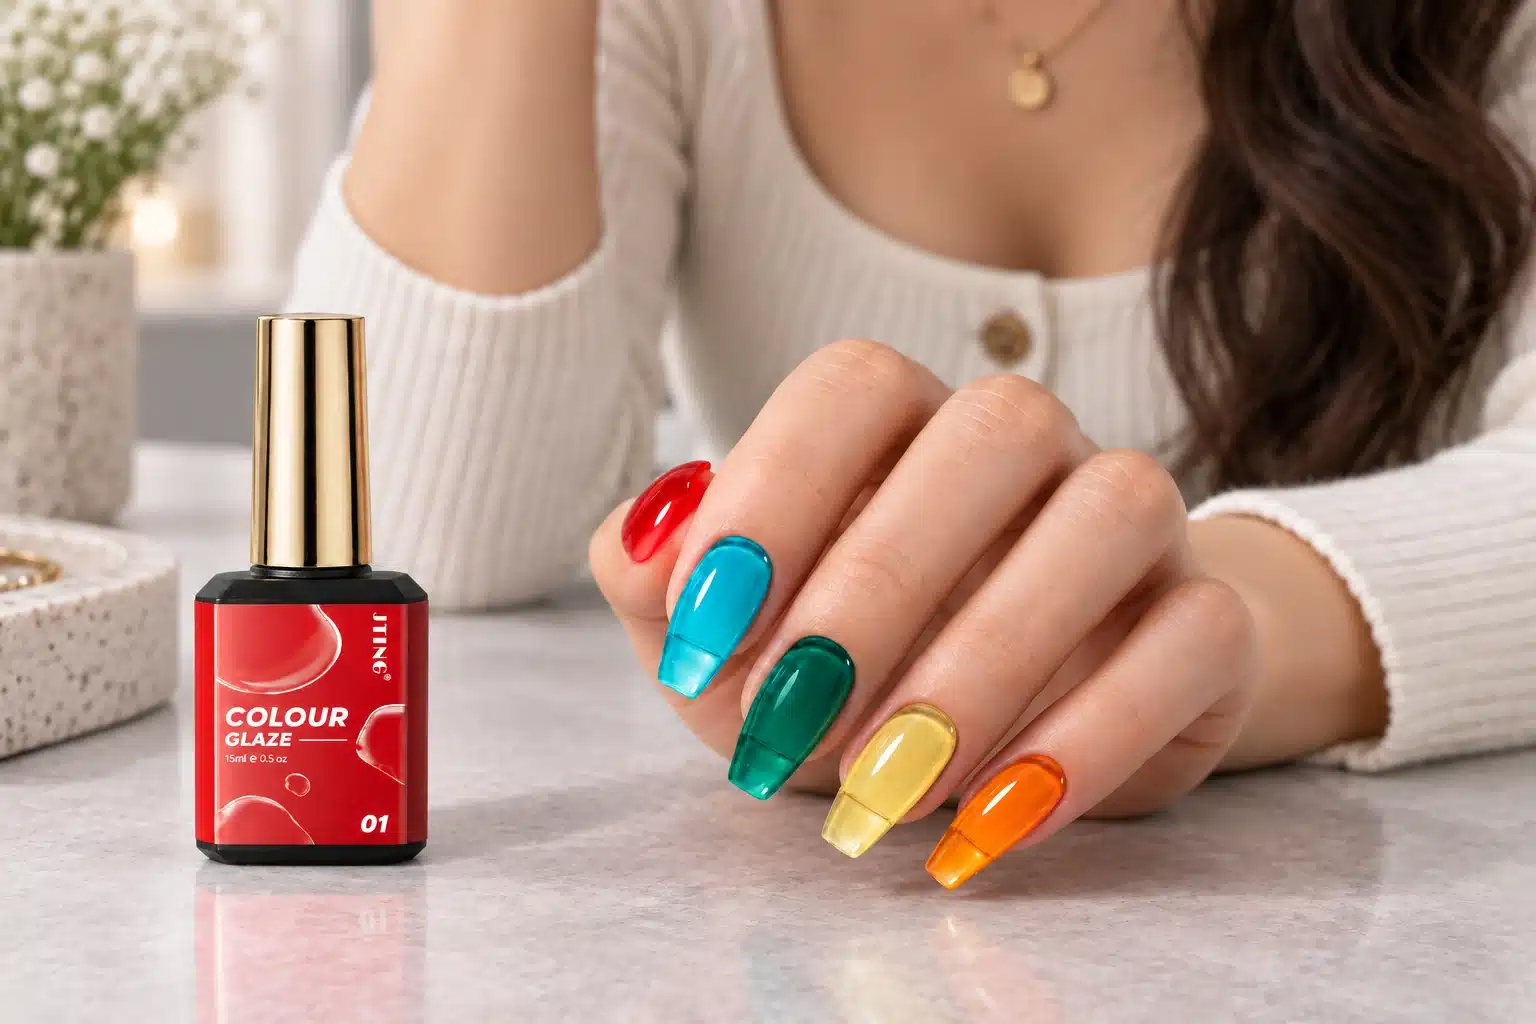
Colorful jelly nails are an opportunity to use bright shades without giving every nail a solid block of pigment. Red, orange, raspberry, lilac and green can be arranged as a coordinated set, but the strongest designs usually have a clear relationship between the colors. Similar transparency can connect a palette even when its hues differ.
Explore the JTING 12-Color Jelly Neon Glaze Gel collection for yellow, green, blue, purple and pink-red color directions. Its supplied swatch images also illustrate how the displayed shades deepen across successive color layers.
A single fruit-inspired color
Start with a cherry, berry or citrus direction and keep the rest of the manicure simple. The point is the color's depth, not a literal fruit illustration on every finger. For a stronger version, choose a richer jelly rather than building unnecessary thickness. For a softer version, select a lighter shade or an appropriate background.
Two-color combinations
Pair a warmer and cooler color deliberately: pink with orange for a lively result, or berry with muted nude for more contrast. Compare them at the finished depth before committing. Two bottles that look compatible may create very different intensity once applied, leaving one nail visually heavier than the others.
Layered designs and jelly sandwiches
A jelly sandwich describes a visual arrangement where a decorative element appears between translucent layers. It is a design concept, not a standalone gel formula. When using a gel system, keep every material and layer within its approved use and cure sequence. Large particles or opaque decorations must not become an excuse for unsupported thick encapsulation.
For a clean commercial sample, use one limited accent and leave enough uninterrupted color to show the jelly effect. Photograph the finished nail from an ordinary angle as well as close up; the design should read as a manicure, not only as a magnified texture.
21. Amber and Tortoiseshell Jelly Nail Designs
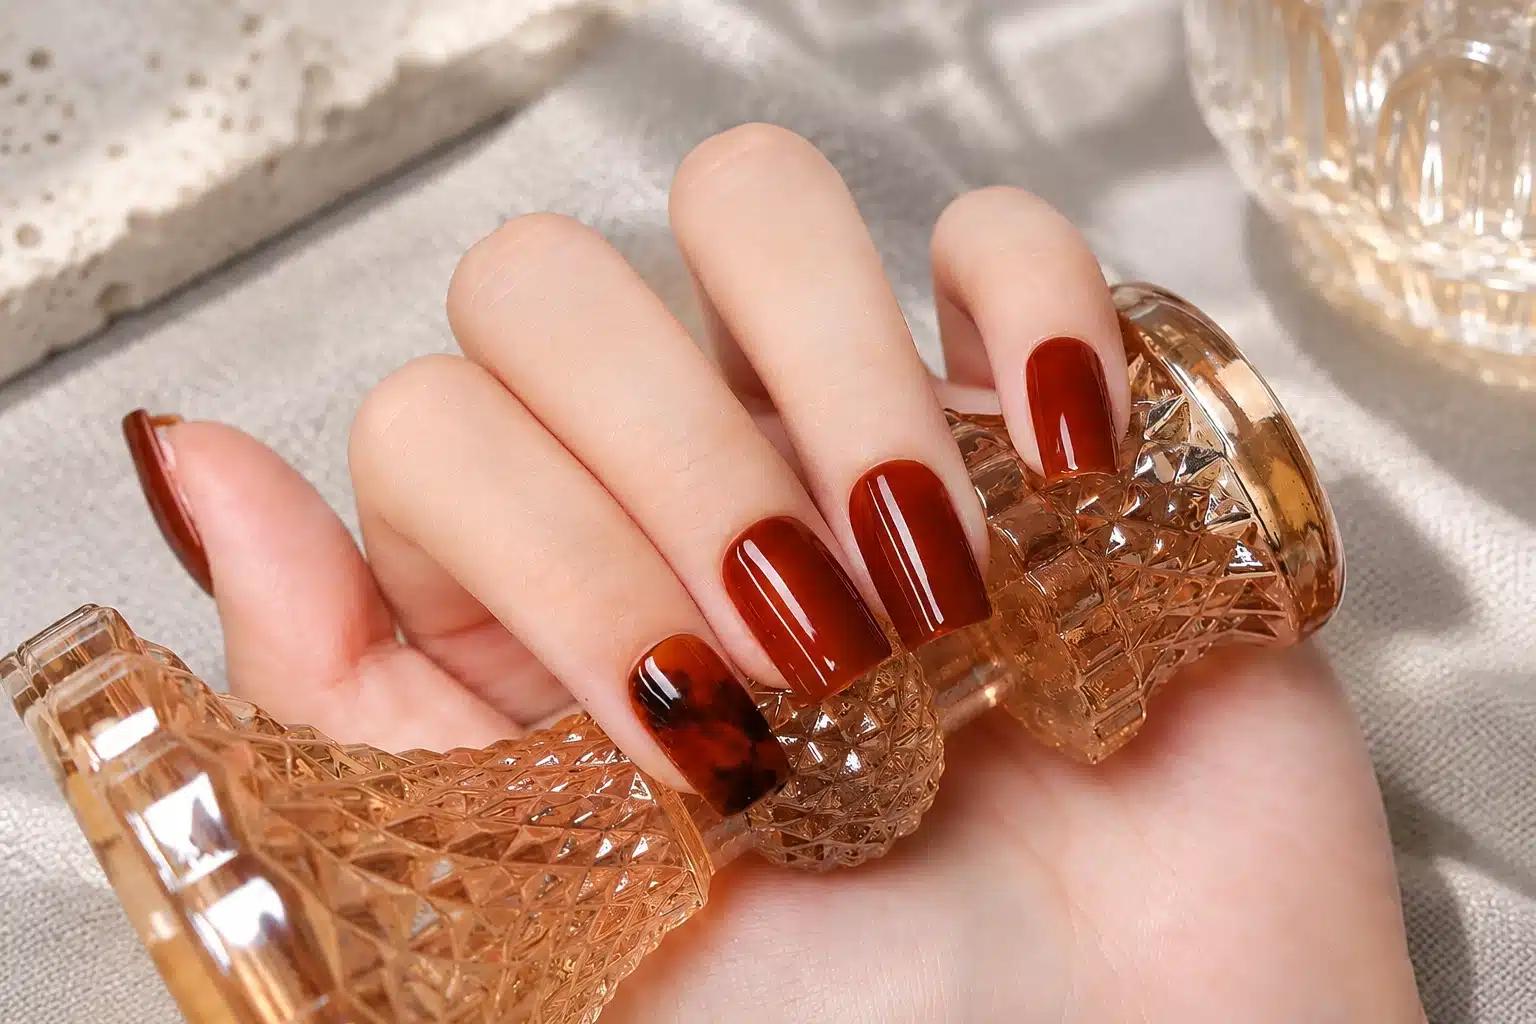
Amber and tortoiseshell designs use translucent warm color to create a sense of depth around darker marks. The most effective versions leave areas of light between the pattern elements. If every part of the nail becomes equally dark, the layered effect can collapse into a flat brown surface.
The JTING 4-Color Amber Tortoise Gel Polish collection offers a focused palette for this warm, translucent design direction. Use the finished nail examples to compare the balance of amber light and darker pattern detail.
Plan three visual roles
Choose a luminous amber background, a mid-tone that connects the pattern and a darker detail for contrast. These roles do not require three equally large areas. Let the background do most of the work, use the mid-tone selectively, and keep the darkest marks relatively limited. A sample tip is useful for deciding how much pattern the chosen nail length can hold.
Vary the spacing and scale of the marks without scattering them indiscriminately. A few connected areas with open amber between them often read more clearly than many tiny spots. View the design at normal distance before adding another layer. What looks subtle under magnification may already be enough for the finished hand.
Adapt the design to the service
For a short set, use tortoiseshell on one or two accents with plain amber or nude supporting nails. For a French layout, keep the patterned area narrow enough that the negative space remains visible. A full set can work when the pattern density is controlled and the shades are coordinated.
Jelly color creates the visual depth, while the chosen art medium controls how the marks behave. If the method uses a blooming product, follow that product's specific sequence rather than assuming any brown gel will diffuse on its own. The aim is a repeatable pattern, not an accidental mixture of unrelated materials.
22. Glass-Look and Magnetic Jelly Nail Designs
Glass nails is a visual description used for more than one technique. It can refer to transparent-looking color, a luminous layered finish or a magnetic design with a polished surface. Ask what the customer likes in the reference: the see-through tip, the moving light or the smooth reflection. Each calls for a different choice of materials.
Keep the light effect visible
Where an approved design system combines a translucent color with a magnetic layer, too much color depth can hide the light you were trying to showcase. Test the complete sequence on a tip. Compare the magnetic effect before and after the color stage, then choose a combination that remains attractive as the nail moves.
A pale nude magnetic set can feel quiet and wearable, while a deeper red or plum version has a more dramatic character. The distinction is not simply seasonal. It also depends on whether the customer wants the effect to be obvious from a distance or visible mainly when the hand catches the light.
Use a balanced accent layout
A practical design pairs two magnetic nails with related nonmagnetic jelly colors. Another uses the magnetic product across the set but keeps the light placement consistent. Both approaches are easier to understand than combining several unrelated magnetic patterns on one hand.
For selling a jelly cat eye collection, include a short movement view along with clear still images. Keep the light source steady instead of using effects that exaggerate the result. The buyer needs to understand the ordinary appearance, not only the brightest instant. That makes selection more confident and helps salons present a realistic sample to clients.
23. Pairing Jelly Color with Blooming, Chrome and 3D Details
Translucent color gives nail art room to show through or stand out. The best combinations have a clear hierarchy: jelly color is the background, while the added effect supplies a focal point. If opaque art covers the whole surface, the choice of a jelly base may no longer be visible.
Blooming and soft organic patterns
Use diffusion selectively for a petal, marble detail or a small abstract area. Keep enough uninterrupted color around it to retain the lightness of the manicure. The blooming gel application guide explores the material and timing choices behind these patterns. A jelly color does not automatically behave like blooming gel, so select the art system intentionally.
Chrome and metallic accents
A narrow metallic edge or small reflective detail can contrast with translucent color without hiding it. A fully reflective overlay creates another finish and may reduce the visible jelly effect. Use the chrome nails guide when choosing between powder-based and gel-based routes, rather than treating every metallic appearance as the same material.
Raised details
A small flower, raised line or water-drop-style accent can introduce texture while leaving the underlying shade visible. Keep size and placement compatible with the client's daily use. For choosing the material for the raised element, the 3D nail art gel guide separates decorative product types and design approaches.
For a collection photo, show the simple jelly manicure first and the embellished version second. This tells customers what belongs to the color product and what comes from additional art materials, without turning the image caption into a technical manual.
24. Seasonal Jelly Nail Color Combinations
A seasonal jelly selection does not have to be rebuilt from zero every few months. Keep versatile foundation shades and change the accent colors or art direction. A rose nude can support a spring floral design, a summer bright, an autumn amber accent or a winter metallic detail.
| Collection direction | Suggested palette | Design approach |
|---|---|---|
| Fresh and light | Rose, peach, soft lilac and a restrained green | Simple color with limited floral detail |
| Bright and playful | Cherry, citrus, raspberry and a clear-looking blue | Color combinations or translucent French tips |
| Warm and layered | Amber, tea brown, muted nude and berry | Tortoiseshell accents with plain supporting nails |
| Deep and polished | Plum, rich red, cool nude and smoky tones | Selective magnetic or metallic highlights |
These are design directions rather than a sales ranking or a requirement to carry every shade. Adapt the mix to local preferences and your customer base. A salon with many natural-nail clients may need subtle colors throughout the year, while an art-led retailer may choose stronger seasonal contrasts.
For a brand launch, keep the supporting products visible in the planning stage. A color story that depends on an opaque base, a magnetic gel and a special top coat needs more than a list of jelly colors. Decide which parts belong in the main collection and which are optional companions.
Use seasonal naming as a helpful layer of presentation, but retain stable shade identification for reorders. A customer who bought a popular berry in a holiday set should still be able to find the same product after the campaign ends.
25. Building a Jelly Gel Selection for a Salon
A salon assortment should make consultations and repeat services easier. Start with the looks your clients actually request, then decide which product families are needed to deliver them. A large number of similar sheer pinks is less useful than a smaller selection whose differences technicians can explain confidently.
Build around three service needs
First, create an everyday group: a few nude and pink directions with meaningful undertone differences. Second, add color-led options such as red, berry and amber. Third, choose effect or structural products that support the services the salon already performs. You do not need a builder in every jelly color simply because that color exists as a polish.
An illustrative starter board could show four natural-looking shades, four brighter or deeper shades, two magnetic looks and two layered art examples. This is a merchandising example, not a recommendation to buy twelve different formulas. Some finished looks can share the same products, making training and stock control simpler.
Make the sample board easy to use
Group by the client's desired result rather than by internal product codes alone. Under each finished sample, retain a back-of-board record of the exact products, foundation, color sequence and finish. A beautiful sample is much more useful when another technician can reproduce it without guessing.
Track what is chosen and what is reordered. Frequent selection with slow bottle use may mean the product is mainly an accent; frequent full-set use needs different replenishment planning. Review duplicated shades after real service experience rather than expanding the range automatically with every new collection.
For client communication, explain the finished service plainly: a sheer color manicure, a magnetic jelly look or a tinted structured overlay. This connects the price and appointment time to the actual service without overwhelming the client with product terminology.
26. Planning a Private Label Jelly Gel Collection
A strong private label jelly collection has a clear visual identity and equally clear product roles. Decide whether the launch is primarily a color story, a natural-overlay system or an effects collection. That decision guides the shade mix, sample plan, packaging and photography far more effectively than starting with the largest available color count.
Coordinate across categories without blurring them
A brand can present jelly colors, translucent cat eyes, tinted builders and rubber bases under one visual theme. Keep the category name prominent on the product and its instructions. Use related colors and design language to connect the range, while making it immediately clear which bottle is a color coat and which belongs to the foundation or structure stage.
Do not assume the same shade name will look identical across formulas at their different working thicknesses. Set an appearance target for each product family and compare the finished results. A coordinated rose palette can be commercially coherent without claiming that all four formulas are interchangeable or perfectly matched.
Develop the product and the presentation together
JTING supports custom color development, formula direction, bottles, caps, brushes, labels, boxes and color charts. These choices work best as one project. Brush selection affects application control; shade labels help reordering; a clear swatch system helps customers understand transparency before purchase. Explore JTING private label gel nail polish development to plan those elements together.
Private label gel nail polish orders start from 10 pieces per shade, while house-brand mixed-color orders start from 100 pieces. Product type, packaging and customization requirements determine the final project terms. Standard samples typically take 7-10 business days; custom color or exclusive formula development typically takes 2-4 weeks. Bulk production typically takes 15-20 days after sample and packaging approval, with the schedule confirmed for the order.
For a first inquiry, send the target market, product families, a few visual references, preferred shade count and estimated quantities. Add whether you need a nearly transparent finish, a softly covering nude or a magnetic version. That gives the sampling discussion a concrete starting point.
27. What to Compare When Testing Jelly Gel Samples
Sampling should answer a purchase decision. Begin with an agreed target and a consistent application method, then compare the products against it. A random set of photos under different lighting will not tell you whether one shade is clearer, easier to apply or simply shown on a different base.
| Sample question | Useful comparison | Record for approval |
|---|---|---|
| Does the color fit the collection? | Adjacent shades on the same background | Product, shade, base and lighting |
| Is the transparency right? | Recommended applications over the intended substrate | Visible nail line and chosen finished depth |
| Is application controllable? | Evenness, brush loading and edge behavior | Brush, technique and working conditions |
| Does the cat eye effect fit? | Still view and movement under steady lighting | Magnet method and complete layer sequence |
| Does the builder fit the service? | Approved structural application and handling | Service type, shape and removal requirements |
| Does the tinted base fit? | Its specified foundation or overlay application | Preparation and required finishing products |
| Can the range be sold clearly? | Labels, instructions, shade chart and packaging | Final approved artwork and sample identification |
Separate appearance review from technical validation. A good-looking swatch is useful for approving shade and visual effect, but it does not prove cure quality, wear performance or market compliance. Ask for the application guidance and product-specific documentation needed for your purchasing process. HEMA-free or TPO-free requirements should be discussed for the selected formula rather than assumed from the jelly finish.
For a wear evaluation, use an appropriate professional process with clearly recorded preparation, application and maintenance. Do not turn a single successful manicure into a universal wear guarantee. Compare more than the best photograph: ease of repeat application and clear aftercare also matter to a salon collection.
Keep approved references for repeat orders. Include the product and shade identification, the sample date and a consistent finished swatch. When expanding into another formula family, approve that new product on its own terms rather than treating the original color approval as a technical approval for everything in the range.
28. Frequently Asked Questions About Jelly Gel Nail Polish
Is jelly gel nail polish supposed to be see-through?
Yes, some background visibility is intentional. The amount varies by shade and application. If you want to hide the natural white edge, choose an appropriate softly covering foundation or a more covering finish rather than expecting a clear jelly color to behave like an opaque gel.
What is the difference between jelly polish and gel polish?
Jelly describes a translucent finish; gel describes a product system that requires its specified curing process. Jelly colors exist in both ordinary air-drying polish and light-cured gel ranges. A glossy photograph cannot tell you which one it is, so check the product type and instructions before buying.
Are syrup gel and jelly gel the same thing?
The terms often overlap in descriptions of translucent, layered color, but they are not a shared technical specification. Compare applied color, transparency and product function. A product called syrup is not automatically thicker, stronger or more suitable for building than one called jelly.
How many coats of jelly gel polish do I need?
Use the product's prescribed application and compare the result with your target shade. Layer demonstrations can help, but there is no single correct count for every jelly. If more depth is needed beyond the intended application, choose a richer shade or another appropriate background rather than applying a thick layer.
Why does my jelly gel look streaky?
Check uneven brush loading, repeated passes that remove color and differences in layer thickness. Also inspect the foundation underneath. Practice the prescribed application on a sample tip and change one variable at a time. Do not assume every pale or visible area is a defect when the product is designed to be translucent.
Can jelly gel cover my natural nail line?
A transparent color may leave it visible. A suitable nude or camouflage layer can reduce the contrast, while a milky shade creates a softer background. That changes the final color and transparency, so compare the complete combination before choosing it for a service.
Can I wear jelly gel on short natural nails?
Yes. A short manicure can use a simple sheer tint, a brighter translucent color or a small accent. Choose the appropriate nail system and keep the design proportional to the available surface. Long clear extensions are one way to display transparency, not a requirement for every jelly look.
Does jelly cat eye gel always need a black base?
No universal base rule applies to every cat eye formula. Black can add contrast but also changes the translucent appearance. Follow the product's application guidance and compare samples on the intended background when the goal is a lighter jelly effect.
Is jelly builder gel just thick jelly color gel?
No. A builder is chosen for its specified structural use, not merely its viscosity or tint. Jelly color gel is primarily a decorative layer. Confirm the builder's approved service, handling and removal method instead of trying to use a color gel for construction.
Can tinted rubber base replace builder gel?
Not as a general rule. Use the product's stated application range to decide. A tinted foundation and a structural builder can produce similar-looking nude nails, but that does not establish the same strength, thickness limits or extension capability.
Can I make jelly gel by mixing color with top coat?
Do not assume that an arbitrary color-and-top mixture is suitable. Use a ready-formulated jelly or a mixing medium and method explicitly supported by the manufacturer for that system. Instructions for mixing ordinary air-drying nail lacquer are not automatically applicable to light-cured gel.
Can I cure jelly gel without a lamp?
Light-cured jelly gel needs the specified compatible lamp and schedule. Leaving it in the air is not an alternative. If you want a no-lamp manicure, select an ordinary air-drying jelly nail polish and follow that product's instructions instead.
Does a sheer gel need less curing time?
Do not shorten the prescribed cure because the color looks transparent. Use the instructions for the exact product and lamp. Visible clarity and surface hardness are not reliable ways to establish complete cure.
How do I remove jelly gel nails?
The removal method depends on the product system, not the color effect. Follow the specific soak-off or file-off instructions and have structural products maintained or removed by an appropriately trained professional. Do not peel or force off the coating; persistent nail problems should be assessed by a dermatologist.
Is jelly gel automatically HEMA-free or TPO-free?
No. Those are formula attributes, not properties of a translucent finish. Request the information for the exact product and target market. A free-from label also does not mean a product cannot cause an allergic reaction or can be applied to skin.
What should I buy first for a professional jelly collection?
Start with the services and color directions your customers need. Choose a small set of clearly different shades and add magnetic, builder or tinted-base products where they support the service. Approve applied samples and clear product labels before expanding the assortment.
Can JTING develop a private label jelly gel range across several categories?
JTING supports coordinated color development and private label product planning across its relevant gel ranges. Share whether you need color gel, cat eye, builder or rubber base, together with your visual references, packaging direction and quantity plan. The sampling stage can then address each product's role and finished appearance.
Start with the Finish, Then Choose the Formula
A successful jelly collection is not defined by one bottle shape or one shade name. It connects the right transparency with the right function: color where you need color, magnetic movement where you want light, and an appropriate foundation or structure where the service requires it.
Choose the looks you want to offer, compare them on the intended base and build a range customers can understand. To plan your own selection, share your jelly gel color references and collection requirements with JTING. Include the product families you need so the discussion starts with relevant samples rather than a generic color catalog.