A beautiful French gel manicure is more than a white tip. The base shade, the curve of the smile line and the balance between the nail bed and the edge all affect the finished look. A barely visible micro French and a dramatic almond French may share the same idea, but they need different color choices, brush control and proportions.
This guide explains how to choose French manicure gel products, plan flattering designs and solve common application problems. It also shows salons and nail brands how to build a useful French collection: complementary base shades, dependable tip colors and clearly identified product types, rather than an assortment of nearly identical pinks.
1. Quick Answer: What Gel Do You Need for a French Manicure?
For a painted French gel manicure, start with the base system suited to the nail, choose a sheer or covering background color, paint the tip with an appropriate white or colored gel, and finish with a compatible top coat. A builder is an additional structural choice, not an automatic requirement for every French design. Each curing stage follows the instructions for the selected products and lamp.
The most useful starting question is not which bottle says French on its label. Ask whether the service needs only color, a tinted foundation, or a shaped enhancement. Once that is settled, choose the contrast between the background and the tip. A soft white on rosy nude looks very different from an opaque white on a clear base, even when the smile line is identical.
| Desired Result | Product Direction | Main Selection Point |
|---|---|---|
| Classic pink and white French | Suitable base, pink or nude color, white tip gel, top coat | Background coverage and clean white edges |
| Short micro French | Suitable foundation, flattering tint, controllable tip color | A narrow line without a heavy ridge |
| Tinted-base French | Appropriate rubber base system, tip color, required finish | Whether the base provides the desired tint and service function |
| Builder overlay or extension French | Specified builder system with a painted French design | Structural suitability first, decoration second |
| Magnetic or metallic French | Prepared foundation and the chosen effect system | Effect visibility within a small tip area |
For a salon, a small selection with distinct jobs is easier to use than a large selection with unclear differences. For a brand, those jobs become the basis of a clear product range: a natural sheer, a soft covering nude, a bright white and a selection of accent colors. The exact number of shades should follow the customers you serve.
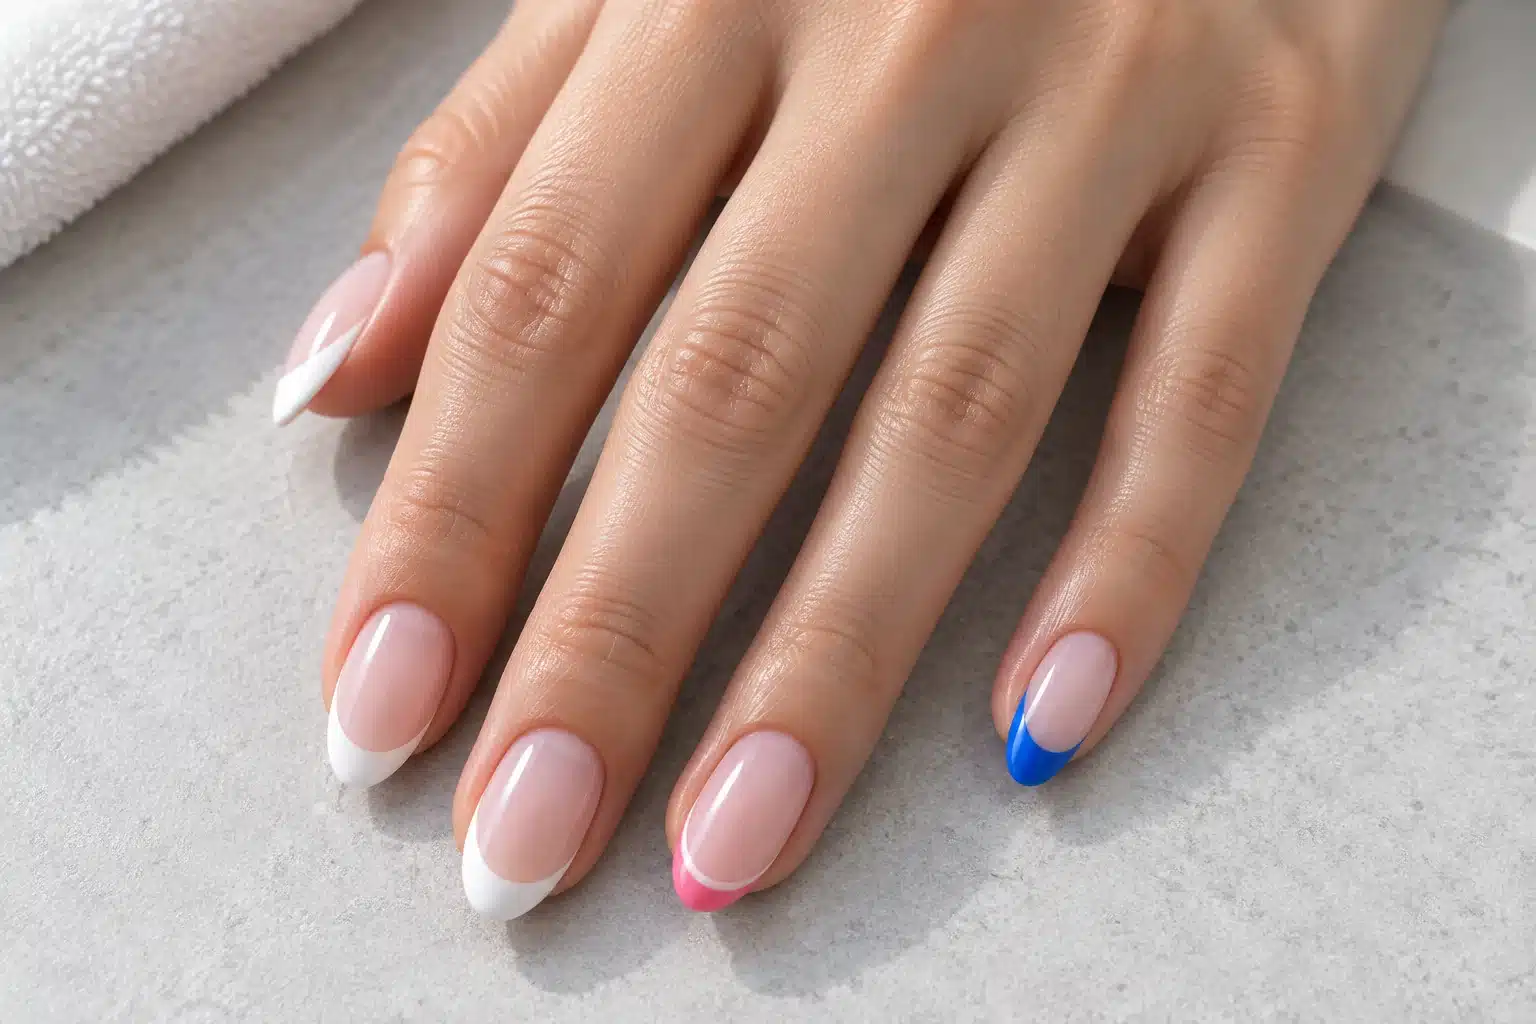
2. What Is a French Gel Manicure?
A French gel manicure uses lamp-cured gel products to create a contrasting tip over a nail-bed color. The familiar version pairs a pink, nude or transparent-looking background with a white edge. Modern versions change the color, outline or finish while keeping the visual distinction between the body of the nail and its tip.
French describes the design. Gel describes the material system. Neither word alone tells you whether the nail is natural, reinforced with an overlay or extended. A client can request gel French nails on a short natural nail, while another may want the same color combination on a long enhancement. Those are different services even if their photographs look related.
Separate the Design from the Structure
A painted French sits on a prepared surface. A sculpted pink-and-white enhancement builds the design into the structure using an appropriate enhancement system. The latter requires a different skill set and product selection; it is not simply a thicker application of ordinary white gel nail polish. This guide focuses mainly on painted French designs and clearly separates the structural choices.
Also distinguish lamp-cured gel from conventional polish advertised as having a gel-like shine. They are not interchangeable in application or removal. When buying a French manicure kit, inspect what each item actually does rather than assuming the word gel guarantees that the whole kit belongs to one curing system.
In a consultation, describe the service in three parts: the nail foundation, the background shade and the tip treatment. For example, a short natural-nail service with a softly covering pink and a thin ivory edge is much more precise than asking for a natural French. This shared vocabulary reduces mismatched expectations before any product is applied.
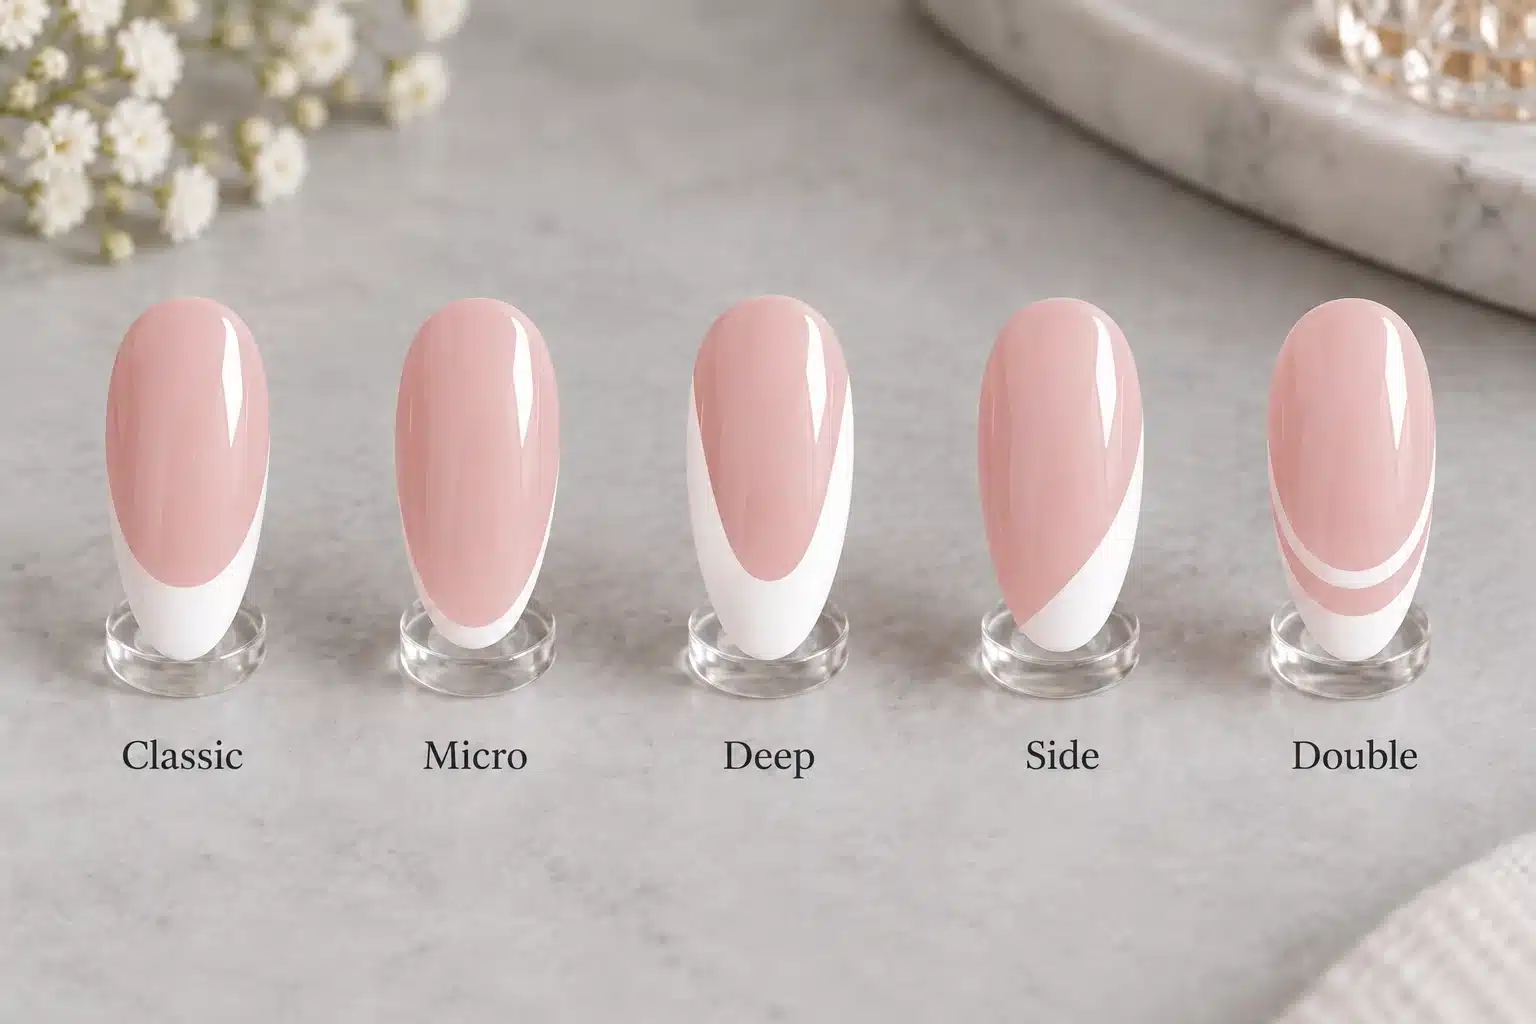
3. French Manicure Styles: From Classic to Modern
The French family includes both quiet everyday designs and strong graphic statements. The key variables are tip depth, curve, color and the amount of negative space. Changing one of these is often enough to create a new look. Changing all of them at once can make the design harder to read, particularly on short nails.
Classic, Micro and Deep French
A classic French uses a recognizable curved tip with a balanced nail-bed area. A micro French reduces that tip to a very narrow outline. A deep French extends the sides of the smile line farther toward the nail bed, creating a more elongated sweep. Deep does not mean that the entire tip should become thick or bulky; it describes the visual shape of the painted boundary.
Side, Double and Reverse French
A side French places the accent diagonally or along one edge. A double French adds another line, usually with a visible gap between the two. A reverse French commonly describes an accent near the base of the nail, but the term is also used in professional enhancement education for a construction method. Show a reference and specify whether you mean the decorative placement or the structural technique.
For colored French tips, the shape can stay familiar while the palette changes. Black gives a stronger outline than ivory. A pastel edge may need more contrast against its background. A metallic line can be very visible even when narrow. Choose the width after seeing the actual color, not before.
A useful salon sample display groups designs by the decision a client makes: subtle, defined or expressive. Within each group, show different lengths and skin-tone contexts. This is easier to navigate than twenty tiny variations displayed without explanation, and it helps customers describe the feature they like rather than copying a whole manicure that may not suit their service.
4. How to Choose a French Design for Different Nail Shapes and Lengths
There is no single correct white-tip width for every nail. Nail-bed length, the visible free edge, the shape of the sidewalls and the desired contrast all matter. Aim for a consistent visual relationship across the hand rather than measuring an identical painted strip on every finger.
Short and Square Nails
On short nails, a broad opaque tip can dominate the design. A narrow curve usually leaves more visible nail-bed color and keeps the result lighter. On square or squoval shapes, avoid turning the white into a completely straight horizontal block unless that graphic result is intentional. A gentle arc can connect the corners without exaggerating the width of the nail.
Oval and Almond Nails
Rounded and tapered shapes offer space for a curved smile line. Its sides should relate to the shape rather than cutting abruptly across it. On a longer almond nail, a deeper sweep may look balanced; on a short oval, the same sweep can consume too much of the visible background. Compare the outline before filling in the tip color.
Longer Square and Tapered Shapes
Longer nails allow more visible tip area and more complex effects, but the structure must support the length independently of the artwork. A painted line cannot correct an unsuitable extension. Once the foundation is finished, decide whether the tip should emphasize the length or soften it with a shallower curve and less contrast.
One hand may have different nail-bed proportions. Adapt the line slightly on each nail to create a coordinated set. Photographing the hand from above before committing to an elaborate design can help reveal an unusually heavy thumb tip or an accent that overwhelms the little finger. A small planning adjustment is easier than repeatedly repainting a finished surface.
5. The Products Behind a French Gel Manicure
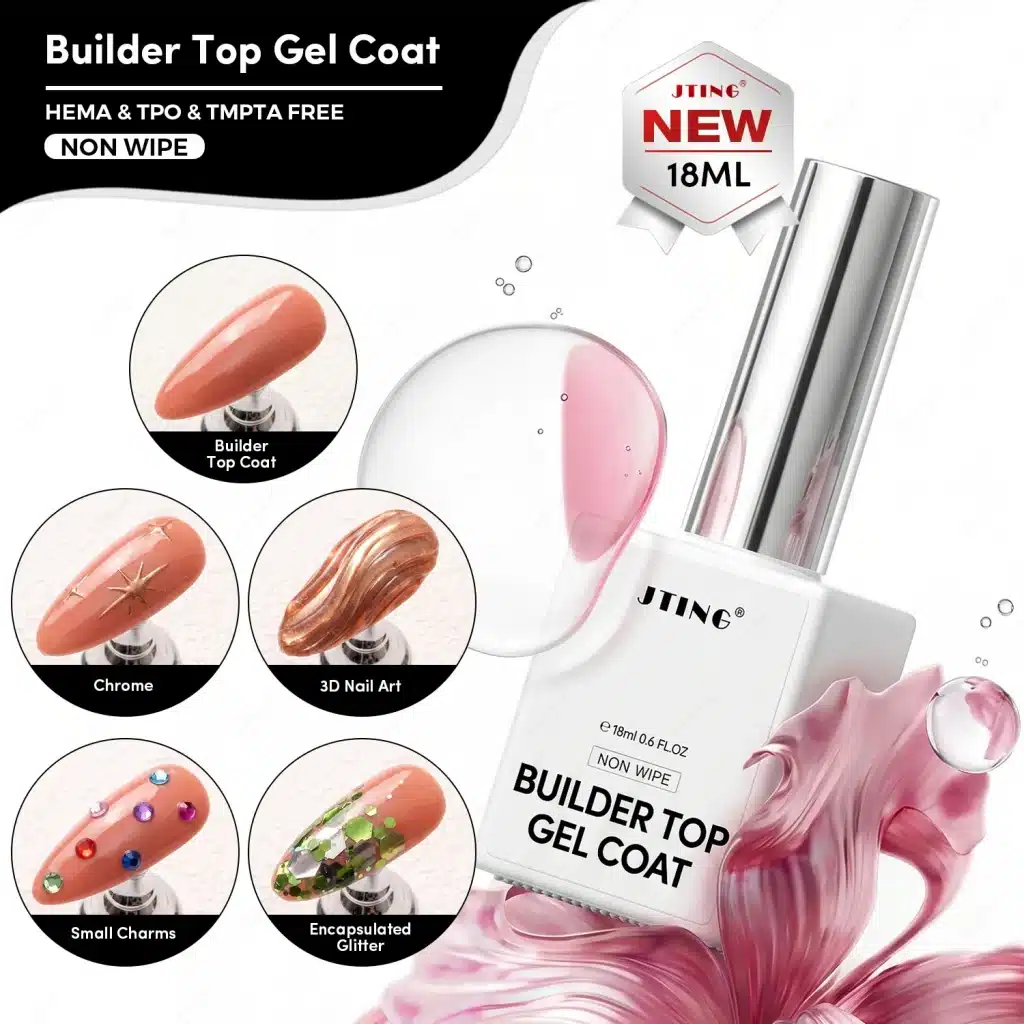
For a glossy finish, consider JTING's Glass Top Coat as a specific top-coat option. Check the finishing sequence for the chosen color and foundation before combining the products.
A French system works best when every product has a clear role. The foundation supports adhesion and any required structure. The background establishes coverage and undertone. The tip gel creates the line and contrast. The finish protects the approved color system and supplies the chosen surface appearance. One product may perform more than one role, but that should come from its instructions rather than guesswork.
| Role | What to Look For | What Not to Assume |
|---|---|---|
| Base system | Suitability for the intended nail service | Every color gel includes its own base function |
| Background color | Useful undertone and coverage at the intended application | Every bottle called nude creates the same result |
| Structural product | Approved overlay or extension use and removal method | A thick art gel is a builder |
| Tip color | Controllable line, even fill and appropriate opacity | Maximum thickness produces better white |
| Top coat | Compatible finish over the selected artwork | One top coat suits every effect technique |
Explore JTING's top coat and base coat range when planning the foundation and finish of a French collection. Select these alongside the colors, not as an afterthought. A beautiful sample tip is more useful when it can be reproduced with a clearly identified complete system.
Keep technical labels visible in a multi-product kit. A technician should be able to distinguish color gel, liner gel and builder gel without opening each container. Matching packaging can create a cohesive brand presentation, but product-role clarity matters more than making every label look identical.
For purchasing, compare the total usable service system. A low-cost white that requires repeated correction may be less attractive than a controllable alternative. Equally, an expensive specialty product is unnecessary if a well-matched color gel already creates the desired line. The right decision is based on the actual French design and workflow.
6. How to Choose the Right French Manicure Base Color
For a focused background palette, JTING's 36-color Milky Pink Gel Nail Polish collection offers milky pink and related nude directions to compare. Choose a small working selection by undertone and visible coverage rather than treating every shade as the same French base.
The best base color for a French gel manicure depends on what should remain visible. A clear background shows the natural nail and its free edge. A sheer pink adds a tint without fully hiding those features. A more covering nude can create a more uniform-looking nail bed, while a milky shade softens the whole design. These are different visual goals, not a simple progression from low to high quality.
Choose Coverage Before Choosing Pink
If the natural free edge remains visible below a newly painted smile line, the manicure can look as though it has two boundaries. A suitable covering background may help with the design, but repeatedly adding sheer coats is not always the right way to get there. Select a formula with the intended coverage and use it within its application instructions.
For a transparent-looking French, allow the natural variation to be part of the result. Show the client what that means before painting. A photograph of an opaque nude base is not a reliable reference for someone who requests an almost clear service. The difference will be especially visible in close-up photographs and on longer free edges.
Compare the Base with the Actual Tip Color
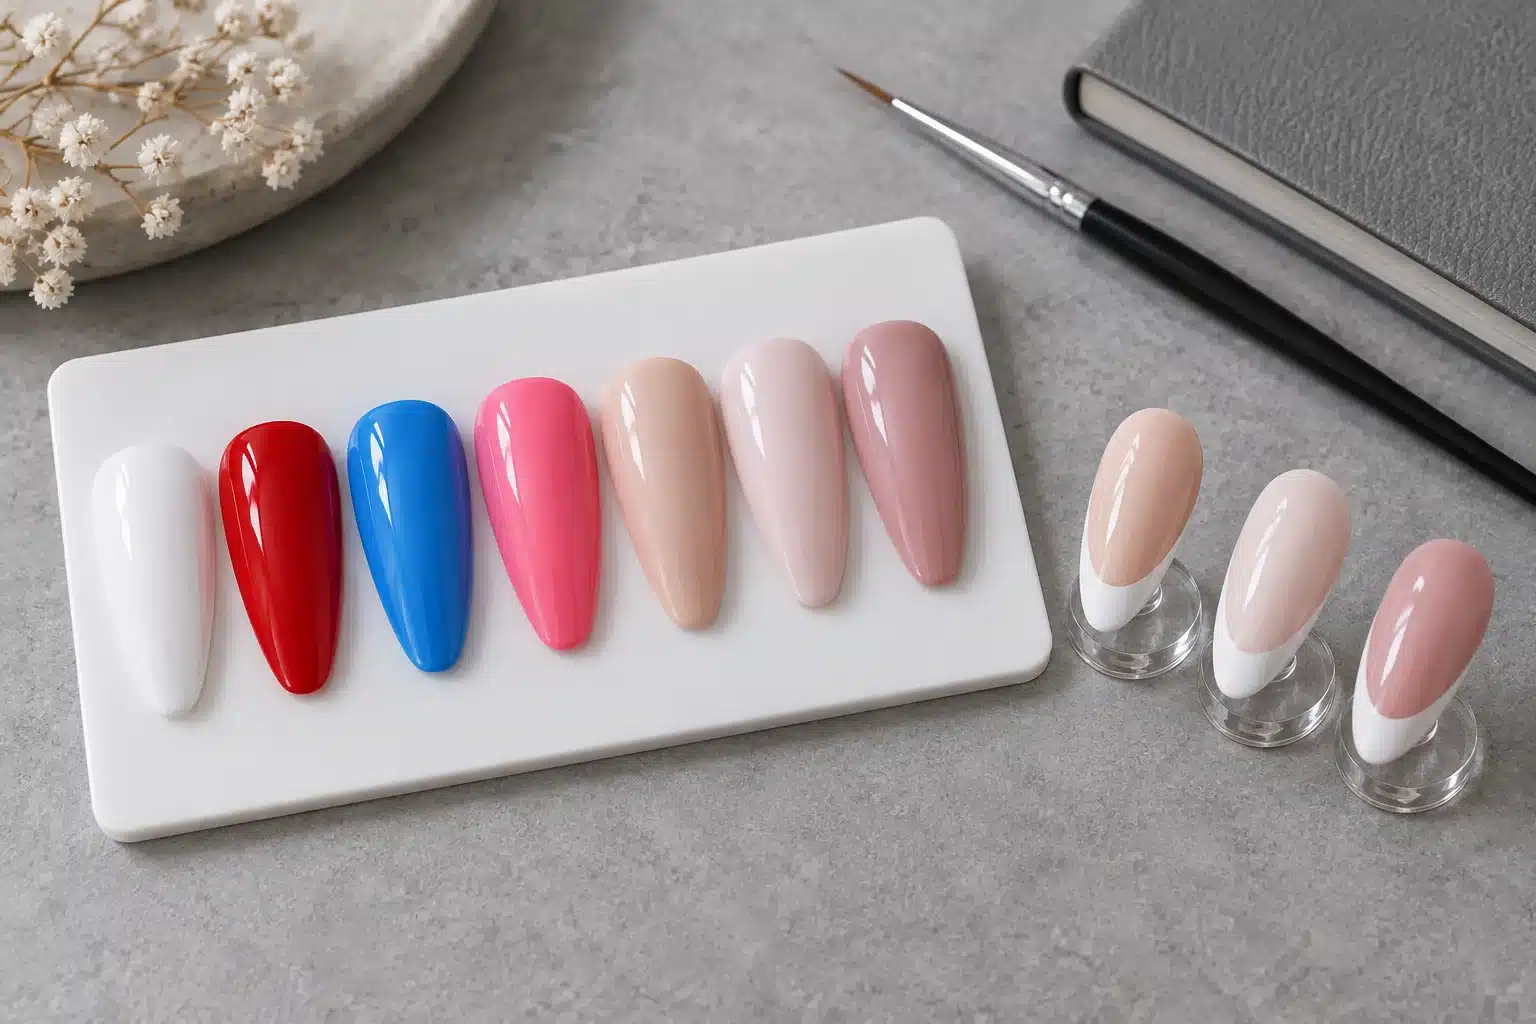
A pink that looks understated alone may appear stronger next to a very bright white. A warm beige with an ivory tip can look softer than the same beige with a stark white edge. Make paired swatches: the background shade with the intended French color, not just an isolated strip of nude gel.
JTING's gel nail polish color collections provide a starting point for selecting backgrounds and coordinating tip colors. For a more translucent direction, the jelly gel nail polish guide explains how sheer color differs from milky and covering finishes.
Label sample boards by both shade and coverage. Terms such as sheer rosy pink, softly covering neutral nude and milky pink give customers a useful expectation. A romantic shade name can remain part of the brand, but it should not be the only clue to how the product looks on a nail.
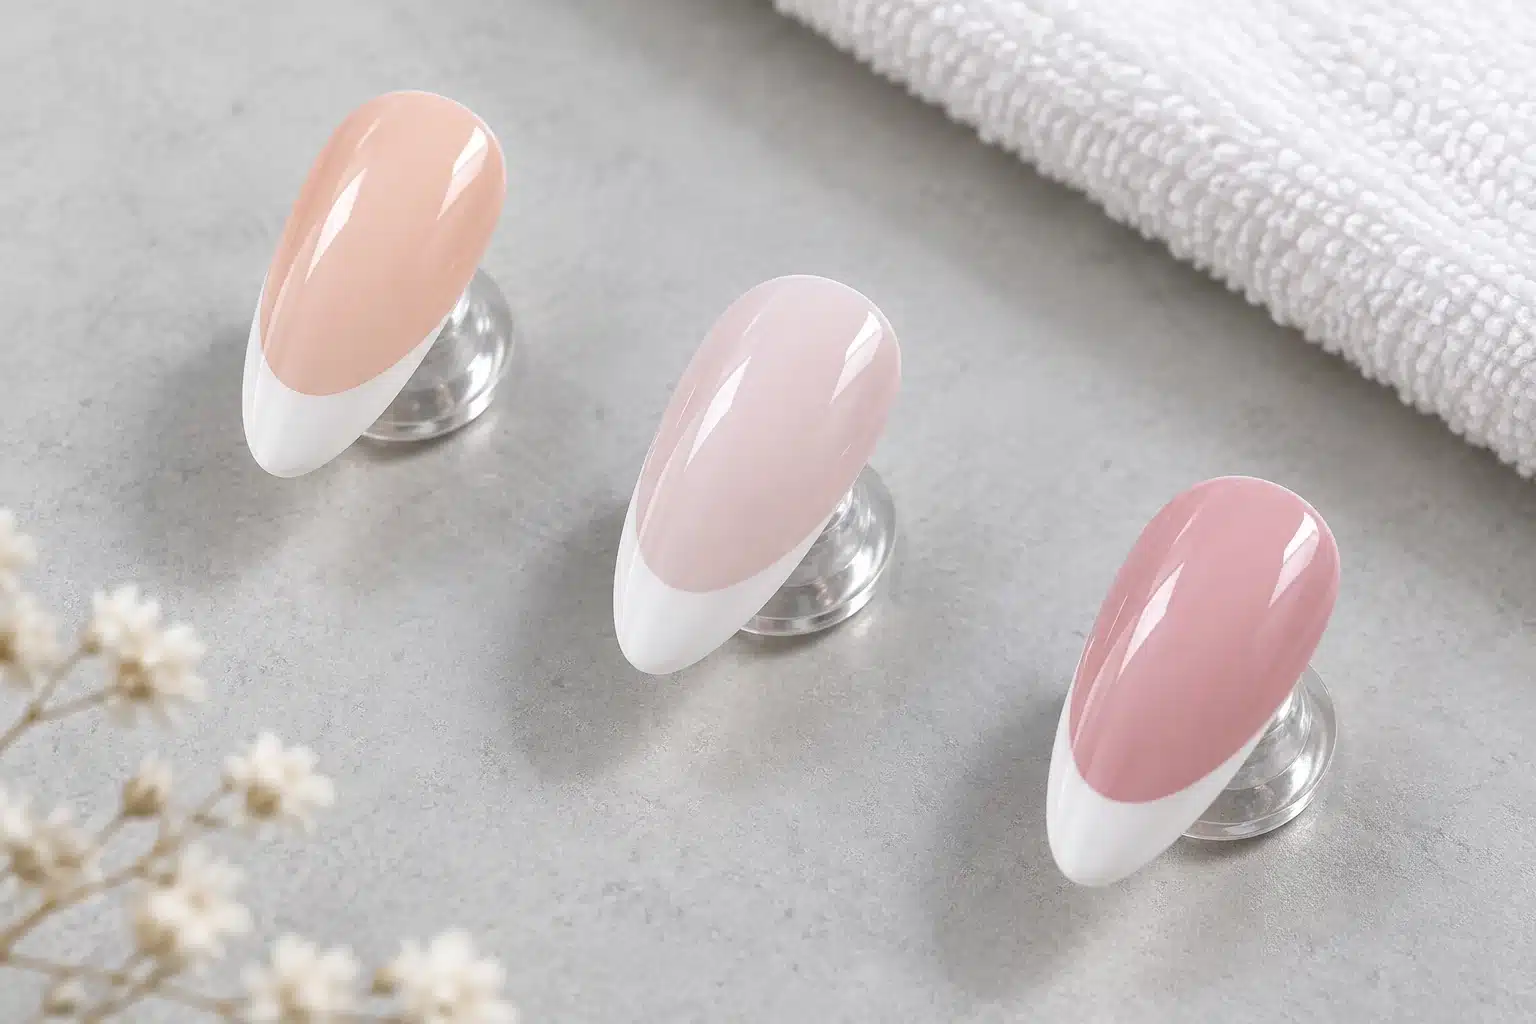
7. Matching Nude and Pink Bases to Different Skin Tones
A flattering French background does not have to match the skin exactly. Some clients want a close, natural relationship; others prefer a deliberate pink or milky contrast. The useful question is whether the finished combination feels intentional next to the hand, rather than whether a shade is marketed as universally flattering.
Compare warm peach, neutral beige and cooler rose directions beside the actual hand in neutral light. The natural nail contributes to the result when the color is translucent. That means the same product can look different on two people, even with similar application. Digital reference photographs can also shift undertones through lighting, screens and editing.
Build a Range of Undertones, Not Only Depths
A collection of pale, medium and deep shades is not complete if all three share the same strong peach undertone. Think about depth and undertone separately. A deeper neutral rose can serve a different customer from a warm caramel nude. A soft pink may create attractive contrast across several skin tones without pretending to disappear into all of them.
Very pale, opaque backgrounds can create a deliberately graphic effect. They can also look chalkier than expected when chosen from a white plastic swatch alone. Conversely, a sheer nude may provide too little visual separation for a client seeking a polished, uniform nail-bed color. Show both possibilities without treating either as a mistake.
Use a Paired Consultation Sample
Hold two or three finished French tips near the hand and compare the complete combination. Keep the tip color constant while changing the background so the client can identify what changes. Then compare the preferred background with a softer or brighter white. This reduces the number of decisions made at once and makes the final choice easier to explain.
For product photography, use varied hands and consistent lighting where genuine sample material is available. Avoid recoloring one hand or digitally changing a product's shade to claim a universal match. Buyers need to understand the palette they are ordering, not only the lighting effect of a promotional photograph.
8. Choosing White Gel for French Tips
The white shade in JTING's 12-color Painting Gel collection is one option to sample for painted French edges. The same collection also contains colored art shades; it is not a set of twelve whites. Compare brush control and the finished tip at your intended line width.
White is a small part of the nail but a major part of the result. A useful white gel for French tips should create the chosen contrast in a controlled application, remain manageable while the line is refined and work with the intended curing system. The goal is a clean, even tip, not simply the whitest possible blob on a sample spoon.
Bright White, Soft White and Milky White
Bright white creates a defined outline and works well when the client wants visible contrast. Soft white can make a classic manicure gentler. Milky white may be more translucent and can serve a different purpose, such as a soft background or blended effect. Product names are not standardized, so compare the actual swatch rather than treating these names as guaranteed opacity categories.
Evaluate the Line and the Filled Area
A product might draw a fine outline well but leave an uneven fill across a broad tip. Another may brush smoothly over a larger area but spread more than desired in a narrow line. Test both actions. Check the smile-line edge, the center of the white and the side profile of the finished nail.
If extra coverage is needed, follow the permitted coat sequence. Do not compensate for patchiness with an unsupported thick application. A surface that looks set does not establish that the whole layer has cured correctly. Use the product's specified lamp and timing, and resolve unusual wrinkling or soft areas before proceeding.
For sample requests, describe whether you want a crisp micro French, a classic opaque white or a softer bridal finish. Ask for suitable options and show a reference at the intended nail length. This is more effective than requesting the best white without explaining the look or method.
Keep the finished top coat in the comparison. A buyer ultimately sells a complete appearance, so approval should be based on the white as it looks in the complete intended system, not on an uncured palette swatch alone.
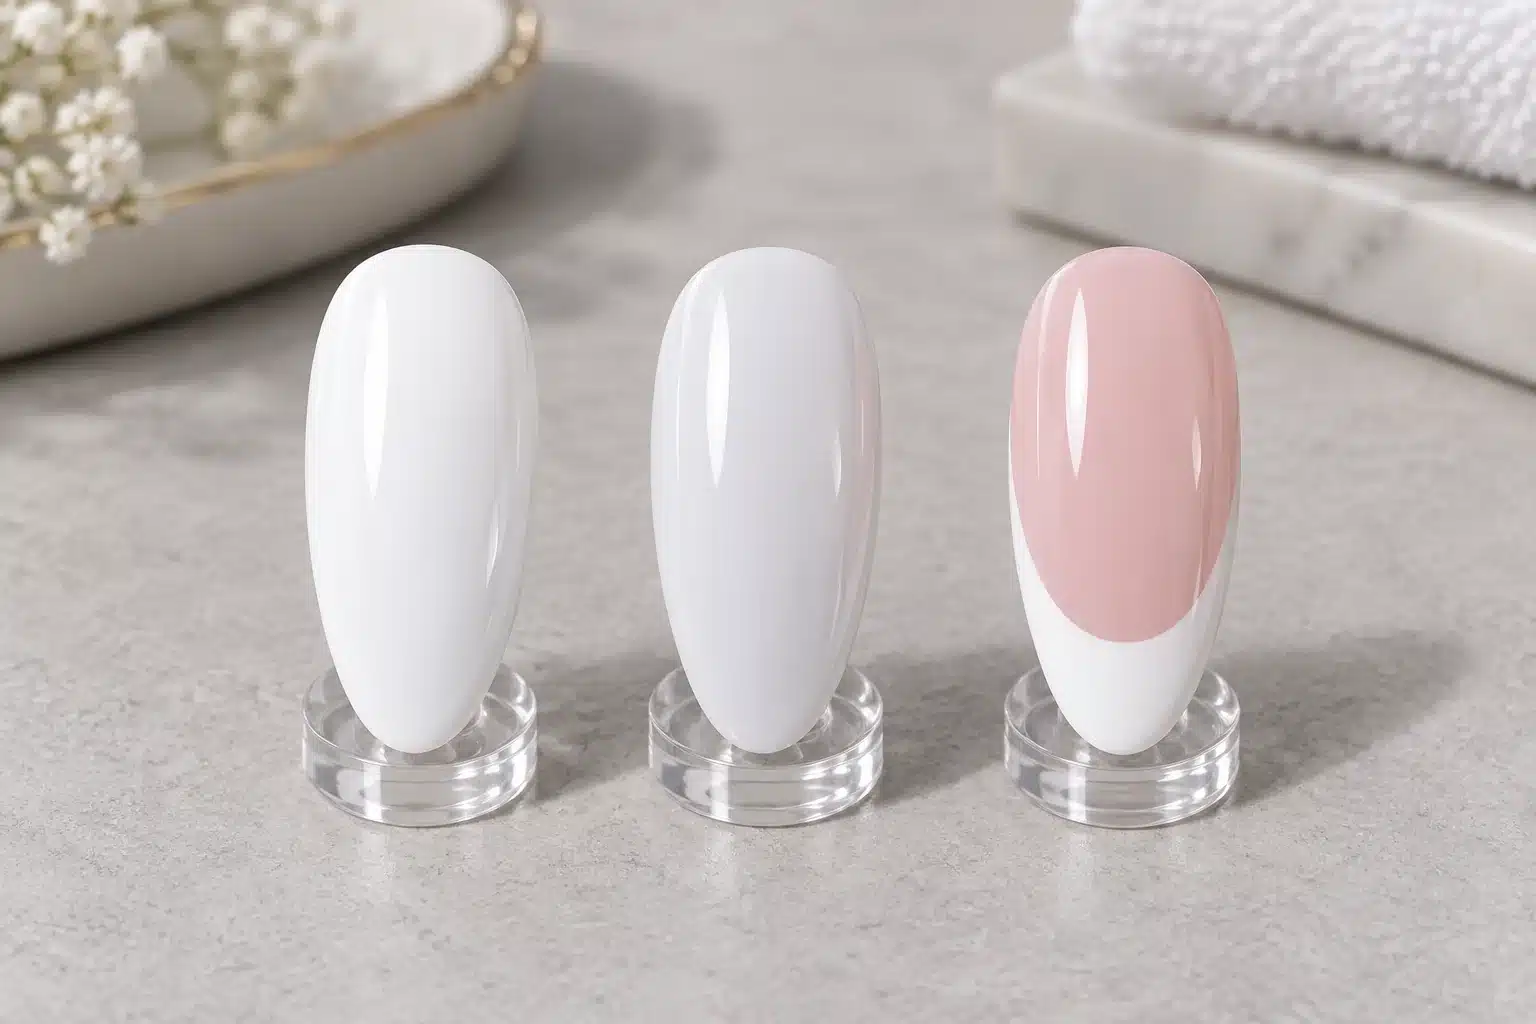
9. Gel Polish vs. Painting Gel for French Tips
Ordinary gel nail polish can create French tips when its brush control, coverage and compatibility suit the job. Painting gel and liner gel offer other handling formats for decorative work. The category name is a useful starting point, but it does not replace a sample test on the design you plan to make.
A bottle color can be convenient when the same shade is used for a full manicure and a matching French accent. A dedicated liner format can suit narrow curves and outlines. A painting gel in a pot can be useful when a technician prefers a separate art brush. None is automatically better for every line width or skill level.
| Format | Potential Use | Sampling Question |
|---|---|---|
| Color gel polish | Classic and colored tips with broader fill areas | Can it produce an even edge without excess material? |
| Liner gel | Micro French, double lines and fine accents | Does the brush and formula combination suit the intended curve? |
| Painting gel | Controlled artwork using a separate brush | Is it specified for this application and compatible with the finish? |
Compare JTING's liner gel range for detailed lines and the painting gel range for brush-based decorative work. Select an individual product after checking its application instructions; do not assume every art gel is intended for full-cover color, raised designs or structural building.
When testing, keep the brush, foundation and design consistent. If several variables change together, it becomes difficult to tell whether a better line came from the formula, the tool or simply a narrower tip. Record the combination that works so it can be repeated by another technician or explained to a wholesale customer.
10. Rubber Base, Builder Gel or Color Gel: Which Foundation Fits?
JTING's 12-color Jelly Rubber Base collection provides a specific tinted-base direction for a French background. Select the shade and service together, and follow the product instructions for preparation, application and removal.
Choose the foundation around the nail service, then choose the French artwork. Color gel supplies color; it should not be used to invent structural strength through repeated thick layers. A tinted rubber base may combine a base function with background color. A builder may support an overlay or specified enhancement, depending on the individual system.
When a Tinted Base Makes Sense
A suitable tinted base can be attractive for a natural-looking service because the background shade is already part of the foundation. Evaluate how that shade looks at the intended application, whether another base is required and what finish the system uses. A product that looks sheer in a thin color sample may appear deeper in a differently shaped application.
JTING's rubber base gel selection is the relevant category for this direction. The useful comparison is between specific products and their approved uses, not a blanket assumption that every rubber base behaves the same way.
When Structure Is Part of the Service
For an overlay or extension, select a builder intended for the required service and length. JTING's gel builder range includes different building directions. Confirm the exact application and removal method before treating any product as interchangeable with another builder.
Once the structure is finished, a French design can be planned over it. The background may come from the structural tint or a suitable color layer. Do not add another colored layer automatically if the existing tint already creates the requested appearance; equally, do not force a structural shade to provide coverage it was not selected to deliver.
For a broader explanation of system differences, see JTING's builder gel and nail foundation comparison guide. The French design is the finishing decision, not a substitute for that initial material selection.
11. Brushes and Tools for Cleaner French Lines
A good French tip brush is one you can control with the selected gel. A long liner can carry a continuous curve, while a shorter detail brush may feel easier for small corrections. A flat or angled brush offers a different way to shape a boundary. Choose by the movement and line you need, not by assuming the smallest brush always creates the cleanest result.
Match the Brush Load to the Stroke
Too much product can leave a bulb at the start of the line. Too little may make the stroke break before the curve is complete. Practice loading a small, consistent amount on a palette or practice tip. Check that the hairs form a controlled point and are not separating into several tracks.
Use a support position that steadies the working hand without forcing the client's finger into an awkward angle. Rotate the finger gently to inspect the sides instead of trying to draw every part of a smile line from one fixed viewpoint. A line can look even from the technician's side and become visibly unbalanced from the client's perspective.
Use Shortcuts Selectively
Stamps, guides and other French tools can help create repeatable shapes, but their geometry may not suit every nail. A dipping shortcut that pushes uncured gel onto surrounding skin is not a useful trade-off for speed. Practice any tool on a separate tip first and keep the material on the nail surface during a real service.
Follow the brush and gel suppliers' cleaning instructions. Do not dilute the gel or leave incompatible cleaning liquid on the brush to make it move more easily. Keep product containers and working brushes away from accidental curing light, and close containers between uses.
For a commercial range, brush selection belongs in sampling. A bottle may look attractive yet supply a brush that is awkward for the intended service. Compare the formula and brush together before approving the packaging direction.
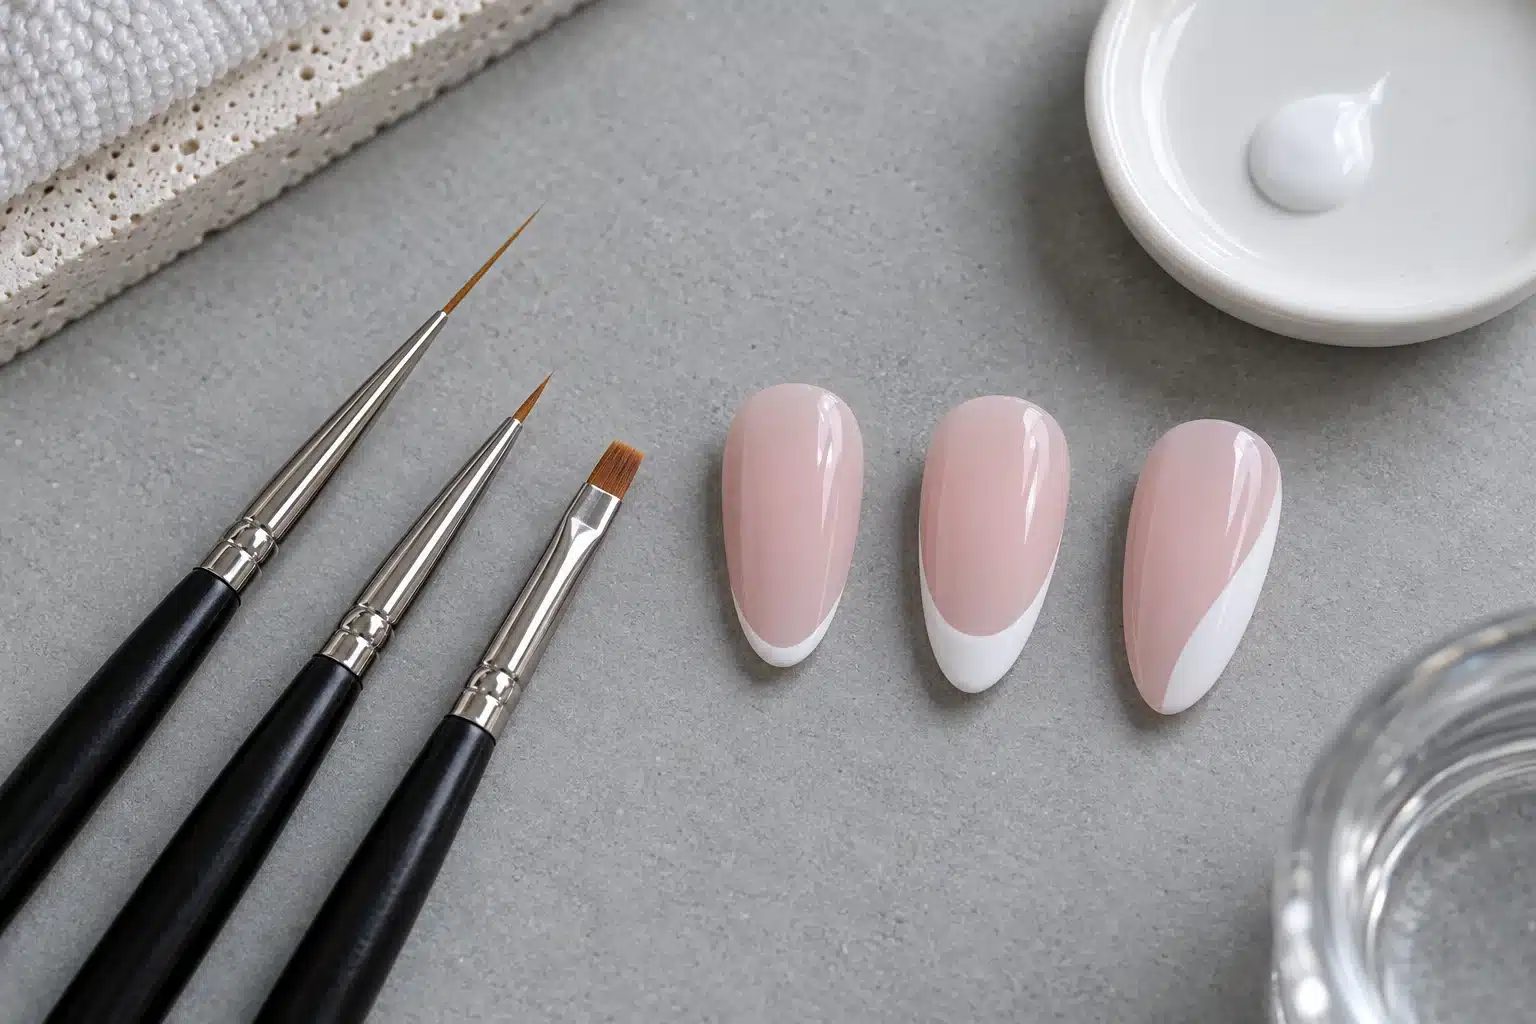
12. How to Do a French Gel Manicure Step by Step
The following sequence describes a painted French over an appropriate prepared foundation. It is a framework for organizing the service, not a replacement for training or product-specific instructions. Choose the complete system before starting, including the correct lamp, preparation products and removal route. Keep uncured gel away from skin throughout the process.
Step 1: Agree on the Finished Look
Confirm the length, shape, background coverage and tip width. Show a finished reference rather than relying only on the words classic or natural. Identify whether the client wants the natural free edge visible. A quick comparison of two sample tips can prevent a lengthy color correction later.
Step 2: Prepare the Nail for the Selected System
Shape and prepare the nail according to the system's instructions. Avoid aggressive filing of the natural nail and do not cut living skin. Remove preparation residue using the specified method, and avoid touching the prepared surface. If the nail or surrounding skin is painful, inflamed or otherwise concerning, pause the cosmetic service rather than covering the problem.
Step 3: Apply the Required Foundation
Use the base or structural system chosen for the service. Keep its application within the prescribed thickness and cure sequence. Complete any required shaping and surface preparation before decorative color. The finished foundation should support the intended design without asking the white tip or top coat to conceal unfinished structure.
Step 4: Establish the Background Color
Apply the chosen pink, nude or milky color in the manner specified for that product, curing as directed. Check the result before adding white. Look for an uneven band near the natural free edge, unexpected undertone or a patch of missing coverage. Resolve the background now rather than painting a French line over a finish the client does not like.
Step 5: Map the Smile Line
Visualize the center and the two side positions. With a controlled amount of tip color, establish a fine outline, then connect the curve. You can work from the center toward the sides or use another trained method that suits the brush. The important point is to decide the boundary before building a broad filled area.
Step 6: Fill the Tip Without Building a Ridge
Distribute the color within the planned area. Avoid depositing a bead at the center or stacking excess gel along the smile line. Inspect the nail from above and from the side. Correct uncured material with the appropriate technique and remove any skin contact before curing; do not cure product onto the skin.
Step 7: Cure According to the Product Instructions
Use the specified lamp and full cure schedule. Do not infer compatibility from lamp wattage alone. If a system permits a brief flash cure to hold the artwork, that does not replace its required full cure. Avoid inventing a universal time for every white, art gel or magnetic formula.
Step 8: Finish and Inspect
Apply the compatible top coat as directed, including any specified edge treatment and final cleansing. Check that the line still looks balanced after finishing and that the surface is smooth. Compare the whole hand, not just the last nail completed. The goal is a coordinated manicure that looks intentional at normal viewing distance as well as in a close-up photograph.
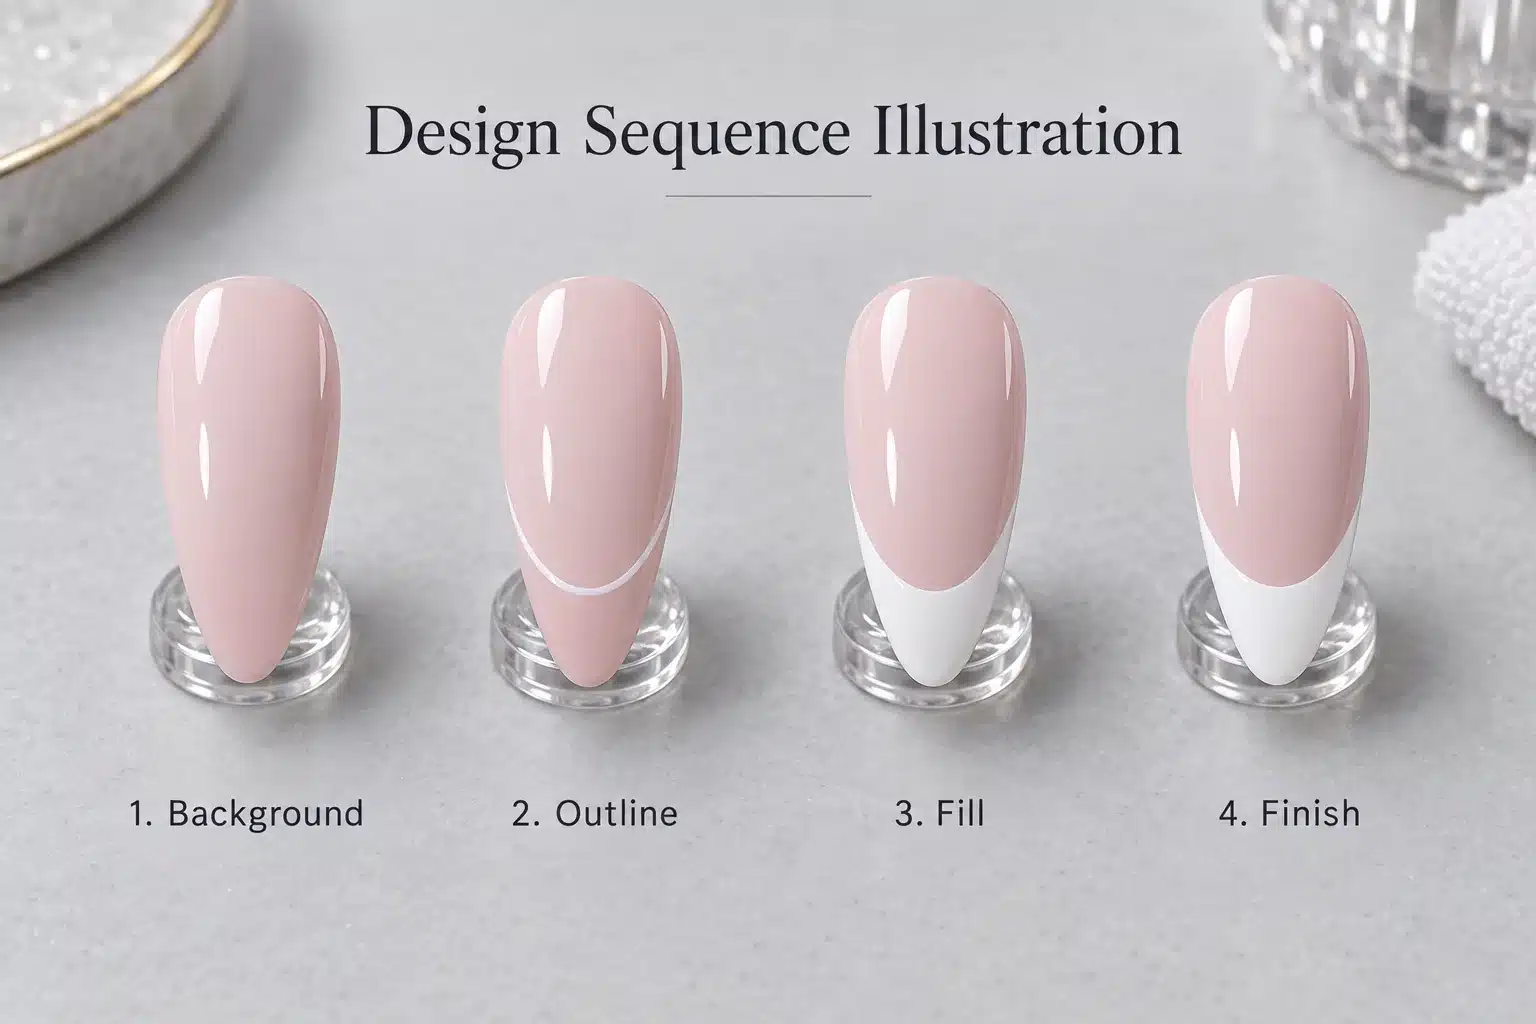
13. How to Paint an Even Smile Line
An even smile line depends on planning the curve, controlling the gel and checking from more than one angle. Repeatedly chasing a crooked line with extra white usually makes the tip wider. Instead, establish the intended boundary with a small amount of product and treat the fill as a separate action.
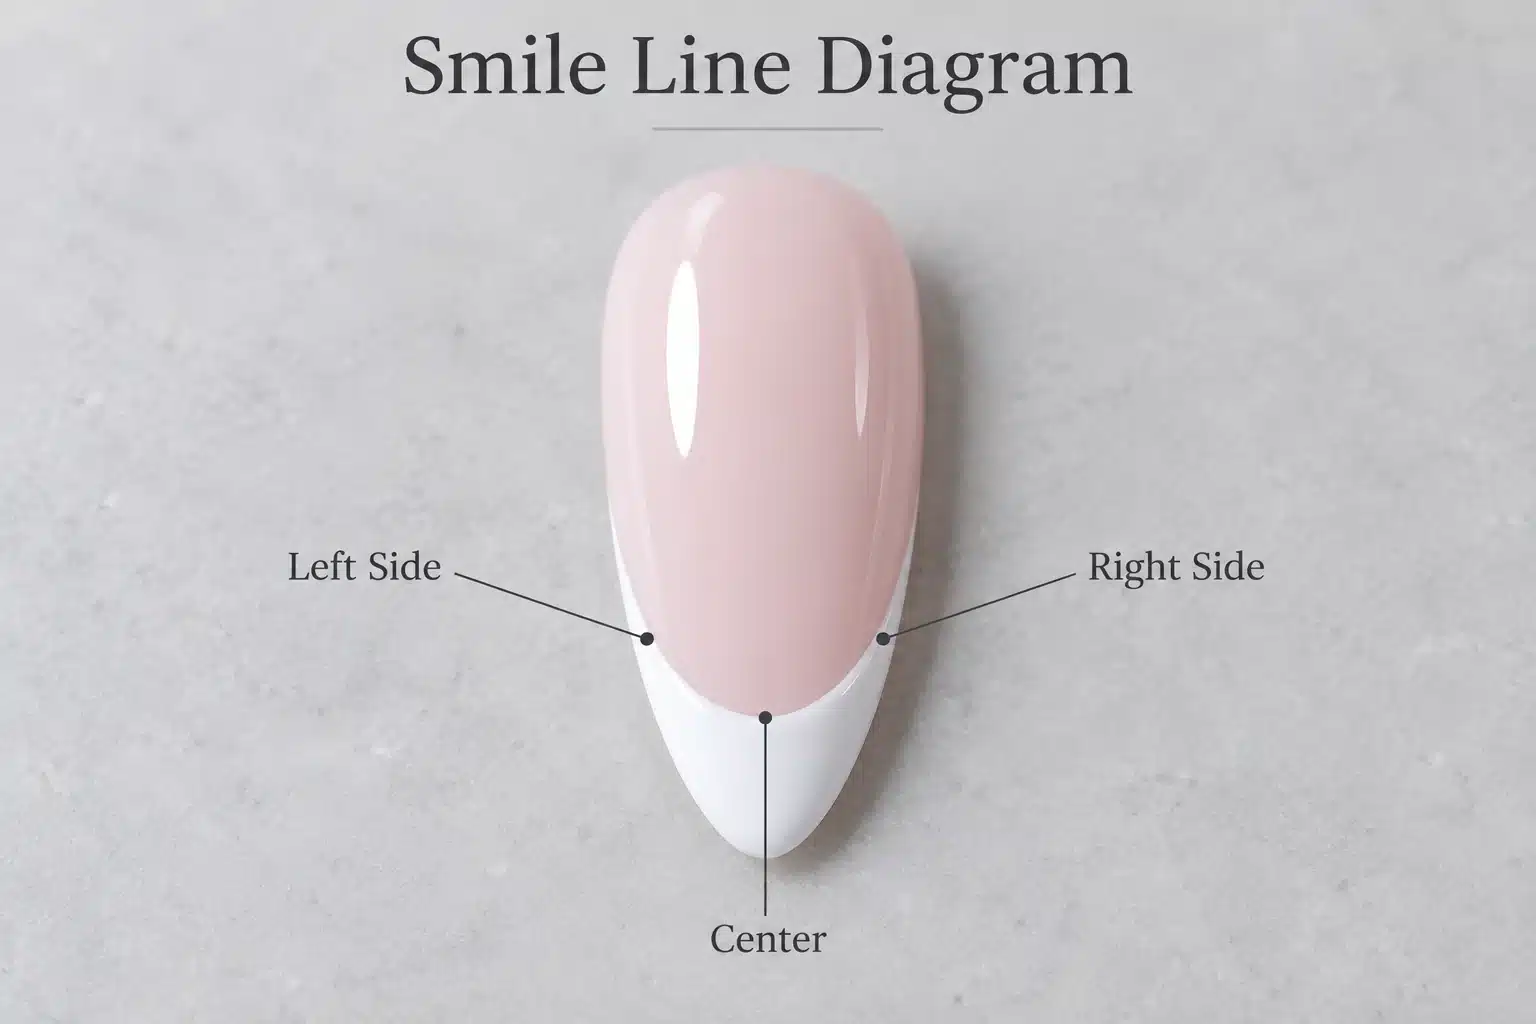
Set Three Reference Points
Choose the center depth and the two side positions before drawing the curve. Those points should relate to the nail shape and the desired visual length. They do not need to be visible dots in the finished technique; they are reference positions that help avoid beginning with an arbitrary stripe and trying to rescue it.
Connect the points with a controlled stroke or a few short connected strokes. Keep brush pressure consistent. If the curve becomes heavier on one side, reduce the excess before filling the rest of the tip. Inspect the result from the client's view so the decision is not based on a tilted working angle.
Separate Symmetry from Identical Measurements
A perfectly equal measured strip can look unequal on nails with different proportions. Match the visual style across the hand while allowing small adjustments in width and curve. The thumb often needs a different movement and inspection angle from the little finger, even when the intended design is the same.
For a deep French, keep the side extensions smooth and tapered rather than abrupt. For a micro French, avoid repeatedly retracing the whole edge after each tiny correction. The more passes made with a loaded brush, the easier it is to lose the narrow shape that made the design attractive.
Practice One Variable at a Time
On practice tips, keep the background and brush constant while changing the tip width. Then test another brush with the same color. Photograph the uncured outline only if doing so does not expose product to accidental curing light; inspect the finished practice tip after the full prescribed process. Compare repeatability, not just your single best attempt.
A useful training board shows the target curve and a few common departures: a flat center, uneven side height or an overly heavy tip. It should teach the decision that improves the next attempt, rather than simply labeling one nail good and another bad.
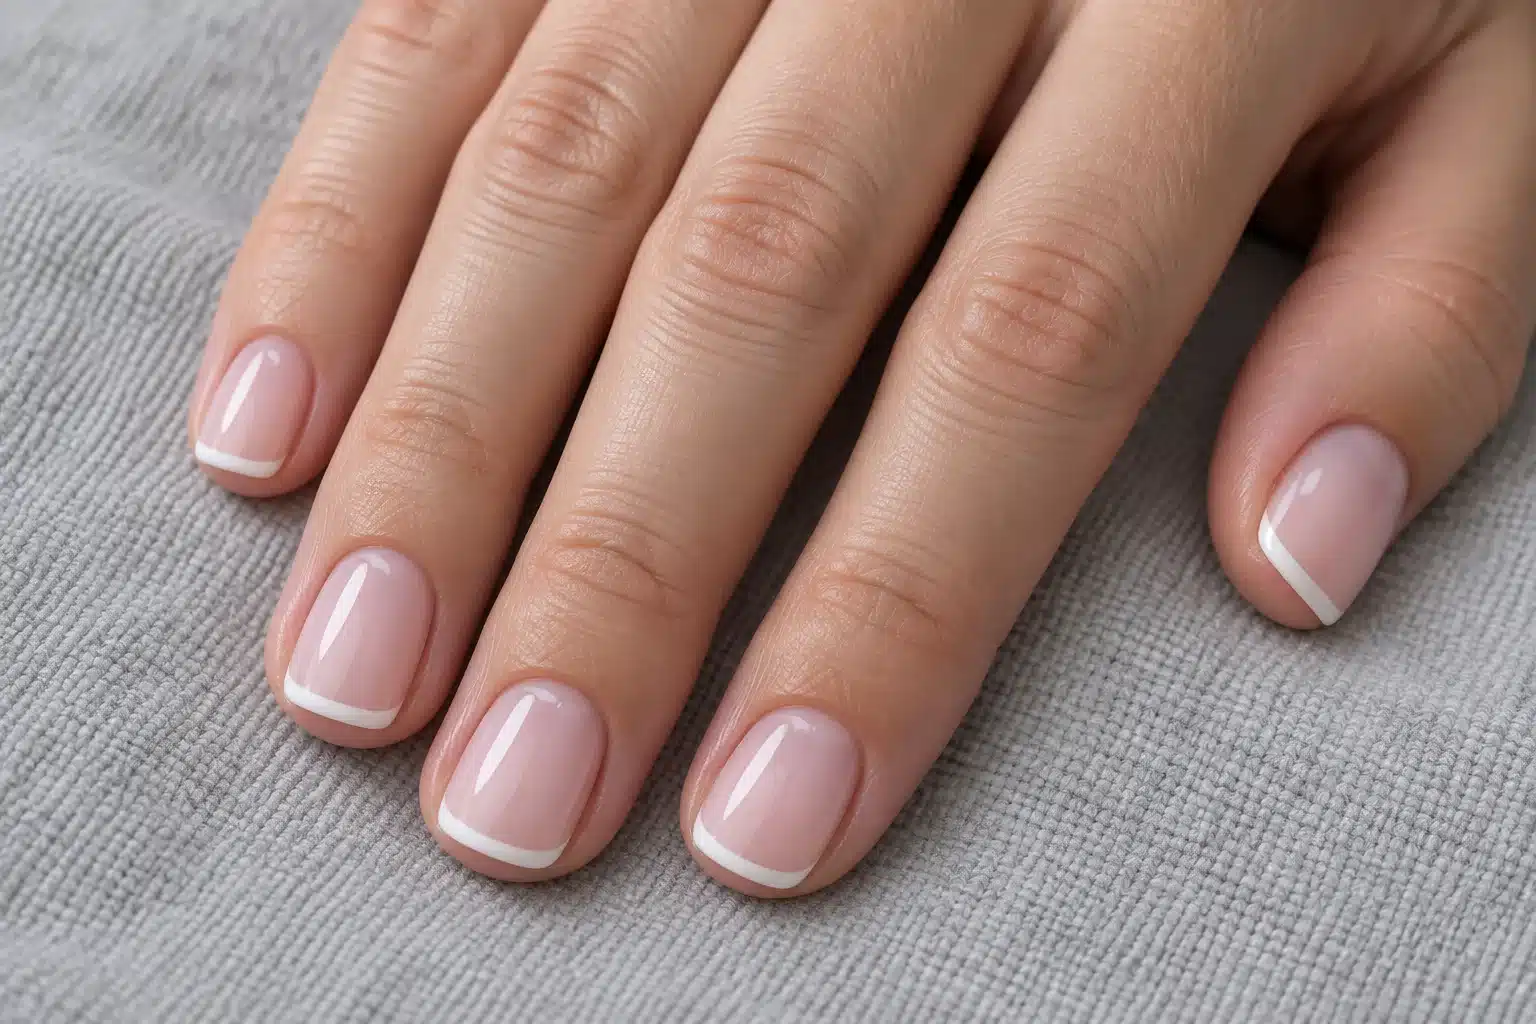
14. How to Do Micro French Tips on Short Nails
Short gel French nails work best when the tip is treated as a precise accent rather than a miniature version of a long enhancement. Begin with a background that produces the desired nail-bed appearance. Then choose a narrow line whose contrast is strong enough to remain visible without occupying a large area.
A micro French does not require a universally fixed line measurement. Nail width and the amount of visible nail bed vary. The practical aim is a light, continuous-looking edge that fits the nail. A very bright white can read clearly at a smaller width than a low-contrast pastel, so color and proportion should be evaluated together.
Deal with the Natural Free Edge First
If an irregular natural edge shows through the background, decide whether to leave it visible or use an appropriate more covering tint. Painting an increasingly wide white strip to hide it can defeat the micro effect. Resolve that choice in the background rather than trying to fix it with the tip alone.
Use controlled small movements and keep the fingertip positioned so the brush stays on the nail. Very short free edges leave little working room. Do not force a dipping tool over the fingertip when that would transfer uncured gel to skin. A simpler freehand line or a different design can be the better service choice.
Choose a Balanced Short-Nail Palette
Soft white with neutral pink creates a gentle result; black, red or a deeper brown makes the outline more graphic. A thin metallic accent can also be effective when its system is appropriate. Avoid adding several parallel lines if the available space cannot keep them visually separate.
For salon menus, show short-nail samples as a distinct option. A client should not have to imagine how a long almond reference would translate to their natural nails. For brands, short-nail imagery can demonstrate how a liner or white shade works in a compact design without implying that every customer needs extensions.
15. How to Create French Tips on Builder Gel and Extensions
For a nude or pink structural background, JTING's 20-color Jelly Gel Builder collection is a specific range to assess. Choose the shade alongside the supported overlay or extension method; a collection name alone does not establish the permitted length, thickness or removal process.
With builder gel French nails, the foundation and the decoration should be planned separately. Establish the structure using the chosen system and its approved service range. Complete its shaping and surface-preparation requirements before adding the painted design. A beautiful white edge cannot compensate for an unsuitable length or unfinished structure.
Use the Structural Tint Deliberately
A pink or nude builder may already provide the intended French background. View it after the required shaping, because color depth can vary with the product's distribution. If a separate color layer is needed, choose it to solve a specific visual need, such as more uniform coverage, rather than adding it automatically.
Where the natural free edge is visible through the enhancement, check how it relates to the planned smile line. A clear extension and an opaque nude background give different design opportunities. Decide whether you want transparent space, a visually extended nail bed or a conventional pink-and-white balance.
Distinguish Painted and Sculpted French
A painted French is surface artwork. A sculpted pink-and-white service uses structural materials and construction techniques to establish the design. Do not substitute a decorative white painting gel for a structural white unless the specific product is intended for that role. The terms may sound similar in a search result, but the materials and skills are not interchangeable.
Full-cover tip systems introduce another foundation route. Follow the selected system's adhesion, preparation and finishing instructions before painting. Do not assume that a pre-colored or opaque tip can be attached using any light-cured adhesive simply because a clear version can; the specified complete system governs that choice.
For buyers, a sample set should identify the actual base structure beneath the artwork. This makes it possible to distinguish the finish supplied by the French color from the profile supplied by the builder or tip. It also prevents a product photograph from accidentally suggesting that a color gel creates an extension on its own.
16. Common French Gel Manicure Mistakes and How to Fix Them
Start by identifying where the problem appears: in the background, at the smile line, across the white area or after finishing. Then change one variable at a time. Adding more product to every problem can make a manicure thicker without making it cleaner.
| Visible Problem | What to Investigate | Useful Next Action |
|---|---|---|
| White line spreads before curing | Brush load, surface condition and product handling | Test a smaller amount on the correctly prepared surface; compare an appropriate art formula |
| Tip looks patchy | Uneven distribution or a shade too sheer for the intended contrast | Choose suitable coverage and follow the allowed thin-coat sequence |
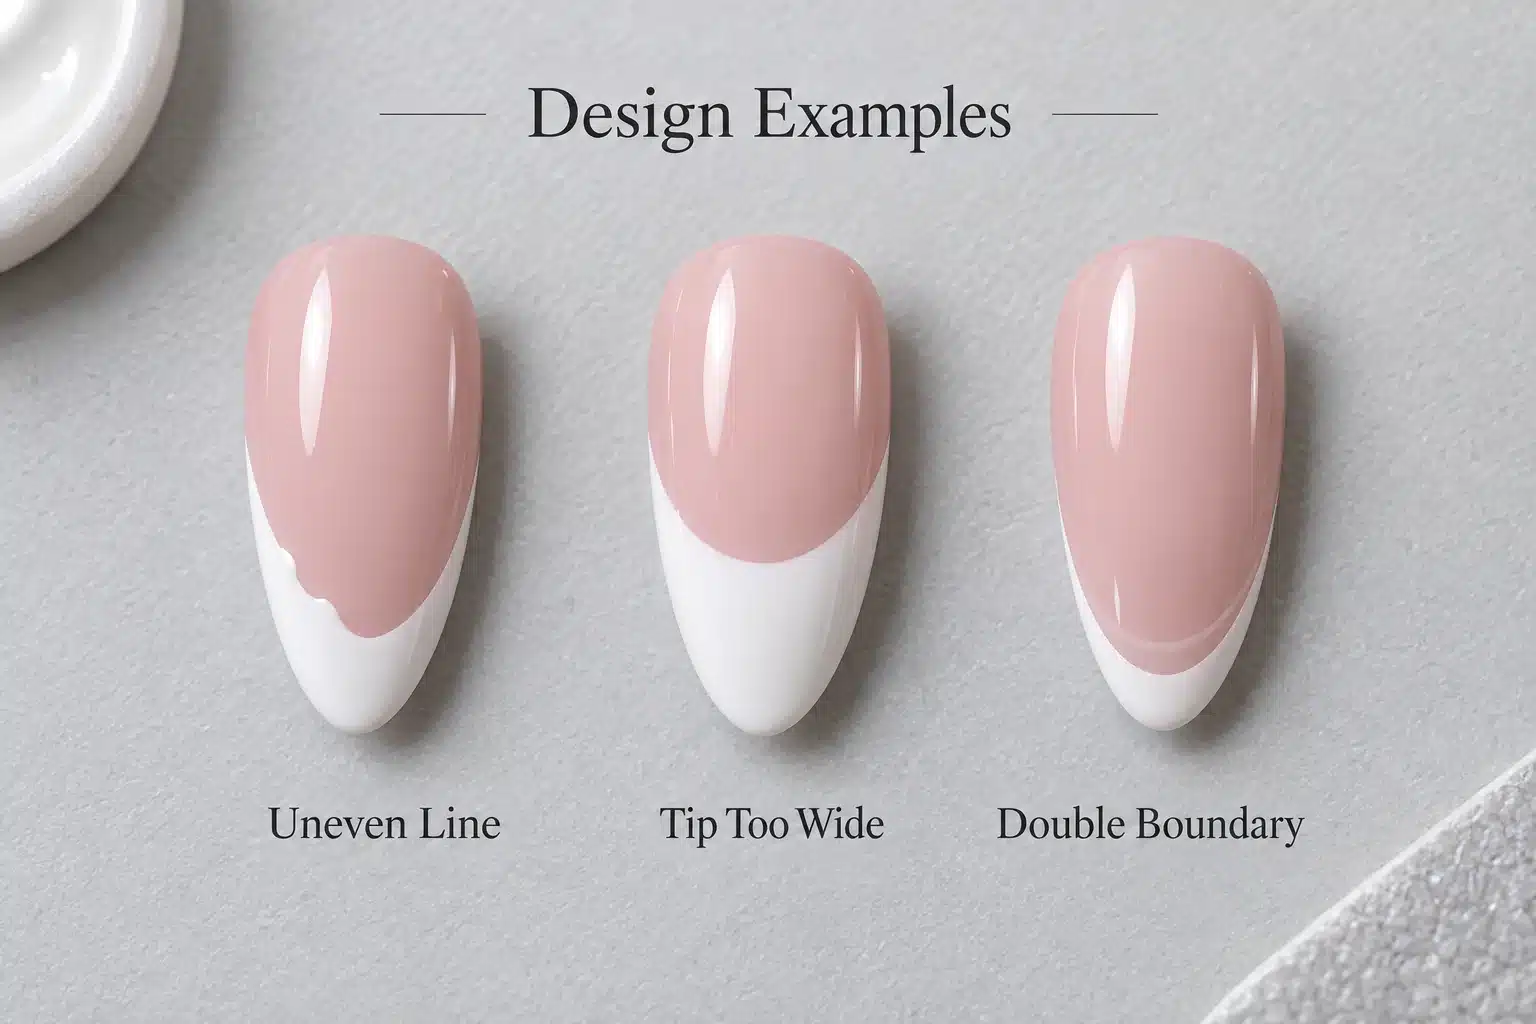
| Smile line is uneven | Side positions, viewing angle and repeated corrections | Map the curve before filling and inspect from the client's viewpoint |
| Natural edge shows below the design | Background transparency and placement of the new boundary | Choose appropriate coverage or reposition the design before completion |
| Raised ridge at the white edge | Material buildup from outline, fill and corrections | Reduce buildup during application instead of burying it under top coat |
| White wrinkles or remains soft | Application thickness, lamp suitability and specified cure | Stop and resolve the product or curing issue; do not seal over it |
| Finish lifts or chips early | Preparation, product contact with skin, compatibility and wear conditions | Review the complete service rather than blaming tip color alone |
| Tip color changes after finishing | The selected top coat, layering method and lighting | Compare completed system samples under consistent conditions |
When White Gel Bleeds into the Background
First confirm that the previous layer has been processed as its instructions require. Do not automatically remove or retain a surface layer based on a general social-media tip. Check whether the chosen art product is intended for the surface you are using. Then assess how much gel the brush deposits and how long the design remains workable before curing.
If the outline stays sharp on a practice surface but not on the intended foundation, that points to a system or preparation difference worth investigating. If the line spreads everywhere, compare application amount and formula choice. Keeping a record of the actual products and sequence makes the next test more useful.
When More Top Coat Is Not the Answer
A top coat is not a repair layer for an uncured color, lifting material or a badly formed structure. Address those issues through the correct removal or correction process. For a sound manicure with a slight aesthetic imbalance, consider whether repainting the artwork is more appropriate than adding enough finish to obscure the whole design.
Different complaints can look similar in a photograph. A visible ridge might be a heavy painted edge, a reflection from the nail shape or an underlying structural issue. Inspect the actual nail before choosing a correction, and avoid treating an online picture as enough information to diagnose a curing problem.
17. Wear, Maintenance and Removal
JTING also offers UV Peelable Base Gel for a deliberately selected peelable-base system. This is a different product choice from a conventional base: confirm its supported layering and removal instructions before use. Its name is not permission to peel off ordinary gel polish or builder enhancements.
The lifespan of a French gel manicure depends on the whole system and the way it is worn. Nail condition, preparation, application, curing, length and daily use all contribute. A design photograph cannot establish a fixed wear period, and the presence of a white tip does not make every French service perform the same way.
Plan Maintenance Around the Service
As the nail grows, the relationship between the background and the tip changes. A transparent-looking base may reveal growth differently from an opaque background, but it does not remove the need to assess the nail and product condition. Plan maintenance with the technician around the actual system rather than waiting only until the design looks unattractive.
Avoid using nails as tools, and use appropriate protective gloves for tasks that repeatedly stress the hands. Do not pick or peel lifting gel. If the nail or surrounding skin develops discomfort, redness or other changes, stop further cosmetic application and seek suitable professional advice rather than covering it with another coat.
Remove According to the Material, Not the Design
French artwork may sit over a soak-off color system, a builder or another enhancement with a different removal route. Follow the instructions for the actual materials present. Do not assume that every product labeled gel can be removed through the same soaking process, and do not force material away because the color has softened unevenly.
For salon-supply brands, include clear use and removal information with the selected products. Customers should not need to infer the process from a promotional name. A transparent product identity improves the buying experience and helps distinguish a color collection from a complete service system.
When discussing lamp exposure with clients, use current professional guidance rather than promising that a device has no exposure-related considerations. Protective measures such as appropriate fingerless UV-protective gloves can be discussed alongside the system's operating instructions. Product performance and responsible service practice should support each other.
18. Classic White, Milky and Nude French Nail Designs
A classic French remains versatile because small changes in white, background and shape create noticeably different results. You do not need elaborate artwork to make a collection feel considered. A soft pink with ivory, a neutral nude with defined white and a milky background with a subtle edge can each serve a different client preference.
Defined Pink and White
Choose this direction when the smile line should be a clear feature. Keep the background even enough to support that contrast. On longer nails, check that the amount of white does not overwhelm the visual nail-bed length. On shorter nails, narrow the outline rather than copying a broad reference tip unchanged.
Soft White on Neutral Nude
This combination can feel understated without making the edge disappear. Compare warm and neutral versions of the background beside the hand. The objective is a coordinated relationship, not a rule that every client needs beige. A softly covering rose can provide the same quiet effect for someone who does not like a yellow-toned nude.
Milky French
A milky background reduces the see-through appearance and can soften contrast. The result should still show enough separation to communicate the intended French design. If the white edge and background merge completely, decide whether the client prefers that subtlety or whether a slightly different tip shade would make the design clearer.
For sample boards, make these differences visible with consistent lighting and similar nail shapes. A dramatic lighting change can make two nearly identical products appear more different than they are. Conversely, a heavy photo filter may erase the undertone differences that a buyer actually needs to see.
Include at least one everyday-length example alongside longer editorial samples. It helps customers picture the design in their own service and keeps the collection from appearing limited to one nail shape. The same shade pairing may support several styles without needing a different product name for each.
19. Colored French Tips: Choosing Balanced Color Combinations
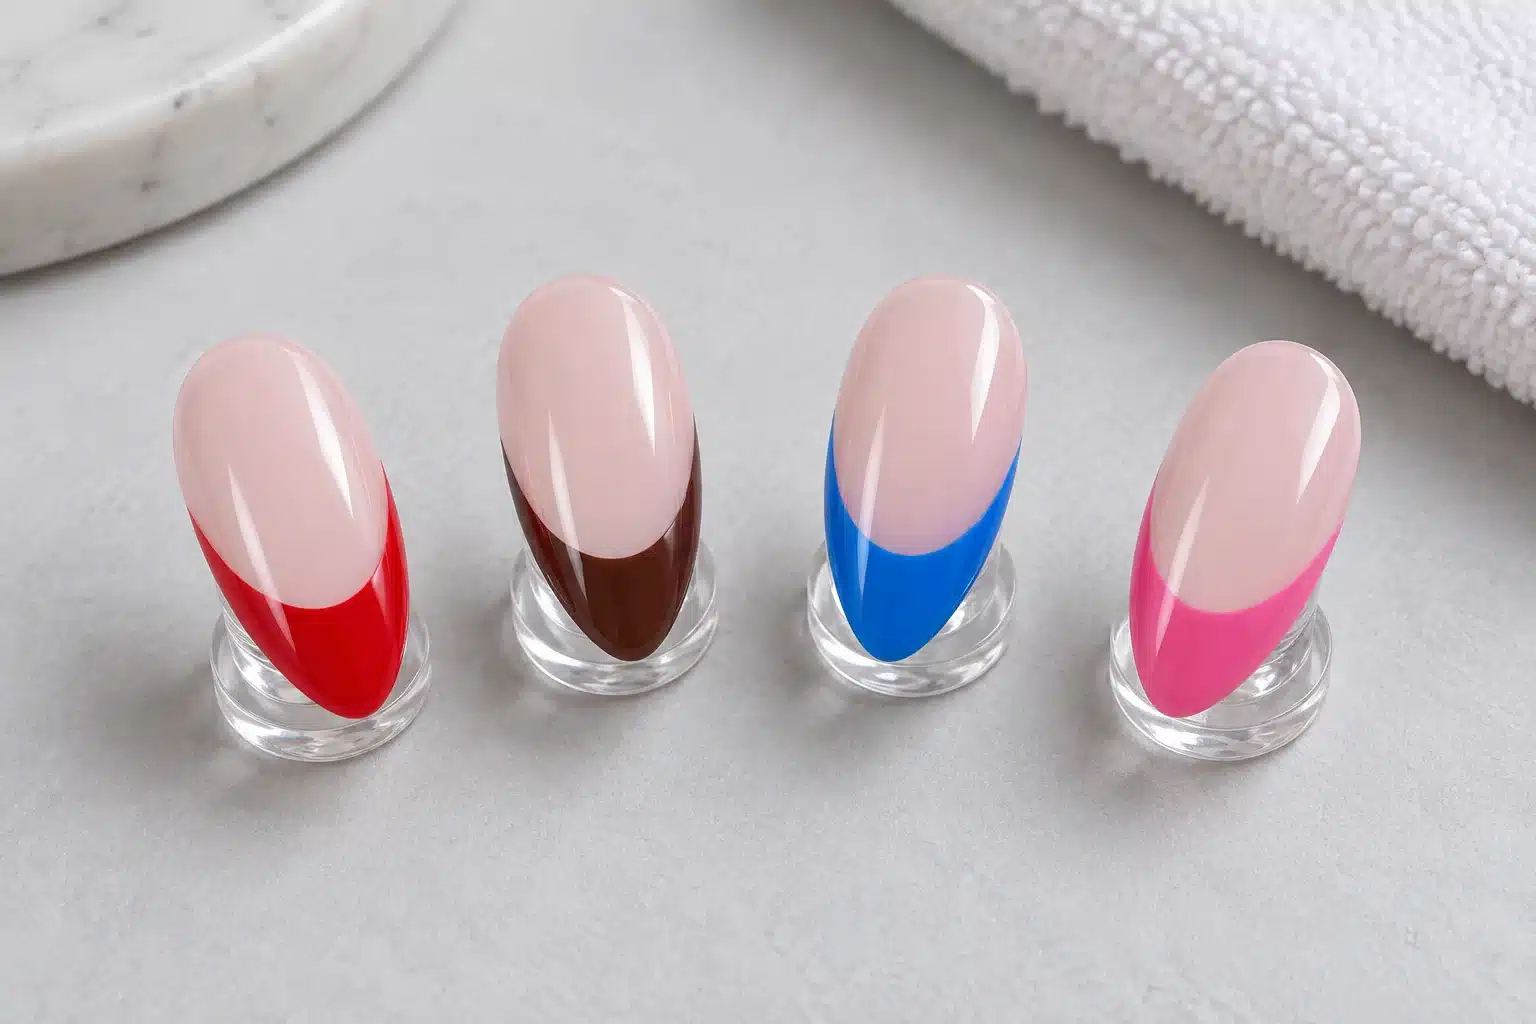
Colored French tips offer a direct way to refresh a familiar design. The color occupies a limited area, so clients can choose a stronger shade without committing to a full-cover manicure. For a brand, this creates a natural relationship between everyday color collections and nail-art applications.
Start with Contrast and Undertone
A deep red or black line remains visible against many lighter backgrounds. A pale yellow or pastel pink may need a more carefully chosen base to avoid disappearing. Compare the full combination at the intended width. A broad swatch does not show how a shade will read as a thin edge.
| Color Direction | Background to Compare | Design Consideration |
|---|---|---|
| Cherry red or burgundy | Neutral pink, warm nude or sheer blush | Keep the edge controlled so the contrast remains deliberate |
| Black or deep brown | Soft nude or milky pink | A smaller area can still create a strong graphic line |
| Pastel blue, lilac or mint | Quiet neutral or light pink | Check that the tip stays distinct under ordinary lighting |
| Bright summer colors | A consistent understated background | Coordinate intensity across the hand rather than mixing random depths |
| Tonal nude tips | A related but visibly different background | Use enough contrast for the curve to remain readable |
Make Multicolor Sets Cohesive
One color per finger can work when the backgrounds and line style stay consistent. You can also repeat two related colors instead of using five unrelated ones. A shared level of brightness often makes the set look more coordinated, even when the hues differ.
Colored tips are also a useful way to connect a seasonal display with a salon's core shades. A customer who likes a blue French may later choose the same blue as a full manicure. Show both uses on the sample board without claiming that a decorative-only gel is suitable for full-cover application unless its instructions support that use.
20. Cat Eye, Chrome and Glitter French Tips
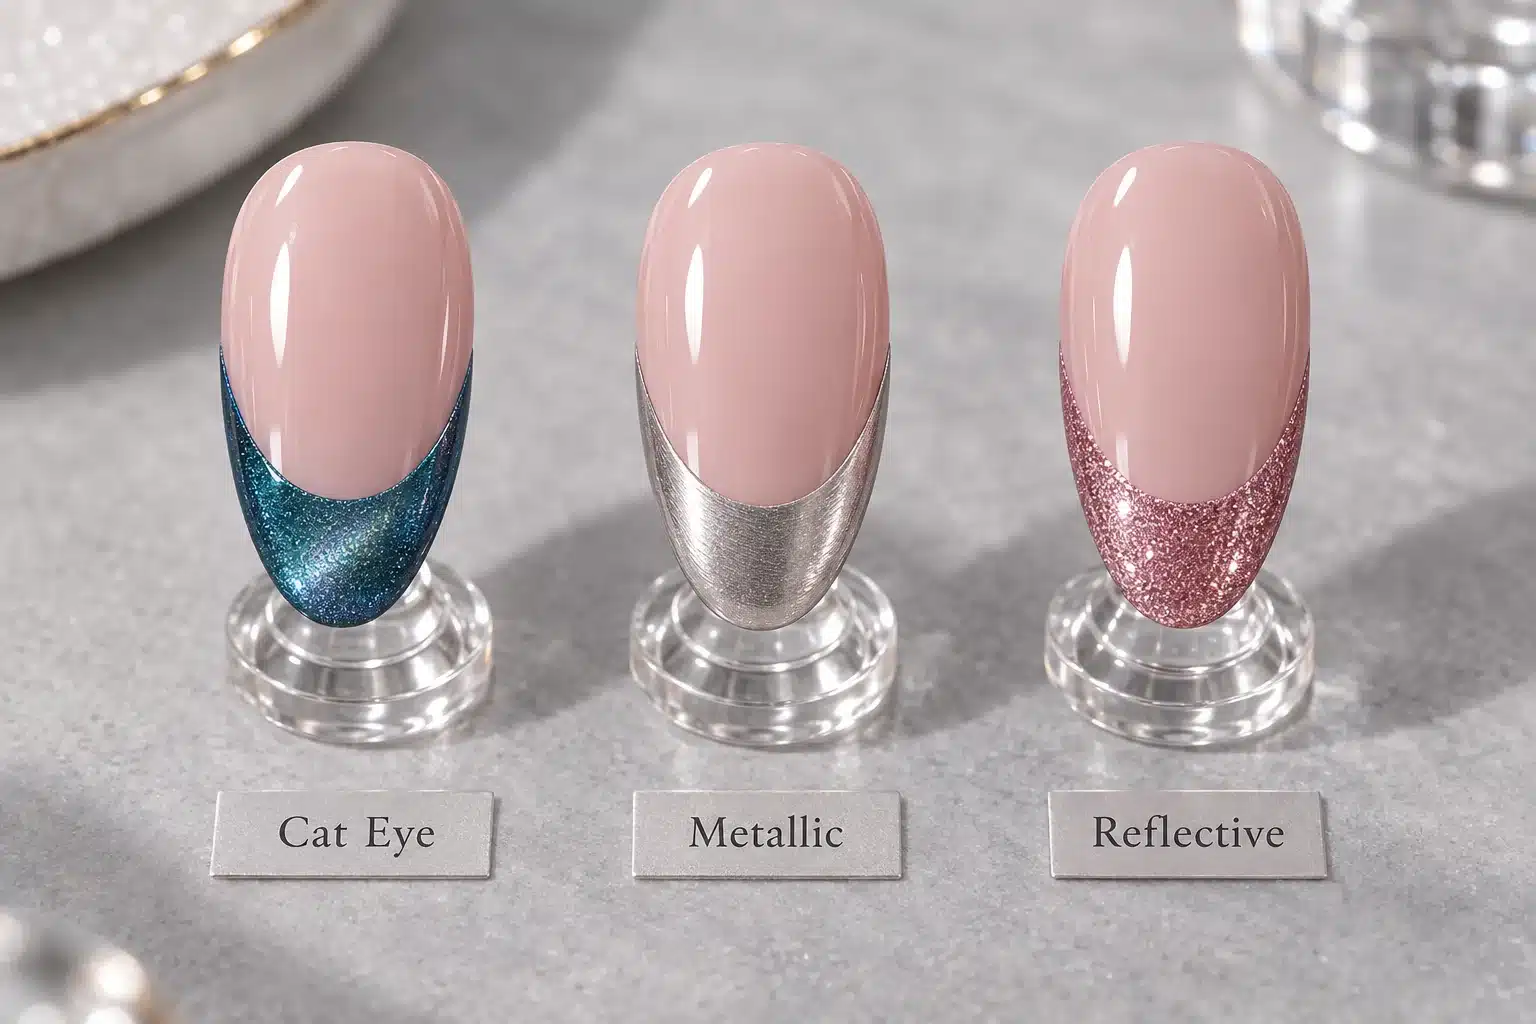
Special-effect French tips need enough space for the effect to read. A finish that looks dramatic across a long full-cover nail can become less visible in a tiny strip. Before selecting the product, decide whether the client wants a fine reflective outline, a visible magnetic highlight or a textured sparkle effect.
Cat Eye French Tips
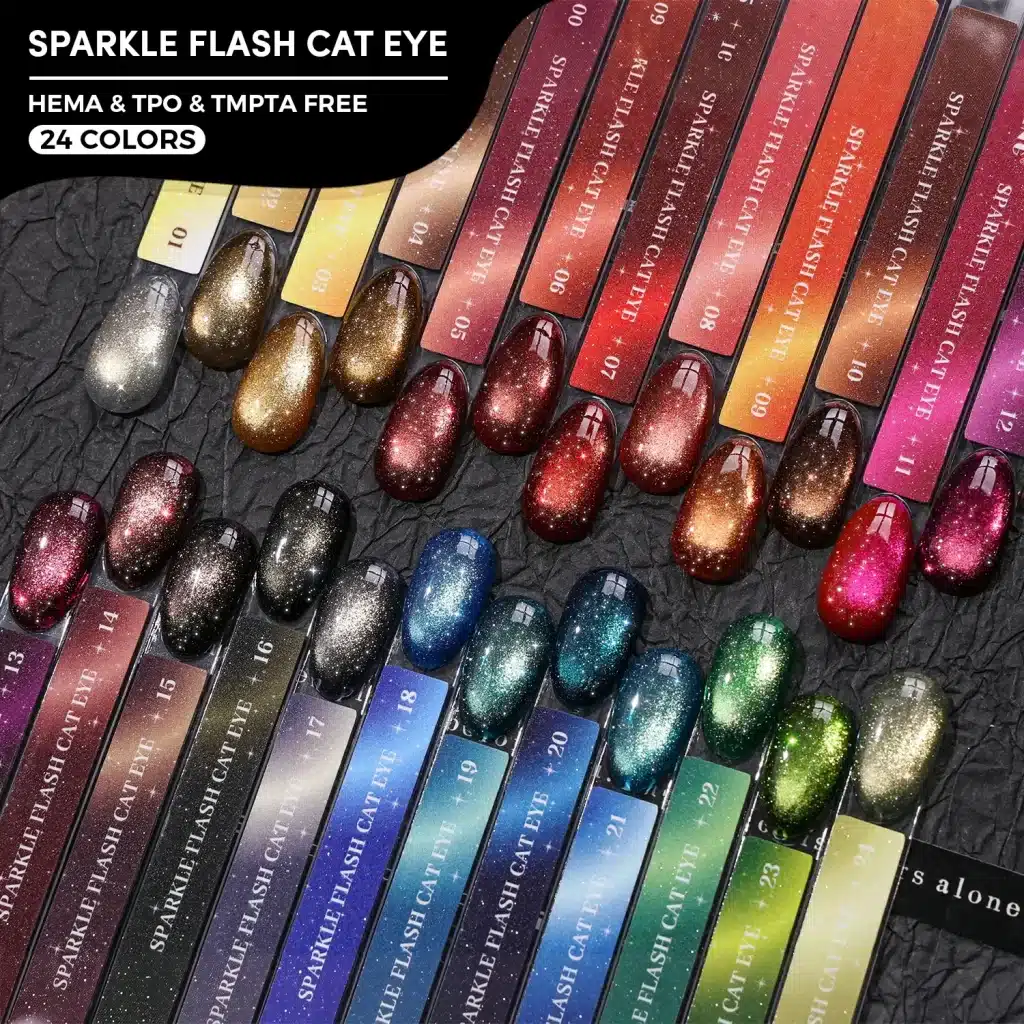
The JTING 24-color Sparkle Flash Cat Eye collection is one magnetic option for this direction. Compare the highlight on a French sample, not only on the full-cover color chart, before deciding how narrow to make the tip.
For a magnetic design, the available tip area and the chosen light pattern work together. Test the effect on a practice nail at the intended width, using the product's application and magnet instructions. Keep the magnetic tool clear of uncured gel and check the result before the prescribed cure. A photograph from only one angle may not explain the effect well.
JTING's cat eye gel collection is a starting point for selecting magnetic options. Ask for a finish that remains visible in French artwork rather than assuming every full-cover cat eye sample will translate equally well to a narrow edge.
Chrome French Tips
For painted metallic accents, explore the JTING 12-color Metallic Painting Gel collection. Treat it as a gel painting option rather than a chrome powder, and use its own application sequence for the intended design.
Chrome powder systems and metallic gel colors are different routes. Their surface preparation and finishing sequences can differ, so choose one supported method instead of combining isolated steps from unrelated tutorials. For the distinction, see the chrome nails application and selection guide.
Glitter and Reflective Tips
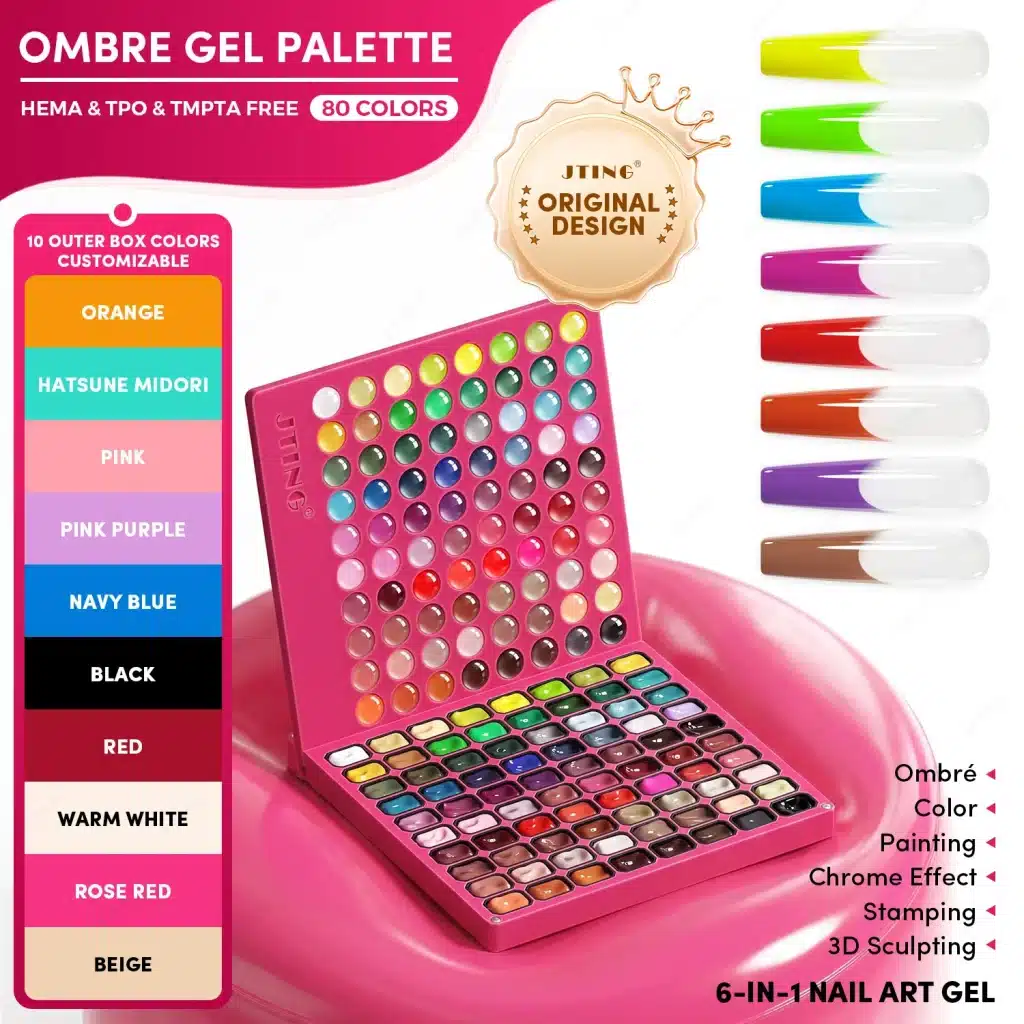
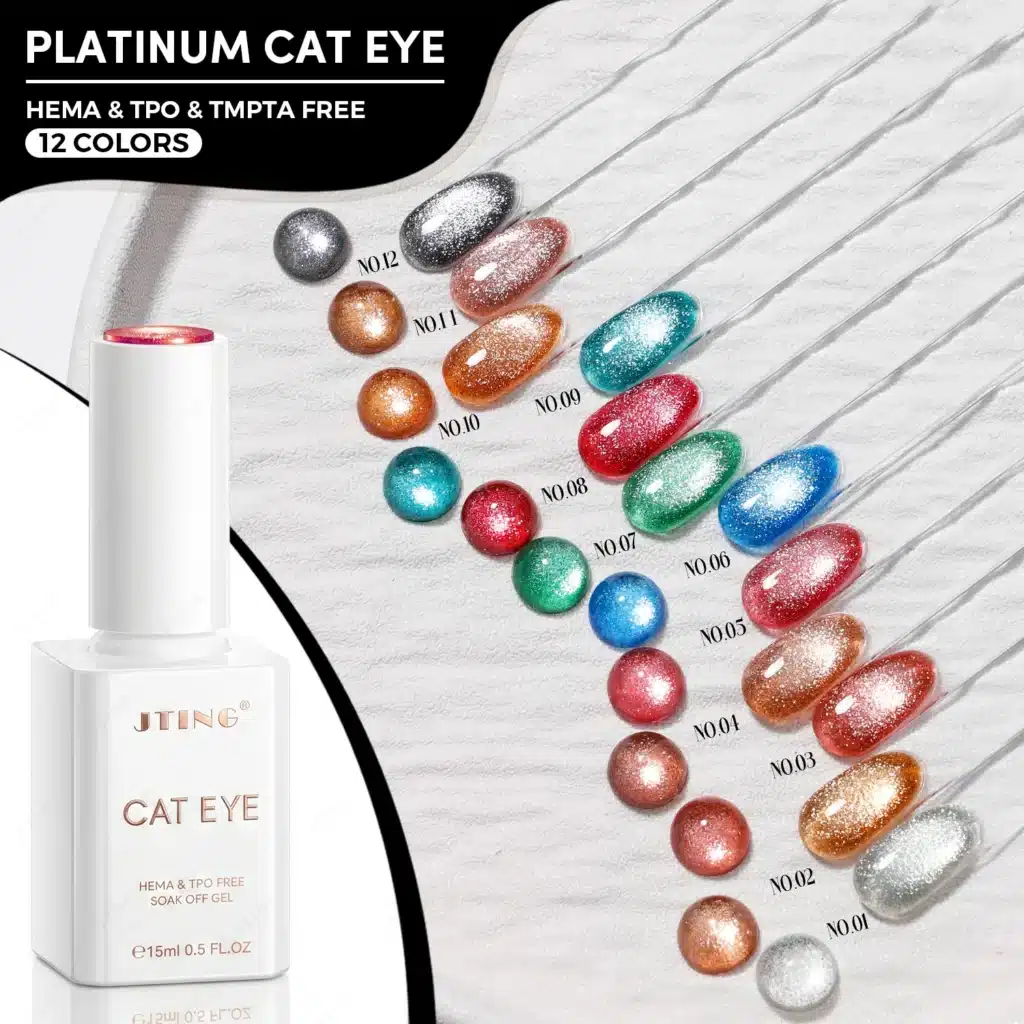
For a fine sparkling outline, the JTING 12-color Platinum Liner Gel collection shown in the product detail images offers a glitter-based liner direction, rather than a plain white liner. For a broader reflective tip, compare the JTING 12-color Reflective Gel Polish collection. These are two different visual roles, not interchangeable finish promises.
Fine sparkle can soften a boundary; larger particles can make a very narrow line harder to define. Inspect the finished edge and surface profile rather than adding more material until it resembles a full-cover glitter swatch. JTING's reflective gel range offers another direction to explore for effect-based designs, with the specific application selected at product level.
For a commercial display, show the effect under ordinary lighting as well as any lighting used to reveal its special appearance. Buyers need to understand what the customer sees in daily wear. A single dramatic flash photograph is not a complete description of an effect product.
21. Ombre French Nails vs. Defined French Tips
A defined French has a visible boundary between the background and the tip. An ombre French blends the transition so the two areas flow into one another. Both can use pink and white, but their visual goals and application techniques differ. A clean smile line is desirable in one and deliberately absent in the other.
Choose the Transition the Client Wants
A client may use the words French, ombre or baby boomer interchangeably while pointing to very different photographs. Show one clearly defined sample and one blended sample. Ask whether the feature they like is the white edge, the soft fade or the overall nude appearance. This resolves the terminology before choosing materials.
A blended design often needs colors and a method that allow a controlled transition. A product selected for a sharp, stable outline may not be the easiest choice for blending. Do not dilute a gel with arbitrary solvents to make an ombre effect. Use products and tools intended for the method, with the required curing sequence.
Evaluate the Middle of the Nail
In an ombre sample, the transition area matters as much as the white tip. Look for an intentional fade rather than a patchy stripe or a heavy opaque band. On a short nail, there is less space for that transition, so the design may need a quieter contrast and a different distribution than a long reference.
For a product collection, decide whether ombre is a core service or an optional design direction. You may need different sample instructions even if some colors overlap. Keep the two techniques distinct in the product presentation so customers understand why a crisp French white and a blending-friendly option might both have a place.
A comparison image should use the same length and similar lighting where possible. Otherwise, the longer nail or brighter photograph can appear better simply because of presentation. The useful comparison is the edge style, not a contest between unrelated finished sets.
22. Seasonal, Bridal and Occasion-Based French Collections
French designs can be updated through color and finish without replacing the whole service system. Keep reliable foundations and core whites, then introduce a small group of accents with a clear purpose. This makes seasonal displays easier to explain and leaves familiar products in use beyond a short campaign.
Bridal and Event French
For bridal work, compare the manicure with the client's preferred level of contrast rather than assuming every bride wants bright white. Soft ivory, rosy nude and a milky background can create different results. Check how the design looks in ordinary light and in the type of photographs the client expects, without using editing to conceal a shade mismatch.
Spring and Summer Color
Pastel edges and brighter colors can share a consistent background to keep the display coherent. Instead of giving every shade the same place in the range, choose which ones are the main statement and which are supporting options. A compact, well-photographed set can communicate more clearly than a large color board with no design direction.
Autumn and Winter Direction
Chocolate, burgundy, deep blue and olive are useful design directions for richer seasonal French palettes. They can be presented with softer backgrounds or a carefully placed metallic accent. For an autumn assortment, JTING's fall nail color and effect guide provides a related starting point for collection planning.
Occasion-based packaging should still identify the product functions. A holiday French collection may contain color gels, an art product and a finish, but the customer needs to know which step each performs. Keep the visual story on the outside and the practical product information easy to find.
Retain successful seasonal shades as individual reorder options when planning the commercial range. Not every customer needs to repurchase an entire kit because one frequently used white or nude runs out. Thinking about replenishment early makes the collection more useful after the launch photography is finished.
23. How to Build a French Manicure Selection for a Salon
Build a salon French assortment around recurring appointments, not only the most eye-catching reference images. Start with the services already offered, the lengths customers request and the backgrounds that suit those customers. Add colors to fill a genuine gap rather than expanding the range simply because several new pinks look attractive together.
Separate Core Shades from Accent Shades
The core selection supports everyday work: a few meaningfully different backgrounds and whites with distinct visual roles. Accent shades create variety through colored or effect French tips. Their use rates are unlikely to be identical. Record which shades are repeatedly selected and which appear only in occasional display designs.
| Selection Group | Purpose | How to Avoid Duplication |
|---|---|---|
| Sheer backgrounds | Natural-looking services with visible nail character | Compare undertones on finished nails |
| Covering nude backgrounds | A more uniform visual nail bed | Distinguish depth as well as warmth |
| French whites | Defined or softened contrast | Compare full finished tips, not bottle labels |
| Graphic colors | Black, red and other clearly defined edges | Prioritize colors customers already request |
| Seasonal and effect accents | Refresh the display and add service variety | Check visibility at real tip widths before buying broadly |
As an illustrative starting plan, a salon might test several contrasting background directions, two different white effects and a small group of frequently requested accent colors. This is a planning example, not a required kit size. A salon focused on natural short nails will allocate its selection differently from one specializing in long decorative enhancements.
Make the Sample Board Work Harder
Display backgrounds with their intended tip combinations. Place a short and longer example near each other when the design translates to both. Identify the materials internally so another technician can reproduce the result without guessing from the photo. Keep customer-facing names descriptive enough to support a clear consultation.
Measure selection value through use: how often a shade is chosen, how smoothly it fits the service and whether customers request it again. A white used daily deserves a different replenishment plan from a seasonal metallic. Do not let the visual symmetry of a boxed collection dictate purchasing quantities that make little sense in the salon.
For a salon supplier, this same logic helps explain the range to buyers. Show how each product earns its place in the working assortment. That is more persuasive than claiming every item is essential or presenting dozens of near-identical shades without a clear reason to stock them.
24. Planning a Private Label French Manicure Collection
A private label French collection should make the customer's next step easy to understand. Decide whether the line is mainly about color, detail work or a coordinated service system. Then build the shade range, packaging and sample material around that promise. A collection aimed at delicate short French nails should not rely entirely on dramatic extension photography.
Define the Collection Brief
Describe the target customer, the primary nail styles and the intended application format. For example, a salon-focused range might emphasize controllable white edges and a broad nude palette, while a design-led range might focus on colored liners and matching background shades. These are different briefs even when both use the phrase French manicure gel.
JTING supports custom color development, formula direction, bottles, caps, brushes, labels, boxes and color charts. Through JTING's private label and OEM/ODM development service, those elements can be considered together rather than treating the label as the only customizable part of the product.
Connect Formula Handling with Packaging
A French collection should be sampled in the intended application format. A brush that works well for a broad nude background may not be the preferred tool for a narrow white line. A jar may suit a separate art brush, while a bottle can offer another workflow. Packaging should help the intended user apply the product, not merely look consistent in a photograph.
Separate color identity from product function. Customers should see whether they are selecting a base, builder, color or liner before they interpret the shade name. Use consistent labeling logic across the range and make it easy to reorder a frequently used white or nude independently of the complete collection.
Approve a Finished Design, Not Only a Bottle
Review the shade on the intended background, the line at the intended width and the appearance after finishing. Confirm the actual packaging and printed information separately. Keep approved samples and written specifications so later discussions refer to the same color and presentation rather than to compressed photographs alone.
JTING's current starting point for private label gel nail polish is 10 pieces per shade, with final requirements depending on the product and customization. Standard samples typically take 7-10 business days; custom color or exclusive formula development typically takes 2-4 weeks. These are different stages, so plan a launch around the work the project actually needs.
For buyers considering HEMA-free or TPO-free directions, specify that requirement in the product brief and confirm the relevant formula and market documentation. Do not treat a collection name or a French manicure photograph as evidence of ingredient status. Clear specifications let the commercial conversation move forward without relying on assumptions.
25. What to Check When Sampling French Manicure Gels
Sampling should answer whether the product combination can create the intended service consistently. A bottle photograph, a beautiful isolated swatch and a supplier's color name each provide useful information, but none is a complete approval test. Evaluate the materials together at the real design scale.
Prepare a Repeatable Comparison
Use comparable practice nails and record the foundation, shade, brush, application sequence and specified curing conditions. Include the top coat used for the finished result. Change one important variable at a time so a difference in the final nail can be traced to something meaningful.
| Check | What to Observe | What to Record |
|---|---|---|
| Background selection | Undertone, visible natural edge and evenness | Shade and intended coverage |
| White or color contrast | Appearance beside the chosen background | The actual pairing, not just individual shade names |
| Line control | Continuity, side detail and spread during working time | Brush and method used |
| Filled tip | Uniform color and an appropriate side profile | Application within the supplied instructions |
| Completed finish | Gloss or chosen effect over the whole design | Top coat and complete process |
| Packaging | Brush handling, container use and label clarity | Approved bottle, cap, brush or jar selection |
| Commercial readiness | Reorder identity, instructions and required documentation | Final specification and remaining questions |
Photograph samples under consistent light, but keep the physical references too. A phone can shift a soft pink or warm white enough to change a comparison. Include a side view where thickness is relevant and a normal-distance view where the overall design balance matters.
Keep Product Approval Separate from Design Preference
A technically sound product may produce a color the buyer simply does not want. A beautiful color may still need handling adjustments for the chosen application. Record those as separate decisions. Saying the sample is wrong without identifying which part needs changing makes a second round less efficient.
For reorder planning, retain shade names, reference identifiers and approved presentation details. Internal codes can help trace the specification, but customers should see understandable product names. The objective is a repeatable collection whose visual story remains clear when a single bottle is reordered months after the original box.
Wear trials, where appropriate, should follow an agreed professional protocol for the actual system. Do not treat a generated image or a one-time display tip as proof of adhesion, cure or long wear. Use the relevant records and product information for those questions, while keeping the marketing photography focused on showing the design accurately.
26. Frequently Asked Questions
What Is the Best Gel for a French Manicure?
The best choice is a compatible system that suits the service and the desired line. For a painted French, look for a suitable foundation, a flattering background and a white or colored gel that is controllable at the intended tip width. A builder is relevant when the service needs its structural function, not simply because the design is French.
Can I Use Regular White Gel Polish for French Tips?
Yes, when the specific gel nail polish is suitable for the application and gives the control and coverage you need. Compare its outline and filled area on a practice tip. A liner or painting gel may offer a different handling option, but it is not automatically necessary for every French manicure.
What Is the Best Base Color for a French Gel Manicure?
Choose according to undertone and the amount of natural nail you want visible. Sheer pink, neutral nude, softly covering rose and milky pink serve different preferences. Compare the base with the actual tip color and beside the hand; a shade that looks ideal alone may create a different contrast once white is added.
Do French Gel Nails Need Builder Gel?
Not always. French is a design, while builder gel is a structural product choice. Some services need only an appropriate base and color system. Others involve an overlay or extension that requires a suitable builder or enhancement system. Choose that foundation around the nail service before deciding the artwork.
Can You Do French Tips on Very Short Nails?
Yes, a narrow painted edge can create a French effect on short nails when there is sufficient working area for controlled application. A micro French often leaves more visible nail-bed color than a broad tip. Keep uncured gel off skin, and select another design if the chosen tool or method cannot do that reliably.
What Is the Difference Between a Micro French and a Classic French?
A micro French uses a very narrow accent at the edge, while a classic French has a more visibly filled tip. There is no single width that defines either on every hand. Nail proportions, contrast and the finished visual effect matter more than applying the same measurement to all fingers.
Should I Paint the French Tip Before or After the Base Color?
In the painted sequence described here, establish and cure the background as directed before adding the tip, then complete the specified finishing process. Other trained techniques can use different layering approaches. Follow the complete instructions for the chosen method rather than combining isolated steps from different systems.
Why Does My White French Tip Spread?
Possible factors include the amount of product, the condition of the underlying surface and the handling characteristics of the formula. Check the preceding layer's required preparation, reduce excessive brush loading and test on a comparable practice surface. Do not assume that wiping every gel surface or changing cure time is a universal solution.
Why Can I See My Natural Nail Line Under the French Design?
The background may be too transparent for the result you want, or the painted smile line may sit in a different position from the natural edge. Decide whether visible transparency is part of the design. If not, select an appropriate more covering background rather than repeatedly widening the white tip.
How Many Coats of White Gel Do French Tips Need?
There is no universal number. The product, application instructions and desired contrast determine the sequence. Use the permitted thin application and prescribed curing steps. If a shade cannot deliver the desired opacity within those instructions, select a better-matched product instead of applying an unsupported thick layer.
How Long Should I Cure White French Gel?
Use the time and lamp specified for that exact product and application. Do not transfer a timing from another brand, another gel or a social-media tutorial. Lamp wattage and a hard-looking surface are not enough to establish a correct cure. A permitted flash cure does not replace the required full curing stage.
Can Rubber Base Be the Background for French Nails?
A suitable tinted rubber base can provide the background color when its intended service and complete system match the manicure. Confirm whether it needs another base, what application is supported and which finish is required. Do not assume that every rubber base has the same coverage, building role or removal method.
What Is the Difference Between French Ombre and White French Tips?
French ombre blends the background into the lighter tip. Defined white French tips use a visible smile line. The colors may overlap, but the application method and desired boundary are different. Show both finished examples during consultation so the client can choose the transition they actually prefer.
Can Cat Eye Gel Be Used for French Tips?
An appropriate cat eye product can be used in a French design when its application instructions support the method. Test whether the magnetic effect remains readable in the intended tip area. A very narrow edge may not show the same light pattern as a full-cover swatch, so choose the design and product together.
How Long Does a French Gel Manicure Last?
Wear varies with the complete product system, preparation, application, curing, nail condition and daily use. French describes the artwork rather than a separate wear guarantee. Follow the product guidance and arrange maintenance around the actual service; do not wait for lifting or discomfort simply to reach an advertised duration.
Are French Gel Nails Removed the Same Way as Other Gel Nails?
Removal follows the underlying material system, not the French pattern. A painted design over soak-off gel and one over a file-off enhancement require different approaches. Identify the products present, follow their removal instructions and avoid peeling or forcing material away from the natural nail.
Can JTING Develop a Private Label French Manicure Collection?
JTING supports private label development across relevant gel categories, with options for color, formula direction, packaging, brushes, labels and color charts. Share the French styles you want to offer, your preferred backgrounds and whites, and the product types you need. The selection can then be built around a coherent customer-facing range.
What Should I Send When Requesting French Gel Samples?
Send reference designs, intended nail lengths, the desired background coverage, preferred white or accent shades and the product formats you want to test. For a brand project, add your market, packaging direction and estimated quantities. Identify the most important handling or finish requirement so sample selection has a clear starting point.
Build a French Collection Around the Finish Your Customers Want
A strong French manicure selection makes the details easier to get right: a flattering background, a controlled line and a product system suited to the service. Start with the looks your customers request, compare the complete combinations and give every shade a clear role.
Planning a salon assortment or your own branded collection? Send JTING your French nail references and product requirements to discuss suitable colors, application formats and a coordinated sample selection.